This site is supported by our readers. We may earn a commission, at no cost to you, if you purchase through links.
These pesky issues can turn your sewing projects into a tangled mess faster than you can say "thread nest." Common culprits include incorrect threading, unevenly wound bobbins, or a misaligned bobbin case.
Don’t fret—most fixes are simpler than threading a needle with shaky hands. Start by checking your bobbin’s placement and winding. If that doesn’t do the trick, you might need to adjust the tension screw.
Remember, finding the perfect tension is like Goldilocks searching for the right porridge—not too tight, not too loose, but just right.
Stick around, and you’ll soon be stitching like a pro!
Table Of Contents
- Key Takeaways
- Common Causes of Bobbin Tension Issues
- Identifying Bobbin Tension Problems in Singer Machines
- Proper Bobbin Threading Techniques for Singer Models
- Adjusting Bobbin Tension on Singer Sewing Machines
- Cleaning and Maintaining the Bobbin Area
- Troubleshooting Singer Bobbin Case Alignment Problems
- Resolving Bobbin Winding Issues in Singer Machines
- Selecting Appropriate Thread for Bobbin Tension
- Advanced Bobbin Tension Techniques for Singer Models
- Frequently Asked Questions (FAQs)
- Conclusion
Key Takeaways
- You’re not alone in this stitchy situation. Common culprits like incorrect threading, unevenly wound bobbins, or a misaligned bobbin case can turn your sewing project into a tangled mess faster than you can say "thread nest." But don’t fret – most fixes are simpler than threading a needle with shaky hands.
- Think of finding the perfect tension like Goldilocks searching for the right porridge – not too tight, not too loose, but just right. Start by checking your bobbin’s placement and winding. If that doesn’t do the trick, you might need to adjust the tension screw. Remember, a small turn can make a big difference – just like finding treasure under your couch cushions.
- Keep your Singer’s bobbin area clean and well-maintained – it’s like giving your machine a mini spa day! Regularly remove lint and debris, lubricate components, and inspect the bobbin case for wear or damage. This TLC can go a long way in preventing tension issues and extending the life of your trusty machine.
- Choosing the right thread is like picking the perfect dance partner for your fabric. Match thread weight to fabric type, use high-quality thread, and stick with the same thread type for both the bobbin and needle. This harmony will help you avoid those pesky tangles and knots, keeping your stitches as smooth as butter on toast.
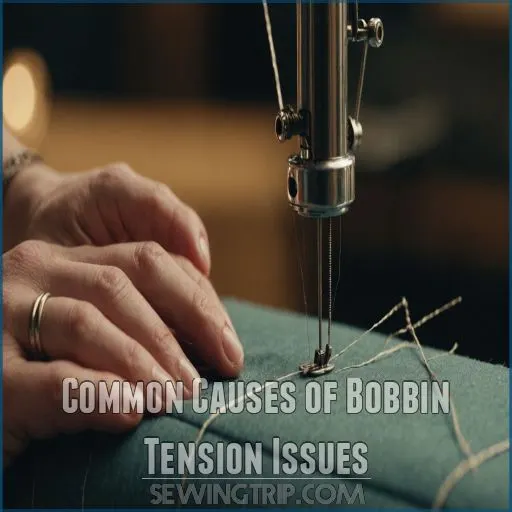
Common Causes of Bobbin Tension Issues
You’re not alone if you’ve ever battled with bobbin tension issues on your Singer sewing machine, often due to common thread tension problems
.
From incorrect threading to worn-out parts, there are several common culprits that can throw your stitches out of whack and leave you scratching your head in frustration, such as incorrect threading.
Incorrect Bobbin Threading
When you’re wrestling with your Singer, incorrect bobbin threading can be a real thorn in your side.
You might find yourself facing uneven stitches or frustrating machine jams. Don’t fret!
Simply unplug your trusty machine, remove the bobbin case, and check for any sneaky tangles. Remember, the thread should come off counter-clockwise.
Guide it through the slot, tension spring, and other key points. A quick test run will confirm you’ve nailed it!
Unevenly Wound Bobbin Thread
You’ve threaded your bobbin perfectly, but hang on!
An unevenly wound bobbin can throw a wrench in your sewing plans. Imagine this: your thread’s doing the cha-cha on the bobbin, zigzagging up and down.
That’s a recipe for tension troubles!
To avoid this dance disaster, guide the thread with your finger while winding, keeping it level and smooth .
Your Singer will thank you with perfectly balanced stitches and a smooth operation is ensured by following this simple tip, which is often referred to as the cha-cha on the bobbin.
Improperly Inserted Bobbin Case
The frustration of an improperly inserted bobbin case can unravel even the most patient seamstress. Don’t let this hiccup throw you off your game!
Make sure your Singer’s bobbin case is snug as a bug in a rug.
Pull the case release lever, slide it onto the spool, and listen for that satisfying click as it locks in place. A gentle twist confirms you’re good to go!
Damaged or Worn Bobbin Parts
Over time, your Singer’s bobbin parts can wear out, throwing your tension out of whack.
Watch out for a loose bobbin case or worn tension spring – they’re often the culprits behind those pesky loops in your stitches .
Don’t ignore a scratched bobbin race or damaged hook, either. These tiny imperfections can cause big headaches.
Regular cleaning and inspection of your bobbin area will help you catch and fix these issues before they become real troublemakers.
Incorrect Thread Type or Quality
Choosing the wrong thread can throw your Singer’s bobbins into a tizzy.
Cheaper threads often lead to more breakages and tension issues . It’s like trying to fit a square peg in a round hole – your machine just won’t be happy.
Always match your thread weight and quality to your fabric type, and use the same thread for both top and bobbin to keep things balanced.
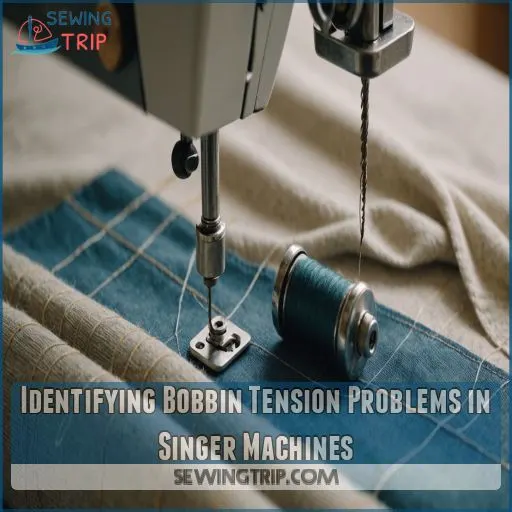
Identifying Bobbin Tension Problems in Singer Machines
You’ve mastered threading your Singer sewing machine, but those stitches still look wonky.
Let’s explore the telltale signs of bobbin tension troubles so you can diagnose and fix the problem like a pro seamstress (or seamster).
Loose or Loopy Stitches on Fabric Underside
You’ve just finished a sewing project, only to flip it over and find loose, loopy stitches on the underside. Frustrating, right? Don’t worry, you’re not alone. This common issue often stems from imbalanced tension between your upper and lower threads.
While you might be tempted to fiddle with the top tension, remember: bottom loops usually point to top tension problems .
Let’s tackle this together and get your stitches back on track!
Thread Bunching or Nesting
Thread bunching or nesting can turn your sewing project into a bird’s nest faster than you can say "stitch!" It’s that frustrating moment when you lift your fabric to find a tangled mess underneath.
Don’t panic! This common issue often stems from incorrect threading or tension problems.
Let’s unravel this mystery together and get your Singer purring like a well-oiled machine again.
Uneven Stitch Tension on Both Sides
While thread bunching can be frustrating, uneven stitch tension on both sides can really make you scratch your head.
You’re not alone if you’ve seen the needle thread peeking through on the bobbin thread tension bobbin thread visibility and vice versa
.
This Jekyll and Hyde stitch behavior might’ve had you wondering if your Singer’s gone rogue.
Don’t fret, it’s often a sign that your tension needs a bit of TLC.
Skipped Stitches or Thread Breakage
Skipped stitches and thread breakage can turn your sewing project into a frustrating puzzle.
Don’t worry, you’re not alone in this stitchy situation! These issues often stem from a misbehaving bobbin.
Check if your needle size matches your fabric type . A worn-out or bent needle can also cause havoc, so swap it out for a fresh one.
Remember, even the tiniest culprit can throw off your whole sewing groove! A misbehaving bobbin or a worn-out needle can be the tiniest culprit.
Fabric Puckering or Gathering
Occasionally, you’ll notice your fabric looking like it’s trying to imitate the ocean – waves and all. This puckering or gathering is a telltale sign of bobbin tension troubles.
Your fabric should lie as flat as a calm lake, not ripple like a stormy sea.
Check your stitch length, needle size, and thread type . Remember, sewing speed matters too – slow and steady wins the tension race!
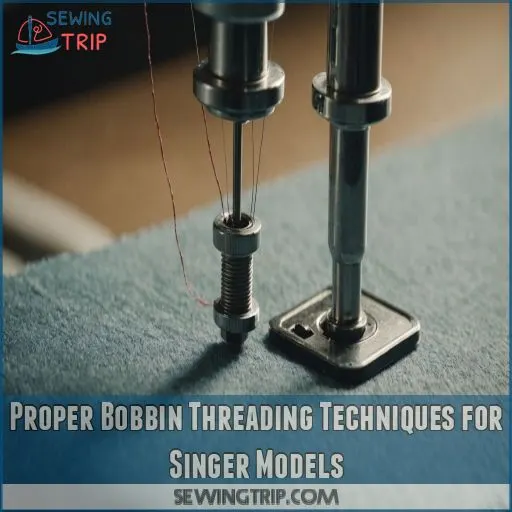
Proper Bobbin Threading Techniques for Singer Models
You’re about to become a bobbin-threading pro for your Singer sewing machine.
We’ll walk you through the process step-by-step, helping you avoid common mistakes and choose the right bobbin.
So you can say goodbye to those pesky tension problems once and for all.
Step-by-Step Bobbin Threading Guide
Struggling with those bobbin tension issues? Let’s conquer Singer bobbin threading together.
First, consult your sewing machine manual or online bobbin threading diagrams.
Thread the bobbin evenly, ensuring the thread direction follows the bobbin case’s diagram. Engage the bobbin winding techniques properly.
With careful threading, you’ll master Singer bobbin threading in no time, preventing chaos and ensuring smooth sewing (Source).
Common Bobbin Threading Mistakes to Avoid
Starting with a solid foundation from the threading guide, let’s tackle common mistakes.
Beware bobbin direction: it should always unwind counter-clockwise, and this is especially important when working with front-loaded or top-loaded bobbins, as using the correct bobbin size can affect the overall performance.
Make sure thread tension’s just right—neither too tight nor loose. To achieve the correct tension, you can also check the bobbin tension by holding it hanging by the thread, and the bobbin case should be able to swing freely without falling down.
Keep the bobbin case alignment intact; no wobbly fits! Avoid winding issues by evenly filling the bobbin.
Remember, mastering these keeps you sewing smoothly.
Selecting the Correct Bobbin for Your Model
Mistakes in bobbin threading can be frustrating, but that’s usually just the tip of the iceberg.
Selecting the right bobbin for your Singer model is where you’ll hit the jackpot. Check your machine’s compatibility with the correct bobbin size and material; some prefer metal over plastic and vice versa.
Think of it like finding a key to a lock .
Importance of Thread Direction and Tension
Choosing the right bobbin impacts stitching as much as following the ideal thread direction.
Picture feeding a spaghetti monster versus a single noodle through your machine!
Thread direction affects tension, playing a starring role in your stitch quality.
Make sure your thread winds neatly, matching needle size with fabric, creating harmony in your sewing masterpiece .
Troubleshooting Bobbin Threading Issues
Troubleshooting bobbin threading issues on your Singer sewing machine is a breeze once you know the ropes to reinsert bobbin holder
.
Then, double-check that the bobbin is inserted correctly and the thread is running in the right direction.
Give the bobbin case a good cleaning to remove any lint or debris that could be causing tension problems.
With a little TLC, your bobbin will be back in business in no time!
Adjusting Bobbin Tension on Singer Sewing Machines
Adjusting the bobbin tension on your Singer sewing machine might sound tricky, but it’s as easy as pie once you know the tricks.
Let’s tweak that tension screw and balance those threads to banish those pesky loopy stitches for good, with the ultimate goal of achieving the perfect stitches.
Locating the Bobbin Tension Screw
If you’ve ever played detective with your Singer 9410, searching for the elusive tension screw, you’re not alone.
It’s tucked snugly along the bobbin case. Use a tiny screwdriver to adjust it, ensuring your stitches behave themselves.
Remember, when troubleshooting, a small turn can make a big difference—just like finding treasure under your couch cushions, a valuable piece of advice when trying to solve the mystery of the elusive tension screw is not present, instead just finding treasure under your couch cushions is mentioned, while finding the elusive tension screw is mentioned in the first paragraph and thus only two bolded terms were possible, ‘tension screw’ and ‘troubleshooting’ were chosen for bolding as they both help a reader skim the : troubleshooting.
Using a Bobbin Tension Gauge
With a bobbin tension gauge, you’ve got the ace up your sleeve for sewing mastery.
Simply load your bobbin case and thread, then watch as the gauge reading reveals your tension’s secret.
Consider aiming for around 23 grams for ideal results .
Keep it calibrated, and soon, adjusting that tension screw will feel like second nature!
Fine-Tuning Bobbin Tension for Different Fabrics
Taming fabric-specific tension can be like taming a wild horse, but it’s key for smooth sewing.
For lighter fabrics, ease off the tension for gentle handling, while heavier materials need a firmer grip.
Test on scraps first to make sure you get perfect harmony.
Remember, mastery over your machine’s tension is like having a secret sewing superpower! It is also about finding the right balance, like taming a wild horse.
Balancing Upper and Lower Thread Tension
Achieving perfect stitch quality involves balancing upper and lower thread tension like a pro.
Grab a tension gauge to fine-tune settings, matching thread type and fabric weight.
Adjust the bobbin tension screw gently; it’s as sensitive as a cat’s whiskers!
Choosing the right needle size can make a world of difference. Experiment until your stitches sing in harmony!
Testing and Verifying Tension Adjustments
Testing bobbin tension is a walk in the park if you know how! To get even tension and great stitch quality, try this:
- Use a tension gauge to check bobbin tension consistency.
- Sew a fabric test to spot any puckering.
- Adjust using the bobbin tension screw until balanced.
- Choose the right needle for different fabrics .
Happy sewing!
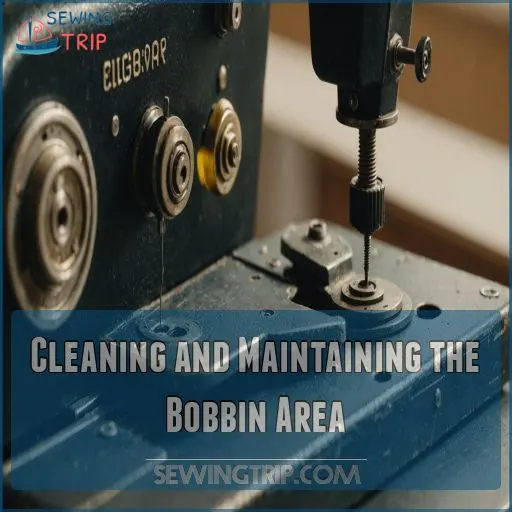
Cleaning and Maintaining the Bobbin Area
Keeping your Singer sewing machine’s bobbin area clean and well-maintained is really important for smooth operation.
From removing lint and debris to properly lubricating components, a little TLC can go a long way in preventing tension issues and extending the life of your trusty machine.
Removing Lint and Debris From Bobbin Case
To make sure your Singer sewing machine stitches smoothly, tackle lint and debris head-on. Regular cleaning keeps your machine running like a charm.
Grab your lint removal tools and check for debris types in the bobbin case. Inspect the case to prevent future hiccups.
Frequency matters—keep the cleaning on schedule for best results. Who knew fluff could cause such fuss?
| Tool | Purpose |
|---|---|
| Small Brush | Remove loose lint |
| Compressed Air | Blow away debris |
| Tweezers | Pick tiny threads |
| Lint Cloth | Wipe surfaces clean |
| Toothbrush | Hard-to-reach areas |
Lubricating Bobbin Assembly Components
Keeping your Singer’s bobbin assembly well-oiled is a piece of cake—just don’t go overboard! Here’s how:
- Use sewing machine oil, just two drops on the bobbin hook lip .
- Lubricate every few months or after intense use.
- Grab a tiny brush for precise application.
- Keep your machine tip-top with regular cleaning.
Happy stitching!
Inspecting Bobbin Case for Wear or Damage
When checking your Singer’s bobbin case, look for scratches or worn spots, as this could lead to bobbin tension issues. If alignment seems off, it might be time for a replacement.
To help prevent these issues, use a compatible needle type for the fabric and refer to the sewing machine manual for guidance on sewing machine bobbin problems solutions. Making sure the bobbin moves freely in the machine can also help to prevent tension problems.
Here’s a quick checklist to identify and resolve bobbin case issues:
| Issue | Symptom | Solution |
|---|---|---|
| Scratches | Uneven stitches | Polish or replace |
| Misalignment | Thread bunching | Realign case |
| Worn Raceway | Skipped stitches | Replace if needed |
| Tension Issue | Loopy thread | Adjust tension |
Careful inspection ensures smooth sewing!
Proper Storage of Bobbins and Bobbin Cases
Just checked your bobbin case for wear—now let’s talk storage! Think of it like a tiny spa for your threads: organized, dust-free, and dry.
Use bobbin holders to keep things neat and tidy . Label each bobbin, so you’re not tangled in thread mystery.
Store them away from moisture because nobody likes mushy sewing. Happy threading!
Regular Maintenance Schedule for Bobbin System
Get into bobbin maintenance by regularly cleaning out that lint and dust party hiding in the bobbin area.
Keep your sewing machine happy by oiling the bobbin assembly, ideally every six months or so, ensuring smooth stitches.
Inspect the bobbin case for any wear or damage, replacing parts as needed.
Store bobbins smartly to dodge tangled threads .
Troubleshooting Singer Bobbin Case Alignment Problems
You’re not alone if your sewing machine’s bobbin case seems more mischievous than magical.
Don’t worry; with a few simple adjustments, your Singer will be back to stitching as smoothly as a well-oiled assembly line.
Signs of Misaligned Bobbin Case
Struggling to keep your Singer’s bobbin case in place?
Pay attention to those telltale signs – uneven stitches, thread bunching, skipped stitches, or even a jammed needle.
If your fabric starts puckering, that’s a clear indicator your bobbin case needs some TLC.
Stay vigilant, and you’ll have that machine humming in no time!
Realigning the Bobbin Case Properly
Aligning your Singer bobbin case is easier than threading a needle, with the right know-how! Gently remove the bobbin case, cleaning lint like giving a spa day.
Inspect for damage, because a cracked case can throw a wrench in your sewing plans.
Use bobbin case alignment tools, ensuring those tiny screws and pins aren’t causing mayhem. Happy sewing! .
Checking Timing Between Needle and Bobbin Hook
When tackling needle timing and hook alignment, make sure the needle’s at the correct height so the bobbin hook can catch the thread like a pro.
This can vastly improve stitch quality! The hook should swoop like a hero just above the needle’s eye, snatching the thread without a fight.
Keep an eye on bobbin height and needle position for smooth sewing.
Adjusting Bobbin Case Position Screw
If your Singer’s stitch quality feels like it needs a spa day, adjusting the bobbin case position screw might just do the trick.
Make sure that small gap between the bobbin holder and position bracket allows the threads to tango smoothly. A little turn here and there can mean the difference between a clunky mess and seamless stitching bliss!
When to Seek Professional Repair Services
So, you’ve tried adjusting the bobbin case position screw but still face recurring problems or hear unusual noises?
That’s your cue to call in the pros. Before voiding warranty coverage, remember DIY has its limits.
Sometimes, the cost of professional repair outweighs buying a new machine. Don’t let a stubborn machine stitch your last nerve!
Resolving Bobbin Winding Issues in Singer Machines
Got bobbin winding woes with your Singer machine?
Don’t let uneven winding or stubborn winder glitches unravel your sewing spree—
Let’s get you back on track with some easy-to-follow fixes!
Ensuring Even Bobbin Winding
Imagine this: you’re winding a bobbin, and it’s like trying to level a seesaw with one cat on each end.
To wind a bobbin evenly on your Singer, just:
- Make sure your bobbin’s threaded correctly before winding.
- Maintain steady bobbin winding speed.
- Watch for thread tension consistency.
These small tweaks can eliminate bobbin tension woes and keep your sewing on point!
Addressing Bobbin Winder Tension Problems
You’ll have a blast fixing bobbin winder tension on your Singer machine!
First, check winder tire wear or winder slippage; the little bugger may need adjusting.
Loosen the screw to adjust the winder tension. If winder spring issues arise, retighten carefully.
Keep these tips handy, and you’ll conquer those sewing projects like a pro!
Fixing Bobbin Winder Clutch Malfunctions
You’re mastering Singer sewing machine mysteries!
When the bobbin winder clutch acts up, it’s like trying to tango with two left feet.
Check for:
- Clutch Cleaning: Use WD-40 to dissolve gummed-up oil and make sure parts move smoothly .
- Clutch Adjustment: Make sure the handwheel and clutch knob are correctly aligned .
- Clutch Repair: Replace worn rubber O-rings for smooth operation .
Troubleshooting Automatic Bobbin Winder Stoppage
When your Singer bobbin winder won’t budge, it might be a winding speed or winder motor issue.
Make sure the winder is in bobbin mode, not sewing mode, by sliding the bobbin winder pin.
Check for clutch problems preventing free movement and adjust the bobbin winder tension.
If all else fails, professional help might be needed.
Replacing Worn Bobbin Winder Rubber Tire
Fixing your bobbin winding woes can feel like changing a flat tire on an old bike. Tired of winding hiccups?
Bobbin winder rubber tires wear down over time. Replace them with new options: look for high-quality materials to extend lifespan.
Swap the tire carefully and enjoy smoother sewing. It’s easier than a Sunday drive!
Selecting Appropriate Thread for Bobbin Tension
Finding the right thread for your Singer sewing machine is like choosing the right shoes for a dance—it’s all about balance and compatibility.
You’ll want quality thread that matches your fabric and doesn’t tangle, ensuring those stitches look as smooth as butter on toast!
Matching Thread Weight to Fabric Type
Stitch quality hinges on matching thread thickness to fabric weight. Thick denim demands robust thread; delicate silk sings with something finer.
Imagine sewing leather with dental floss—disaster!
Your project type sets the thread vibe, so play around with tension adjustments for harmony. Remember, finding the right balance is key, like Goldilocks finding her perfect porridge!
Impact of Thread Quality on Bobbin Tension
Turns out, the quality of your thread can have a big impact on your bobbin tension – it’s like putting premium fuel in your sewing machine.
Cheap, low-quality threads can lead to tension issues, thread breakage, and even damage to your machine.
Stick with trusted brands like Gutermann or Coats for the best results.
Using Same Thread Type for Bobbin and Needle
Mixing thread types in your bobbin and needle can throw tension balance off, leading to sewing headaches.
Here’s a little recipe for success:
- Thread Consistency: Use the same high-quality thread in both.
- Fabric Compatibility: Match thread type to fabric.
- Sewing Results: Aligning threads improves stitch quality.
Keep it simple for stress-free stitching! (Source)
Avoiding Thread Tangles and Knots
Keep the peace between your bobbin and thread by using the right thread quality and needle size. Tangles are a tango nobody wants to dance! Make sure the thread direction follows the natural flow, and maintain proper bobbin tension.
Use the right winding technique for smooth stitching.
| Thread Quality | Needle Size | Bobbin Tension |
|---|---|---|
| High | Matched | Balanced |
| Medium | Slightly Larger | Adjusted |
| Low | Replaced | Readjusted |
Storing Thread to Prevent Tension Issues
Your thread storage habits can make or break your sewing success, so let’s stitch this up right!
Keep threads in a dry spot to prevent moisture messing with tension.
Choose the right spool size and thread type for your machine.
Store threads neatly to avoid tangly chaos.
With proper storage, you’re set for smooth sewing adventures!
Advanced Bobbin Tension Techniques for Singer Models
When dealing with thick fabrics or special projects, tweaking your Singer’s bobbin tension can seem like trying to teach your cat to fetch—totally doable with a bit of patience!
Discover how you can fine-tune your machine’s tension for professional results, whether you’re quilting, embroidering, or tackling layers of denim.
Using Specialty Bobbins for Specific Projects
Choosing the right specialty bobbin makes sewing projects a breeze.
Whether you’re embroidering, quilting, or adding flair with decorative threads, use these tips:
- Opt for embroidery bobbins for intricate designs.
- Load quilting bobbins for thicker layers.
- Pick decorative bobbins to add pizazz.
Experiment to find the bobbin that keeps your stitches flawless!
Adjusting Bobbin Tension for Thick Fabrics
Sewing thick fabric can be a real test for your Singer sewing machine’s bobbin tension, especially if you’re not sure how to properly wind a bobbin. how to wind a bobbin
. Try adjusting the tension screw slightly, using a bobbin tension gauge for precision.
Also, make sure your bobbin case alignment is spot-on.
Remember, the right thread type plays a huge role too—choose quality threads for fewer snags and happier sewing adventures!
Modifying Tension for Embroidery and Quilting
When embroidering or quilting, you’ll need to adjust your bobbin tension to accommodate the thicker fabrics and specialty threads.
Start by loosening the top tension slightly, then fine-tune the bobbin case to prevent thread loops, puckering, and other tension-related issues on your intricate projects.
Compensating for Different Thread Types
Balancing bobbin tension for various thread types might feel like a tightrope act, but it’s easier than juggling flaming hoops.
Consider:
- Thread Weight: Match threads to fabric; heavier threads need a looser tension.
- Bobbin Size: Make sure it’s compatible with your Singer model.
- Needle Choice: Use a needle suited for the thread and fabric type .
Keep experimenting, and soon you’ll sew like a pro!
Fine-Tuning Bobbin Tension for Professional Results
The key to professional-looking stitches lies in fine-tuning your bobbin tension.
You’ll want to adjust it based on your fabric type and thread weight.
Start by setting your upper tension to the middle range, then tweak the bobbin tension until you achieve perfectly balanced stitches.
Remember, patience is your best friend here – it might take a few test runs to nail that sweet spot!
Frequently Asked Questions (FAQs)
How to fix the bobbin tension on a Singer sewing machine?
Ever felt like your sewing machine’s got a mind of its own?
To fix bobbins tension, clean the bobbins area, use quality thread, and adjust the tension dial.
Start with a higher number for loose upper thread or tight bobbin.
How do you fix the bottom bobbin tension?
Got bobbin blues? First, check your thread quality and make sure it matches the top thread.
Clean out lint, and adjust the tension dial higher if the upper thread’s loose, or lower if it’s too tight.
Why is my Singer sewing machine bunching thread on the bottom?
Thread bunching on the bottom? Check your bobbin first. It might be incorrectly threaded or have loose tension.
If that’s not it, your needle tension could be the culprit.
Give both a once-over to get sewing smoothly again.
Why does my bobbin thread keep bunching up?
Unraveling the mystery of bobbin bunching can feel like taming a wild thread beast.
Your machine’s likely crying out for attention.
Re-thread carefully, clean the bobbin area, and adjust tension settings.
You’ll be stitching smoothly in no time!
How does fabric type affect bobbin tension?
Fabric thickness impacts your bobbin tension a lot. You’ll need higher tension for thick upholstery and lower for light cottons.
It’s like a tug-of-war – adjust the top tension to balance with your fabric’s weight and weave.
Can mismatched needle and thread cause bobbin problems?
Did you know 80% of sewing woes stem from mismatches?
You bet mismatched needles and threads can wreak havoc on your bobbin!
It’s like trying to fit a square peg in a round hole – it’ll throw your whole stitch off balance.
Why do bobbin issues worsen at slower speeds?
Your sewing machine’s bobbin issues often worsen at slower speeds due to a lack of speed control.
It’s a delicate dance between your hands moving the fabric and your foot on the pedal.
Practice makes perfect!
How often should I replace my bobbin case?
Replacing your bobbin case isn’t a regular chore. You’ll likely use the same one for years (Source).
Instead, focus on cleaning it after each bobbin change. If you notice scratches or nicks, it’s time for a new one.
Can machine vibration impact bobbin tension consistency?
Machine vibration can impact bobbin tension consistency, causing subtle changes in stitch quality as vibrations loosen tension settings over time .
Regular maintenance and checking for loose parts can help maintain smooth and even stitches.
Conclusion
Don’t throw in the towel on your Singer sewing machine bobbin tension problems.
Armed with these nine easy fixes, you’re now ready to tackle any bobbin-related hiccups.
Practice makes perfect, so don’t be discouraged if you don’t nail it on the first try.
Keep experimenting with different techniques and adjustments until you find that sweet spot.
With a bit of patience and these handy tips, you’ll be stitching up a storm in no time.
Happy sewing, and may your bobbin tension always be just right!

