This site is supported by our readers. We may earn a commission, at no cost to you, if you purchase through links.
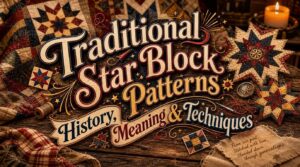
A quilt folded on a frontier table in 1798 held more information than most people realize—which fabrics a family could afford, which community they belonged to, and sometimes, which side of a political fight they stood on. Star blocks carried all of that.
Ohio Star patterns stitched into quilts helped guide freedom seekers along antislavery networks during the Civil War.
The Lone Star went by at least three other names before Texas claimed it in 1845.
These weren’t decorative choices. They were statements.
Traditional star block patterns connect geometry, history, and identity in ways that still reward anyone willing to learn them.
Table Of Contents
Key Takeaways
- Star block patterns weren’t just pretty — quilters used them to signal political loyalties, community ties, and even antislavery resistance during the Civil War.
- Each classic pattern (Ohio Star, Lone Star, LeMoyne Star) carries a distinct construction logic, and knowing the difference between half-square triangles, quarter-square triangles, and Y-seams determines whether your points land crisp or muddy.
- Fabric value contrast does more work than color choice — light against dark is what makes star geometry readable from across the room.
- Starch before you cut, sew a sample block before you commit, and press every seam consistently — those three habits separate flat, sharp stars from lumpy ones.
Origins of Traditional Star Blocks
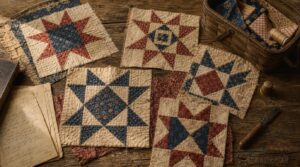
Star blocks didn’t just appear out of nowhere — they carry centuries of stories stitched right into their seams. From Civil War symbolism to state pride and cultural identity, each pattern has roots worth knowing. Here’s where it all began.
The Ohio Star is just one gem in a rich tradition — classic quilting block designs trace the full arc of that heritage, pattern by pattern.
Early American Quilt Traditions
Star quilts didn’t start in a craft store. They started on frontier kitchen tables, where settlers stitched together whatever scraps they’d—wool meltons, printed cottons, leftover trade cloth.
By the late 1700s, geometric star blocks were showing up on beds across the colonies, each one a quiet record of available fabrics, family identity, and regional pride stitched into something useful. These early gatherings often evolved into community quilting bees, strengthening social bonds among settlers.
Civil War-era Symbolism
Quilts didn’t stay politically neutral during the Civil War. Ohio Star and Friendship Star blocks carried real weight — stitched by antislavery communities in Ohio as quiet acts of resistance.
Meanwhile, Union Flag imagery appeared on envelopes and posters everywhere, and quilters responded in kind, embedding patriotic symbols into fabric. Both sides did it.
Cloth became a canvas for conviction.
State and Regional Names
Names tell stories. The Ohio Star quilt block didn’t borrow its name by accident — it carried the identity of a state already tied to resistance and reform.
The Lone Star quilt pattern went through several names — Mathematical Star, Star of Bethlehem, Star of the East — before Texas claimed it in 1845.
Quilters have always stitched geography right into the fabric.
Cultural Meaning of Stars
Geography named the blocks. But stars themselves? They’ve carried deeper human meaning long before any quilt frame existed.
Across cultures, stars guided travelers, marked harvests, and represented divine protection. Native American traditions honored the Morning Star as Venus — a sacred force, not just a point of light.
Across cultures, stars guided travelers and harvests — but to Native Americans, the Morning Star was sacred force, not mere light
- Star of Bethlehem blocks echo centuries of spiritual longing stitched into cloth
- Friendship Star patterns reflected community bonds during the Civil War era
- Modern quilts use celestial symbolism to express resilience and shared identity
Classic Star Block Patterns
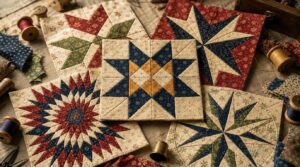
Some star blocks have been around for centuries — and they’re still just as satisfying to make today. Each one has its own personality, its own construction logic, and yes, its own little piece of history sewn right in. Here are five classics worth knowing.
Ohio Star
Few blocks pack this much punch into a simple nine-patch grid. The Ohio Star quilt block earns its legendary status by turning basic geometry into something genuinely striking — a bold four-pointed star that reads clearly from across the room.
Its roots run deep. Civil War-era Ohio quilters used this block to signal solidarity, and it surged again in popularity during the 1930s revival of traditional American patchwork. History sewn right into your fabric.
To honor that legacy with every cut, sharp blades and proper fabric prep make all the difference in keeping those heritage patterns crisp and true.
The construction is beginner-friendly but endlessly adaptable. Most versions rely on half square triangle units for the star points, though quarter-square triangles sharpen those angles considerably. Your block layout is fundamentally a three-by-three grid: corner squares, star-point units, and one bold center square.
Size options run from a compact 6-inch block — great for scrappy samplers — up to a full 12-inch version with room to showcase a feature fabric.
| Feature | 6-Inch Block | 12-Inch Block |
|---|---|---|
| Star Points | HST units | QST or HST |
| Best For | Scrap quilts | Sampler quilts |
| Fabric Visibility | Limited | High impact |
A classic two color scheme — think navy on cream or red on white — keeps the silhouette razor-sharp. Color value repeats across multiple blocks naturally create cohesion when you’re building sashing or borders. Modern adaptations swap in bold prints or unexpected palettes, but the timeless geometry holds up beautifully either way.
Sawtooth Star
The Sawtooth Star packs serious personality into one block. Its eight jagged star points — built from flying geese or half-square triangle units around a bold central square — create that signature spiky silhouette.
Dating back to 19th-century American quilting, it’s remained a staple ever since.
High contrast is your best friend here: dark points against a light center make the sawtooth edge really pop.
Friendship Star
If the Sawtooth Star is bold and spiky, the Friendship Star is its warmer, quieter cousin. Built from Half Square Triangles and simple squares in a 9-patch layout, it’s approachable but deeply rooted in tradition.
This block earned its name through community. Friendship Star Community quilting circles exchanged these blocks as tokens of connection — stitched goodwill, fundamentally.
High contrast between star and background keeps every point crisp.
LeMoyne Star
The LeMoyne Star quilt block is something else entirely. Eight diamond-shaped pieces, arranged at precise 45-degree angles, create that iconic star — no triangles, no flying geese. Just pure eight-point geometry. It’s historically tied to New Orleans, which already makes it feel a little legendary.
The catch? Y seams. Three fabric edges meeting at one point. Intimidating at first, but manageable with careful pinning and pressing.
Lone Star
If the LeMoyne Star is the elegant stranger, the Lone Star is the showstopper that owns the whole room. Born from 19th-century American quilt traditions, this bold radiating diamond pattern carries the spirit of Texas independence — unity, pride, grit.
High-contrast fabrics make those points sing.
A contrasting border frames it perfectly.
One block. Total impact.
Historic Construction Methods
Every star block you’ve ever admired starts with handful of basic building units — and knowing them changes everything. Quilters have relied on core techniques for generations, refining them into methods that are both precise and practical.
Here’s a look at five foundational construction methods behind traditional star blocks.
Half-square Triangle Units
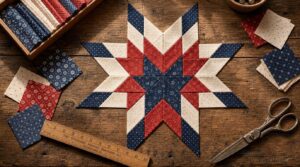
The half-square triangle is the workhorse of traditional star quilt blocks — simple, but endlessly adaptable.
Two triangles sewn along the diagonal create one tidy square unit. A 2-inch finished HST starts with a 2⅞-inch cut square. Batch cutting speeds things up fast. Press seams toward the darker fabric, then trim carefully.
Consistent units mean stars that actually lie flat.
Quarter-square Triangle Points
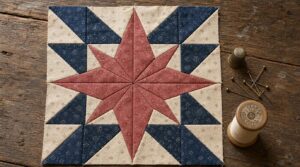
Where the HST square stays intact, the quarter-square triangle splits things further — one square cut diagonally twice, yielding four triangles that meet at a precise center point. That’s the secret behind sharp Ohio Star tips.
Exact ¼-inch seams matter here more than anywhere. Even tiny shifts muddy your tip alignment, and those star points lose their crispness fast.
Flying Geese Star Points
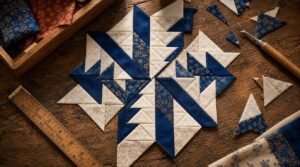
From precise quarter-square points, we move to something a bit more energetic — flying geese star points.
Each goose unit pairs one large triangle with two smaller ones, creating those bold diagonal lines that pull your eye straight to the block’s center. Geese alignment is everything here. If your center seams don’t sit flush against the square edges, your points go soft fast.
Here’s what keeps your star sharp:
- Press seams toward the background to reduce bulk right at the tips.
- Trim each unit to exact finished dimensions before assembly — don’t skip this.
- Keep layout symmetry tight; outer geese rows must mirror each other perfectly.
- Invert your fabric placement to flip light and dark points for a whole new star look without changing a single shape.
Color inversion is honestly one of the most understated tricks in traditional star quilt patterns — same block, completely different personality.
Diamond Piecing Techniques
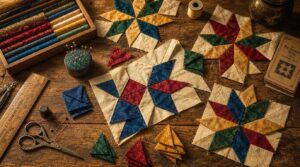
From flying geese, diamonds feel like a whole new language — and honestly, they kind of are.
Diamond-shaped pieces demand respect for grain line orientation from the start. Keep the straight grain along the long edges, or your block will bow before you even press it.
Seam allowance clipping at sharp points prevents ugly bulk. Clip small. Be deliberate.
Size matters too — diamond size scaling changes everything.
Paper Piecing Traditions
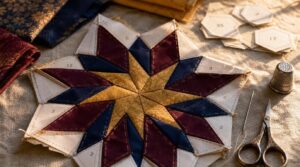
Diamonds demand grain-line discipline. Paper piecing offers a different kind of control altogether.
Foundation Paper Piecing flips the script — you sew fabric to a printed paper pattern in numbered order, trimming after each seam. The result? crisp, accurate points that traditional piecing struggles to match, especially on complex star quilt blocks.
English Paper Piecing slows things down beautifully. Wrap fabric around paper templates, then whip stitch joining by hand.
Choosing Fabrics for Star Blocks
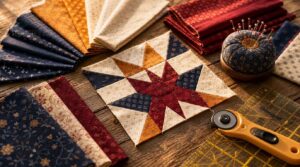
Fabric choice can make or break a star block — even the most precise piecing falls flat if your fabrics fight each other. The good news is that a few key decisions cover most of what you need to know. Here’s what to think about before you start cutting.
High-contrast Fabric Pairings
Contrast is the secret handshake of every great star block. Value contrast ratios — how light and dark your fabrics sit next to each other — determine whether your star points pop or disappear. Think white on black, or navy against ivory. That difference in value is what makes the geometry do its job.
| Bold Color Duo | Effect |
|---|---|
| White + Black | Crisp, dramatic star points |
| Navy + Ivory | Strong visibility, softer glare |
| Jewel Tone + Charcoal | Rich clarity, no overwhelm |
Neutral accent pairing works beautifully when your star fabric is busy — a calm background lets the points breathe. For texture contrast techniques, try pairing matte cotton with a subtle sateen. That quiet sheen adds dimension without stealing the show.
Traditional Color Palettes
Traditional star quilts lean on a handful of tried-and-true palettes — and they work for a reason. Heritage neutrals like parchment cream and taupe make ideal backgrounds, letting star points breathe.
Anchor those with deep navy or burgundy for rich contrast. A whisper of antique gold on cornerstones or star centers mimics historic embellishment without overwhelming.
These colors weren’t random — they echoed the natural world quilters lived in.
Fussy-cut Center Squares
Here’s where fabric selection for quilting gets genuinely fun. Fussy-cut center squares let you frame a motif like a tiny painting inside your star quilt block.
- Use center mark rulers to align your motif before cutting
- Apply starch stabilization to keep fabric crisp and still
- Try the window method to preview exactly what you’ll frame
Print orientation matters too — keep motifs upright so they read correctly in the finished pointy star block.
Print Scale Considerations
Print scale is sneaky — it can make or break your star block before you even thread a needle.
A busy floral that looks gorgeous on the bolt might completely muddy your star points at a 7‑inch finished size.
High contrast, simple prints read cleanest at smaller scales.
Always test a proof at your actual target size first.
Sewing Traditional Star Patterns
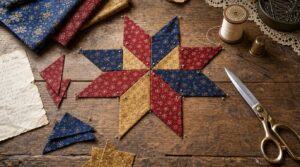
Getting your fabric cut and sewn correctly makes all the difference between a star that lies flat and one that puckers at the points. The good news is that a handful of simple habits will carry you through almost any traditional pattern. Here’s what to focus on before you sew a single seam.
Cutting Charts and Sizes
Before you cut a single piece, your cutting chart is everything. It maps out finished sizes, seam allowances, and how many pieces you need — no guessing.
Here’s what a solid cutting chart covers:
- Block size standards like 6" or 9" finished squares
- Seam allowances and notch markings for clean alignment
- Yardage estimates for efficient material use
Rotary Cutting Accuracy
A dull blade is the enemy of a clean star. Blade maintenance matters more than most quilters think — swap it out the moment cuts start dragging.
Pair that with solid ruler alignment and a grippy mat surface, and your pieces stay true.
Apply steady, even cutting pressure so the blade glides without skipping.
Keep fabric tension smooth, and every rotary cut lands exactly where your cutting chart says it should.
Starching Before Cutting
Once your blade is sharp and your mat’s set, there’s one more prep step worth not skipping: starch your quilt fabrics before you ever make a rotary cut.
Starch adds body to the weave, so edges stay crisp and stable.
Three reasons to starch first:
- Bias edges on star points won’t stretch or warp during cutting.
- Fabric edge stability means cleaner seam allowances and sharper intersections.
- Pieces stay put when pinned — no shifting, no surprises.
A light starch spray, set with a hot iron, is usually enough for standard quilting cotton.
Making a Sample Block
Before you cut into your main fabrics, sew a sample block first. Think of it as a dress rehearsal.
Use your actual fabrics, follow the illustrated instructions exactly, and rotary cut every piece as planned.
Check your Half Square Triangles for drift, verify seam accuracy at every intersection, and measure the finished block.
Catching a ⅛-inch problem now saves a whole quilt later.
Pressing Seams Consistently
Your sample block passed — now don’t ruin it at the iron.
Pressing seam edges correctly is what separates a flat, crisp star from a lumpy mess. For HSTs especially, seam press consistency matters every single step.
- Press closed first, then open — it sets the stitch
- Use light steam pressure settings to avoid stretching bias edges
- A cloth protection layer guards delicate fabrics from shine
Frequently Asked Questions (FAQs)
How do I choose a star block layout?
Measure twice, cut once." Start simple. Think about color placement and scale proportion first. A high-contrast pairing makes star points pop. Then consider your arrangement patterns — constellation layouts create stunning movement across the whole quilt.
Can star blocks be combined with other patterns?
Absolutely — star blocks pair beautifully with other patterns. Try combining them with an Irish chain for a striking contrast. Mixed layout designs like this add unexpected rhythm without overwhelming the eye.
What quilt sizes work best for star patterns?
Star block scale drives everything. A 12-inch block fits most quilt size planning goals — three across works for a throw, five for a queen. Match your block layout planning to the bed, not the other way around.
How do beginners troubleshoot misaligned star points?
Measure twice, cut once." Verify seam allowance first—uneven cuts snowball fast.
Trim dog-eared corners, align point tips carefully, and always test block fit before committing.
Precision cutting methods and quilt block templates make perfectly pointy star blocks surprisingly achievable.
Are star quilts appropriate for hand quilting?
Yes, absolutely. Hand quilting suits star quilts well — especially with tight cotton fabrics, low-loft batting, and a good hoop to maintain tension. Use a hoop, stitch in the ditch, and you’re set.
Conclusion
Like a map stitched in fabric, traditional star block patterns carry more than geometry—they carry memory.
Every Ohio Star, every LeMoyne point, every pressed seam connect you to quilters who used these blocks to signal belonging, belief, and identity.
You’re not just learning a technique.
You’re joining a conversation that’s been running for centuries.
Pick your fabric.
Cut your triangles.
Let the pattern say something worth remembering.
- https://www.vintagekitquilts.net/starshistory.htm
- https://sherriquiltsalot.com/2023/11/22/the-journey-of-a-quilt-block-from-england-to-the-new-world-from-mathematical-to-lone-star
- https://englishpaperpiecingjourney.wordpress.com/tradition-blocks-their-origins
- https://www.stitchedincolor.com/blog/2022/8/8/favorite-8-types-patchwork-star-blocks
- https://www.nps.gov/home/planyourvisit/quilt-discovery-experience.htm