This site is supported by our readers. We may earn a commission, at no cost to you, if you purchase through links.
nine-patch block is one of the oldest quilt patterns in American textile history—simple enough for a beginner’s first project, yet precise enough to humble an experienced seamstress. Nine squares of fabric, arranged three-by-three, have warmed generations of families through hard winters and harder times. That staying power isn’t accidental.
The pattern’s geometry rewards careful fabric choices and honest quarter-inch seams, giving you a finished quilt that holds together for decades. Whether you’re working with two coordinating cottons or pulling scraps from a fabric stash, a traditional nine patch quilt builds real skill with every block you complete.
Table Of Contents
Key Takeaways
- Fabric choice is everything — pair light and dark 100% quilting-weight cottons, and keep prints under 1.5 inches so your blocks pop the way they’re supposed to.
- A true quarter-inch seam isn’t optional — it’s what keeps every block the right size and makes the whole quilt line up when you join rows.
- Your must-have tools are a quality thread, good batting, a rotary cutter, a self‑healing mat, and an acrylic ruler — get those right and the work gets a lot easier.
- Press every seam flat after each row and nest opposing seams when you join blocks — that’s what keeps your intersections clean and your finished quilt lying smooth.
Plan Your Nine Patch Quilt
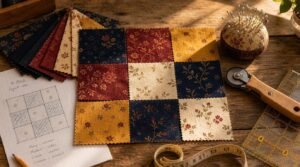
Before you cut a single square, a little planning goes a long way. Good choices up front make the whole process smoother and the finished quilt something you’ll actually love. Here’s what to think through before you start.
If you’re new to the craft, working through a beginner quilting guide with step-by-step lessons can help you build confidence before your fabric even hits the cutting mat.
Choose Contrasting Cotton Fabrics
Most quilters agree: fabric choice makes or breaks a nine patch block. Stick to 100% quilting-weight cotton — it’s easy to cut, sews cleanly, and holds its shape wash after wash.
- Pair light and dark fabrics for that classic checkerboard pop
- Keep prints under 1.5 inches so patterns don’t overwhelm
- Prewash everything to prevent dye bleed
- Choose two to three colors maximum
Pick Traditional Color Placement
Once your fabrics are chosen, color placement is what ties everything together. In a traditional nine patch block, dark fabrics go in the corners, midtones sit in the middle, and lights fill the rest. This keeps your color contrast balanced and your eye moving smoothly across the quilt. Considering a complementary color scheme can further improve visual interest.
| Patch Position | Recommended Value |
|---|---|
| Corners | Dark fabric |
| Center | Midtone fabric |
| Remaining squares | Light fabric |
Spread each color at least three times across your Nine Patch Quilt Blocks so nothing feels crowded or random.
Decide Finished Quilt Size
Now that your colors are locked in, it’s time to think about size. What’s the quilt for? A twin bed needs roughly 64 by 88 inches, while a queen runs closer to 90 by 108. Here are three quick size decisions to make:
- Choose your bed or throw size
- Add 12–15 inches of overhang per side
- Account for border and binding width
Your block count and layout follow naturally from there.
How Much Fabric You’ll Need
Once you know your quilt size, the math gets straightforward.
A 60 by 72 inch quilt usually needs 6 to 7 yards of assorted fabrics total. Split that evenly between light and dark for a balanced traditional nine patch block.
Add 10 percent extra for prewashing shrinkage and miscuts. Round up to the nearest quarter yard — your budget reserve saves frustration later.
Plan Spacer Block Placement
Spacer blocks are the secret to a quilt that looks intentional, not rushed. Cut them from the same finished block dimensions as your nine‑patch units — measure a completed block first, then cut to match.
Spacer blocks cut to match your finished nine-patch units are what make a quilt look planned, not accidental
Use a neutral contrasting fabric so each block pops.
Pairing the right neutral against your main print takes a little practice, but browsing traditional patchwork block patterns gives you a solid feel for which combinations actually work.
Align spacers with the fabric grain to keep seams flat and your layout grid perfectly even.
Top 5 Traditional Nine Patch Supplies
Good supplies make every step easier — and with nine-patch quilts, a few key tools really do most of the heavy lifting. You don’t need a whole craft store, just the right five things that quilters keep reaching for again and again. Here’s what belongs in your kit before you cut your first square.
1. Aurifil Dove Mako Cotton Thread 50wt
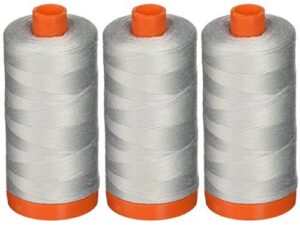
Good thread makes or breaks your quilt. Aurifil Dove 50wt is a top pick for nine-patch projects because it’s made from 100% Egyptian cotton with a mercerized finish — meaning it feeds smoothly, sheds almost no lint, and keeps your seams flat and clean.
The dove gray shade blends quietly with most fabric colors, so your patchwork stays the star. Each spool holds 1,422 yards, giving you plenty for a full quilt without mid-project restocking.
| Best For | Quilters and embroidery enthusiasts who want a reliable, low-lint thread that plays well with most fabrics and machines. |
|---|---|
| Primary Material | 100% mercerized cotton |
| Intended Use | Machine quilting/embroidery |
| Quilting Suitability | Yes |
| Ambidextrous Design | Not applicable |
| Unit Count | 3 spools |
| Weight | 4.16 oz per spool |
| Additional Features |
|
- Smooth feed means fewer tension headaches and almost no lint buildup in your machine.
- 1,422 yards per spool is generous — plenty to finish a full quilt without running out mid-project.
- The neutral dove shade blends with a wide range of fabrics, so it works across all kinds of patchwork projects.
- It costs more than standard polyester or budget cotton threads, so it’s a bigger investment upfront.
- You may need to tweak your machine’s tension settings before it runs perfectly.
- This pack only comes in dove — if you need other colors, you’ll have to buy them separately.
2. Hobbs Tuscany Washable Wool Batting
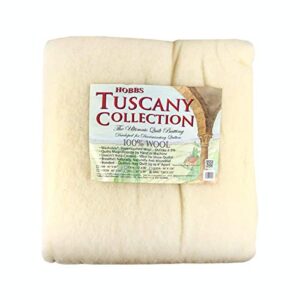
Batting is the secret heart of any quilt — it’s what makes the whole thing feel alive in your hands. Hobbs Tuscany Washable Wool Batting is a favorite for nine-patch projects because it’s made from 100% superwash wool that’s both breathable and lightweight.
It holds beautiful loft, so your stitching really pops. And since it’s fully machine washable with minimal shrinkage, you don’t have to baby it after all that hard work.
| Best For | Quilters who want a lightweight, breathable batting they can toss in the wash without worrying about ruining their finished project. |
|---|---|
| Primary Material | 100% super-wash wool |
| Intended Use | Quilt batting/insulation |
| Quilting Suitability | Yes |
| Ambidextrous Design | Not applicable |
| Unit Count | 1 batting |
| Weight | 1.98 lb |
| Additional Features |
|
- Beautiful loft that makes hand-quilting stitches really stand out
- Fully machine washable with only 3–5% shrinkage, so it holds up over time
- Made in the US from 100% superwash wool — breathable, non-itchy, and comfortable
- At $99, it costs more than cotton or poly-blend options
- That 3–5% shrinkage is minimal, but it’s still something to plan for before gifting or sizing a project
- You’ll need to keep quilting stitches within 4 inches apart to maintain loft and avoid distortion
3. Fiskars Classic Loop Rotary Cutter
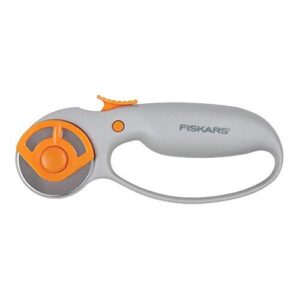
Every accurate cut starts with the right cutter. The Fiskars Classic Loop Rotary Cutter has a 45mm precision-ground steel blade that glides through multiple fabric layers cleanly — no dragging, no fraying.
The ergonomic loop handle fits comfortably in your hand, so longer cutting sessions don’t wear you out. The sliding button extends and locks the blade securely, then retracts it for safe storage. It’s also ambidextrous, so it works whether you’re right- or left-handed.
| Best For | Sewers, quilters, and crafters who cut fabric, paper, or vinyl regularly and want a comfortable, reliable rotary cutter that works for both hands. |
|---|---|
| Primary Material | Alloy steel blade |
| Intended Use | Fabric cutting |
| Quilting Suitability | Yes |
| Ambidextrous Design | Yes |
| Unit Count | 1 cutter |
| Weight | 2.56 oz |
| Additional Features |
|
- The 45mm precision-ground blade slices through multiple layers cleanly without dragging or fraying.
- The loop handle feels natural in your grip and cuts down on hand fatigue during longer sessions.
- Snap-in blade replacement is quick and easy, so you’re not losing time between projects.
- The retractor button can feel a bit awkward if you’re left-handed, even though the blade itself is ambidextrous.
- Replacement blades aren’t covered by the lifetime warranty, so that’s an ongoing cost to factor in.
- The plastic handle can feel a little flimsy when you’re working through thicker or denser fabrics.
4. Fiskars Eco Self Healing Cutting Mat
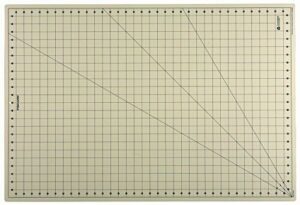
Your rotary cutter needs a worthy partner — and the Fiskars Eco Self-Healing Cutting Mat delivers. Measuring 24 by 36 inches, it gives you plenty of room to cut full-width fabric without constantly repositioning.
The self-healing surface closes up after blade passes, so your mat stays smooth longer. Both sides carry a printed grid with ¼-inch dots and bias lines at 30°, 45°, and 60° — perfect for cutting nine-patch squares accurately every time.
| Best For | Quilters, sewists, and scrapbookers who need a large, reliable cutting surface for full-width fabric projects. |
|---|---|
| Primary Material | Polypropylene (PP) |
| Intended Use | Surface protection/measuring |
| Quilting Suitability | Yes |
| Ambidextrous Design | Yes (double-sided) |
| Unit Count | 1 mat |
| Weight | 2.06 lb |
| Additional Features |
|
- Big 24×36 surface means fewer stops and repositions mid-cut
- Double-sided design effectively doubles the mat’s usable life
- Built-in grid with bias lines at 30°, 45°, and 60° makes angled cuts quick and accurate
- Grid ink can wear off over time, making measurements harder to read
- Runs thinner and less rigid than some competing mats
- Label adhesive is a pain to remove and can leave residue behind
5. Omnigrid Acrylic Quilting Ruler
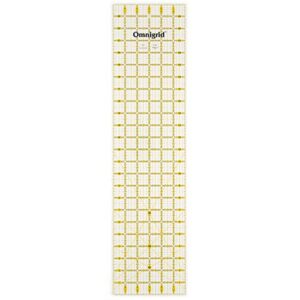
The Omnigrid 6 × 24 in acrylic ruler is the quiet workhorse of any nine‑patch project. Its double-line grid — printed in black and yellow — stays readable on both dark and light fabrics, so you’re never squinting to find your line.
Angle markings at 30°, 45°, and 60° make bias cuts straightforward.
The laser-cut edge glides cleanly with your rotary cutter, giving you accurate strips and squares every single time.
| Best For | Quilters and sewers who need a reliable, easy-to-read ruler for cutting strips, bias pieces, and precise blocks on both dark and light fabrics. |
|---|---|
| Primary Material | Premium acrylic plastic |
| Intended Use | Precise fabric measuring |
| Quilting Suitability | Yes |
| Ambidextrous Design | Yes |
| Unit Count | 1 ruler |
| Weight | 11.56 oz |
| Additional Features |
|
- The double-line black and yellow grid stays visible on any fabric color — no more guessing where your line is.
- Laser-cut edges mean clean, accurate cuts every time, whether you’re using a rotary cutter or hand knife.
- Angle markings at 30°, 45°, and 60° make bias cuts quick and hassle-free for both lefties and righties.
- No non-slip feet, so you’ll need to press down firmly or use a grippy mat to keep it from shifting.
- One size only — bigger projects will have you repositioning the ruler multiple times.
- The two-color grid is a practical choice for most, but if you prefer a clean single-color overlay, it might feel a little busy.
Cut and Sew Nine Patch Blocks
This is where your nine patch quilt actually starts taking shape. Getting your cuts and seams right from the beginning saves you a lot of headaches later. Here’s exactly what to do, step by step.
Cut Equal Fabric Squares
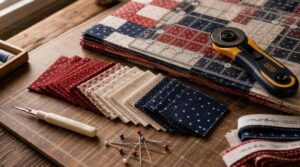
Getting your cuts right is the foundation of a clean ninepatch block.
- Trim the fabric edge first to create a true starting edge
- Align to grain — keep cuts parallel to the selvedge
- Replace dull rotary blades before cutting
- Check both diagonals on sample squares to confirm they match
Precise fabric squares make traditional quilting feel smooth later.
Arrange The Three Rows
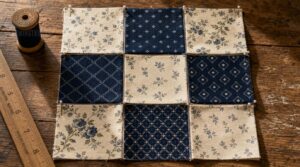
Once your squares are cut, lay them out in a 3 × 3 grid before touching the machine. Alternate light and dark patches so a diagonal pattern forms across the block. Pin the start and end of each row to keep things flat. Nest your seam allowances by flipping rows so bulk doesn’t stack at the joins.
Sew Quarter-inch Seams
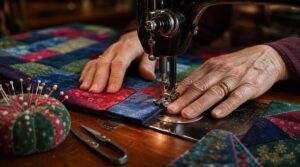
With your rows pinned and ready, it’s time to sew. A quarter inch foot on your machine makes presser foot alignment simple — no guesswork needed.
- Test on scrap fabric first for seam accuracy testing
- Keep thread tension balance even for smooth stitches
- Backstitch at each end to lock seams
- Maintain a steady pace — don’t pull the fabric
Press Seams After Rows
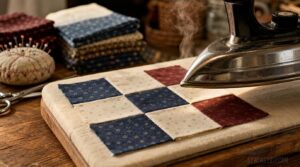
Once your seams are sewn, grab your iron. Press seams after rows — not during — so each row lies flat before you join the next.
Press in one direction per row, then alternate press seam direction on the next row. This lets seams nest neatly when rows meet, cutting down seam bulk at every intersection.
Use medium-high heat for cotton.
Check Block Measurements
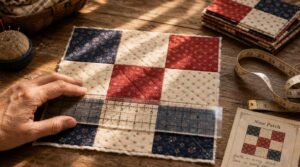
Before moving on, take a minute to check block measurements — it saves headaches later.
- Measure each block at three different points
- Confirm all sides hit your target size
- Set aside any blocks outside tolerance
A ¼-inch seam allowance affects your final size, so stay consistent. Every block should match before you start joining rows.
Assemble, Quilt, and Bind
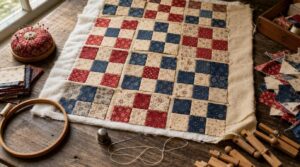
Your blocks are done — now it’s time to bring the whole quilt together. This part covers the steps that turn individual pieces into a finished, functional quilt. Here’s what you’ll work through to get there.
Join Blocks Into Rows
Once your blocks are pressed and measured, it’s time to bring them together. Lay your blocks out in rows.
Use row seam nesting — flip opposing seams so they butt together snugly. This cuts bulk fast. Chain piecing keeps things moving.
Press row seams flat after each join. Check alignment at three points before moving on.
Add Spacer Blocks Carefully
Spacer blocks can quietly make or break your layout. Your Spacer Placement Strategy is simple: match each spacer to the size of your nine-patch unit squares and keep gaps consistent across every row and column.
- Prewash spacer fabric before cutting
- Cut with a rotary cutter for flush, square edges
- Press the seams away from patch blocks
- Verify alignment before joining rows
Layer The Quilt Sandwich
Now comes the part that holds everything together — the quilt sandwich method.
Tape your quilt back face-down on a flat surface, then center your batting on top with at least 4 inches of excess around every edge. Finally, place your quilt top right side up, smoothing outward from the center.
| Layer | Position | Key Tip |
|---|---|---|
| Quilt Back | Bottom, face-down | Tape flat to surface |
| Batting | Middle, centered | Leave 4-inch overhang |
| Quilt Top | Top, face-up | Smooth from center out |
| Pins | Every 6–8 inches | Prevents shifting |
| Edges | All four sides | Check equal allowance |
Batting selection matters here. Cotton lies flatter; wool adds loft. For edge alignment, confirm all corners meet squarely before basting. Use pin basting every 6 to 8 inches across the entire surface — this is your insurance against puckering later.
Mark Quilting Guidelines
Think of this step as drawing a quiet map before you stitch. Lay your fabric marker flat and start light — mark only what you need.
A Hera marker scores lines without ink, perfect for darker fabrics. Use a water soluble pen or chalk pencil on lighter cotton. For straight grids, masking tape keeps lines true. Echo lines follow each block’s edge naturally, while crosshatch patterns add classic texture.
Calculate Binding Length
Before you cut a single strip, measure your quilt’s full edge. Add all four sides together — that’s your perimeter calculation. A 60×80 quilt gives you 280 inches.
Then add about 10–12 inches for corner allowance and diagonal joins. Cut your binding width to 2.5 inches for a clean double-fold finish.
A yardstick keeps your strips straight and accurate.
Frequently Asked Questions (FAQs)
What is the history of the nine-patch pattern?
The nine-patch pattern traces back to European patchwork traditions in the 1700s. Pioneer women and Civil War quilters kept it alive using scraps. Today, it’s a beloved gateway block for beginners worldwide.
How old is the nine-patch quilt tradition?
How deep do those roots actually go? The nine patch block traces back to the early 19th century — over 200 years of generational craft tradition, born from pioneer resourcefulness and carried straight through the Civil War era.
Which nine-patch block variations exist today?
Several variations exist. The Rail Fence, Churn Dash, Shoofly, and Monkey Wrench styles each rework the classic grid. The Friendship Star adds triangles for flair.
Can beginners learn nine-patch quilting quickly?
Yes — beginners pick this up fast. Think of it as a simple classic quilt block: just nine squares, straight seams, and a clear pattern. It’s one of the most beginner-friendly DIY quilting tutorials you’ll ever try.
How did pioneer women use nine-patch quilts?
Pioneer women relied on nine-patch quilts as practical bedding, portable blankets, and teaching tools. They stitched fabric scraps into blocks to stretch every scrap, keeping families warm through brutal winters while passing sewing skills to daughters.
Conclusion
Patience, practice, and precise quarter-inch seams—that’s the quiet secret behind every traditional nine patch quilt that outlasts the hands that made it. You’ve learned to cut, arrange, sew, and bind with intention.
Now your blocks carry that same staying power—generations of quilters built before you.
Don’t rush the finish. Press every seam flat, square every block true, and trust the process.
The quilt you’re making today could warm someone’s winter decades from now.
- https://alanteatherquilting.com/archives/175124
- https://www.nps.gov/home/planyourvisit/quilt-discovery-experience.htm
- https://threadbarecreations.blogspot.com/2020/02/classic-quilt-blocks-nine-patch.html
- https://www.seasonedhomemaker.com/nine-patch-beginner-quilt-block
- https://www.epidastudio.com/five-9-patch-quilt-blocks