This site is supported by our readers. We may earn a commission, at no cost to you, if you purchase through links.
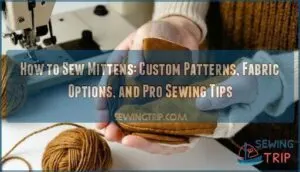 Learning how to sew mittens starts with creating a custom pattern by tracing your hand on paper, adding seam allowances, and selecting warm fabrics like wool or fleece.
You’ll cut two mitten shapes, sew them together with reinforced seams, and finish with cuffs or linings for extra comfort.
The process combines basic sewing skills with practical results, giving you perfectly fitted hand warmers that beat store-bought options every time.
Whether you’re repurposing old sweaters or working with fresh fabric, the key lies in getting your pattern right and choosing materials that’ll actually keep your fingers toasty when winter bites, which is the main goal of making custom mittens.
Table Of Contents
Key Takeaways
- Create a custom pattern by tracing your hand – You’ll get perfectly fitted mittens by placing your hand flat with fingers together, tracing around it with a 1-inch space, and adding ¼ to ⅜ inch seam allowances.
- Choose warm, easy-to-sew fabrics like fleece or wool – You’ll achieve the best results with medium-weight polar fleece for warmth without bulk, or felted wool for durability and non-fraying edges.
- Use zigzag stitches for stretchy materials – You’ll prevent thread breakage and maintain fabric stretch by using zigzag stitches instead of straight stitches when sewing fleece or wool blends.
- Add finishing touches for professional results – You’ll transform basic mittens into cozy accessories by adding elastic cuffs for a secure fit, soft linings for comfort, and reinforced seams for durability.
Supplies for Sewing Mittens
You’ll need basic sewing supplies like fabric scissors, pins, and thread, plus about 1/3 yard of fleece for both the mittens and lining.
A sewing machine with zigzag stitch capability works best for stretchy fabrics, and don’t forget 8-12 inches of elastic for the wrist cuffs.
Creating a Custom Mitten Pattern
You’ll create professional mitten templates by tracing your hand on paper, then adding essential seam allowances for perfect fitting. Place your hand flat with fingers together, trace around it leaving about one inch of space, and mark your thumb placement carefully.
- Hand Measurement: Trace with fingers together and thumb extended naturally
- Seam Allowance: Add ¼ to ⅜ inch around entire pattern outline
- Fabric Grain: Mark grain direction for proper stretch and comfort
- Pattern Drafting: Create wrist opening wide enough for easy hand entry
This custom mitten sewing pattern guarantees your handmade mittens fit perfectly every time. Using a reliable mitten sewing pattern is vital for achieving professional results.
Additional Sewing Patterns
Beyond basic mitten sewing patterns, you’ll discover specialized mitten templates that expand your creative horizons.
Free mitten sewing patterns online offer stitch variations and fabric layouts for unique designs.
Pattern blocks help you draft custom mittens sewing instructions, while sewing guides provide professional techniques.
These mitten sewing pattern resources let you experiment with different styles, from vintage-inspired designs to modern interpretations that showcase your personal flair, using sewing guides.
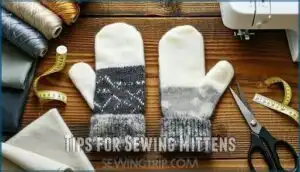
Tips for Sewing Mittens
Once you’ve mastered the basics of cutting and assembling mitten pieces, these essential techniques will help you achieve professional-looking results.
You’ll learn how to properly size sweater mittens, felt wool materials for durability, and secure your zigzag stitches for lasting seams.
Sizing Sweater Mittens
Getting the perfect mitten fit requires careful hand measurement before cutting your sweater fabric. Since sweater material stretches during sewing, you’ll want to check sizing frequently throughout the process.
Here’s how to guarantee proper mitten sizes for your sweater mittens:
- Measure hand circumference around your palm just below the knuckles, excluding your thumb while making a fist
- Calculate finger length from the bottom edge of your palm to your middle fingertip for accurate pattern sizing
- Check wrist circumference to guarantee the cuff won’t be too tight when using the sweater’s existing ribbing
- Assess thumb size separately, measuring both length and circumference for comfortable movement
When sewing mittens for kids or making recycled sweater mittens, size up by one increment if you’re between sizes. This extra room accommodates the fabric’s natural stretch and prevents tight, uncomfortable mittens that restrict hand movement.
To create durable mittens, consider using felted wool sweaters as your primary material for the best results.
Felting Sweaters for Mittens
Three simple steps transform any wool sweater into felted wool perfect for sewing mittens from sweaters.
Transform wool sweaters into felted fabric with just hot water, heat, and agitation.
First, wash your sweater upcycle candidate in hot water with regular detergent, using high agitation.
The heat and friction cause wool blends to shrink and mat together, creating dense felted sweater mittens material.
Check progress frequently—over-felting ruins the fabric.
Second, run through a hot dryer cycle for additional shrinkage.
Finally, air dry flat to prevent stretching.
Your mitten felting process yields thick, non-fraying fabric ideal for upcycled sweater mittens and recycled sweater mittens with optional fleece linings.
For best results, consider the wool felting process when selecting sweaters for your projects.
Securing Zigzag Stitches
Strong zigzag stitches secure your mitten seams when you follow proper techniques. Master these fundamentals to prevent loose threads and maintain fabric stretch while ensuring durable mitten construction.
- Stitch Tension: Adjust your machine’s tension settings to prevent puckering while maintaining seam reinforcement
- Thread Choice: Select polyester or cotton-poly blend thread that matches your fabric’s stretch properties
- Elastic Attachment: Use zigzag stitch for sewing elastic, stretching it gently as you sew
- Hand Stitching: Finish thread tails with secure knots on the wrong side of your fabric
- Sewing Techniques: Backstitch at seam beginnings and ends to lock your stitches permanently
Choosing The Right Fabric
The fabric you choose determines your mittens’ warmth, durability, and comfort level. Fleece, wool, and felt offer the best combination of insulation and ease of sewing for beginners.
Fabric Options for Mittens
Your fabric choice determines whether you’ll sew mittens that truly protect against winter’s bite.
Smart fleece selection starts with medium-weight polar fleece for ideal warmth without bulk.
Wool blends offer superior insulation materials that regulate temperature naturally.
Consider fabric texture when choosing mitten lining options:
- Microfleece provides soft, breathable mitten lining
- Felted wool creates durable, non-fraying edges
- Sherpa fleece adds luxurious warmth for winter mittens
- Cotton jersey offers comfortable inner layers
This mitten sewing tutorial emphasizes matching your fabric’s stretch to your sewing skills for successful fleece mittens.
Understanding climate specific fabrics is vital for selecting the right materials for your mittens, ensuring you have warmth without bulk and a good fabric choice.
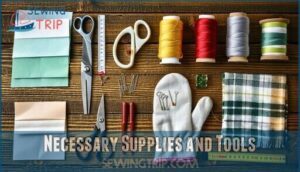
Necessary Supplies and Tools
Now that you’ve selected your mitten fabric, it’s time to gather your sewing essentials for the construction process.
You’ll need sharp sewing scissors for clean cuts through multiple fabric layers, plus fine-tipped fabric scissors for detailed trimming work. Stock up on quality thread types that match your mitten fabric – polyester thread works well for most materials, while cotton thread suits natural fibers.
Don’t forget sewing pins to secure pattern pieces, a sewing tape measure for accurate sizing, and various sewing needles for different fabric weights. Elastic bands will create snug wrist closures that keep cold air out.
These scissors tools and basic supplies transform your chosen materials into cozy winter accessories that’ll keep your hands warm all season long. For the best results, invest in high-quality sewing scissors sets to guarantee precise cuts and professional finishes.
The Unique Mitten Pattern
You’ll discover that vintage wool blankets and repurposed leather create stunning mittens with character that store-bought options simply can’t match.
These unique materials transform your mitten-making project from basic to extraordinary, giving you warm, durable mittens with a story to tell.
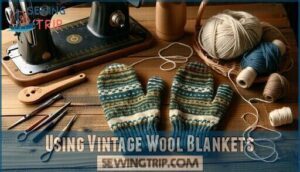
Using Vintage Wool Blankets
Vintage wool blankets offer exceptional material for crafting warm, durable mittens through thoughtful blanket upcycling.
You’ll find these repurposed materials provide superior mitten insulation compared to modern fabrics.
When selecting vintage fabric, check for moth holes and verify the wool’s integrity before cutting your pattern.
Felted wool blankets work particularly well since they won’t fray during construction.
This wool selection process transforms cherished family heirlooms into practical winter gloves sewing projects that honor the past while serving present needs, providing a unique opportunity for thoughtful crafting.
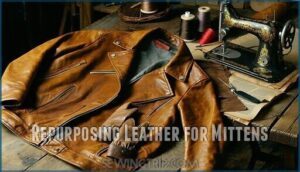
Repurposing Leather for Mittens
When breathing new life into worn leather jackets or purses, you’ll discover that leather crafting transforms forgotten materials into durable, character-rich mittens.
This mitten upcycle approach embraces eco fashion while mastering hand stitching techniques.
The use of high-quality leather materials, such as those found in leather mitten products, can greatly enhance the overall durability of the mittens.
- Leather Selection – Choose cowhide for durability or deerskin for softness and flexibility
- Pattern Preparation – Trace your mitten pattern onto the leather using heavy paper templates
- Cutting Technique – Use sharp utility knives or rotary cutters for clean, precise edges
- Sewing Process – Hand stitch with pricking irons and beeswaxed thread for professional results
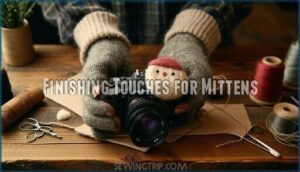
Finishing Touches for Mittens
Once you’ve sewn your mittens together, you’ll want to add the finishing touches that transform them from basic handwear into cozy, professional-looking accessories.
These final steps include adding elastic cuffs for a secure fit, creating decorative needle-felted designs, and properly finishing seams for durability.
Adding Cuffs and Linings
Creating professional-looking mittens requires proper cuff materials and lining techniques to guarantee warmth and durability.
You’ll want to fold your cuff fabric twice for a clean finish, then secure it with straight stitches or a zigzag pattern for seam reinforcement.
When sewing lined mittens, choose soft materials like fleece or cotton for comfort against skin. Add wrist elastic inside the cuff to prevent cold air from sneaking in – this simple trick transforms basic mittens into sewing warm mittens that actually work.
Your mitten sewing guide should emphasize how proper mitten insulation comes from combining quality cuff materials with effective lining techniques for maximum comfort.
Needle-Felted Designs
Enhancing mittens with needle felting transforms plain wool into stunning Fiber Art masterpieces.
You’ll need felting needles in coarse, medium, and fine gauges for different detail levels, plus dense foam padding and colorful wool roving.
Insert the foam pad inside your mitten to prevent needle punctures, then poke wool fibers repeatedly into the fabric surface.
This sewing technique creates beautiful Felt Designs that won’t budge with proper needle selection.
Layer thin wisps for shading effects or follow templates for precise Mitten Embellishments.
Your hand stitching skills will shine as you sew mittens worthy of any artisan market, showcasing your mastery of Fiber Art techniques.
Benefits of Making Your Own Mittens
When you sew your own mittens, you create custom accessories that fit perfectly and match your style preferences.
You’ll also repurpose materials like old sweaters or wool blankets, reducing waste while crafting unique winter gear.
Customization and Unique Designs
Making custom mittens opens endless creative possibilities. You can add Mitten Embellishments like embroidery, appliqué, or decorative buttons to reflect your personal style.
Custom mittens let you express your creativity through endless embellishment possibilities and personal style choices.
Fabric Choices range from repurposed wool sweaters to vintage blankets, creating truly unique pieces. Custom Fits guarantee perfect sizing for each wearer’s hands.
Try Decorative Stitches like blanket stitch or contrast topstitching for visual interest. Personalized Details such as monograms, patches, or needle-felted designs make each pair special.
Whether you’re sewing mittens with cuffs or experimenting with mittens sewing designs, your creativity determines the final result. Custom mittens become treasured accessories that tell your story.
Understanding yarn weight options is vital for achieving the desired texture and warmth in your handmade mittens.
Sustainability and Repurposing Fabric
Beyond creating unique designs, your mitten-making journey becomes an eco-friendly adventure when you embrace fabric recycling and upcycling materials.
Repurposing materials transforms textile waste into treasured accessories while reducing your sewing environmental impact.
- Felted wool sweaters provide excellent insulation and water resistance for sustainable textiles
- Vintage blankets offer large fabric pieces perfect for multiple mitten pairs
- Worn denim creates durable outer shells with natural character and strength
- Fleece scraps become cozy linings that extend garment lifecycles through repurposed fashion
Coordinating Accessories for Your Mittens
Your handmade mittens deserve equally stunning companions to complete your winter wardrobe.
When sewing mittens, plan coordinating winter accessories from the same fabric or complementary materials.
Create matching mitten hats using your leftover fleece mittens fabric, or design contrasting scarf sets that highlight your DIY mittens’ unique features.
Consider sewing fingerless glove options for layering versatility, or craft winter bags that echo your mitten sewing pattern’s design elements.
Add practical coat clips to keep your accessories secure during windy weather.
Gift sets combining mittens, hats, and scarves showcase your sewing skills beautifully.
Whether you’re working with bold prints or subtle solids, your homemade mittens become the foundation for an entire coordinated winter ensemble.
Smart planning transforms individual pieces into a cohesive, professional-looking collection that’ll keep you warm and stylish all season long.
Mastering basic sewing skills, such as those involving custom accessories, can help elevate your mitten-making to the next level, creating a cohesive collection that enhances your winter wardrobe with professional-looking accessories.
Frequently Asked Questions (FAQs)
How to make handmade mittens?
Like threading a needle through time itself, you’ll trace your hand on paper, cut fabric pieces, and stitch them together with careful seams to create cozy mittens.
How hard is it to make mittens?
Sewing mittens isn’t too difficult – you’ll need basic straight-line stitching skills and pattern-cutting abilities.
With proper materials like fleece, clear instructions, and patience for curved seams, beginners can successfully complete mittens in a few hours, utilizing their basic straight-line stitching skills.
How to get mittens to stay on?
Most lost mittens happen to kids under 8 years old.
You’ll keep mittens secure by sewing 25-inch elastic through sleeves, creating mitten clips, or adding ribbed cuffs that grip wrists tightly for warmth retention.
How do you prevent mittens from shrinking?
Pre-wash your fabric before cutting to avoid surprises later. Choose pre-shrunk fleece or wool, wash in cold water, and air dry your finished mittens to maintain their perfect fit.
Whats the best stitch for stretchy fabrics?
You’ll need a zigzag stitch when working with fleece or stretchy fabrics. This stitch moves with the material, preventing threads from breaking when the mittens stretch during use.
How do you fix uneven mitten sizing?
Measure both mittens against your hand and identify the smaller one.
You can adjust by taking in seams on the larger mitten or adding fabric strips to enlarge the smaller one for a perfect match.
Can you make waterproof mittens at home?
You can’t make truly waterproof mittens at home since "necessity is the mother of invention,"
but you’ll need specialized waterproof fabrics and professional seam-sealing techniques that aren’t available in typical home sewing setups.
How do you attach strings to mittens?
Sew the string directly into the wrist seam during construction, or hand-stitch it securely to the inner wrist area after completing the mittens. You’ll want strong thread and reinforced stitches.
Conclusion
Mastering how to sew mittens transforms you into an unstoppable winter warrior who’ll never face cold hands again.
You’ve learned pattern creation, fabric selection, and finishing techniques that’ll produce mittens perfectly fitted to your hands.
These skills let you repurpose materials, create unique designs, and craft accessories that outlast store-bought alternatives.
With practice, you’ll confidently tackle any mitten project, from basic fleece versions to intricate felted designs that showcase your growing expertise, and help you become a skilled winter warrior with perfectly fitted mittens.

