This site is supported by our readers. We may earn a commission, at no cost to you, if you purchase through links.
 If you’re excited to harness the power of the Brother CS6000i, you’re in for a treat.
This sewing machine is perfect for both newbies and seasoned stitchers, offering user-friendly features that make sewing a breeze.
With its wide range of stitch options, automatic needle threader, and convenient LCD screen, you’ll find creating projects smoother than ever.
Plus, the free-arm and extension table let you tackle complex pieces with ease.
Whether you’re sewing a quilt or hemming pants, the CS6000i is a trusty companion.
Stick around to uncover game-changing secrets that will elevate your sewing skills to new heights.
Table Of Contents
- Key Takeaways
- Getting Started With Brother CS6000i
- Brother CS6000i Features and Capabilities
- Mastering Basic Functions
- Exploring Advanced Functions
- Quilting and Sewing With Brother CS6000i
- Maintenance and Troubleshooting
- Brother CS6000i Accessories and Upgrades
- Tips and Tricks for Brother CS6000i Users
- Brother CS6000i Vs Other Sewing Machines
- Advanced Projects With Brother CS6000i
- Frequently Asked Questions (FAQs)
- Conclusion
Key Takeaways
- You’ll appreciate the Brother CS6000i’s user-friendly features like the automatic needle threader and LCD screen, making it ideal for both beginners and experienced sewers.
- Explore a wide range of creative possibilities with 60 built-in stitches, including decorative options and seven buttonhole styles.
- The machine’s free-arm and extension table let you tackle complex projects with ease, enhancing your sewing experience.
- Regular maintenance, including cleaning and oiling, ensures smooth operation and extends the machine’s lifespan, while optional presser feet expand its functionality.
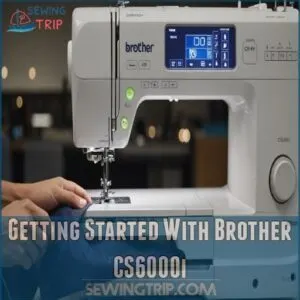
Getting Started With Brother CS6000i
You’re about to start an exciting sewing journey with your new Brother CS6000i.
From unpacking to threading, we’ll guide you through the first steps to get your machine humming and ready for action.
Unpacking and Accessories
When you crack open your Brother CS6000i box, it’s like unwrapping a sewing treasure chest.
You’ll find a bounty of goodies: the sleek machine, a hard case for safekeeping, and a wide table for those big projects.
Don’t overlook the 10 sewing feet – they’re your new best friends.
Spot the needle set, bobbins, and other nifty tools.
It’s all there, ready to kickstart your sewing adventure.
Assembling The Machine
Setting up your Brother CS6000i is like putting together a puzzle that opens up creative possibilities.
Before you start, make sure to power up the machine as you’d with any sewing machine, following general guidelines for sewing machine setup.
You’ll master this versatile machine in no time by following a few simple steps.
- Place the machine on a sturdy, well-lit surface and snap the power cord into the designated socket
- Attach your chosen presser foot until it clicks securely
- Insert the bobbin case following the threading diagram‘s arrows
Understanding The LCD Screen
The LCD screen on your Brother CS6000i puts total control at your fingertips.
You’ll love how the bright display shows your stitch selection and settings in crystal-clear detail.
Navigate the menu with simple button presses to select from 60 built-in stitches.
The screen displays everything you need to know: stitch width, length, and helpful error messages to keep your sewing journey smooth.
Initial Setup and Threading
From your workstation, start mastering your Brother CS6000i with confidence.
Wind the bobbin smoothly using the automatic winder, then engage the quick-set drop-in system.
You’ll love how the automatic needle threader takes the strain off your eyes.
Adjust your thread tension to medium, snap on your chosen presser foot, and you’re ready to command this versatile machine like a pro.
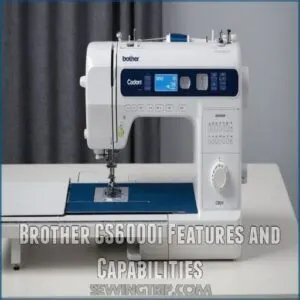
Brother CS6000i Features and Capabilities
You’ll discover how the Brother CS6000i combines user-friendly features like 60 built-in stitches and an automatic needle threader to make your sewing projects easier.
With the Brother HC1850’s impressive features, including over 100 built-in stitches, the machine’s variable speed control and convenient LCD screen let you take charge of your creativity while keeping everything simple and straightforward.
Stitch Options and Selection
Now that you’ve got your machine ready, it’s time to explore your creative potential with 60 built-in stitches.
Your LCD screen displays every stitch type and setting at your fingertips.
You’ll love experimenting with decorative stitches, seven buttonhole styles, and adjustable stitch length and width.
Just press a button to select your perfect stitch, and you’re in complete control of your sewing destiny.
Automatic Needle Threader and Bobbin System
Frustration with threading needles becomes ancient history thanks to your Brother CS6000i’s automatic needle threader.
You’ll love how the quick-set bobbin system prevents thread jamming and maintains perfect tension.
Simply drop your bobbin in from the top, follow the threading guide’s path, and you’re ready to sew in seconds.
When bobbin winding, the machine automatically stops when it’s full.
Variable Speed Control and Start/Stop Button
Taking control of your Brother CS6000’s is is.
Variable speed control is a game-changer for both quilting and sewing, as it allows for greater control over stitch quality and eliminates foot pedal issues, allowing for consistent stitches, as seen in Brother sewing machines for speed control.
The start/stop button puts you in command – no foot pedal needed! It’s your choice: use the button or pedal to match your sewing style.
Free-Arm and Extension Table
Your Brother CS6000i puts you in command with its versatile free-arm feature.
Simply slide off the flatbed attachment to access those tricky-to-reach areas like cuffs, sleeves, and pant legs.
When you’re ready to tackle larger projects, snap on the extension table for a spacious work surface that’ll make quilting and handling bulky fabrics feel like a breeze.
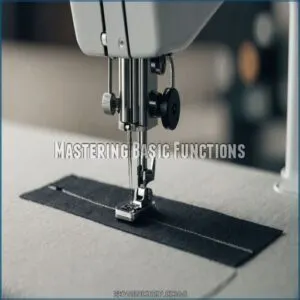
Mastering Basic Functions
You’ll feel more confident with your Brother CS6000i once you understand its basic functions, from threading to bobbin setup.
Learning these essential skills will help you create beautiful projects and avoid common beginner mistakes that can slow down your sewing progress.
Threading The Machine
Threading the Brother CS6000i is a breeze once you know the tricks.
Start by raising the needle to its highest position.
Before threading, it’s a good idea to review the essential threading steps to make sure everything is in place.
Guide the thread through the upper thread guide, then down and around the tension disc.
Follow the arrow, bringing the thread up and through the take-up lever.
Finally, thread the needle from front to back.
The automatic needle threader is your secret weapon for hassle-free setup.
Inserting and Removing The Bobbin
Now that you’ve mastered threading, let’s tackle the bobbin.
The Brother CS6000i’s top-loading bobbin system is a game-changer.
Just pop the cover, drop in the wound bobbin, and guide the thread – if you need replacement bobbins or accessories, check out Brother CS6000i bobbin.
It’s like hitting the easy button!
Remember, a smooth bobbin insertion sets the stage for flawless stitching.
Here’s why mastering this skill will make you feel:
- Empowered to tackle any sewing project
- Confident in your machine’s capabilities
- Excited to experiment with different thread types
- Relieved that bobbin jams are a thing of the past
- Proud of your growing sewing expertise
Changing The Needle and Presser Foot
Let’s level up your sewing game! Changing needles and presser feet on your Brother CS6000i is a breeze. You’ll feel like a pro in no time. Here’s a quick guide to help you master these skills:
| Task | Needle | Presser Foot |
|---|---|---|
| When | Bent or dull | Project-specific |
| How | Loosen screw, replace | Release lever, snap on |
| Tips | Match fabric weight | Make sure they’re compatible |
| Troubleshoot | Check insertion | Verify attachment |
Remember, the right tools make all the difference. You’ve got this!
Basic Stitch Settings and Seaming
The Brother CS6000i’s basic stitch settings are your secret weapon for perfect seams.
Start with the straight stitch, adjusting stitch length for different fabrics.
Set your seam allowance using the handy guide on the needle plate.
For stretchy fabrics, try the zigzag stitch.
Don’t forget to test your settings on scrap fabric first.
With practice, you’ll be stitching like a pro in no time!
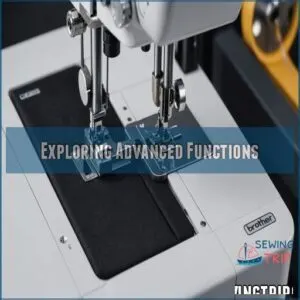
Exploring Advanced Functions
You’ve mastered the basics, now it’s time to explore your Brother CS6000i’s full potential.
Learn how to use advanced features like speed control, specialty stitches, and tension management to take your sewing projects to the next level.
Speed Control and Reverse Stitch
With the basics under your belt, it’s time to flex your sewing muscles.
Your Brother CS6000i’s speed control is like a secret superpower.
Slow it down for tricky curves or crank it up for straight stretches.
And that reverse stitch?
It’s your best friend for locking seams tight.
You’ll feel like a sewing pro, zipping through projects with confidence and precision.
Specialty Stitches and Buttonholes
Explore the realm of specialty stitches and buttonholes with your Brother CS6000i.
You’ll discover a wealth of creative possibilities.
Master these features to elevate your sewing game:
- Experiment with decorative stitches for unique embellishments
- Create perfect buttonholes in various styles with ease
- Use the LCD screen to select and customize your stitches
Don’t be afraid to push your limits and try new techniques.
You’re in control of your sewing destiny!
Tension and Thread Management
Mastering thread tension and management on your Brother CS6000i is like finding the perfect balance in a tug-of-war.
You’ll achieve smoother sewing and professional-looking results.
Let’s break down the key elements:
| Tension Setting | Fabric Type | Thread Type |
|---|---|---|
| 0-2 (Loose) | Lightweight | Fine |
| 3-5 (Medium) | Medium | All-purpose |
| 6-9 (Tight) | Heavy | Heavy-duty |
| Auto | Varies | Varies |
Adjust these settings to conquer any sewing challenge.
Remember, practice makes perfect!
Feed Dogs and Overlock Stitch
Now that you’ve mastered tension, let’s explore the power of feed dogs and overlock stitches on your Brother CS6000i.
To find the perfect accessories and supplies for your machine, check out the wide range of products on CS6000i overlock stitch.
These features are your secret weapons for professional-looking seams.
Here’s how to wield them:
- Adjust feed dog height for different fabrics
- Use overlock stitch for neat, durable edges
- Experiment with stitch width for various effects
You’ll be amazed at how these techniques elevate your sewing game.
It’s like having a built-in finishing expert!
Quilting and Sewing With Brother CS6000i
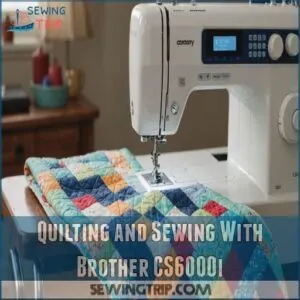
With the Brother CS6000i, you can tackle quilting and sewing projects with ease, thanks to features like free-motion quilting and a range of accessories.
Whether you’re working with thick fabrics or exploring creative embroidery, this machine offers the tools you need to succeed.
Free-Motion Quilting and Embroidery
Embrace the precision of your Brother CS6000i’s free-arm for free-motion quilting and embroidery.
It’s like having an artistic sidekick that adapts to your quilting patterns and designs.
Adjust thread tension according to common issues like thread breakage, loops, and uneven stitches which can be caused by improper tension settings, as explained in thread tension issues, and needle selection for different stabilizer types and fabrics.
The CS6000i lets your creativity bloom, so you can create stunning quilts and intricate embroidery with ease on your sewing machine.
Working With Thick Fabrics and Multiple Layers
Feeling brave enough to handle thick fabrics? The Brother CS6000i makes it simpler than you think.
Here’s how:
- Pick the right needle size, suitable for tough layers, ensuring smooth stitching.
- Adjust stitch length and tension control to accommodate dense materials.
- Maintain a steady seam allowance to prevent surprises.
With these tips, even denim and leather are no match for you.
Quilting Feet and Accessories
Ready to elevate your quilting game? Explore the realm of quilting feet and accessories for the Brother CS6000i! Unravel the mysteries of each foot with this quick guide.
| Quilting Foot Types | Essential Accessories |
|---|---|
| Walking foot | Extension table |
| Spring action quilting foot | Quilting needles |
| 1/4 inch piecing foot | Quilting gloves |
| Open toe foot | Quilt guide |
| Free-motion foot | Bobbin set |
Tips for Smooth Quilting and Sewing
A key to smooth quilting is careful project planning.
Choose the right fabric; consider its weight for your quilting machine.
Select the correct needle; a wrong needle choice leads to frustration.
Master tension control for even stitching.
Use a walking foot or spring action quilting foot for consistent feed.
Proper seam finishing prevents unraveling.
With practice, you’ll conquer quilting!
Maintenance and Troubleshooting
Keeping your Brother CS6000i sewing machine in top shape requires regular maintenance and a bit of troubleshooting know-how.
By mastering simple tasks like cleaning, oiling, and understanding common error messages, you’ll guarantee smooth sewing sessions without unexpected hiccups.
Cleaning and Oiling The Machine
Keeping your Brother CS6000i in top shape requires regular cleaning and oiling.
While working wonders on your projects, dirt and lint sneak in, affecting performance.
Set a cleaning schedule to tackle common dirt traps and oiling frequency.
Your essential tools? A well-lit workspace and regular cleaning with a soft brush for cleaning can go a long way, a soft brush, sewing oil, determination to make sure preventative maintenance keeps your sewing machine running smoothly.
- Avoid skipped stitches
- Smooth sewing sessions
- Extend machine lifespan
Common Issues and Solutions
Wrestling with bobbin jams, thread tension, or stitch skipping on your Brother CS6000i is no fun.
Start with simple fixes: check if your needle’s threaded properly and bobbin seated correctly.
Adjust foot pressure to see smoother stitches.
These small tweaks can prevent those frustrating interruptions, giving you more control and mastery over your sewing journey.
Error Messages and Codes
Ever wonder why the Brother CS6000i flashes mysterious error codes?
Don’t fret!
These codes are simply the machine’s way of asking for help.
For example, if you see an “E1,” it means the presser foot’s not down.
Check your manual for quick solutions.
Understanding these alerts helps you sew smoothly, putting you in control of your projects.
Brother CS6000i Accessories and Upgrades
Upgrading your Brother CS6000i with optional presser feet and accessories can transform your sewing experience, making it more versatile and efficient.
Whether you’re tackling quilting projects or customizing your machine, these enhancements open up new creative possibilities for all your sewing tasks.
Optional Presser Feet and Accessories
After tackling maintenance, let’s chat about optional presser feet and accessories for your Brother CS6000i, because they really boost your sewing game.
With options like a walking foot for tricky fabrics, an overcasting foot for neat edges, and a zipper foot for precision, your projects will soar.
These upgrade options are compatible with your machine and are truly essential accessories.
Extension Table and Quilting Kit
Beyond basic sewing, you’ll conquer quilting with the Brother CS6000i’s extension table and quilting kit.
This setup greatly increases your workspace, making large projects like quilts much easier to manage.
The quilting kit provides specialized feet for free-motion quilting and other quilting techniques.
With this added space and the right tools, your quilting projects will become masterpieces.
Explore various quilt patterns and project ideas; you’ll be amazed at what you can create!
Upgrading and Customizing The Machine
Enhancing your Brother CS6000i is like adding new spices to your kitchen. The extension table offers you more space, but why stop there? Consider these upgrades: You can also find specific accessories like the CS6000i walking foot at online marketplaces CS6000i walking foot.
- Walking Foot: Helps manage tricky fabrics.
- Sewing Feet Set: Expands your sewing repertoire.
- Needle Plate: Guarantees precision.
- Bobbin Case: Keeps thread issues at bay.
Tips and Tricks for Brother CS6000i Users
If you want to make the most of your Brother CS6000i, mastering a few handy tips and tricks can boost your sewing projects.
From optimizing stitch quality and speed to tackling thread and bobbin issues, you’ll find that working with delicate and stretchy fabrics is easier than you might think.
Optimizing Stitch Quality and Speed
While sewing with the Brother CS6000i, balancing stitch tension and needle selection is key for perfect results.
Adjust foot pressure and speed control using the LCD display for precise stitch quality.
Try decorative and buttonhole stitches to enhance projects.
Here’s a quick guide:
| Element | Tip |
|---|---|
| Stitch Tension | Balance for each fabric type |
| Needle Selection | Match needle to fabric |
| Fabric Type | Use appropriate settings |
| Foot Pressure | Adjust for uniform stitches |
| Speed Control | Start slow, increase as needed |
Managing Thread and Bobbin Issues
Mastering stitch speed is great, but thread and bobbin issues can pop up.
With the Brother CS6000i, maintaining thread tension and preventing bobbin jams is key. To minimize issues, ensure you follow the guidelines for proper bobbin winder use when preparing your machine.
Make sure the bobbin is wound evenly and inserted correctly.
Use the automatic threader carefully to avoid thread breakage.
To avoid problems, understanding the intricacies of sewing machine needle selection tips is crucial. Regularly check for needle problems to keep your sewing machine running smoothly.
Working With Delicate and Stretchy Fabrics
After sorting out thread tangles, let’s focus on handling delicate and stretchy fabrics with your Brother CS6000i.
When working with slippery fabrics, consider using tips for handling slippery fabrics to achieve professional results.
Use a stretch stitch and adjust the tension for smooth sailing.
Choose a sharp needle to prevent snags and guarantee strong stitch finishing.
With this machine, sewing knits and quilting cotton becomes a breeze, offering control over every stitch.
Advanced Techniques and Projects
You’ve got the Brother CS6000i; now let’s explore some advanced techniques!
Let’s try free-motion embroidery to add flair to any project.
Master garment construction by using decorative stitches for a polished finish.
Appliqué techniques are a breeze with the free arm feature.
Try custom sewing projects or quilting patterns to showcase your skills.
Tackle buttonhole stitches smoothly for professional results.
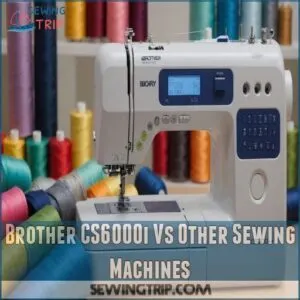
Brother CS6000i Vs Other Sewing Machines
So, you’re thinking about the Brother CS6000i, but want to know how it stacks up against other sewing machines?
Let’s compare features, prices, and user reviews to help you find the perfect machine for your sewing adventures!
Comparing Features and Capabilities
While considering your sewing machine needs, think about the Brother CS6000i’s wide array of stitch types and buttonholes, alongside its easy speed control.
Brother CS7000i and HC1850 offer more advanced quilting features.
They each shine in needle threading and bobbin systems, making them ideal for quilting enthusiasts and everyday sewing projects alike.
User Reviews and Ratings
Considering the features and capabilities brings us to user feedback.
People rave about the Brother CS6000i’s ease of use and versatility across projects.
Printer reviewers often highlight its competitive stitch quality and durability compared to other machines.
The machine’s pros outweigh its cons, making it a favorite in sewing machine reviews, particularly among those valuing simplicity and functionality.
Price and Value Comparison
Choosing a sewing machine? You can’t ignore the budget-friendly Brother CS6000i, which stands tall with competitors in the price-performance arena.
It’s a true value-for-money option, offering remarkable features at a low cost.
Compared to other machines, this model provides more bang for your buck, ensuring you get all the sewing essentials without breaking the bank.
Choosing The Right Machine for Your Needs
After comparing price and value, let’s tackle which machine suits you best.
Consider these points:
- Budget: Evaluate how much you’re willing to spend.
- Skill Level: Are you a beginner, or do you have advanced skills?
- Project Types: Think about the projects you love, from quilting to simple sewing.
- Brand Reputation: The Brother CS6000i is known for reliable features.
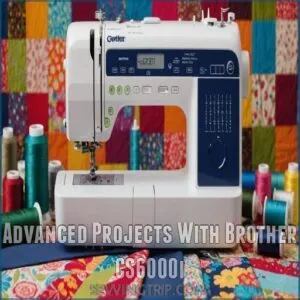
Advanced Projects With Brother CS6000i
With the Brother CS6000i, you can tackle advanced projects like quilting, garment construction, and home decor with ease.
Its versatile features, such as specialty stitches and embroidery options, make creating impressive pieces a breeze.
Quilting and Home Decor Projects
Get started with quilting and home decor with the Brother CS6000i, transforming fabric into art.
Explore your creativity with dynamic quilting patterns and fabric choices.
Use these project ideas to guide you:
| Project Idea | Description |
|---|---|
| Throw Pillows | Add a personal touch to your space. |
| Table Runners | Perfect for special occasions. |
| Wall Hangings | Showcase your style with bold designs. |
Embrace machine quilting with confidence!
Garment Construction and Alterations
How ready are you to conquer garment construction?
With your Brother CS6000i, you’ll master essential techniques.
You can confidently tackle:
- Neat hemming, creating professional-looking edges.
- Precise darts for shaping, giving garments a flattering fit.
- Installing zippers and buttonholes, adding functional flair, and for smaller projects, you can try sewing machine projects for small items.
This sewing machine for home use empowers you to create and alter clothes with ease, becoming a sewing pro in no time.
Embroidery and Appliqué Techniques
With the Brother CS6000i, embroidery becomes a breeze, as you weave personal tales into cloth with every stitch.
You’ll master appliqué designs and explore stabilizer choices easily.
Selecting the right thread and machine settings ensures perfect finishes.
Use the monogramming foot for fun personalization.
| Key Focus | Detail to Master |
|---|---|
| Embroidery basics | Creative exploration |
| Appliqué designs | Layering techniques |
| Stabilizer choices | Fabric stability |
| Thread selection | Color harmony |
| Machine settings | Best precision |
Frequently Asked Questions (FAQs)
Is Brother CS6000i good for beginners?
You’ll find the Brother CS6000i a great choice for beginners.
It’s user-friendly, affordable, and packed with features like easy threading and stitch selection, making sewing simple and enjoyable.
Perfect for learning and exploring new projects.
Does the Brother CS6000i need to be oiled?
Maintaining your sewing machine is key; it’s like keeping a car running smoothly.
Yes, your Brother CS6000i benefits from occasional oiling, especially its moving parts.
Regular lubrication helps extend its lifespan and prevents frustrating jams.
Check your manual for specifics.
What can a Brother CS6000i do?
The Brother CS6000i is great for sewing projects like clothing and crafts, offering 60 stitches, automatic needle threading, and easy bobbin winding.
It’s user-friendly for quilting, beginners, and pros, but struggles with thick fabrics.
Is Brother CS6000i a low shank sewing machine?
Need to know about your Brother CS6000i?
It’s a low shank sewing machine, making it compatible with many standard sewing feet for more creative control over your projects.
Explore sewing with versatility and ease!
How does the warranty process work?
Imagine holding a ticket to hassle-free repairs, that’s your warranty.
For the Brother CS6000i, contact their support team, provide proof of purchase, and describe the issue.
They’ll guide you through repairs or replacements smoothly.
Is Brother CS6000i suitable for professional use?
You’re eyeing the Brother CS6000i for professional use, huh?
It’s a solid choice for varying projects, though it might struggle with heavy materials.
Great for flexibility but not built to handle industrial demands.
Can it sew without electricity?
Electricity drives the modern sewing machine’s heart; without it, the Brother CS6000i won’t function.
It’s like asking a car to run without fuel.
Consider a manual sewing machine if you’re planning to sew electricity-free.
Whats the best storage solution?
Think about versatile storage bins with lids for organizing all those little things.
You can stack them, saving space and keeping items dust-free.
Consider clear containers so you quickly spot what’s inside without digging around.
Are instructional videos available online?
Want to master your sewing machine? Yes! Loads of instructional videos are online. Search YouTube; you’ll find tons of tutorials, even for beginners. Reach your sewing potential now!
Conclusion
Discovering the potential of the Brother CS6000i means tapping into your creativity and expanding your sewing potential.
With its user-friendly features, including those found in similar models like the Brother LS2125i review, versatile stitch options, and well-built accessories, you’re set to tackle anything from simple repairs to intricate quilting projects.
The automatic needle threader saves time, while the extension table supports larger pieces.
By mastering its capabilities, you’ll find sewing more enjoyable and efficient.
Transform your sewing projects and let the Brother CS6000i be your guide to success.

