This site is supported by our readers. We may earn a commission, at no cost to you, if you purchase through links.
Then, check your bobbin and case—they’re the heart of your sewing. Lubricate with sewing machine oil—a little goes a long way. Adjusting tension is key; it’s like finding the perfect balance in a recipe.
If you’re facing stubborn thread breaks, don’t panic; a little troubleshooting might be all you need. A DIY sewing machine tune-up empowers you to master your machine. But there’s more to this than meets the eye… We’ll uncover hidden tips and tricks to keep your machine purring like a kitten.
Table Of Contents
- Key Takeaways
- Importance of Regular Maintenance
- Cleaning The Sewing Machine
- Bobbin and Bobbin Case Maintenance
- Lubricating The Sewing Machine
- Tension Adjustment Techniques
- Troubleshooting Common Issues
- Electrics and Timing Maintenance
- Signs Your Sewing Machine Needs Servicing
- DIY Tune-Up Vs Professional Servicing
- Tips for a Smooth DIY Tune-Up
- Frequently Asked Questions (FAQs)
- Conclusion
Key Takeaways
- Regularly clean your sewing machine to prevent dust buildup and improve performance; focus on the feed dogs, needle area, and bobbin case.
- Use high-quality thread and needles, and adjust the tension to avoid thread tangling and ensure smooth stitching.
- Apply sewing machine oil to moving parts for lubrication, but avoid nylon gears, and wipe away any excess oil after application.
- Know your limits with DIY maintenance; for persistent issues or unusual noises, seek professional servicing to avoid costly repairs.
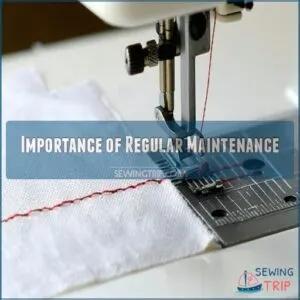
Importance of Regular Maintenance
You shouldn’t let your sewing machine gather more dust than your last high school science project!
Regular maintenance keeps your machine running smoothly, preventing wear and tear and those wallet-draining repair costs.
Reduces Wear and Tear
Think of your sewing machine as a trusty car; regular maintenance keeps it running smoothly and reduces wear and tear. Here’s how you can keep your machine purring:
- Proper needle selection: Avoid fabric snags.
- Regular oiling: Keeps parts moving.
- Using the right bobbin: Makes sure you get perfect stitches.
- Cleaning the feed dog: Prevents jams.
Keep your sewing adventures stress-free and enjoyable!
Prevents Costly Repairs
Regular sewing machine maintenance is your secret weapon against hefty repair bills.
Imagine that tiny squeak turning into a major breakdown—ouch.
To know exactly when your machine needs a tune-up, consider its service frequency guidelines, and remember, preventive maintenance, like a regular checkup, catches small issues before they snowball into expensive problems.
A little oil and a quick clean can save you hundreds in the long run.
DIY sewing machine tune-ups are a smart way to extend your machine’s life.
Compare the cost of DIY vs. pro—it’s a no-brainer!
Think of it as preventative care for your sewing machine.
Improves Sewing Performance
Imagine this: a perfectly stitched seam, smooth as a jazz tune on a lazy afternoon.
That’s what regular sewing machine tune-ups do for your projects.
When you fine-tune needle and thread tension, make sure proper lubrication is in place, and keep an eye on timing, your sewing machine hums at peak performance.
It’s all about keeping your stitches strong and your creations flawless.
Cleaning The Sewing Machine
When you clean your sewing machine, you’re not just getting rid of pesky dust bunnies but also helping your machine run smoothly and last longer.
Think of it like flossing your teeth; skip it, and you might’ve a mess on your hands!
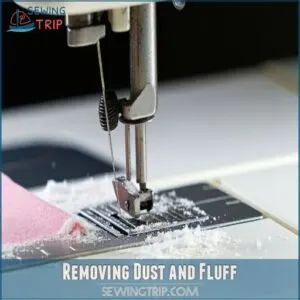
Removing Dust and Fluff
Got some dust bunnies hiding in your sewing machine? Grab your dust removal tools and get cracking!
Give special attention to the needle area and upper thread path to keep fluff under control.
Regular cleaning prevents issues, boosts your machine’s longevity, and makes sure smooth sewing.
Follow these sewing machine maintenance tips for fewer jams and better performance.
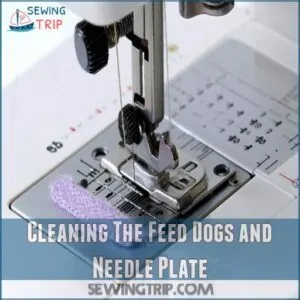
Cleaning The Feed Dogs and Needle Plate
If your stitches start skipping, it’s time to focus on feed dog cleaning and needle plate care.
Regularly checking for issues like feed dogs stuck down can also help prevent jams and guarantee proper fabric movement, as explained in more detail about sewing machine feed dogs.
Carefully remove lint lodged around the feed dogs to prevent jams.
Avoid needle plate scratches by using a soft brush or vacuum.
Regular sewing machine cleaning here guarantees smooth fabric movement, keeping your projects on track and frustration-free.
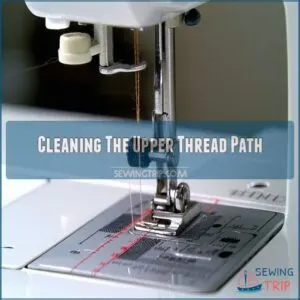
Cleaning The Upper Thread Path
Ever wondered how thread tension gets off balance? It could be lint buildup in your sewing machine’s upper thread path.
For a more thorough cleaning, consider investing in a good sewing machine cleaning kit (Sewing Machine Kits).
Follow these steps to clean it up:
- Use a sewing machine cleaning brush to unearth hidden fluff around thread guides.
- Gently clean the needle bar.
- Finish by dusting bobbin tension areas.
Your machine will thank you!
Bobbin and Bobbin Case Maintenance
Make sure your sewing projects aren’t derailed by tangled threads or mysterious snapping by giving your bobbin and bobbin case some loving attention.
Simply remove the bobbin, clean it out with a quick puff of air to keep everything running smoothly, and check that you’ve got the right bobbin type for a snug fit.
Removing and Cleaning The Bobbin Case
After cleaning your machine’s fluff, it’s time to tackle the bobbin case.
Open your machine and carefully remove the bobbin case.
Give it a good blow-out to remove any lingering dust or debris.
Inspect it closely; a damaged bobbin case can cause all sorts of bobbin tension issues.
Use a soft brush to gently clean any hard-to-reach spots.
Replacing a worn-out bobbin case is cheaper than a major sewing machine repair, so don’t hesitate!
Remember, a clean bobbin case means smoother sewing.
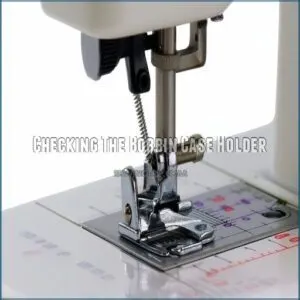
Checking The Bobbin Case Holder
Keeping your sewing machine running smoothly? Make sure the bobbin case holder is in tip-top shape. Check for wear or damage and make sure it fits snugly in the housing.
- Look for cracks or scratches.
- Make sure the bobbin rotates freely.
- Clean the holder to avoid dust buildup.
- Replace if you notice imbalance.
This helps maintain proper tension!
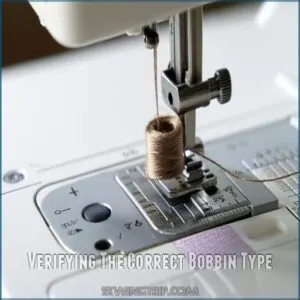
Verifying The Correct Bobbin Type
Finding the right bobbin type for your sewing machine is like choosing the right partner—it’s essential for harmony.
Check your sewing machine manual to confirm bobbin size and material compatibility.
Misfit bobbins can cause thread snarls or worse.
Seek a perfect match for your sewing machine parts, ensuring smooth operation and avoiding unnecessary sewing machine repair headaches.
Happy sewing!
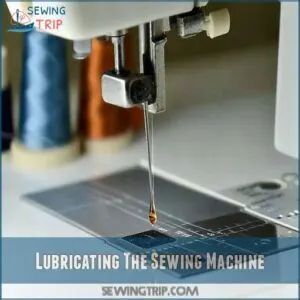
Lubricating The Sewing Machine
To keep your sewing machine running smoothly, you need to give it a little TLC with regular lubrication.
Access the top and bottom mechanisms carefully, apply a small amount of sewing machine oil to moving parts, and wipe away any excess—think of it like giving your machine a spa day!
Accessing The Top and Bottom Mechanisms
You’ve got this!
To access the top and bottom mechanisms for your DIY sewing machine tune-up, grab your screwdrivers. Check mechanism diagrams to identify screw types and clip removal spots.
Look at each part like a puzzle piece for motor access and gear alignment.
Remember, a good sewing machine maintenance keeps you sewing smoothly and prevents those pesky breakdowns, ensuring you have a smooth sewing experience.
Applying Sewing Machine Oil
Once the mechanisms are exposed, it’s time for the magic touch: oiling.
Oiling frequency matters—don’t skimp! Apply a drop of sewing machine oil on each moving part.
Remember, effective oiling techniques keep your machine humming perfectly, making DIY sewing machine maintenance a breeze, with the best oil types for sewing machines, like synthetic or mineral, for smooth operation, using sewing machine oil.
Wiping Away Excess Oil
After oiling your sewing machine, some excess oil is inevitable. Don’t worry; it’s easily fixed!
Here’s how to prevent an oil spill:
- Use a soft cloth.
- Gently wipe away excess oil.
- Focus on moving parts.
- Dispose of the oily rag responsibly.
This prevents oil drips and keeps your machine running smoothly. Proper oiling is key for sewing machine repair at home!
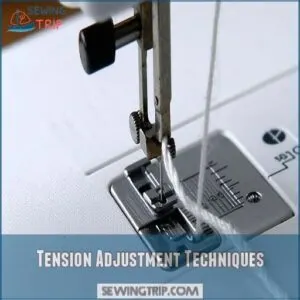
Tension Adjustment Techniques
You’ve got this—adjusting sewing machine tension is like tuning a guitar; it might take a few tries, but you’ll know when it’s just right.
Start by checking the bobbin tension and, if needed, give that tension spring a little twist to keep your stitches smooth and frustration-free.
Checking The Bobbin Tension
Swing into maintaining top-notch sewing performance by checking the bobbin tension.
Lift the bobbin case by its thread; if it supports itself and slightly unwinds, you’re golden. Loose bobbin cases can cause mischief, so make sure everything’s snug as a bug.
Here’s a quick guide:
| Bobbin Thread Types | Tension Springs | Bobbin Housing |
|---|---|---|
| Cotton | Strong | Metal or Plastic Cases |
| Polyester | Medium | Compatible Sizes |
| Silk | Light | Materials Matter |
| Nylon | Adjustable | Check Fit Regularly |
Adjusting The Tension Spring
Ready to tackle that pesky sewing machine tension adjustment?
Grab your tension tools and turn the screw on the tension spring—you’re aiming for a just-right grip on the bobbin case thread.
Think of it like tightening a jar lid; not too loose, not too tight.
This Spring Tension Tip helps prevent thread breakage and keeps your sewing projects humming smoothly.
Replacing Worn or Cracked Bobbin Winder Rubber Tires
Cracked bobbin winder tires can throw a wrench in your sewing projects, so replace them promptly.
Opt for quality bobbin tire materials from a DIY bobbin kit for a smooth swap.
This simple sewing machine repair at home can prevent future sewing machine bobbin issues.
Regular bobbin winder maintenance keeps your machine humming, offering mastery over tire wear prevention.
Troubleshooting Common Issues
When your sewing machine decides to act up, understanding common issues is key to keeping it running smoothly.
From broken threads to hinky machine timings, let’s tackle these gremlins with some easy fixes that won’t have you tearing your hair out.
Unexplained Broken Threads
Got frustrating thread breaks? Proper tension is key! First, check your bobbin tension; it shouldn’t be too tight or too loose. Make sure the thread follows its correct path and passes through all necessary guides to avoid misaligned tension, check out threading issues troubleshooting.
Then, inspect your needle; a bent or damaged needle is a common culprit.
Use high-quality thread – cheap thread often leads to more jams.
A sewing machine tune-up might be needed if problems persist. Remember, a happy needle means happy sewing!
Checking The Timing and Needle Hook Interaction
Dealing with timing issues can feel like solving a sewing mystery.
Imagine the needle and hook as dance partners—timing is everything.
If they’re out of sync, you’ll face broken threads and frustration.
To troubleshoot, gently turn the handwheel and make sure they’re perfectly timed.
Correct needle hook interaction keeps your sewing machine in rhythm, ensuring smooth stitching.
Replacing Worn or Damaged Motor Brushes
Noticing your machine’s stitches skipping? It might be time to think about the motor brushes.
Worn brushes can wear out your patience.
Here’s a quick tip: Swapping them with new ones can breathe life back into your sewing machine.
Look for signs like sparking or strange noises.
Remember, knowing your limits is key; sometimes, a pro touch is worth it!
Electrics and Timing Maintenance
Before you start tinkering with the electrics, make sure to unplug your machine—getting zapped isn’t the kind of sewing excitement you want!
Once you’re safe, lubricate the foot pedal and check the motor belt tension to keep your machine humming smoothly.
Disconnecting The Machine From Power
Safety precautions are important in your sewing machine tune-up. Start by disconnecting the machine from power to avoid electrical hazards.
- Unplug the power cord to make sure the appliance is safe.
- Check for damage or fraying.
- Inspect your circuit breaker to prevent issues.
- Ensure all settings are off.
Quick and easy, right? Now you’re ready for the next steps in sewing machine maintenance!
Lubricating The Foot Pedal
Once you unplug your machine, it’s time to pamper that foot pedal. Think of it as a long-neglected shoe that could use some love.
To keep it running smoothly, consider purchasing a suitable sewing machine oil from a reliable supplier for Sewing machine oil products. A little sewing machine oil will keep it moving without a hitch.
Just a drop or two will guarantee smooth operation, making your DIY tune-ups feel like a breeze.
Happy sewing and don’t forget the pedal maintenance tips!
Checking The Motor Belt Tension
After oiling the foot pedal, check your sewing machine’s drive belt tension.
A loose belt leads to motor slippage and slower sewing speeds. You can usually adjust tension by tightening a screw or replacing the belt altogether.
Signs of a problem include decreased sewing speed or a whining motor.
Regular sewing machine maintenance schedule are key! Using the right tension adjustment tools makes this quick and easy, with the right tension adjustment tools.
Signs Your Sewing Machine Needs Servicing
You’ll know your sewing machine needs some love when it starts sounding like a rock concert and stitching slower than molasses.
Don’t ignore those funny noises or the fabric that suddenly resembles Swiss cheese—give it a quick check-up before small issues become big headaches!
Decreased Performance
When your sewing machine’s performance drops, it’s a nudge to check your sewing machine maintenance schedule.
Is your stitching slower than a sloth on a lazy afternoon? Perhaps thread breakage haunts you? Keep an eye on these signals:
- Slow Stitching
- Clogged Needles
- Motor Strain
Address these with regular sewing machine lubrication and sewing machine repair tools for seamless sewing.
Increased Noise and Vibration
Is your sewing machine starting to sound like a small marching band?
Increased noise and vibration might mean it’s time for a check-up.
Think about loose screws and motor imbalance; they can rattle your nerves and your work.
A closer look at common causes, such as loose or worn parts, can help identify the issue.
Worn belts or alignment issues are common vibration causes.
Keep an eye on your sewing machine maintenance schedule to maintain smooth, harmonious stitching.
Visible Signs of Wear and Tear
Imagine your sewing machine as a car, needing regular oil changes.
Needle condition impacts performance.
If you’re wrestling with thread tension issues, or noticing bobbin case wear, it’s time for a check-up.
Also, look for signs like frayed motor belts or a squeaky foot pedal.
Don’t let skipping stitches or strange noises spoil your creative journey.
DIY Tune-Up Vs Professional Servicing
When it comes to keeping your sewing machine running smoothly, it’s important to know when a DIY tune-up will do the trick and when it’s time to call in the pros.
Tackling basic maintenance yourself can be fun and cost-effective,
but don’t hesitate to seek expert help if your trusty machine starts acting up like it’s got a mind of its own!
Knowing Your Limits
Knowing your DIY limits is important in sewing machine maintenance.
Tackle repairs within your skill set, but know when complexity demands a pro.
- DIY wins: Simple tasks like cleaning and oiling.
- Red flags: Persistent jams or erratic stitching.
- Safety first: Avoid risking further damage.
- Ask for help: When repairs feel overwhelming.
This balance maximizes mastery while minimizing mishaps!
When to Seek Professional Help
Even if you’re handy, some sewing machine problems are best left to the pros.
When facing complex repairs, unusual noises, or recurring issues, it’s time to call in reinforcements.
Major malfunctions, especially electrical problems, aren’t DIY projects.
To avoid costly repairs, you should carefully consider the cost of fixing your machine against buying a new one, and you can find more information on Sewing Machine Repair to help you make that decision.
| Problem | DIY? | Professional? | Notes |
|---|---|---|---|
| Recurring skipped stitches | Maybe | Often | Check tension, but persistent issues need help |
| Loud, unusual noises | No | Yes | Could indicate serious internal damage |
| Electrical issues | No | Yes | Safety first! Don’t risk electric shock |
| Broken internal parts | Usually no | Yes | Requires specialized tools and expertise |
A sewing machine repair can be costly, so weigh the pros and cons before diving in.
Benefits of Regular Professional Servicing
Getting your sewing machine professionally serviced offers peace of mind and boosts its lifespan and performance.
Expert advice guarantees increased accuracy and prevents breakdowns before they become costly repairs.
Regular checks by a pro mean your machine gets the kind of care it craves, resulting in smoother sewing and fewer hiccups.
It’s like having a trusted mechanic for your creative engine.
Tips for a Smooth DIY Tune-Up
To keep your sewing machine humming like a pro, make sure you’re using good quality thread and needles, as cheap options can turn your projects into a knotty mess.
Oil your machine regularly to keep everything moving smoothly—think of it as giving your machine a little spa day!
Avoid canned air when cleaning.
Using Good Quality Thread and Needles
When you’re tackling a DIY tune-up, choosing the right thread and needle is like picking the perfect tool for the job.
Here’s a short list to keep your stitch quality excellent:
- Use durable sewing machine thread.
- Select the right needle size based on fabric.
- Maintain proper sewing machine tension.
This way, your sewing projects run smoothly!
Avoiding Canned Air
You’ve chosen excellent threads and needles, now let’s chat about avoiding canned air.
It’s tempting for dust removal, but it often blasts lint deeper into the sewing machine.
Opt for a vacuum or small brush instead.
These eco-friendly alternatives keep things tidy without the hassle.
After all, a sewing machine tune-up guide should make life easier, not messier!
Oil Your Machine Regularly
Think of sewing machines like old friends—they need regular TLC.
Use quality sewing machine oil to lube up those moving parts, boosting performance.
You can find a wide range of sewing machine oils online at sewing machine oil.
Oil frequency? Aim for every few months or after heavy use.
Application’s a breeze: just a drop on metal joints.
The benefits? Smooth sewing and less wear.
Skip messy alternatives; stick to this sewing machine upkeep essential.
Frequently Asked Questions (FAQs)
How much does a sewing machine tune-up cost?
A sewing machine tune-up, akin to giving a car a spa day, typically costs $75 to $
This investment gets you smoother stitches and less drama in your sewing projects, ensuring everything runs like a dream.
How do you maintain a sewing machine?
Regularly clean dust from the feed dogs and needle plate using a brush.
Keep bobbin and case dust-free.
Oil moving parts excluding nylon gears.
Adjust tension, check electrics, and replace worn parts for smooth operation.
What should you expect from a sewing machine service?
Imagine a spa day for your sewing machine: expect cleaning, lubrication, tension adjustments, and electrical checks.
It’s all about restoring smooth operation, fixing wear and tear, and ensuring your trusty companion stitches flawlessly again.
How do I re-use my sewing machine?
Dust off your sewing dreams by cleaning your machine, checking for lint in the feed dogs, and lubing all moving parts.
Make sure everything’s in place, tweak thread tension, and switch to fresh needles.
How to clean a sewing machine?
Ever wondered what’s lurking inside your sewing machine?
Start cleaning by removing dust and lint from the feed dogs, needle area, and tension adjuster using a brush.
Check for broken needles, ensuring smooth, snag-free sewing sessions.
How do you spruce up a sewing machine?
Want a sewing machine that purrs like a kitten?
Clean the fluff, oil the moving parts (not nylon!), check the tension, and make sure the bobbin’s happy.
A little TLC goes a long way!
Can I tune up my sewing machine myself?
Think of tuning up your sewing machine like giving it a spa day.
You can handle it yourself by cleaning, lubricating moving parts, adjusting tension, and checking electrics.
Just make sure you follow guidelines for a smooth operation.
What does a sewing machine tune up consist of?
A sewing machine tune-up involves cleaning dust, adjusting the tension, lubricating moving parts, and checking electrics.
You’ll make sure the bobbin and needle areas are clear and test everything for smooth, quiet operation.
How do I know if my sewing machine needs servicing?
Isn’t it funny how your sewing machine makes odd noises or constantly tangles thread, just when you need it most?
If tension adjustments, odd sounds, or skipped stitches are frequent, it’s time for a tune-up.
What is the most common problem of the sewing machine?
A common problem with sewing machines is tension issues, where threads break or stitches become uneven.
This happens when thread tension is too tight or loose, leading to frustration.
Regular maintenance helps keep things running smoothly.
How often should needles be replaced?
Replace sewing machine needles after 8-10 sewing hours or when you notice issues like skipped stitches or fabric snagging.
Regular replacement prevents damage to your fabric and machine.
Keeping everything running smoothly, just like a well-oiled machine.
What type of oil is best?
Use a high-quality sewing machine oil, not household oil, to make sure smooth operation.
It’s specifically designed to lubricate moving parts, reducing wear and tear.
Avoid over-oiling; just a drop goes a long way!
How to prevent thread tangling?
Thread tangling? Keep your bobbin and thread cones clean, use the right thread, and make sure your machine’s tension is properly adjusted. A smooth, tangle-free sewing experience awaits!
Can thread tension affect stitch quality?
Think of stitch quality like a good jam session—everything’s gotta be in harmony.
Thread tension is important for smooth stitching.
If your thread tension’s wonky, stitches can be too loose or too tight, leading to puckering or loops.
Adjust tension for smooth stitching.
What are signs of a misaligned needle?
A misaligned needle hits the needle plate, causing threads to snap and fabric to pucker.
If your stitches look like a bad spaghetti day, it’s time for a needle adjustment to regain stitching harmony.
Conclusion
Keeping your sewing machine in top shape is like fine-tuning an orchestra, where each part plays a key role.
With a DIY sewing machine tune-up, you’ve got the tools to guarantee your machine runs smoothly.
Regular maintenance cuts down on unwanted wear, improves performance, and even prevents costly repairs.
So, roll up your sleeves, grab that sewing machine oil, and let your creativity flow with confidence. You’re all set to turn those fabric dreams into reality!

