This site is supported by our readers. We may earn a commission, at no cost to you, if you purchase through links.
 To do smocking on a sewing machine, start by choosing a lightweight fabric and marking a grid to guide your stitching.
Stitch parallel rows using regular thread on top and elastic thread in the bobbin. This magical combo pulls the fabric into delightful pleats, just like Grandma’s vintage aprons.
Keep your tension balanced to avoid wonky gathers. Hooping your fabric helps keep everything tidy, like a good haircut.
Want more pizzazz? Play with stitch types and thread colors. Smocking isn’t just for baby clothes—think chic blouses and decor.
Stick around for tips to add flair and troubleshoot like a pro.
Table Of Contents
- Key Takeaways
- Preparing Your Fabric for Smocking
- Creating a Smocking Grid on Your Sewing Machine
- Understanding Smocking Stitches for Sewing Machines
- Working the Smocking on Your Sewing Machine
- Smocking on a Sewing Machine: Tips and Tricks
- Embellishments and Smocking Plates for Sewing Machines
- Sealing the Smocking Design on Your Sewing Machine
- Testing the Smock and Making Adjustments
- Pressing, Washing, and Caring for Smocked Fabric
- Frequently Asked Questions (FAQs)
- Conclusion
Key Takeaways
- Choose lightweight fabrics like cotton or double gauze, and wind elastic thread onto your bobbin for that classic smocked look—kind of like waving a magic wand and watching the fabric pleat itself.
- Keep your sewing machine tension just right, avoiding the dreaded "spaghetti-like squiggles." It’s all about balancing the tightrope between too tight and too loose, making your fabric dance beautifully.
- Mark your fabric with a grid using a fabric pen or iron-on dots—your roadmap to smocking. It’s like drawing a treasure map, but instead of finding gold coins, you’ll find perfectly pleated fabric.
- Experiment with stitch types and thread colors to add flair to your smocking projects. Who knew your trusty sewing machine could also be your artistic muse, churning out everything from chic blouses to whimsical cushions?
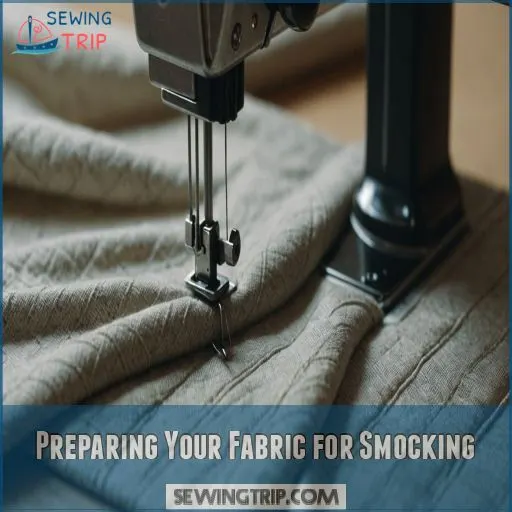
Preparing Your Fabric for Smocking
Getting your fabric ready for smocking is like prepping for a fantastic road trip— choose the right material, and you’re halfway there!
Opt for light, breathable fabrics and sturdy threads so your creative journey is smooth and enjoyable.
Choosing the Right Fabric Type for Smocking
Diving into smocking? Start with the right fabric type.
Lightweight fabrics with a loose weave, like cotton or double gauze, are your best pals—they’re forgiving and easy to manage.
Make sure your fabric’s got some stretch, as this helps with those lovely smocking stitches.
So, choose wisely, and remember: not all heroes wear capes; some are hidden in perfect thread count!
Selecting the Ideal Thread for Smocking
After picking the perfect fabric, choosing the right thread for smocking is important.
Elastic thread for the bobbin and regular thread for the top work wonders.
Go for colors that match or complement your fabric. Make sure the thread weight and durability suit your project for enduring results.
With the right thread, your smocking patterns will shine! .
Measuring and Cutting the Fabric for Smocking
Imagine you’ve got your fabric ready for smocking! To measure and cut like a pro, allow ample fabric width, usually 1.5 to 2 times your desired width, as smocking condenses fabric.
Follow the grain direction and consider cutting allowance for seam allowance and pattern scale.
Securely cut with precision . Now, you’re all set for magic with your sewing machine!
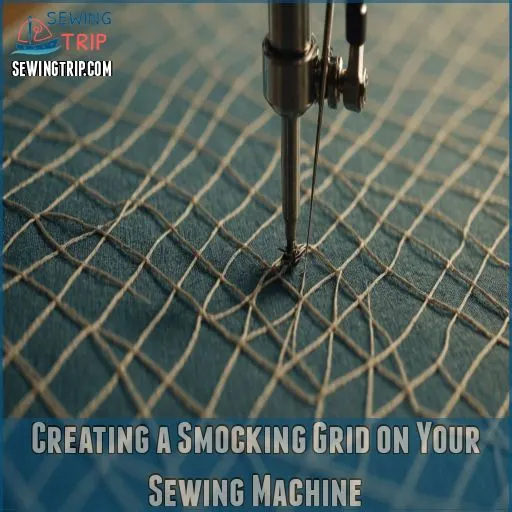
Creating a Smocking Grid on Your Sewing Machine
Creating a smocking grid on your sewing machine might seem tricky, but it’s easier than folding a fitted sheet.
By marking your fabric with a fabric pen or using iron-on dots, you’ll have a perfect guide to start your smocking adventure.
Marking the Grid With a Fabric Pen or Pencil
Grab your trusty fabric pen or pencil and get ready to mark that smocking grid with precision.
Whether you opt for a light blue pen or a disappearing marker, the key is creating a clear, evenly spaced grid that will serve as your roadmap for those intricate stitches.
Take your time aligning the lines – a steady hand and a keen eye will help your smocking turn out flawless.
Using Iron-on Dots for Easy Grid Creation
Using iron-on dots for smocking simplifies grid creation on your sewing machine. As an easy alternative to hand-drawn grids, iron-on dots align perfectly and save time.
Here’s how to start:
- Dot Alignment Tips: Press gently for uniform marks.
- Dot Spacing Variations: Adjust to your design needs.
- Dot Size Impact: Larger dots ease fabric visibility.
- Dot Removal Methods: Wash fabric gently to fade dots.
With these tips, smocking becomes a breeze!
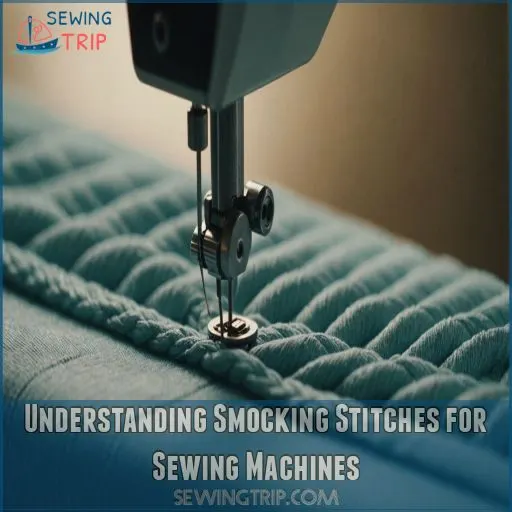
Understanding Smocking Stitches for Sewing Machines
When you’re ready to smock with a sewing machine, you’ll discover a world of stitches that can transform your fabric into stunning pleats.
From basic to elastic smocking stitches, choosing the right one is like finding the perfect setting on your favorite radio station—it’s all about hitting the right note for your fabric, and from basic to more complex stitches, you’ll have the tools to bring your vision to life.
Basic Smocking Stitches for Sewing Machines
After crafting your smocking grid, let’s chat about smocking stitches. Whether you’re using a trusty Brother or Janome machine, explore stitch types like the zigzag or cross stitch.
Handy tip: keep thread tension balanced and stitch length uniform to avoid chaotic results.
Smocking isn’t just for garments; it’s a nifty trick for accessories and crafts!
Elastic Smocking Stitches for Sewing Machines
Discover the magic of sewing machine smocking with elastic stitch variations for mastering perfectly spaced stitches
!
Mastering this technique involves balancing smocking tension control and stitch density impact.
Picture each row as a rhythmic dance—too tight, and it won’t stretch; too loose, and it lacks form.
Smocking plates can guide you, ensuring your fabric flows beautifully (Source).
Who knew elastic could be so charmingly complex?
Choosing the Right Smocking Stitch for Your Fabric
So, you’ve got your sewing machine ready, and now you’re wondering—how do you match the smocking stitch to your fabric?
Consider fabric weight and thread thickness; light fabrics like voile need gentler tension . Heavier fabrics handle denser stitches well.
Think of it like dancing—some fabrics waltz, some cha-cha; choose a stitch that complements your fabric’s groove.
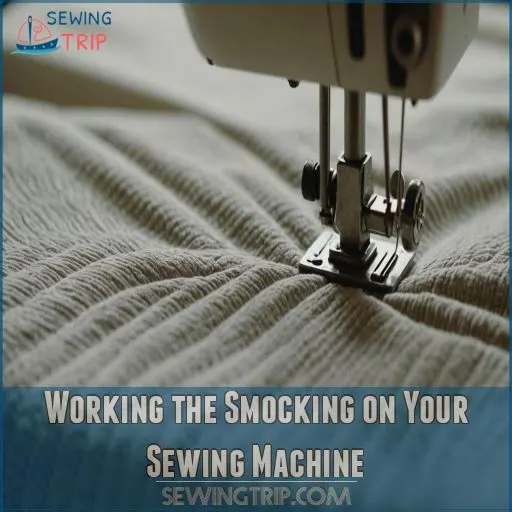
Working the Smocking on Your Sewing Machine
To make smocking easier using a sewing machine, you’ll need to master fabric hooping.
Whether you’re working with cotton, linen, or a more delicate material, choosing the right stitch and managing layers will keep you from becoming a tangled mess of fabric and frustration due to poor thread handling.
Hooping the Fabric for Smocking
When it’s time to work the smocking on your sewing machine, proper fabric hooping is key. Start by hooping only the stabilizer, then carefully place your fabric on top, aligning the center. Secure the fabric taut but not too tight – you don’t want any puckering.
- Use an embroidery hoop or specialized smocking hoop
- Lightly score the stabilizer to expose the sticky surface
- Mark the center of your design area for easy alignment
- Smooth the fabric flat as you lower it onto the hoop
- Adjust the tension so the fabric is taut but not overstretched
This will help prevent fabric slippage and make sure you get even, consistent stitches.
Using the Elastic Thread for Smocking
There’s an art to using elastic thread for smocking on your sewing machine.
First, wind the elastic thread onto the bobbin—don’t stretch it! Adjust the thread tension to avoid spaghetti-like squiggles .
Start stitching, spacing rows about 3/8 inches apart.
Keep it light, like a dance with fabric, ensuring beautiful, gathered texture (Source).
Managing Fabric Layering for Smocking
With fabric tension properly maintained, managing fabric layering for smocking can be a breeze.
Imagine you’re orchestrating a dance between layers of elegant fabric types.
Keep an eye on stitch length and needle size, especially with varying layer thickness.
A sewing machine becomes your trusty partner, helping to master this skill with finesse and flair, ensuring each smocking project is smooth and successful.
Selecting the Ideal Stitch for Cotton Fabrics
Selecting the ideal stitch for cotton fabrics is like dancing with rhythm and grace. Keep your stitch tension balanced to prevent puckering.
Consider these tips:
- Needle size: Use a size 80/12 for lighter cotton.
- Thread type: Opt for polyester-cotton blends that offer durability.
- Stitch length: Set to medium, around 3mm, for smooth, even smocking.
Enjoy your sewing journey!
Choosing the Best Stitch for Linen Fabrics
When you’re smocking linen fabrics on a sewing machine, choose a stitch that’s compatible with linen’s weight and weave, similar to those used for sewing jersey fabric
.
A longer stitch length helps maintain the fabric’s structure while ensuring even stitch tension.
Use linen thread and a needle suited to the fabric’s weight, like a size 80/12.
This combo creates a smooth, appealing pattern that holds well.
Working With Delicate or Thick Fabrics
Imagine your sewing machine as a trusty steed, ready to tackle both delicate and thick fabrics for smocking.
Choose fabric wisely; for fine materials, use smaller needles and lower tension.
Stabilizers work wonders in managing fabric layering and seam allowances.
Craft smocked dresses, cushions, or bags, and remember: practice chic restraint, not stitches flying wild.
Smocking on a Sewing Machine: Tips and Tricks
Smocking on a sewing machine might sound fancy, but it’s really about keeping things stable and tension-free.
We’ll show you how to make your smocking project smoother than a cat’s purr, with tips that help you avoid common snags and keep everything in line.
Using Stabilizing Materials for Smocking
Think about stabilizing materials as the unsung heroes of your smocking projects.
Whether you’re taming unruly knits or delicate silks, the right stabilizer keeps fabric in line.
Choose wisely: stabilizers come like secret agents in tear-away, cut-away, or water-soluble types.
Apply them directly under layers, and watch your stitching fall into place with the precision of a tightrope walker .
Maintaining Even Tension for Smocking
A smocked masterpiece begins with balancing your thread tension. Remember that bobbin tension and needle choice are critical for fabric weight harmony.
Adjust stitch length to weave smocking magic on your perfect quilting machine
. Keep fabric layers smooth—like butter gliding across toast—to make sure even tension.
Experiment with settings; each sewing machine has its sweet spot. Nail this, and you’re smocking royalty!
Troubleshooting Common Smocking Issues
After mastering tension, smocking might still trip you up with issues like uneven gathers or thread breakage. These are a needle in the haystack!
- Rethread with care: Loose stitches beg for better technique.
- Adjust tension settings: Tame fabric puckering.
- Check needle and fabric compatibility: Avoid stitch skipping .
Embellishments and Smocking Plates for Sewing Machines
Boost the creative potential in your smocking with sewing machine smocking plates and embellishments.
They let you add flair and personality to every design without making you feel like you’re wrestling an alligator.
Using Smocking Plates for Easy Smocking
You’re ready to make smocking a breeze. Using smocking plates is the trick up your sleeve.
Place the plate under your fabric, ensuring it’s snug and smooth. Set your sewing machine to a gentle pace to let the plate guide your pleats perfectly, ensuring proper thread tension settings
.
Remember, practice makes perfect, so keep experimenting with plate types and positions for stunning results!
Adding Embellishments to Your Smocking Design
Get creative by adding embellishments like beads, lace, ribbons, or sequins for that extra sparkle.
- Stitch beads between pleats for a dazzling effect.
- Seam lace at the edges for elegance.
- Weave ribbons through stitches.
- Sew sequins for a whimsical touch.
You’re the maestro of textile art!
Creating Custom Smocking Designs
Wondering how to create your own custom smocking designs? Let your creativity shine with the help of smocking plates and embellishments!
Experiment with different stitch patterns, color combinations, and textures to craft one-of-a-kind designs that reflect your personal style.
The possibilities are endless when you harness the power of your sewing machine.
| Smocking Plate Designs | Embroidery Embellishments |
|---|---|
| Classic Floral | Bullion Roses |
| Geometric Patterns | Continuous Eyelets |
| Whimsical Motifs | Garment Patterns |
| Monogrammed Designs | Lace Trims |
Sealing the Smocking Design on Your Sewing Machine
You’ve gathered, stitched, and now it’s time to seal your smocked design.
It’s like giving your creation a final touch-up, making sure everything stays put, and we’re going to show you how to do it both by machine and by hand for a polished finish!
Using a Sewing Machine to Seal the Smocking Design
Securing your smocking design with a sewing machine can feel like magic! By adjusting thread choice and smocking stitch tension, you’ll get a neat, professional finish.
- Choose quality thread
- Use proper tension settings
- Secure edges with a zig-zag stitch
- Test stitch on scrap material
This technique elevates your skill and design effortlessly.
Hand-Sealing the Smocking Design for a Professional Finish
After completing your smocking, think of it like putting the cherry on top of a sundae—hand-seal those stitches.
Use a needle to secure thread ends and reinforce loose stitches.
Pay attention to thread tension control for a snug finish. This bit of needlework makes your stitches secure and finishes the seam, transforming your smocking into handcrafted artistry.
Pressing and Washing the Fabric After Smocking
Once you’ve hand-sealed your smocking masterpiece, it’s time for ironing and washing.
Use a steam iron over a damp cloth to revitalize those pleats . Choose a gentle detergent to preserve the textile art’s delicate artistry.
Wash carefully, then lay flat to dry, preserving the magic of your fashion technique. Now, you’re ready to impress!
Testing the Smock and Making Adjustments
You’ve crafted a beautiful smock, but before you pat yourself on the back, let’s check for evenness and tension.
If your smock’s looking more like a roller coaster, it’s time to adjust those stitches or threads for a smooth finish!
Checking the Smocking for Evenness and Tension
You’re almost there! Before you wrap up, take a moment to assess your smocking masterpiece.
Like tuning a guitar, you want harmony in your stitches. Check for uneven gathers and loose stitches; they’re like a band out of sync.
Adjusting stitch length or tension can solve pesky tension problems.
Remember, the fabric choice impacts your smocking’s artistry and fashion statement.
Keep refining your technique—you’re crafting a wearable work of art! .
Making Adjustments to the Smocking Stitch or Thread
Struggling with your smocking? No worries, friend! First, check your stitch tension – it should be just right, not too tight or loose.
Next, try adjusting the thread thickness or needle size.
Tweaking the stitch length can also work wonders.
And remember, the fabric type makes a big difference too.
With a little trial and error, you’ll be a smocking pro in no time!
Pressing, Washing, and Caring for Smocked Fabric
You’ve crafted a beautiful smocked piece on your sewing machine, and now it’s time to keep it looking fresh and fabulous.
Pressing guarantees a crisp finish, while proper washing and care make sure your hard work doesn’t unravel faster than a cat in a yarn shop.
Pressing the Smocked Fabric for a Crisp Finish
After mastering your smock, make sure a crisp finish with ironing techniques.
Set the iron to steam and gentle heat, as smocking is more art than science.
Use a damp cloth over the fabric to avoid direct contact and maintain its artistic elegance.
Relish this finishing touch, knowing your skill and artistry shine with each steam.
Washing and Caring for Smocked Fabric
Let’s talk about caring for smocked fabric.
Use cold water and a gentle cycle or, better yet, hand wash with mild detergent. Avoid wringing; instead, press out excess water.
Lay flat or hang to dry, but nix the tumble dryer. Iron only the non-smocked areas, opting for low heat settings to preserve this textile art‘s charm.
Tips for Maintaining the Smocking Stitch Over Time
To keep your smocking artistry crisp and beautiful, focus on proper washing, ironing, and storage.
Use a gentle cycle and mild detergent for washing.
Iron carefully, avoiding the smocked areas to maintain tension and thread integrity.
Store items flat or hang them in a cool, dry place to preserve this traditional skill’s charm and elegance over time.
Frequently Asked Questions (FAQs)
Can You smock on a sewing machine?
You can easily create beautiful smocked fabric using your trusty sewing machine with the right walking foot techniques
.
Just grab some elastic thread, follow a few simple steps, and voila – you’ve got a gorgeous, stretchy fabric perfect for all sorts of projects.
What smocking stitches can you use on a sewing machine?
Unearth the magic of machine smocking by using stitches like zigzag or stretch, which mimic traditional smocking’s charm.
Just align rows between your gathering stitches, and let your machine strut its decorative stuff!
What is smocking in sewing?
Smocking is a charming embroidery technique transforming fabric into pleats with decorative stitches, creating stretch and detail, using a variety of sewing machine stitches
.
Traditionally found on cuffs and yokes, it’s a timeless art bringing elegance to both modern and vintage garments.
Can you smoke on a sewing machine?
You can indeed create smocking on a sewing machine, crafting lovely gathers like tiny waves on fabric.
Use elastic thread in the bobbin for shirring or decorative stitches for a faux smock effect.
Can smocking be done on a sewing machine?
You can smock on a sewing machine.
Just sew decorative stitches over gathered fabric.
Use elastic thread for stretchy effects or decorative stitches for a classic look.
It’s creative and adds charm to any project.
What stitch is used for smocking?
A zigzag stitch, often paired with elastic thread, can mimic traditional smocking.
Choose a decorative stitch on your sewing machine to create those charming gathers and waves.
It’s easy, satisfying, and feels like magic .
How to do elastic smocking on a sewing machine?
Start by winding elastic thread onto the bobbin without stretching it. Sew rows 3/8 to 1/2 inch apart on lightweight fabric. Use steam to shrink and gather the fabric.
What thread do you use for smocking?
Most experts recommend using 4 strands of floss for smocking on knits, as it provides full coverage while allowing the individual stitches to shine.
For lightweight fabrics like batiste, 2-3 strands of floche, coton à broder, or pearl cotton work beautifully.
How can I adjust tension for smocking?
To adjust tension for smocking, try winding elastic thread tightly onto the bobbin and make sure it goes through the tension spring.
Experiment with stitch length and tension settings to get the best results without creating "spaghetti" on fabric’s back (Source).
What is the difference between smocking and shirring?
Smocking and shirring are like distant cousins of fabric art.
Smocking uses embroidery to create intricate, hand-pleated patterns, while shirring gathers fabric with elastic thread for stretchy, simple designs.
Both add texture and elegance differently.
How do I wind elastic thread on the bobbin?
Hand wind the bobbin with elastic thread, keeping it taut but not stretched.
Use your sewing machine’s bypass for the tension knob, guiding the thread carefully.
Adjust bobbin tension if needed to make sure sewing is smooth.
Which fabrics are best for machine smocking?
Lightweight and medium-weight fabrics like cotton lawn or silk are ideal for machine smocking.
They create beautiful gathers without becoming too bulky, allowing your creativity to shine without a stitch of trouble.
How does fabric thickness affect smocking?
Ooh, let me tell you a little secret about fabric thickness and machine smocking – it’s like a dance, my friend!
The thinner the fabric, the more it’ll gather up, while thicker fabrics play hard to get.
Just adjust your stitches and gather lines to make that fabric sing!
Conclusion
Much like turning humble flour into a magnificent cake, mastering smocking on a sewing machine transforms fabric into art.
With your newfound skills, selecting the right materials, and following this step-by-step guide, you’ll create pieces that charm and delight.
Smocking isn’t just for the pros—your imagination’s the limit. So thread your machine, tap into those creative juices, and watch as each stitch brings your clothing and decor projects to life with elegance and flair.

