This site is supported by our readers. We may earn a commission, at no cost to you, if you purchase through links.
Sealing off your sewing isn’t complicated, but it makes the difference between a project that lasts and one that falls apart after a few washes. A secure finish takes about ten seconds and protects all the time you just invested.
Whether you’re working with a single thread or double, on felt or cotton, the right technique keeps everything locked in place.
Table Of Contents
- Key Takeaways
- Step 1: Tying Off With a Double Threaded Needle
- Step 2: Tying Off With a Single Threaded Needle by Knotting
- Step 3: Tying Off With a Double or Single Threaded Needle Without a Knot
- Step 4: Tying Off on Felt
- Needles and Thread
- Tips for Successful Stitching
- Bury The Thread Technique
- Weave The Thread Technique
- Finishing Methods in Hand Sewing
- Hand Sewing for Beginners
- Frequently Asked Questions (FAQs)
- Conclusion
Key Takeaways
- Tying off your stitches—using knots, weaving, or burying—keeps your sewing secure and stops it from unraveling.
- Pick your needle and thread based on fabric type and project, as the right tools make sealing off easier and neater.
- Extra steps like burying or weaving thread ends hide them for a clean, professional look on any sewing project.
- Practicing on scraps and leaving enough thread for tying off will help avoid mistakes and give your work better durability.
Step 1: Tying Off With a Double Threaded Needle
When you’re finishing up your stitches with a double threaded needle, here’s a trick to keep everything neat and secure. Snip the thread just below the needle to get ready for tying off sewing. For the best Double Thread Security, pick a needle size that fits your fabric type—no one wants puckers!
Tie the two thread ends together, leaving about a two-inch tail. You’ll want about three snug knots for good Thread Durability. Wiggle each knot close to the fabric, but don’t pull so tight that the seam starts Preventing Puckering. This way, your securing stitches look smooth and last as long as your project does!
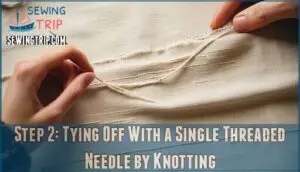
Step 2: Tying Off With a Single Threaded Needle by Knotting
If you’ve tackled the double thread, it’s time to see how simple it is to tie off your stitches using just a single thread and a little knotting know-how. This method gives you a clean finish and keeps your work secure.
Start by leaving about three inches of thread after your last stitch. Here’s what to do next:
- Make a small loop with your thread right against the fabric where your last stitch ended.
- Hold that loop in place with your thumb while you pass the needle through it.
- Pull gently to tighten the knot, watching your thread tension so the fabric doesn’t pucker.
- Repeat this process two or three times for solid knot security.
- Trim the excess thread close to your final knot.
Your needle size matters here. A finer needle works best for delicate fabrics, while heavier materials need something sturdier. Good knot placement right at the stitch line keeps everything looking neat. This single-threaded needle technique works great with most hand stitches.
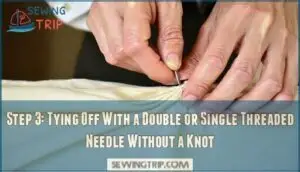
Step 3: Tying Off With a Double or Single Threaded Needle Without a Knot
Some projects call for a cleaner look, and that’s where the knotless tie-off comes in handy. This method works with both a double-threaded needle and a single-threaded needle. It gives you a secure stitching finish without any bumps.
Here’s how you do it. Start by placing your needle in the seam allowance where it won’t show. Take a tiny stitch at the end of your sewing line. Now push your needle back through that same stitch to make a small loop. Pass your needle through the loop and pull it flat against the fabric. Make sure your thread tension stays even so the fabric doesn’t bunch up.
This knotless finish is great for delicate fabric types where knots might show through or create bumps. Your needle choice matters here too. A sharp needle works best for securing stitches this way. Trim the thread tail close to your last stitch and you’re done.
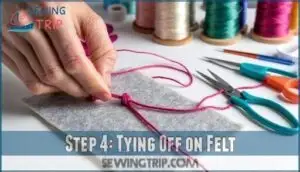
Step 4: Tying Off on Felt
Felt is different from most fabrics because it’s thick enough to hide your thread ends right inside the material itself. This makes tying off on felt super easy and neat.
Start by tying a simple knot close to the felt surface. Pull it snug so it sits right against the fabric. Now insert your needle right next to that knot. Push it through and bring it back out somewhere in the middle of the felt layer. Give the thread a good tug to pull that knot slightly into the felt. Then snip the thread end with your scissors.
The magic happens next. That little thread tail will shrink back inside the felt and disappear completely. No visible ends poking out. This technique gives you perfect stitch security and felt fray prevention without any bumps showing on your finished project. Your stitches stay locked in place and look professional every time.
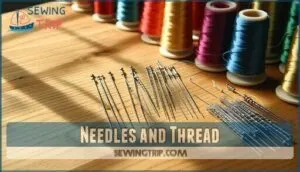
Needles and Thread
The right tools make all the difference when you’re learning to tie off your stitches. You’ll want to pick needles and thread that match your fabric and project.
Let’s look at what works best for different sewing tasks.
Needles
Your needle is like the paintbrush of sewing—picking the right one can make or break your entire project. Needle types and sizes matter big time. Sharp needles work great for woven fabrics, while ballpoint needles slide through knits without snagging.
Match your needle size to your fabric weight. Thick fabrics need bigger needles. Thin fabrics need smaller ones.
Keep your needles clean and replace bent ones right away for safe, smooth stitching.
Thread
Think of thread as the backbone of every stitch—it’s what holds your work together long after the needle’s done its job. Picking the right Thread Types makes all the difference. Match Thread Weight to your fabric—heavy thread for thick material, light thread for delicate work. Thread Tension affects how your stitches look and last. Thread Color can blend in or stand out.
- Choose all-purpose polyester for most projects
- Cotton thread works best for natural fabrics
- Keep Thread Storage dry to prevent tangling
- Test thread ends by securing thread with a quick knot
- Practice tying off before starting your real work
Books for Your Library
A solid reference library can feel like having a sewing mentor on your shelf. Building your collection with the right titles helps you master everything from tying off sewing to achieving a professional finish.
Here are three must-have categories:
- Beginner Guides: Start with "First Time Sewing: The Absolute Beginner’s Guide," which has been the top-selling entry-level book in North America since 2018. It walks you through sewing techniques and securing sewing projects with over 150 photos.
- Fitting Books: Try "Fitting and Pattern Alteration" for preventing thread unraveling and perfect garment construction—it offers over 1,000 solutions for common problems.
- Specialty Resources: Explore "Couture Techniques" for high-end finishing, "Quilting References" like the "All-in-One Quilter’s Reference Tool," or "Activewear Sewing" guides for stretch fabrics. Many beginners prefer visual learning materials with clear illustrations.
Tips for Successful Stitching
You’ve learned the basics of tying off stitches. Now let’s talk about three simple habits that will make your sewing stronger and cleaner.
These tips will help you avoid common mistakes and get professional results every time.
Leave Enough Thread for Tying Off
Running out of thread right when you need to tie off is like hitting an empty gas tank one mile from home. Thread Length Matters more than you think. Always leave at least four to six inches of tail when you finish your last stitch. This gives you enough room for securing stitches and prevents unraveling down the line. Too short? You’ll struggle to tie a proper knot. Too long? You’re wasting thread.
- Imagine this: your thread tail should be about as long as your index finger—just right for tying off without fumbling.
Smart thread management means better Project Durability and fewer frustrating do-overs.
Practice on a Scrap of Fabric
Before you stitch on anything important, grab a scrap piece and play around—it’s like a dress rehearsal that saves you from opening-night disasters. Test your Tension Control and Stitch Consistency before securing stitches on real fabric. Try different sewing techniques and see how tying off feels with your Thread Type and Fabric Choice.
- Experiment with finishing stitches on various materials to master Technique Refinement without pressure.
- Practice weaving thread ends to build confidence before tackling your actual project.
Additional Steps: Burying and Weaving The Thread
Once you’ve tied off your thread, there’s one more trick to learn if you want your work to look clean as a whistle—tucking those pesky thread tails out of sight. Burying and weaving are two smart ways of hiding thread ends after tying off. Both create invisible finishes while preventing unraveling.
| Method | Best For |
|---|---|
| Burying | Multi-layer projects (quilts, stuffed toys) |
| Weaving | Single-layer work (hems, appliqués) |
| Burying | Securing ends inside batting or stuffing |
| Weaving | Blending stitches along seam lines |
Bury The Thread Technique
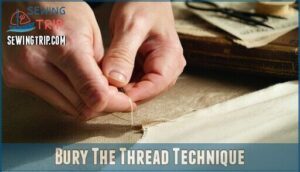
Once you’ve tied off your stitch, you’re not quite done yet. The bury the thread technique helps you hide that loose thread end so it won’t show or come loose later.
Here’s how to make your work look clean and professional.
Purpose of Burying The Thread
Burying the thread is like tucking in loose ends so your work stays strong and neat. This simple step boosts seam longevity by hiding thread ends inside the fabric layers. You’ll get an invisible finish that looks professional.
It also helps with shadow prevention when you’re working with contrasting colors. Plus, burying makes rework facilitation easier if you need to adjust stitches later. Burying thread tails secures quilting thread effectively.
Thread adaptability improves too since securing stitches this way works with different thread weights and types.
Application on Projects With Multiple Layers
Quilts, stuffed toys, and padded bags all share one thing—they need layers held together without visible knots or loose ends poking through. Burying the thread works perfectly for layered projects because it hides your securing stitches between fabric thickness without adding bulk. This technique gives you stitch security and keeps seam alignment smooth:
- Tie off your stitches with a small knot on top of your work
- Thread your needle back through to reach the middle layer
- Pull gently to pop the knot inside where it won’t show
- Trim the excess thread close to the fabric
This method improves layer stability while reducing bulk and stitch visibility, making your durable seams look professional on both sides.
Steps for Burying The Thread After Tying The Knot
Now that you know the knot is tucked safely inside, let’s walk through the exact steps to make it happen every time. First, tie your knot close to the fabric surface. Insert your needle right next to that knot, then push it through to the middle layer—aim for about half an inch away. Pull gently until the knot pops inside and disappears between your multiple layers.
Trim the thread ends flush with the fabric for neat finishes and completely hidden thread ends.
Weave The Thread Technique
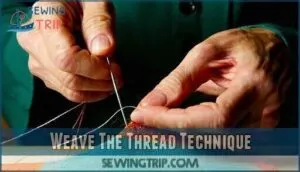
The weave technique works best when you’re sewing on a single layer of fabric. You’ll thread your needle through existing stitches or directly through the fabric itself. This method keeps everything neat and secure without adding bulk.
Application on Projects With a Single Layer
When you’re working on a single-layer project like a bookmark or a patch, weaving the thread through stitches keeps everything secure without adding bulk. This minimalist approach works great for lightweight projects where you don’t want visible thread ends poking through.
Here’s why weaving works well for single layers:
- Edge stability – Your fabric choice matters less when thread ends are woven invisibly through existing stitches.
- Thread visibility – Weaving hides the thread end completely, unlike tying off with knots that can show.
- Clean finish – Your sewing project looks professional without extra layers to hide mistakes.
Steps for Weaving The Thread Through Stitches
Slide your needle under two or three stitches on the back of your fabric, pull it through until just a tiny tail remains, then snip that tail close to the surface. Repeat this weaving motion one more time for extra security.
This simple thread weaving step keeps your hand sewing from unraveling. The thread ends disappear into your existing stitch lines, preventing any loose threads from popping out later. Your project stays neat without burying extra knots.
Steps for Weaving The Thread Through Fabric
If you’re working with loose-weave or delicate fabric, you can skip the stitches and weave straight through the fabric threads instead. This thread weaving technique helps with stitch security enhancement and concealing thread ends beautifully.
Here’s your quick guide for securing stitches techniques:
- Push your needle between the fabric layers—never through the front surface.
- Angle your needle parallel to the fabric grain for smooth thread management.
- Pull gently to avoid puckering or distorting your fabric layering effects.
- Use needle placement precision to keep everything hidden from view.
- Snip close after weaving twice for professional results.
Finishing Methods in Hand Sewing
You’ve already learned several ways to tie off your thread. Now let’s look at three more finishing methods that work great for different hand sewing situations.
Each one has its own benefits depending on what you’re making and how visible you want your stitches to be.
Loop Through an Existing Stitch Method
Think of this method as your safety net—it catches your stitching right where it needs to stay put. Here’s how tying off sewing works. Bring your needle up through the fabric, then slip it under a nearby stitch without piercing the fabric. Pull the thread through to create a small loop. Now thread your needle back through that loop and pull tight. You’ve just made a secure knot using the knotless loop method.
This gives you excellent stitch security without bulk. Repeat once more for reinforcement stitching. The fabric type impact matters—denser fabrics hold these loops better. It’s perfect for securing stitches techniques when you want a clean finish!
Backstitch Method Variations
Backstitching is your secret weapon for locking down seams that won’t budge—but tweaking the classic method opens up a whole new world of strength and style. Try these backstitch variations for enhanced stitch security:
- Anchoring Backstitches – Take two or three back stitches in the same spot when tying off for rock-solid securing seams.
- Layered Backstitch – Stack multiple back stitches at variable lengths to create extra reinforcement on stress points.
- Decorative Backstitch – Adjust stitch spacing and thread color to add visual interest while maintaining strength.
- Padded Backstitch – Weave thread under existing stitches before backstitching for a raised, cushioned effect.
These backstitch method tweaks give you both function and flair!
Hide The Knot Method
Nobody wants a lumpy knot sticking out like a sore thumb on the outside of their project—so here’s how to tuck it away where it belongs. Tie your knot on the wrong side of the fabric, then slip your needle between fabric layers or through the batting. Pull gently until the knot pops through and disappears inside. Snip the thread end close for an invisible thread end and professional results.
| Fabric Type | Hiding Method | Best For |
|---|---|---|
| Felt | Insert needle next to knot, pull through middle | Felt knot hiding on thick materials |
| Layered fabrics | Slide knot between layers | Quilts and lined garments |
| Single layer | Weave through existing stitches | Visible seams needing neat knot finish |
Master these knotting techniques for secure thread ends every time!
Hand Sewing for Beginners
Hand sewing opens up a world of creative possibilities once you nail the basics. Start by choosing the right needle for your fabric—sharps work best for most woven materials, while ballpoint needles work with knits without snagging. Polyester thread is your friend here since it’s strong and doesn’t fray easily.
The running stitch and backstitch are your Essential Stitches to master first. They’re simple but powerful. When you’re working through any project, keep your tension even so your stitches look clean and hold tight.
Common Challenges? Most beginners forget to leave enough thread for tying off, or they skip practicing on scraps first. Don’t make that mistake! A few practice runs on scrap fabric will save you frustration later.
Once you’ve got your stitches down, secure them with knots or try weaving the thread back through existing stitches. These finishing touches transform wobbly beginner work into something you’ll be proud to show off.
Frequently Asked Questions (FAQs)
What sewing techniques can you use to seal a fabric?
Sealing fabric feels permanent yet surprisingly simple. You can secure your work using tying off sewing methods for stitch security, seam finishes like zigzag or overlocking for edge sealing, or mechanical and chemical methods to prevent unraveling and guarantee strong finishing.
Securing fabric for good is simpler than it seems—tie off or seal edges to keep your hard work from unraveling
How do you finish off sewing?
You finish off sewing by tying off sewing with a secure knot or weaving thread through stitches. This prevents unraveling and ensures seam durability.
Burying the sewing thread or concealing seam edges keeps finishing sewing projects neat and professional.
How do you seal a sewing machine?
Machine maintenance involves cleaning and oiling your sewing machine regularly.
Seam sealants and fabric stabilization help with stitch durability. Thread security comes from backstitching or using reverse stitch at seams.
Don’t forget tying off loose threads by weaving them back through your fabric for stronger finishes.
How do you stop a seam in a sewing machine?
To stop a seam on a sewing machine, use the reverse stitch lever to add a few backstitches at the end. This reinforces stitches, secures your seam, and gives a neat, knotless finish that prevents unraveling.
How do you secure a seam in a sewing machine?
Sewing strong seams starts with sound strategies like backstitching or using the automatic tie-off. These techniques lock in threads, manage tension, and create secure fastening.
Machine knotting and seam reinforcement keep your stitches sturdy and your projects lasting longer.
How to finish a seam without sewing?
When you want fray prevention but don’t sew, try fabric glues, heat adhesion, seam tapes, or fusible webs.
These seam finishes work great for finishing seam edges and raw fabric edges, making fraying a thing of the past.
Can I use the same tying off technique for different types of stitches?
Stitch compatibility is surprisingly flexible—most tying off sewing techniques work across many stitches. The right knot security and technique adaptability matter more than the stitch chosen, but always check for material impact and that your hand sewing techniques prevent unraveling.
How do I prevent fabric puckering when tying off in sewing?
Tug your knot just enough so it sits snug to the fabric—don’t pull too hard.
Check your thread tension, stitch length, and needle size, and place knots near secure stitches.
This simple combo helps prevent fabric puckering every time.
What is the difference between tying off with a knot and tying off without a knot?
Picture a floppy disk in a smartphone world—using a knot gives top-tier knot strength and security, but it may show.
A knotless finish trades some stitch security for low visibility, suited to lighter fabrics or delicate projects.
Is there a specific technique for tying off when working with felt?
Working with felt? For tidy felt thread hiding, tie a small knot for knot security, then slip the needle into the felt’s thickness beside the knot.
Pull through, trim the thread, and your stitch visibility disappears—magic!
Conclusion
Think of tying off your stitches as putting the period at the end of a sentence—a simple mark that says, "I’m finished, and this is strong." When you know how to seal off sewing, your work transforms from temporary lines into lasting patterns.
Every knotted thread is a promise that your effort won’t unravel. Make finishing your trademark. With every project, you’re building more than a garment—you’re building confidence, one tied thread at a time.
- https://www.sewingmachinefun.com/best-sewing-book-for-beginners/
- https://so-sew-easy.com/best-sewing-books-as-recommended-by-our-readers/
- https://siemachtsewingblog.com/favorite-sewing-books/
- https://www.accio.com/business/best-selling-sewing-books
- https://sewliberated.com/best-books-on-how-to-fit-sewing-patterns

