This site is supported by our readers. We may earn a commission, at no cost to you, if you purchase through links.
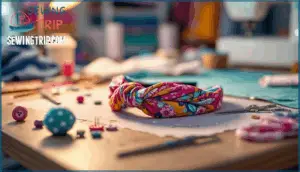
Better yet, you probably already have the stretchy fabric scraps sitting in your stash right now. With just a quarter-yard of jersey knit, some basic elastic, and about 30 minutes at your machine, you’ll create a headband that actually stays put while looking effortlessly polished.
Table Of Contents
- Key Takeaways
- What Fabric Works Best for a Twist Headband?
- Essential Supplies for Sewing a Twist Headband
- How to Measure and Cut Fabric for Any Size
- Step-by-Step Instructions to Sew a Twist Headband
- Adding Elastic for a Perfect Fit
- Finishing Touches for a Professional Look
- Troubleshooting Common Sewing Issues
- Frequently Asked Questions (FAQs)
- Conclusion
Key Takeaways
- The twist headband design solves the slipping and pressure problems of traditional elastic bands by using a combination of stretchy knit fabric (cotton spandex jersey or double brushed poly) with 30-40% stretch recovery and a small piece of elastic, creating a comfortable fit that stays put without causing headaches.
- You can create a professional-looking twist headband in about 30 minutes using fabric scraps you likely already own, with total material costs under two dollars, making this an accessible and sustainable project that transforms leftover jersey knit or old T-shirts into functional accessories.
- Proper measurement and construction techniques are critical—subtract 5 inches from head circumference for stretch, center seams against the scalp for comfort, offset the tube ends by an inch before stitching to create the faux knot twist, and use zigzag stitches with ballpoint needles to prevent puckering on knit fabric.
- The key to a boutique-quality finish lies in the details: trim all excess threads, topstitch 1/8 inch from folded edges for crisp seams, hide the elastic junction inside the tube, and customize with color blocking, pattern mixing, or embellishments to create a unique accessory that reflects your personal style.
What Fabric Works Best for a Twist Headband?
The fabric you choose makes or breaks your headband—literally. You need something with stretch, softness, and enough structure to maintain that twist without collapsing after one wear.
Let’s look at the knit fabrics that actually work for this project and why they matter.
Top Knit Fabrics for Headbands
Cotton spandex jersey, double brushed poly, and French terry with spandex aren’t just fabric names—they’re your ticket to a headband that actually stays put without feeling like a vise grip.
Here’s what makes these knit fabrics champions for your cotton twisted headband project:
- Cotton spandex jersey — soft texture, medium stretch, breathable for all-day wear
- Double brushed poly — buttery smooth, excellent stretch factors, vibrant color choices
- French terry with spandex — cozy texture options, structured grip, perfect fabric selection
- Jersey fabric blends — affordable knit types, easy to sew, forgiving for beginners
Factors for Choosing Stretchy, Comfortable Material
Picking the right knit isn’t just about stretch—it’s about how that fabric behaves when it’s wrapped around your head for hours without leaving a dent or sliding off mid-conversation. Your material stretch should snap back without going limp—aim for 30-40% recovery in cotton spandex or jersey.
Fabric that stays put without leaving dents—aim for 30-40% stretch recovery in cotton spandex or jersey
Comfort factors hinge on fabric weight too: lightweight knits prevent headaches, while heavier options add structure. Test your elastic choices against your knit fabric before committing—mismatched stretch ruins the whole game.
Sustainable and Scrap Fabric Options
Your scraps aren’t trash—they’re green crafting options waiting to happen. Upcycling leftover jersey or organic cotton cuts waste while slashing your carbon footprint by up to 75% compared to virgin materials. Here’s how to source smart:
- Raid your stash for old T-shirts or leggings with intact stretch
- Hit nonprofit fabric sales like FABSCRAP for pre-consumer scraps at $2/pound
- Choose organic cotton or bamboo knits for biodegradable, renewable options
- Grab recycled polyester to divert textiles from landfills
- Test fabric scraps first—sustainable textiles still need that 30-40% recovery
Repurposed fabrics turn eco-friendly crafts into sustainable living wins—no guilt, all style. By choosing natural fabrics, you can create unique and environmentally friendly clothing items.
Essential Supplies for Sewing a Twist Headband
You don’t need much to make this headband, and chances are you’ve already got half of it sitting in your sewing room. The real key is keeping it simple—no fancy tools or mystery notions required.
Here’s what you’ll actually use from start to finish.
Complete List of Required Materials and Tools
You won’t need much to turn a humble scrap of knit into a standout accessory—just a handful of basics you probably already have tucked in your sewing corner.
Grab your sewing machine, a quarter-yard of stretchy fabric (jersey or cotton spandex works like a dream), coordinating thread, sharp scissors, and a 4-inch piece of half-inch elastic. Toss in pins, a ruler, and a safety pin for threading elastic through your tube—that’s it.
Material costs? Under two bucks, which means you’re sewing freedom, not draining your wallet.
Where to Find Affordable Supplies
Thrift stores like Savers slash fabric prices by 50–70%, turning secondhand finds into runway-ready materials. Online deals through WAWAK and Fabric Mart deliver free shipping or flat-rate discounts on bulk buying. Hobby Lobby drops sewing notions 30–50% weekly, while craft reuse centers offer scrap fabric at 80% below retail.
Hunt fabric sales, raid thrift aisles, and score elastic without breaking the bank. When searching for materials, consider checking online fabric stores for a wide selection of fabrics.
Recommended Sewing Machines and Notions
Breaking free from expensive gear starts with smart machine picks. Brother CS7000X nails fabric compatibility with 70 stitches, while Janome HD5000 handles thick knits effortlessly.
Thread selection matters—Gutermann polyester stretches without snapping. Grab stretch needles, ballpoint pins, and a 45mm rotary cutter.
For notion essentials, pair an elastic threader or safety pin with your machine. Serging optional, but a Babylock Acclaim levels up seam finish.
How to Measure and Cut Fabric for Any Size
Getting the measurements right is where you take control of the fit. Whether you’re sewing for a newborn or yourself, the math is straightforward once you know the formula.
Here’s how to measure, calculate, and cut like you mean it.
Sizing Guide for Babies, Kids, and Adults
Getting the right size from the start saves fabric and frustration. For babies, cut strips 15–16 inches long; toddlers need 16–17 inches. Kids between 5 and 12 work best with 18–19 inches, while adult headbands usually measure 19–21 inches.
These measurements account for stretch and the twist detail, giving you a snug, comfortable fit across all age groups without constant adjustments.
Calculating Dimensions for a Custom Fit
If you want a headband that actually fits—not too tight, not sliding off—measure the head before you cut. Wrap a tape measure around the crown, subtract 5 inches for fabric stretch calculation and elastic length determination, then add ½ inch sewing margin allowance per side.
Custom fit tips for impeccable headband patterns:
- Head size measurement dictates strip length—tighter weaves need less fabric
- Fabric stretch varies by knit type; test a sample before committing
- Elastic tension should close a 4–5 inch gap without bunching
- Width preference changes comfort—wider bands suit thicker hair
- Seam allowance eats ½–1 inch total; plan accordingly in sewing projects
Tips for Cutting Knit Fabric Accurately
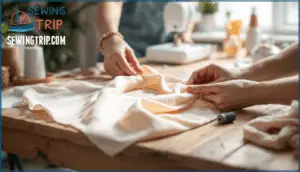
Knit fabric squirms and stretches the second your scissors touch it—unless you know the tricks to pin it down. Use a rotary cutter on a mat instead of scissors—it slices through knit fabric types without distorting the fabric grain.
Weight the edges, measure with precision measuring tools, and cut in one smooth motion. Your zigzag stitch will thank you later when seams lie flat.
Step-by-Step Instructions to Sew a Twist Headband
Now that you’ve got your fabric cut and ready, it’s time to bring this headband to life.
The actual sewing process is where you’ll transform those strips into something you can actually wear—and it’s way easier than you might think.
Let’s break down exactly how to fold, sew, and twist your way to a headband that looks like it came from a boutique.
Folding and Sewing The Fabric Tube
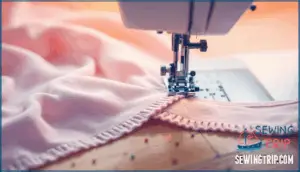
The magic of a twist headband starts with one simple fold—take your knit rectangle and bring those long raw edges together, right sides kissing, like you’re closing a book that’s about to become something way cooler.
Pin along that edge if your fabric’s slippery, then stitch using a zigzag stitch about half an inch from the raw edge—this seam allowance keeps your tube construction strong while letting the knit stretch naturally without popping stitches.
Turning and Positioning Seams for Comfort
Once your tube is sewn shut, flip it right side out—this is where the seam you just stitched disappears to the inside, and trust me, you’ll want that seam centered on what will become the back of your headband so it sits flat against your head instead of digging in like a tiny fabric rebellion.
Here’s your seam placement game plan for maximum comfort fit:
- Slide your hand through the tube and pull the fabric through itself until all the folded edges look clean and the stretchy seams are hidden inside
- Iron or finger-press that seam to the center of one side—this becomes your back panel where smooth finishing matters most
- Pin the seam face-down so when you twist later, it stays put and doesn’t rotate awkwardly against your scalp
That centered seam is your secret weapon—it’s what separates a professional twisted headband from one that screams "first attempt." Sewing tutorials often skip this detail, but proper sewing techniques mean your sew twist headband project won’t just look good, it’ll feel invisible when you wear it all day.
Techniques for Creating The Faux Knot Twist
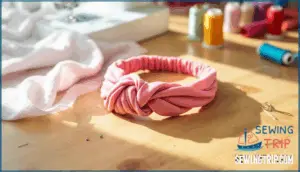
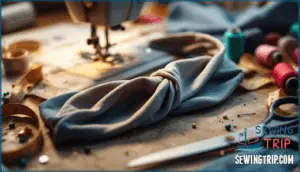
Now fold your tube in half so the short ends meet—but here’s the trick that makes everything look intentionally twisted instead of accidentally messy: offset those ends by about an inch before you pin them together. This Twist Fold Technique creates that coveted Faux Knot Method center—stitch across those offset ends, and your DIY Headband instantly gets that signature wrap-around illusion that makes people think you spent way more than ten minutes on it.
| Knit Fabric Management | Headband Shaping Tips | Sewing Techniques |
|---|---|---|
| Stretch fabric gently | Pin offset ends first | Use zigzag or stretch stitch |
| Don’t pull while sewing | Center seam stays down | Backstitch at start/end |
| Let feed dogs guide | Twist shows naturally | Trim threads close |
| Press seams with fingers | Check alignment twice | Turn right side smoothly |
| Avoid excessive tension | Topstitch if desired | Test elastic placement |
Adding Elastic for a Perfect Fit
This elastic step separates a good headband from one that actually stays put. You’ll add a small strip to the back that lets the headband hug your head without feeling too tight or slipping off.
Here’s how to measure, attach, and finish it cleanly.
Measuring and Cutting The Elastic Band
Grab your elastic and let’s nail down the one measurement that’ll make or break your headband’s comfort. You’ll need 4 inches of ½-inch wide elastic for most adult headbands—that’s your ideal range for band tension without cutting off circulation. Measure twice, then use sharp scissors or a rotary cutter to get clean edges.
Remember, your fabric stretch already does half the work, so don’t overdo the elastic length or you’ll end up with a vise grip instead of a chic accessory.
Attaching Elastic With a Threader or Safety Pin
Pin your safety pin to one end of the elastic, then feed it into the fabric tube like you’re threading a needle through a very stubborn straw. Push the pin through, scrunching fabric as you go—this is your stretchy fit secret in action. Keep tension steady so the elastic doesn’t twist inside.
Elastic threader tips and safety pin tricks:
- Anchor the tube’s far end with your foot or a heavy book to prevent it from bunching
- Scrunch fabric over the pin in small waves instead of yanking—saves your fingers
- Don’t let go of the elastic’s tail or you’ll be fishing it out with tweezers
- Mark the elastic ends with a pen dot so you know when you’ve threaded it fully
- Use a larger safety pin if your elastic is thick—sewing machine stitches love smooth glides
Securing and Hiding The Elastic Seam
Overlap the elastic ends by half an inch, stitch them together with a tight zigzag, then tuck that little bulky knot back into the tube where nobody will ever see it.
Smooth the fabric over the enclosed elastic so the seam finishing disappears—your hidden stitches and secure closure make the back stretchy without any lumpy distractions.
Fold the fabric edges inward, pin, then topstitch to lock everything in place.
Finishing Touches for a Professional Look
You’ve got the twist headband almost done, but it’s the final details that’ll make yours look store-bought instead of homemade. A few quick tweaks—cleaning up threads, reinforcing seams, and adding your own flair—turn a basic project into something you’ll actually want to wear.
Here’s what you need to nail that polished finish.
Trimming Excess Threads and Raw Edges
A clean finish starts with a good trim—those stray threads and uneven edges won’t disappear on their own, so snip them now before your headband hits the runway (or the gym).
Use sharp fabric scissors to clean up raw edges and prevent fraying, focusing on seam allowances and any loose stitching from your sewing project.
This simple fabric crafting technique instantly elevates your work from homemade to handmade-with-pride.
Topstitching and Seam Placement Tips
Topstitching isn’t just a decorative flourish—it’s your secret weapon for keeping seams flat, edges crisp, and your headband looking like it came from a boutique instead of a basement.
Run your topstitch 1/8 inch from the folded edge along the fabric grain for professional seam finishing. Match your thread colors to your fabric or go bold with contrast—either way, keep your stitch length at 3-3.5mm for clean topstitch patterns that won’t pucker.
Styling Variations and Personalization Ideas
Your twist headband just became a blank canvas—and you’re about to turn it into something nobody else at the coffee shop, yoga class, or playground is wearing.
Master these styling variations and personalization ideas to make your DIY fashion accessories uniquely yours:
- Color blocking: Sew two contrasting fabrics together before constructing your twisted headband for bold, graphic impact
- Pattern mixing: Pair florals with stripes or polka dots with geometrics—fashion crafts thrive on unexpected combinations
- Folded styles: Wear your sew twist headband wide across the forehead, twisted to the side, or scrunched for texture
- Accessorizing options: Add fabric flowers, embroidered patches, or small brooches to transform basic hair accessories into statement pieces
- Seasonal themes: Choose holiday prints, autumn plaids, or summer tropicals to rotate your headband wardrobe year-round
Troubleshooting Common Sewing Issues
Even the simplest headband project can throw you a curveball—twisted seams, elastic that won’t cooperate, or fabric that puckers when you least expect it. Don’t let these hiccups derail your momentum.
Here’s how to troubleshoot the most common issues and get your twist headband back on track.
Fixing Twisted Seams or Uneven Elastic
If your headband twists like a pretzel gone rogue or your elastic looks more saggy than snappy, don’t panic—these hiccups are surprisingly easy to fix with a quick seam check or elastic swap.
For twisted fixing, unpick your side seam and realign the fabric so the center seam sits flat before restitching.
If your elastic’s gone limp, measure a fresh piece 1–2 inches shorter than your original, thread it through with a safety pin, and secure both ends. This elastic adjustment transforms stretch correction from nightmare to five-minute fabric realignment victory.
Preventing Fabric Stretch or Puckering
Knit fabric has a mind of its own—it’ll stretch, ripple, or pucker the second you get bossy with it, so soft manipulation and the right stitch settings are your secret weapons.
For puckering prevention, use a ballpoint needle and reduce presser foot pressure to let fabric flow without wrestling.
Set your stitch length to 3–3.5mm for seam stability—this stretch control keeps fabric tension balanced, stopping ripples before they start, turning your sewing project into pure knit fabric characteristics mastery.
Tips for Beginners to Achieve Great Results
Beyond those fixes, you can own every step by starting small and building confidence through practice.
5 beginner power moves:
- Test your tension on scrap fabric before the real run—adjust until no puckers show
- Pin sparingly to avoid distorting knit stretch during sewing
- Choose ballpoint needles for cleaner stitches and fewer skips
- Measure twice, cut once—knit fabric forgives fit issues, not length mistakes
- Join a sewing community for quick troubleshooting and styling inspiration
This DIY hair accessories project is your gateway to mastering sewing basics, dodging beginner mistakes, and turning fabric selection into pure headband styling rebellion.
Frequently Asked Questions (FAQs)
Can I use a non-stretch fabric for the twist headband?
Let’s be honest—skipping stretch fabric for a twisted headband isn’t ideal. Non-stretch options lack the give needed for comfort and stability, creating sewing challenges and fit issues.
Knit fabrics with stretch are essential for this sewing tutorial, guaranteeing your headband hugs without squeezing.
How do I determine the width of the twist headband?
The width determines your headband’s coverage and comfort. Cut strips between 6-9 inches wide—narrower for babies, wider for adults.
Remember that knit fabric width doubles when folded, so a 7-inch strip creates a 5-inch finished headband after sewing and accounting for seam allowance.
Are there any styling options or variations for the twist headband?
Flip it to the side for a retro vibe, or stack two Twisted Headbands in contrasting colors for bold impact.
Try Knotted Accents, Braided Details, or even Headband Wraps for fresh styling.
Can I hand-sew a twist headband instead?
Imagine stitching a headband during a power outage—hand sewing makes it possible. You can absolutely hand-sew a twist headband using a backstitch or running stitch for seams.
It takes longer than machine sewing, but you’ll master fabric choice and sewing tools while creating handmade headbands perfectly suited for beginners exploring DIY accessories.
How do I wash and care for it?
Machine wash cold on gentle with like colors, or hand wash for longer life. Skip fabric softener—it weakens cotton spandex’s stretch.
Air dry flat or tumble low.
For stains, spot-treat before washing.
Iron low if needed, avoiding elastic areas.
What if my headband feels too tight?
A too-tight headband squeezes like an overstuffed duffle—uncomfortable and unforgiving. Loosen it by swapping in longer elastic or choosing stretchier fabric next time.
Sizing charts help you nail comfortable wear from the start, so measure twice before you sew your twisted headband masterpiece.
Can I make reversible twist headbands easily?
Yes — reversible designs simply mean choosing two coordinating knit fabrics and treating them as one layer throughout construction. The twist techniques stay identical, but you’ll sew wrong sides together, hiding all seams inside for a double-sided finish that flips your styling options wide open.
How do I add embellishments or decorations?
Add fabric paint for custom designs, sewn appliques for texture, or iron transfers for quick graphics.
Try beaded accents or ribbon embellishments for extra flair—these DIY fashion techniques transform basic headbands into statement pieces.
Conclusion
Stitch by stitch, you’ve mastered how to sew a twist headband that actually solves the slipping problem most store-bought versions create. You’ve transformed scraps into something genuinely useful—no more adjusting mid-errand or dealing with pressure headaches.
Now you control the fit, the fabric, and the final look. That’s the real win here: you’re not just following instructions anymore. You’re building skills that let you customize accessories on your own terms, without waiting for someone else’s solution.
- https://www.zippia.com/sewing-jobs/demographics/
- https://www.asustainablecloset.com/home/5-diy-trends-for-2024
- https://www.archivemarketresearch.com/reports/home-sewing-machines-226830
- https://threadsmonthly.com/headband-sewing-patterns-tutorials/
- https://www.katia.com/uk/academy/post/top-3-2024-craft-trend-ideas-for-knitters-and-sewers

