This site is supported by our readers. We may earn a commission, at no cost to you, if you purchase through links.
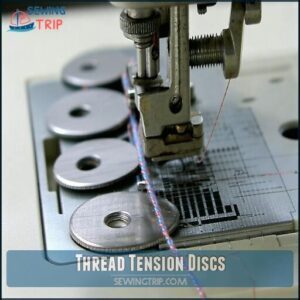
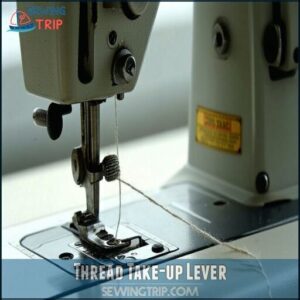
Next, guide it through the tension discs, ensuring it’s snug, and bring it up to the take-up lever, threading it from right to left.
Continue down through the lower thread guides, then thread the needle from front to back.
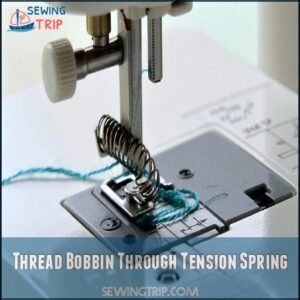
For the bobbin, place it in the bobbin case, pull the thread through the tension spring, and insert it into the machine.
Table Of Contents
- Gather Necessary Materials for Zig Zag Machine Threading
- Prepare Your Zig Zag Sewing Machine
- Wind The Bobbin for Zig Zag Stitching
- Insert The Bobbin Into The Machine
- Thread The Upper Part of The Machine
- Thread The Needle for Zig Zag Stitching
- Set Up Zig Zag Stitch on Your Machine
- Troubleshoot Common Zig Zag Threading Issues
- Maintain Your Zig Zag Sewing Machine
- Frequently Asked Questions (FAQs)
- Conclusion
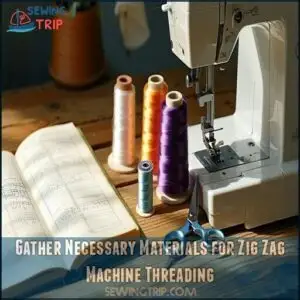
Gather Necessary Materials for Zig Zag Machine Threading
Before you begin threading your zig zag sewing machine, you’ll need to gather your sewing machine, thread spool, bobbin, scissors, needle, and owner’s manual.
You’ll save yourself frustration later by having everything within arm’s reach before starting the threading process.
Zig Zag Sewing Machine
What makes a zig zag sewing machine essential for your crafting toolkit? Before threading your machine, let’s understand this versatile workhorse that revolutionized home sewing since its widespread adoption in the mid-20th century.
A quality zig zag sewing machine offers:
- Decorative stitching capabilities beyond what straight-stitch machines provide
- Buttonhole techniques that create professional-looking results
- Stretch fabric handling without breaking threads or puckering
- Specialty feet compatibility for enhanced functionality
- Multiple stitch width options for various applications
Your zig zag machine’s threading process works similarly across most models, though consulting your specific sewing machine guide is always recommended. The distinctive zigzag stitch moves the needle side-to-side while feeding fabric forward, creating that familiar pattern.
You can find a variety of models online. When setting up for your threading tutorial, make certain you have adequate lighting to see the threading path clearly. Soon you’ll master sewing machine threading and access the full potential of your zigzag sewing machine!
Thread Spool
Having the right thread spool is essential for successful zigzag stitching.
Select a spool that matches your project needs—whether it’s polyester for durability or cotton for natural fabrics.
| Spool Material | Best For | Threading Tips |
|---|---|---|
| Polyester | Stretch fabrics | Flows smoothly through guides |
| Cotton | Natural fabrics | May create more lint |
| Specialty | Decorative work | Check machine compatibility |
Position your spool securely on the spool pin to prevent wobbling that could affect thread tension during your sewing machine threading process.
Different projects may require you to examine various spool types.
Bobbin
Now that you’ve got your thread spool ready, you’ll need a compatible bobbin for your zig zag machine.
The bobbin holds the lower thread that works with your upper thread to create stitches.
- Check your machine’s bobbin compatibility before purchasing replacements
- Follow proper bobbin winding techniques for even thread distribution
- Note the correct thread direction when loading your bobbin case
- Verify proper bobbin tension for balanced stitches
- Clean the bobbin case regularly to prevent thread jams
Remember: A properly wound bobbin is the foundation of successful zig zag stitching.
Scissors
You’ll need proper scissors while threading your zig zag sewing machine.
With your bobbin ready, grab scissors that’ll make clean cuts and prevent frayed thread ends.
- Scissor Types: Keep fabric scissors separate from paper scissors to maintain sharpness.
- Scissor Types is related to the idea of having the right tools, and Cutting Technique will follow, but first, the importance of ergonomic handles should be noted: Ergonomic handles reduce hand fatigue during long threading sessions.
- Cutting Technique: Hold thread taut and cut at a 45-degree angle for easy needle threading.
Needle
While scissors trim thread ends, selecting the proper needle guarantees successful zig zag stitching. Choose the correct needle size and type for your fabric to prevent damage and thread breakage.
A variety of options for purchasing a needle exist online.
| Needle Type | Best For | Signs to Replace |
|---|---|---|
| Universal | Most fabrics | Dull point, bent shaft |
| Ballpoint | Knits, stretch | Skipped stitches |
| Sharp | Wovens, silk | Thread breaking |
Position your needle correctly in the needle bar, making sure it’s inserted all the way up and tightened securely. When threading, trim the thread end cleanly and guide it through the needle eye from front to back. Replace bent needles immediately to maintain stitch quality and prevent thread breakage.
Owner’s Manual
Your machine’s owner’s manual serves as the ultimate guide when threading a zig zag sewing machine. This essential reference contains detailed threading instructions specific to your model that you’ll want to keep accessible.
Your manual provides:
- Diagram clarity with visual threading paths unique to your machine
- Troubleshooting guides for common issues like broken threads or tension problems
- Maintenance schedules to keep your machine performing at its best
- Warranty information should mechanical issues arise
- Safety precautions to prevent accidents during operation
Even experienced sewers consult their manuals regularly. Machine threading guides vary between models, so don’t rely on general knowledge alone. When in doubt, your manual’s precise, manufacturer-approved instructions will guarantee proper threading every time.
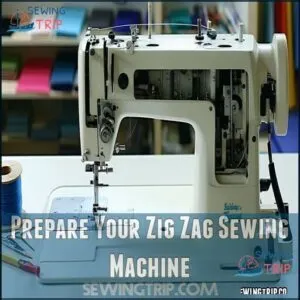
Prepare Your Zig Zag Sewing Machine
Your zigzag sewing machine needs proper preparation before threading begins. Place your machine on a stable, flat surface where it won’t wobble during operation.
For safety, always unplug the power supply and turn all machine settings to the off position. Raise the presser foot lever completely and verify it’s correctly attached.
Examine your needle for sharpness and confirm needle compatibility with your fabric type—replace immediately if bent or dull. Check that the bobbin area is empty and free from dust.
Remove any lint from the feed dogs, tension discs, and other key components. Regular maintenance can prevent uneven zigzag stitches.
These simple preparation steps guarantee smooth machine threading and ideal stitch formation when you’re ready to create your zigzag stitches.
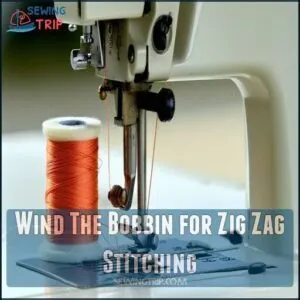
Wind The Bobbin for Zig Zag Stitching
You’ll need to wind your bobbin properly before attempting any zig zag stitching, as a poorly wound bobbin can lead to tension problems and uneven stitches.
Place your empty bobbin on the winder spindle and guide the thread through the machine’s bobbin winder thread guide to guarantee smooth, even winding.
Place Empty Bobbin on Winder Spindle
Gently position your empty bobbin on the winder spindle, typically located on the top right side of your zig zag sewing machine. Proper placement guarantees smooth bobbin winding later.
For secure placement:
- Check your bobbin material matches your machine’s specifications
- Align any notches on the bobbin with spindle pins
- Push firmly until you hear or feel a click
The spindle size varies by machine model, so consult your manual if you encounter winder compatibility issues. Regular winder maintenance prevents jamming during this critical threading step.
When properly seated, the bobbin shouldn’t wobble. A secure fit now means fewer headaches when sewing those perfect zig zag stitches later!
Guide Thread Through Bobbin Winder Thread Guide
Now that your bobbin is in position, let’s guide the thread correctly. Locate the bobbin winder thread guide at the top of your zigzag sewing machine.
| Thread Guide Types | Correct Thread Path |
|---|---|
| Standard Hook | Clockwise wrap |
| Vertical Pin | Counter-clockwise |
| Tension Disc | Through slot first |
| Automatic Winder | Follow machine marks |
Pull thread from the spool and pass it smoothly through this guide. Don’t pull too tight—just enough tension guarantees proper winding.
This step prevents tangling and guarantees your bobbin will wind evenly.
Wind Thread Around Bobbin
Now that you’ve guided the thread through the winder, it’s time to secure it on your bobbin. Hold the thread tail firmly and wrap it clockwise around the bobbin 4-5 times. This initial winding creates anchor points for even thread distribution later.
For successful bobbin winding, consider the following steps:
- Maintain gentle tension on the thread while wrapping
- Verify thread spool placement is stable during the process
- Check that threads don’t cross or tangle on the bobbin
Pre-wound bobbins can save time, but learning proper bobbin winding techniques gives you more control over your sewing machine threading.
Engage Bobbin Winder
Now that you’ve wrapped thread around your bobbin, it’s time to engage the bobbin winder. This step activates your machine’s winding mechanism.
First, push the bobbin winder spindle to the right until you hear a distinct click. This locks the winder mechanism in place for proper threading.
| Winder Mechanism Types | Threading Direction Importance |
|---|---|
| Automatic Stop | Clockwise is standard |
| Manual Stop | Guarantees proper unwinding |
| Speed Control | Prevents tangling |
Check that your bobbin material impacts winding quality—plastic bobbins often need consistent winding speed. Most machines feature automatic winder features that stop when full.
Turn your handwheel while holding the thread tail for smooth bobbin winding start-up.
Trim Excess Thread
A full bobbin signals it’s time to cut any excess thread.
Trim the thread tail length neatly with sharp trimming tools, guaranteeing clean ends to prevent fraying or tangles during sewing machine threading.
Keep the cut short but manageable to aid in threading steps for your zigzag sewing machine.
Practice waste reduction with safe disposal of trimmings.
Neatly trimmed thread guarantees flawless bobbin function and smooth zig zag stitch execution.
Insert The Bobbin Into The Machine
You’ll need to place your wound bobbin into the machine correctly to guarantee smooth stitching.
Turn off your sewing machine and open the bobbin compartment to access the bobbin case where you’ll insert your thread-loaded bobbin.
Open Bobbin Compartment
Now that you’ve properly wound your bobbins, let’s access the bobbin compartment.
To open your zig zag machine’s bobbin compartment:
- Locate the sliding or hinged bobbin door mechanism near the needle plate
- Push the release button or gently slide the cover in the direction indicated by threading diagrams
- Make certain your machine is powered off for safety
- Keep the area dust-free for smooth compartment access
Hold the door carefully—dropping it can damage the bobbins case!
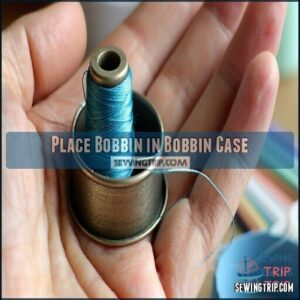
Place Bobbin in Bobbin Case
Now that your bobbin compartment is open, you’ll need to correctly place the bobbin in its case for smooth operation. Take your wound bobbin and check its orientation—the thread should unwind in a counter-clockwise direction when placed in the case. This bobbin thread direction guarantees proper tension during sewing.
Different machines have various bobbin case types, but the principles remain similar. Place the bobbin firmly into the case, making sure it sits flush against the bottom. A loose bobbin can cause irregular stitches and tension problems.
For proper bobbin setup, align the metal tab on the bobbin case with the corresponding notch in the machine. This alignment is vital for compartment security and smooth thread flow.
Leave about 4-6 inches of thread extending from the bobbin. This tail will help you establish proper tension spring function once everything is assembled.
Regular bobbin maintenance prevents thread jams and guarantees consistent stitching results.
Thread Bobbin Through Tension Spring
Now that your bobbin is properly placed, you’ll need to thread it through the tension spring for consistent stitches on your zig zag sewing machine.
Follow these 4 simple steps:
- Find the small metal tension spring on the bobbin case (it looks like a tiny curved clip)
- Pull the thread gently through the slot, following the thread path marked on your machine
- You should feel slight resistance as the thread passes under the spring – this is normal
- Verify the thread is properly seated in the spring for correct bobbin tension
This step guarantees your thread flows smoothly without tangling.
Insert Bobbin Case Into Machine
Now you’ll carefully insert the bobbin case into your machine.
Different bobbin case types require slightly different handling, but the correct insertion method remains similar.
Hold the metal latch open while aligning the case notch with the machine’s pin. Gently push until you hear a click.
Check thread flow verification by lightly pulling the thread—it should move with mild resistance.
Proper alignment prevents future compartment closing issues.
Close Bobbin Compartment
The final touch in your bobbin setup is closing the compartment with care.
Press the bobbin door until you hear a satisfying click that signals secure closure.
Your machine’s smooth operation depends on this simple yet vital step.
- Check bobbin orientation before closing to prevent thread snagging
- Apply gentle pressure until you feel proper alignment
- Listen for the click confirming complete attachment
- Verify thread flows freely through tension paths
- Avoid forcing the door to prevent compartment damage
Now your sewing machine bobbin is properly installed and ready for the upper threading!
Thread The Upper Part of The Machine
You’ll need to thread the upper part of your machine correctly to guarantee smooth zig zag stitches without frustrating thread breaks or tangles.
Follow the thread path marked on your machine, guiding the thread through each point from the spool pin to the tension discs and finally through the take-up lever.
Place Thread Spool on Spool Pin
Placing your thread spool correctly sets the foundation for successful zig zag stitching. Start by locating the spool pin on your sewing machine – it’s either horizontal or vertical depending on your model. Position your thread spool so it sits firmly on the pin, ensuring the thread will unwind smoothly from the bottom toward you.
If your machine includes a spool cap, snap it onto the end of the pin to secure the thread in place and prevent wobbling. For horizontal pins, the thread should unwind counterclockwise for ideal feeding.
- Imagine the spool pin as a tiny flagpole waiting for its flag
- Picture the thread unwinding like water flowing down a gentle stream
- Visualize the spool cap as a tiny hat keeping everything in place
- Think of the thread as a tightrope walker needing perfect balance
- See the correctly positioned spool as a lighthouse ready to guide your sewing journey
Alternative spool holders might be needed for specialty threads – check your manual if you’re using unusual spools.
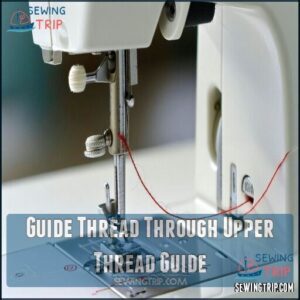
Guide Thread Through Upper Thread Guide
Now that your spool is secured, you’ll need to find the upper thread guide on your zig zag sewing machine. This small metal hook or slot sits near the top of your machine and establishes the correct thread path.
Gently pull your thread up and slip it through this guide. You’ll want to make certain it’s properly seated for smooth threading and tension consistency later on.
Step Action Purpose
Thread Tension Discs
Now that you’ve guided your thread through the upper guide, you’ll encounter the tension discs – the gatekeepers of stitch balance.
Thread must pass between these metal plates for proper stitch formation. Guide your thread in a downward motion, ensuring it slips between the discs with a subtle "click" sound.
- Clean discs regularly to prevent lint buildup affecting tension
- Position presser foot up when threading to open discs properly
- Note thread path markings on your machine for accuracy
- Match tension settings to your fabric weight and thread type
Thread Take-up Lever
Where does the take-up lever fit in your zig zag sewing machine threading journey? This essential cam follower creates the perfect thread slack for proper stitch formation.
- Identify the silver lever that moves up and down as your needle operates
- Verify it’s raised to its ideal position when threading
- Slip your thread through its eye or hook with gentle pressure
- Check for smooth lever timing – jerky movement indicates issues
- Perform regular lever maintenance to prevent thread jams
Threading the take-up lever correctly prevents upper thread guide issues and maintains proper tension. When it’s working right, you’ll never notice it – when it’s wrong, your stitches will tell you immediately, which affects the overall stitch formation and can lead to thread jams.
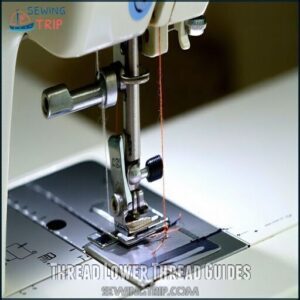
Thread Lower Thread Guides
After completing the take-up lever step, you’ll need to thread the lower thread guides—vital checkpoints that guarantee proper threading for your zig zag sewing machine.
First, locate the small metal or plastic guides near the needle bar. Guide your thread through these lower thread guides with a gentle downward motion. They’ll help direct your thread flow precisely toward the needle.
Check that the thread passes smoothly without catching. Proper threading here prevents tension issues later. Regular guide maintenance keeps your thread path clear.
Wipe these guides occasionally with a soft cloth to remove lint buildup. The spool pin placement is essential for smooth top stitching. When done correctly, your thread should flow effortlessly toward the needle—ready for the final threading step, ensuring a successful and efficient sewing process.
Thread The Needle for Zig Zag Stitching
You’ll need to properly thread your needle for zig zag stitching, which is the final essential step before you can start creating those versatile stitches.
Position your needle at its highest point by turning the handwheel toward you, then guide the thread through the needle bar thread guide and insert it through the eye of the needle from front to back.
Raise Needle to Highest Position
The first vital step in threading your zig zag sewing machine properly is raising the needle to its highest position.
Turn the handwheel toward you (never away!) until the needle reaches its maximum height. This facilitates proper threading ease and prevents tension issues.
- Grasp the handwheel firmly with your dominant hand
- Rotate it clockwise (toward you) until resistance stops
- Check that the take-up lever is fully visible
- Verify needle eye is accessible for threading
- Verify presser foot is raised for better visibility
By following these steps, you ensure that your sewing machine is properly threaded, which is crucial for successful sewing.
Guide Thread Through Needle Bar Thread Guide
With your needle in its highest position, now you’ll tackle the needle bar thread guide. This small metal piece sits just above your needle and plays a huge role in your zig zag sewing machine’s threading process.
Locate the thread guide on your needle bar—it usually looks like a small hook or hole. Pass your thread through it with gentle precision, avoiding any tugging that might affect tension balance impact later.
| Step | What Happens | Common Issues | Solution |
|---|---|---|---|
| Locate guide | Positions thread correctly | Can’t find it | Check manual diagram |
| Insert thread | Creates proper alignment | Thread slips out | Hold with light tension |
| Check path | Ensures smooth flow | Guide alignment issues | Clean with brush |
| Verify threading | Prevents future problems | Thread breakage | Confirm no bends in thread |
Proper threading technique here prevents tension problems when you start sewing those perfect zig zag stitches!
Thread Needle From Front to Back
Now let’s tackle threading your needle from front to back – a critical step for perfect zig zag stitches.
With your thread already guided through the needle bar thread guide, you’re ready to complete this important step:
- Hold your threaded needle with your non-dominant hand.
- Look at your needle eye carefully – notice it has a front and back side.
- Position the thread end about 6 inches long, making it slightly stiff by twisting it.
- Push the thread directly through the needle eye from front to back.
4 Pro Tips for Easy Needle Threading:
- Cut thread ends at an angle for easier insertion
- Use proper lighting when threading dark threads
- Try needle threaders for difficult needle eyes
- Moisten thread ends slightly for finer threads.
Your thread should now pass smoothly through the needle eye, ready for your perfect zig zag stitches!
Pull Thread Through Needle Eye
The final step in threading your zig zag machine is guiding thread through the needle eye.
Holding the thread taut, insert it from front-to-back through the needle eye.
For easier threading, try these tips: trim the thread end at an angle, use threading tools like a needle threader, or hold a magnifying glass nearby.
Different thread type matters—thicker threads need larger needle eye sizes.
Pull 4-6 inches through to prevent unthreading during your sewing machine threading steps.
Set Up Zig Zag Stitch on Your Machine
Now that you’ve threaded your needle, you’ll need to set up the
Locate Stitch Selection Dial
Now that your needle is threaded, you’ll need to find the stitch selection dial to create those perfect zigzag stitches.
On most machines, you’ll find this control in one of these locations:
- Front panel – typically alongside stitch length controls
- Top deck – near the tension adjustment
- Right side – close to the handwheel
- Digital display – on computerized models.
Look for zigzag pattern symbols or numbered settings representing different stitch options.
Choose Zig Zag Stitch Pattern
Now that you’ve located the stitch selection dial, it’s time to pick your zigzag stitch pattern.
Rotate the dial until you find the zigzag symbol, which typically looks like a series of diagonal lines.
Your zig zag sewing machine offers several pattern variations—basic zigzag for hemming, multi-step for stretchy fabrics, or decorative for embellishments.
Consider fabric compatibility when choosing; delicate materials work better with narrower patterns.
For beginners, start with the standard zigzag setting before experimenting with more complex patterns.
You’ll be threading and stitching like a pro in no time!
Adjust Stitch Width
Now that you’ve selected your zig zag stitch pattern, it’s time to fine-tune the width. The stitch width dial controls how far your needle moves from side to side.
Adjust your stitch width based on:
- Fabric type – wider for stretchy fabrics (4-5mm), narrower for delicates (1-2mm)
- Project needs – buttonholes typically need 4-5mm width
- Decorative applications – appliqué works best at 2-3mm
- Thread thickness – thicker threads need wider settings
- Machine capabilities – check your manual for limitations
For enhanced control, consider how adjustable stitch width can improve your project.
Set Stitch Length
Now that you’ve set your width, it’s time to adjust the stitch length for your zig zag pattern.
Find the stitch length dial on your machine, typically marked with numbers from 0-5.
- Choose longer lengths (3-5) for heavier fabrics like denim or canvas
- Select medium settings (2-3) for everyday cotton and polyester
- Use shorter lengths (0.5-1.5) for delicate fabrics requiring dense stitching
Your fabric type determines the ideal stitch density.
Fine-tune Tension Settings
Always test tension settings on scrap fabric to guarantee balanced stitches.
Adjust for smooth stitching using the table below:
| Issue | Cause | Solution |
|---|---|---|
| Loops on top | Loose upper thread tension | Tighten upper tension |
| Loose bottom stitches | Tight upper thread tension | Loosen upper tension |
| Uneven zigzags | Incorrect bobbin tension | Adjust bobbin screw |
Proper tension balance guarantees clean stitch appearance, regardless of fabric type or thread weight, and is essential for achieving smooth stitching and preventing issues like uneven zigzags.
Troubleshoot Common Zig Zag Threading Issues
Threading issues can disrupt your zig zag stitching, but fixing them is straightforward with a few checks.
Understanding common problems like thread breaking or uneven patterns helps you keep your machine running smoothly.
Thread Breaking
Thread breakage can be frustrating, but it’s often caused by simple issues you can fix quickly. Start by checking for tension issues—tight upper tension can snap your thread. Loosen it slightly for smoother stitching.
Next, inspect the needle. A damaged or dull needle can shred thread, so replace it with the correct size for your fabric.
Use high-quality thread to avoid fraying and snags. Cheap thread might save money but often leads to headaches. Finally, focus on machine maintenance. Dust or lint in the thread path or bobbin area can create tension problems.
- Adjust thread tension for balance.
- Replace damaged needles.
- Use quality thread.
- Clean your sewing machine regularly.
Skipped Stitches
Skipped stitches on your zig zag sewing machine? It’s often a sign of tension issues, a dull needle, or incorrect needle threading.
Verify that your needle type matches the fabric choice, and check that the thread quality suits your project. Timing adjustment may also be needed if gaps persist.
Here’s a quick troubleshooting guide:
| Problem | Likely Cause | Solution |
|---|---|---|
| Skipped stitches | Dull needle | Replace the needle |
| Stitch gaps | Machine timing | Service the machine |
| Looping threads | Bobbin tension | Re-thread the bobbin |
Stay proactive to keep your stitches flawless!
Uneven Zig Zag Pattern
Uneven zig zag patterns can throw off your sewing flow, but a few tweaks can fix it.
- Check Tension Imbalance: Adjust tension settings for smooth, even stitches.
- Inspect Needle Type: Replace bent or dull needles; they impact stitch quality.
- Ensure Fabric Stability: Use proper fabric support to avoid shifting.
- Test Stitch Settings: Verify stitch width and length align with your zig zag sewing machine’s setup.
- Clean Feed Dog: Dust buildup can disrupt fabric movement.
These steps will keep your threading on point and your zig zags flawless!
Loose or Tight Tension
Struggling with messy zig zag stitches? It’s likely due to tension settings. Start by checking the upper thread tension knob on your zig zag sewing machine. Adjust it slightly—tighten for loose stitches or loosen for tight ones.
For bobbins, use a small screwdriver to turn the bobbin case screw clockwise (tighten) or counter-clockwise (loosen). Always test adjustments on scrap fabric to confirm proper stitch quality.
If your fabric puckers, reduce tension for both upper and bobbin threads. Incorrect threading can also throw things off, so double-check the thread path. Small tension adjustments, matched to your fabric type and thread weight, will restore balance.
Needle Threading Difficulties
A bent needle or mismatched needle eye size can make threading a nightmare.
First, check if the needle is damaged or unsuitable for your thread type and fabric. Raise the needle to its highest position using the handwheel, ensuring proper needle position for smooth threading.
Lift the presser foot to release tension, preventing thread breakage or snags. Guide the thread steadily through the needle eye, leaving six inches of slack.
Avoid thread fraying by using high-quality thread and inspecting for proper tension adjustment during setup.
Maintain Your Zig Zag Sewing Machine
Keeping your zig zag sewing machine in top shape guarantees smooth stitching and extends its lifespan.
Regular maintenance, like cleaning the bobbin area and oiling moving parts, prevents common issues and keeps your machine running efficiently.
Clean Bobbin Area
Keeping your zig zag sewing machine in top shape starts with tackling lint buildup in the bobbin area.
It’s a simple task that prevents tension issues and thread jams. Here’s how:
- Unplug the machine and remove the needle plate to access the shuttle race and feed dogs.
- Take out the bobbin case and inspect for stuck threads or debris.
- Brush away lint using a soft brush, ensuring the bobbin area is spotless.
To maintain peak performance, it’s important to know how to clean the bobbin case. Regular sewing machine maintenance makes threading smoother and stitches flawless.
Oil Machine Parts
Proper oiling is key to smooth operation and long-lasting performance. Use specialized sewing machine oil—never substitutes like WD-40—for effective lubrication.
Focus on key lubrication points weekly after cleaning lint.
| Lubrication Point | Benefit |
|---|---|
| Needle bar | Prevents squeaking |
| Hook race | Maintains smooth stitching |
| Tension discs | Maintains thread tension |
| Moving gears | Reduces wear and tear |
Apply oil sparingly to avoid fabric stains. Regular oiling frequency prevents rust and maintains consistent sewing machine care. Always wipe excess oil and refer to your manual for sewing machine oiling tips.
Replace Needle Regularly
A fresh sewing machine needle is key to maintaining stitch quality and preventing fabric damage.
Replace your needle every 8-10 hours of sewing time or sooner if you notice skipped stitches or dull tips.
Choose the right needle type—sharp for wovens, ballpoint for knits—and align it properly during needle replacement.
Always thread through the needle eye front to back to avoid threading issues.
Regular needle replacement guarantees smooth operation and protects your machine from unnecessary strain, ensuring a longer lifespan and maintaining the overall sewing machine performance.
Check and Tighten Screws
Once your needle is sorted, it’s time to focus on those screws holding your zigzag sewing machine together. Loose screws can affect threading, tension, and overall performance, often caused by vibration loosening during use.
Regular inspection keeps your machine running smoothly.
- Spot Loose Screws – Check needle plates, bobbin cases, and foot holders for wobbling or gaps.
- Choose Correct Screwdriver Types – Match the driver size to avoid stripping screw heads.
- Tighten Gently – Turn screws clockwise until snug, avoiding overtightening risks.
- Set a Maintenance Routine – Inspect screws monthly to prevent issues from escalating.
A steady hand and proper tools keep your machine tensioned and stitching perfectly!
Store Machine Properly
Place your zigzag sewing machine in a safe location, away from humidity and direct sunlight, to prevent damage.
Use a dust cover to shield it from debris and keep threading smooth. Store it on a stable surface to avoid misalignment.
For long-term storage, control temperature and check the machine regularly. A breathable cover guarantees airflow, protecting parts from rust while maintaining your machine’s performance for future sewing projects, ensuring a smooth sewing experience.
Frequently Asked Questions (FAQs)
How do you thread a zig zag sewing machine?
Start by placing the thread spool on the pin, guide it through the machine’s thread path, including tension discs and take-up lever.
Then thread the needle from front to back, follow your machine’s manual for specifics.
How to use a deluxe zig zag sewing machine?
Balancing precision and creativity, a deluxe zig zag sewing machine lets you adjust stitch width, length, and tension for versatile designs.
Follow the manual, thread carefully, select stitches, and test on scrap fabric for perfection.
How to zigzag stitch on a sewing machine?
Select the zigzag stitch on your machine, set the desired width and length, and position fabric under the presser foot.
Lower the needle, hold threads lightly, and sew, guiding fabric smoothly for even stitches.
How do I adjust the tension on a deluxe zigzag sewing machine?
To adjust tension on your deluxe zigzag machine, turn the tension dial.
For balanced stitches, aim for a setting of
Test on scrap fabric, tweaking slightly if threads loop or pull unevenly, to ensure balanced stitches.
What sets the zig zag stitch apart?
The zig zag stitch stands out because it moves side-to-side, creating a wider, flexible seam.
It’s perfect for stretchy fabrics, reinforcing edges, or decorative designs, offering versatility beyond a standard straight stitch.
How to make a zig zag pattern longer?
Think of stitch length as the heartbeat of your zig zag.
To make the pattern longer, turn the stitch length dial higher.
This increases the space between each zig and zag, elongating the design.
Why is my sewing machine missing stitches on zig zag?
Your sewing machine might miss zig-zag stitches due to a dull needle, incorrect tension, or improper threading.
Verify that the needle matches your fabric, thread tension is balanced, and the machine is correctly threaded, ensuring proper adjustments are made to resolve the issue.
Can all sewing machines do zig zag stitch?
Not all sewing machines can do a zig zag stitch.
Straight-stitch-only models lack the side-to-side needle movement required.
Check your machine’s manual or stitch selector to confirm if zig zag stitching is supported.
How to use a zig zag sewing machine?
Mastering a zig zag sewing machine is like riding a bike—start slow.
Select zig zag stitch, adjust width and length, thread properly, and test on scrap fabric.
Guide fabric steadily for smooth, even stitches.
Can you adjust zig zag stitches on a sewing machine?
You can adjust zig zag stitches by changing the stitch width and length settings on your machine.
Turn the width dial for wider or narrower zig zags, and adjust length for tighter or looser spacing.
Conclusion
Threading a zig zag sewing machine is like following a map—each step leads you closer to success.
With the right tools and a little patience, you’ll master the process in no time.
From winding the bobbin to threading the needle and adjusting settings, every detail matters for smooth stitching.
Practice these steps, troubleshoot issues as they arise, and keep your machine well-maintained.
Soon, threading your zig zag sewing machine will feel like second nature.
Happy sewing!

