This site is supported by our readers. We may earn a commission, at no cost to you, if you purchase through links.
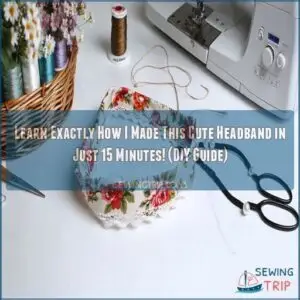
First, pick your fabric—cotton, silk, or even stretchy knit works great. Measure your head with a flexible tape for the perfect fit. Cut a fabric strip based on your measurement, adding a bit for seams.
Sew it into a tube, then turn it inside out (a safety pin helps here). For an elastic headband, slide elastic through the tube, secure the ends, and close it up.
Want to decorate? Add pearls, flowers, or a bow. And that’s it—you’re ready to rock your DIY masterpiece!
Table Of Contents
Key Takeaways
- Pick a comfortable fabric like knit, cotton, or silk, and measure your head for an exact fit.
- Sew the fabric into a tube, add elastic if needed, and secure it for durability and a snug fit.
- Add flair with decorations like pearls, flowers, or bows to create a unique style.
- Use tools like a flexible tape for measuring and sharp scissors for precise cutting to keep everything neat and professional.
Choose Headband Type
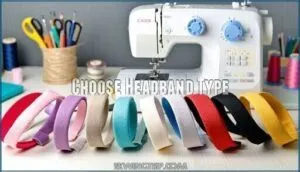
You’ll need to pick the right headband type before getting started, with options including elastic, non-stretchy fabric, knit fabric, or knit with elastic insert.
Your choice will determine how comfortable your headband feels and how well it stays put during your next bad hair day rescue mission.
Elastic Headband
Starting with stretchy elastic, this headband type offers the perfect blend of comfort and functionality.
Stretchy elastic headbands combine unbeatable comfort with a secure fit, making them perfect for active days or quick DIY projects!
You’ll love how it fits snugly without causing headaches! Made with either knit or woven fabric, elastic headbands feature an internal elastic band that creates adjustable sizing for your DIY accessory.
They’re ideal for sports and can be whipped up in just 15 minutes using fabric scraps. Durability testing shows they maintain shape after repeated wear, which is a great aspect of their durability and overall functionality.
Non-Stretchy Fabric Headband
For a non-stretchy fabric headband, you’ll want to choose woven fabrics like cotton, silk, or satin.
This style includes a partial elastic section that helps it stay put during activities, and unlike fully elastic versions, these headbands offer more print options but can be trickier to put over your head.
The fabric choice affects both style and durability concerns, and for proper headband sizing, measure your head circumference and add 1-2 inches for comfortable closure methods.
Knit Fabric Headband
While non-stretchy fabric headbands need elastic to stay put, knit fabric headbands offer comfort through their natural stretch. They’re perfect for everyday wear!
Knit fabric headbands bring effortless comfort with their natural stretch—perfect for all-day wear and your go-to accessory for any occasion!
- They won’t give you headaches like tight elastic bands
- They feel like a gentle hug for your head
- The soft fabric won’t snag your hair
- They’re comfy enough to forget you’re wearing them
- You can make them in just minutes!
When selecting knit fabric, look for options with spandex content for better recovery. Jersey works wonderfully for this project!
Knit Fabric With Elastic Headband
Combine knit fabric with elastic for the perfect headband that won’t slip during workouts. This hybrid design offers superior comfort while maintaining a secure fit.
The Spandex percentage affects how tight your headband feels—aim for 2-10% for this 15-minute craft. Proper headband sizing guarantees comfort factors remain ideal throughout wear.
| Feature | Knit Only | Knit+Elastic | Elastic Only |
|---|---|---|---|
| Comfort | High | Medium-High | Low |
| Stability | Low | High | High |
| Durability | Medium | High | Medium |
This design is ideal for workouts, as it provides a secure fit and superior comfort, making it perfect for active individuals.
Select Fabric Material
You’ll want to pick a fabric that’s both pretty and practical for your headband, with cotton, silk, or satin being your best options.
Cotton offers durability for everyday wear, while silk and satin give your headband that special touch when you’re feeling fancy.
Cotton Fabric
Cotton is your go-to fabric for a 15-minute headband DIY! It’s breathable, easy to work with, and perfect for sewing beginners.
You’ll find cotton in various qualities:
- Quilting cotton with fun prints stays crisp
- Cotton jersey stretches for comfort
- Organic cotton feels gentle against skin
- Cotton blends with spandex offer recovery
Cotton’s durability means your headband will last through countless wears, and it’s washable too! Many styles are available if you want to buy cotton headbands online.
Silk Fabric
While cotton offers comfort, silk brings luxury to your 15-minute headband project.
This premium fabric glides effortlessly through your hair, preventing breakage while adding elegant shine.
For your silk fabric headband DIY, choose from various silk weave variations – from flowy chiffon to more structured options.
Silk colorfastness is excellent, but always test-wash a sample first.
Mulberry silk options provide a luxurious feel.
When sourcing silk fabric, look for 25 Momme Mulberry silk for superior durability and a truly professional-looking quick headband project.
Satin Fabric
Satin is perfect for your 15-minute headband! Its smooth Satin Weaves and glossy Satin Sheen add a touch of elegance.
Satin Colors come in stunning varieties, and the Satin Durability guarantees your fabric headband DIY lasts.
Affordable Satin Cost also keeps this quick headband project budget-friendly. It’s the ideal material for a stylish, easy sewing project!
Its unique structure also makes it remarkably wrinkle-resistant.
Measure Head Circumference
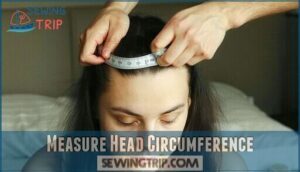
To get the perfect fit, grab a flexible measuring tape and wrap it snugly around your head where the headband will sit.
If you’re making one for a child, follow the same steps but be gentle to avoid tickling or squirming!
Using Flexible Measuring Tape
Grab a flexible measuring tape—it’s your secret weapon for accuracy. Wrap it snugly around your head, at the spot where the headband will sit. Don’t pull too tight, though! Make certain you’re reading the increments clearly for an accurate fit.
Many suppliers offer a variety of options for this tool.
- Use a soft, non-rigid tape for comfort.
- Position tape evenly across your forehead.
- Keep it level all around.
- Note the measurement for easy headband craft success.
Measuring for Kids
Measuring head circumference for kids starts with a soft measuring tape. Wrap it gently around the largest part of the child’s head for accuracy. Measure three times and average the results to account for growth considerations.
To get the best fit, it’s vital to use accurate body measurements.
Use the table below for sizing guidance.
| Age Group | Head Circumference | Headband Size (Inches) | Comfort Tips |
|---|---|---|---|
| Baby (0-1 year) | 16-18 inches | 15 inches | Opt for stretchy fabric |
| Toddler (2-4 years) | 18-20 inches | 17 inches | Lightweight materials |
| Kid (5-8 years) | 20-22 inches | 19 inches | Soft elastic backing |
| Preteen (9-12 years) | 21-23 inches | 20 inches | Use adjustable options |
Cut Fabric Rectangles
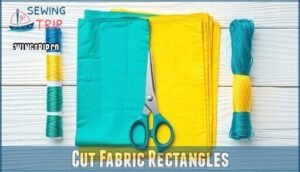
Grab your fabric and cut two rectangles to the exact sizes you need—this step sets the foundation for your headband.
Precise cuts make sewing and assembly easier, so don’t rush it!
Sewing Rectangles Together
Start by aligning the fabric rectangles with right sides facing each other.
Use pins to keep everything steady. Sew along the edges, leaving a ½ inch seam allowance for a clean finish.
Focus on straight stitching techniques—uneven seams can ruin your 15-minute headband! Don’t forget corner finishing to prevent fraying.
This step sets up your easy sewing project perfectly!
Turning Fabric Inside Out
Next, turn the fabric inside out to hide raw edges and achieve a smooth finish. This step helps with seam concealment and shape retention, ensuring fabric integrity.
Use a pencil or tool for tight corners to avoid puckering.
- Tug gently to prevent damage while flipping fabric.
- Smooth seams for a consistent finish.
- Check for any missed stitching before continuing to ensure complete concealment of raw edges.
Create Elastic Casing
Now it’s time to make the elastic casing, which keeps your headband snug and secure.
With a simple fold and a quick stitch, you’ll have it ready in no time.
Inserting Elastic Band
Slip your elastic band into the casing, guiding it through gently with a safety pin.
Keep an eye on the elastic length to match your headband sizing. The fabric bunching is normal—it lets the band stretch later.
Adjust elastic tension slowly, ensuring it’s comfortable for your head circumference. Consider the elastic width plus 1/4 inch when determining the casing size.
Proper elastic insertion guarantees perfect fit without compromising the casing stitching.
Securing Elastic
Keep your elastic band from slipping by overlapping its ends by about an inch.
Use a strong elastic stitch to secure it—this adds durability and prevents slippage later.
The casing size impacts how the elastic sits, so be sure it’s snug but not tight. If needed, try alternative elastic materials to better suit your headband sizing and head circumference!
Add Decorative Elements
Now it’s time to make your headband truly stand out by adding decorative elements.
Use pearls, flowers, or both to create a unique design that suits your style.
While keeping everything securely in place with a hot glue gun.
Gluing Pearls
Let’s add some sparkle with pearls! Use a hot glue gun for precise pearl placement on your headband material.
For a polished, balanced design, follow these steps:
- Dot glue slightly larger than each pearl.
- Press pearls onto each spot gently.
- Work section by section, letting glue dry.
- Verify even spacing for a polished look.
Your handmade accessory will shine!
Attaching Flowers
Flowers turn any headband into an eye-catcher. Curve wired flowers to fit, securing them by wrapping velvet-covered wires tightly around the band. Use a hot glue gun for flowers without wires.
Add glow with branch combinations. Balance your floral arrangement, alternating colors for diversity. Fill gaps creatively to finish your floral design beautifully.
| Flower Placement | Glue Types | Color Diversity |
|---|---|---|
| Center | Hot Glue Gun | Bright & Bold |
| Evenly Spaced | Floral Tape | Pastel & Subtle |
| Layers | Dual Adhesive | Monochromatic |
| Clusters | Craft Glue | Neutral & Earthy |
| Balanced Ends | Tacky Glue | Vibrant Combinations |
To ensure a floral design that is visually appealing, consider the placement and color diversity of the flowers. This will help create a balanced and beautiful arrangement that catches the eye.
Make Bow Tie Headband
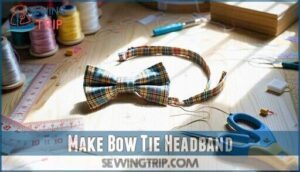
You’re about to create a playful bow tie headband that’s simple and stylish.
With just a few fabric pieces and quick stitches, you’ll have a fun accessory ready in no time!
Cutting Fabric Pieces
Start by laying your fabric scraps flat and checking the fabric grain for alignment.
Place your pattern for the bow tie headband securely, ensuring minimal fabric waste. Use sharp cutting tools for clean fabric cutting.
Remember to leave a small seam allowance for sewing later. Precise fabric pieces now save frustration later; it’s a quick 15-minute craft!
Sewing Bow Tie Piece
After prepping your fabric scraps, sew the bow tie piece with the right sides facing.
Don’t skip adding interfacing—it’s the unsung hero for keeping shape.
If you’re using a sewing machine, try topstitching techniques for a sharp look.
Experiment with bow-tie variations by tweaking pattern adjustments.
Fancy attachment methods let you secure this handmade item beautifully and uniquely.
Sew Headband Pieces
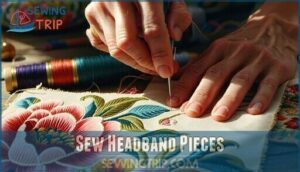
You’ll bring your headband to life by sewing the fabric pieces together neatly and securely.
Whether you’re using a sewing machine or stitching by hand, focus on steady, even seams for a polished finish.
Using Sewing Machine
Using a sewing machine for your 15-minute headband saves time and creates even stitches. Choose the right needle and adjust thread tension for smooth sewing.
Set a generous seam allowance to avoid fraying. Keep your machine maintained for flawless performance.
- Test different stitch types
- Align fabric edges carefully
- Use quality thread
- Follow this sewing tutorial closely
- Master sewing for beginners!
Hand Sewing Options
Hand sewing offers a relaxing way to finish your headband.
Use simple sewing techniques like a narrow zigzag or stretch stitch.
Carefully fold the fabric, pin layers together, and stitch along edges.
Choose a sharp needle and sturdy thread for smooth results.
For beginners, sewing this way builds confidence while exploring stitch types, fabric folding, and mending techniques beautifully.
Consider using the backstitch for seams to create a stronger hold.
Add Finishing Touches
Now that your headband is coming together, it’s time to make it look polished.
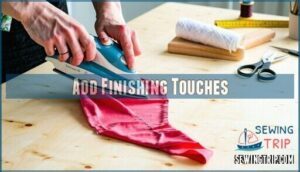
Iron the seams flat and trim any loose threads to give your creation a clean, professional finish.
Ironing Seams
To give your 15-minute headband a polished look, grab your iron and press the seams open.
This seam pressing step keeps everything flat, prevents stretching, and makes sewing easier later.
Use gentle ironing techniques based on your fabric type—cotton, silk, or knit.
Proper seam finishes guarantee your headband looks store-bought, even if it’s a simple sewing project!
Trimming Excess Thread
Once your 15-minute headband is nearly complete, trim excess thread neatly for a polished finish. It’s like adding the final brushstroke to a masterpiece.
Use sharp thread trimming tools to guarantee clean cuts and prevent fraying.
Follow these steps:
- Snip threads close to knots.
- Check for loose ends on seams.
- Secure hidden knots tightly.
- Neaten seams for a professional look.
By following these simple steps, you can ensure your headband has a clean and finished appearance.
Customize Headband Style
You can make your headband truly unique by switching up fabrics or adding fun embellishments like pearls and flowers.
Don’t be afraid to mix materials or experiment with bold colors to match your style!
Using Different Fabrics
Choosing the right fabric transforms a simple headband into a chic accessory.
Go bold with vibrant color combinations or mix textures like cotton and satin for contrast.
Seasonal fabrics, like lighter options in summer, keep it versatile.
Use fabric scraps creatively—every piece has potential!
For patterns, match the fabric’s properties to its stretch.
Enjoy fabric crafting freedom!
Adding Embellishments
A dash of creativity brings life to your handmade accessories!
Use a hot glue gun to attach pearls evenly for a polished finish.
Mix flower varieties and try branch integration for texture.
Achieve a vintage look with only flowers or a natural style using branches.
Personalized headbands shine with thoughtful pearl placement and balanced designs, creating standout pieces!
For structured headbands, consider fusible interfacing application to maintain shape and ensure a polished finish.
Frequently Asked Questions (FAQs)
What kind of fabric do you use to make headbands?
Use stretchy knit fabric with a bit of spandex for comfort and flexibility.
Cotton blends work great for breathability, while silk or satin add elegance.
Choose based on your style or the occasion!
How to ensure durable elastic placement?
Secure durable elastic by stitching it multiple times at both ends—think of it as double-knotting for fabric.
Use a zigzag or stretch stitch, ensuring the elastic stays firmly anchored through repeated wear.
What tools help create precise fabric cuts?
Imagine cutting fabric perfectly every time—tools like rotary cutters, fabric scissors, and clear rulers make it happen.
Add a cutting mat to protect surfaces and guarantee clean lines.
It’s precision made simple!
How to prevent hot glue burns during decoration?
Keep a bowl of cold water nearby for quick cooling if glue touches your skin.
Hold the headband with tweezers or wear finger protectors.
Work carefully, and don’t rush—precision saves your fingers!
What techniques keep materials securely attached?
Worried about things falling apart?
Anchor flowers and pearls with a dab of hot glue, wrapping wires tightly.
For extra hold, press firmly as the glue sets.
Layer carefully to avoid crowding.
Problem solved!
How to achieve symmetry in headband design?
Start by marking the center of the headband.
Decorate outward evenly on both sides. Alternate flowers, branches, or pearls for balance.
Step back often to check symmetry and tweak for a naturally appealing look.
Conclusion
Did you know that DIY crafting projects like this can reduce stress by up to 68%?
Now you’ve learned exactly how I made a headband in 15 minutes, so grab your fabric and start creating!
With just a few simple steps—measuring, sewing, and adding elastic or decorations—you’ll have a custom accessory ready to wear.
Whether you prefer pearls, bows, or bold fabrics, the possibilities are endless.
Have fun rocking your handmade masterpiece and impressing everyone!
- https://www.joann.com/pop-teal-multi-floral-knit-fabric/17402876.html
- https://craftsondisplay.com/maze-generator/
- https://www.bridalfabrics.com/collections/satin-fabrics
- https://www.onlinefabricstore.com/product-group-satin.aspx?srsltid=AfmBOorP2Dic1APEpPPpBgEBoaEMyrPpS-IQbCYP9ehKoledhRhfDVC7
- https://zelouffabrics.com/collections/satin-1?srsltid=AfmBOor5FGYGyBbMbLCh1pzGl3xX5wGVvSN1NvT8Hl9rFSRGJGobMjGR

