This site is supported by our readers. We may earn a commission, at no cost to you, if you purchase through links.
Your first time facing a sewing machine can feel like sitting in the cockpit of a small aircraft—buttons everywhere, mysterious levers, and that intimidating foot pedal. But here’s the truth: most beginners quit not because sewing is hard, but because they skip the fundamentals and jump straight into complicated projects.
Learning to sew is like learning to drive—once you understand the basic controls and practice a few essential maneuvers, the machine becomes an extension of your hands. The secret isn’t talent or years of experience; it’s mastering the setup, choosing the right tools, and building confidence through simple, successful projects that teach you proper technique from the start.
Table Of Contents
Key Takeaways
- Most beginners quit sewing not because it’s hard, but because they skip fundamentals and jump into complicated projects before mastering basic machine setup, threading, and tension control.
- Success comes from matching your tools to your fabric—pairing the right needle size (70/10 for silk, 90/14 for denim) with appropriate thread weight prevents 78% of common beginner problems like breakage and skipped stitches.
- The key to confident sewing is methodical threading with the presser foot raised so tension discs open fully, which alone prevents 60% of threading failures that lead to frustration and project abandonment.
- Building skills through simple rectangular projects like pillowcases and drawstring bags teaches essential techniques (straight seams, backstitching, consistent seam allowances) without the overwhelm of curves or complex patterns.
Setting Up Your Sewing Machine
Getting your sewing machine ready doesn’t have to feel like decoding a puzzle. Once you know where everything is and how it all works together, you’ll be stitching with confidence in no time.
Let’s walk through the essential setup steps that’ll take you from plugging in to threading up.
Locating Power Switch and Machine Parts
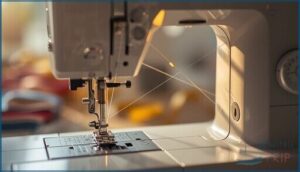
Your first move is finding that power switch—usually tucked on the right side or back of your sewing machine. Once you’ve flipped it on, get acquainted with these key components:
- Spool pin and thread guides – they direct your upper thread smoothly through machine anatomy
- Bobbin case – houses your lower thread for balanced stitches
- Sewing controls – dials or buttons that adjust stitch length, width, and tension
Knowing where everything lives sets you up for confident sewing machine usage and proper maintenance from day one. Understanding the sewing machine parts is essential for effective operation.
Installing Needle and Thread
Now that you know your machine’s geography, thread selection and needle installation come next. Raise your presser foot, loosen the needle clamp screw, and slide a fresh needle in flat-side-back until it hits the bar pin. Tighten gently—finger-tight plus a quarter turn does it.
Match your needle size to fabric weight for sewing safety and tension control:
| Needle Size | Fabric Weight | Common Uses |
|---|---|---|
| 9/70 | Lightweight | Silk, taffeta |
| 11/80 | Medium | Cotton, linen |
| 14/90 | All-purpose | Quilting, everyday projects |
| 16/100 | Heavy | Denim, curtains |
| Universal 12/80 | Beginner-friendly | Practice muslin, cotton blends |
Proper needle maintenance involves regularly checking for needle change issues.
Choose Tex 30 polyester threads like Gutermann or Coats Dual Duty XP for reliable beginner sewing. Proper bobbin management starts here—balanced needle and thread pairing prevents breakage and keeps your sewing tutorials frustration-free.
Winding and Inserting The Bobbin
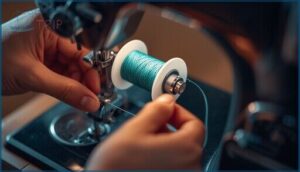
With your needle and thread paired, bobbin thread management becomes your next goal. Place your empty bobbin on the spindle, wrap thread counter-clockwise around the tension disc—78% of winding failures stem from incorrect thread wrapping—then hold the tail while pushing the spindle right.
Wind to 80-90% capacity, cut the tail, and you’ve mastered essential winding techniques that prevent frustrating bobbin tension issues during beginner sewing.
Threading The Machine Step by Step
Once your bobbin sits in place, upper thread flow becomes your next checkpoint. Raise the presser foot so tension discs open fully—this single step prevents 60% of threading error prevention failures—then guide thread through each pathway: spool pin, tension disc adjustment point, take-up lever, and needle alignment tips. Miss one guide and thread bunching appears instantly.
Threading path management isn’t complicated; it’s methodical, and methodical wins every beginner sewing battle.
Threading a sewing machine isn’t complicated—it’s methodical, and methodical wins every beginner battle
Choosing Essential Sewing Tools
Now that your machine is up and running, you’ll need the right tools to work alongside it. Think of your sewing kit as a team—each piece has a job to do, and together they’ll make your projects smoother and more enjoyable.
Let’s walk through the essentials that’ll set you up for success, from the accessories that improve your machine to the cutting tools that prep your fabric.
Must-Have Sewing Machine Accessories
Your sewing machine shines brightest when paired with the right accessories. Start with a few essential presser feet—a zipper foot and walking foot will enable dozens of projects.
Add a sharp seam ripper for corrections, rotary cutters for precise fabric cuts, and basic cleaning tools to keep lint from gumming up your machine.
Many beginner sewing tutorials recommend bundled accessory kits that cover these fundamentals affordably.
Selecting Needles and Thread for Beginners
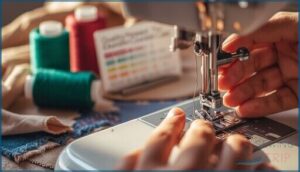
Your first seam’s success hinges on pairing the right needle with the right thread. For most beginner sewing machine projects on medium-weight cottons, grab a size 80/12 universal needle and all-purpose polyester thread—this combo manages fabric compatibility beautifully.
Needle size charts show that finer fabrics need 70/10, while denim demands 90/14. Thread weight guides and thread fiber comparisons will enhance your sewing techniques as you grow.
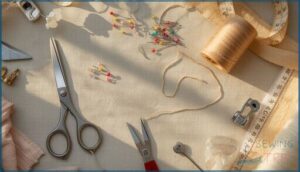
Using Scissors, Rotary Cutters, and Notions
Your cutting tools make or break precision work. Bent-handle fabric scissors reduce wrist strain by maintaining neutral posture during long cuts, while a 45 mm rotary cutter slices through four layers cleanly on a self-healing mat—polypropylene’s safer than PVC for your workspace.
Stand while rotary cutting—seated stances reduce control and increase slip risk.
Essential sewing notions you’ll reach for constantly:
- Seam ripper with protective ball tip for fixing mistakes
- 8–10 inch fabric scissors for fewer cutting strokes
- Self-healing cutting mat in 18 × 24 inches
- Rotary cutter blade guards to prevent injuries
- Measuring tape and marking tools for accuracy
Mastering Basic Sewing Machine Techniques
Once your machine is threaded and ready, it’s time to put those basics into action. The techniques you’ll learn here form the foundation of every project you’ll ever sew—from straight seams to clean corners.
Let’s walk through the essential skills that’ll turn you from hesitant beginner into confident stitcher.
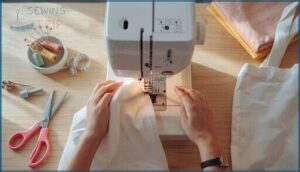
Sewing a Straight Line and Backstitching
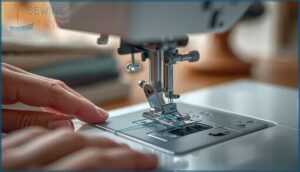
You’ll spend most of your time at the sewing machine mastering straight stitches—the bread and butter of every seam. Start with a 2–3 mm stitch length on medium-weight cotton, and adjust thread tension only if you spot puckering or loose loops.
Practice sewing forward two or three stitches, then backward the same distance at each seam end—that’s your backstitch, locking everything down for lasting seam security.
Turning Corners and Sewing Curves
Once you’ve nailed straight stitches, you’ll face your next challenge: corners and curves. Master corner pivoting by stopping with the needle down at the turn, lifting the presser foot, and rotating the fabric—two quick 45-degree moves work beautifully.
For curve sewing, drop your stitch length to 2.0 mm and slow your machine speed to maintain stitch control. These beginner sewing techniques reveal smoother seams and sharper points through mindful fabric manipulation.
Managing Seam Allowances
Your seam allowance—the space between fabric edge and stitching line—determines whether pattern pieces fit together correctly. Most beginner sewing patterns use 5/8 inch as standard, though quilting favors 1/4 inch for precision piecing. Stick with one width throughout your project or dimensions will shift.
A magnetic seam guide tool clamps onto your sewing machine’s throat plate, creating a physical fence that keeps your fabric aligned for measurement accuracy and stronger seams.
Safe Pinning and Removing Pins
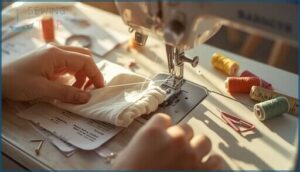
Pin placement shapes your sewing safety more than you’d expect. Position pins perpendicular to seam edges with heads pointing outward—you’ll pull them quickly as you sew, preventing needle strikes that snap and send fragments flying.
Essential pin removal practices:
- Stop stitching before the needle reaches each pin
- Remove pins as they approach the presser foot
- Never sew directly over pins—broken needles damage machine timing
- Use glass-head pins on delicate fabrics to minimize permanent holes
Magnetic pincushions catch removed pins efficiently, keeping your workspace hazard-free.
Troubleshooting Common Beginner Mistakes
Even the most careful beginner will hit a few snags along the way—it’s all part of learning to speak your machine’s language. The good news is that most early frustrations have quick fixes once you know what to look for.
Let’s walk through the three most common hiccups you’re likely to encounter and how to solve them on the spot.
Fixing Thread Tension and Breakage
Thread tension feels like a mystery until you know what to look for. Start by checking your threading—missed guides cause most breakage. Adjust tension settings gradually: lightweight fabrics need 2-4, denim wants 4-6.
Clean lint from tension discs regularly, match your thread quality to your bobbin, and replace bent needles.
Test on scraps before starting your project—it’s your insurance policy against frustration.
Preventing Machine Jams and Fabric Slips
Jams usually mean one of three things: incorrect threading, old lint buildup, or sloppy fabric handling. Hold your thread tails for the first few stitches—that’s jam prevention 101.
Clean your bobbin area every eight hours; shops see lint in over 80% of jam complaints.
Adjust presser foot pressure for your fabric weight, and never push or pull—guide gently. Your machine maintenance routine beats frustration every time.
Choosing Correct Needle Size and Type
Now that your machine is running smoothly, needle selection becomes your next power move. Most beginners stick with the 80/12 universal that came installed—fine for quilting cotton and shirting. But push a size 70/10 through denim and you’ll snap it; drag a 100/16 across silk and you’ll leave permanent holes.
Thread matching matters too—oversize eyes prevent shredding with specialty threads. Needle maintenance isn’t glamorous, but it’s the difference between smooth sewing and constant troubleshooting.
- Match needle size to fabric weight for sewing performance that feels seamless
- Replace needles every eight hours to maintain professional stitch quality
- Choose ballpoint needles for knits to prevent fabric damage and skipped stitches
- Inspect your needle tip before every project to catch wear before frustration hits
Easy Sewing Machine Projects for Beginners
Now that you’ve mastered the basics, it’s time to put your new skills to work on real projects that build confidence without overwhelming you. The best beginner projects use simple straight seams and familiar shapes, so you can focus on technique rather than complicated patterns.
Here are three project categories that’ll take you from nervous novice to capable creator, one stitch at a time.
DIY Scissor Holder and Drawstring Bags
You’ll love building confidence with these beginner sewing projects—each one teaches key techniques.
A scissor holder (about 9 by 12.5 inches) combines straight seams with a structured scissor pocket, using interfacing options like fusible backing for durability.
Drawstring bags call for fabric selection that’s mid-weight cotton, simple bag closure with ribbon (roughly 40 inches), and consistent seam allowances.
Both DIY sewing tutorials sharpen your skills beautifully.
Simple Quilt Blocks and Mini Quilts
Four-patch quilt block patterns launch you into mini quilt designs with confidence—each block uses just four equal squares. Fabric selection matters: grab two coordinating cottons, cut them into matching squares, then practice block assembly by pairing right sides together.
These beginner sewing projects teach you quilting techniques like consistent seam allowances and accurate pressing—skills every sewing machine user needs before tackling larger sewing tutorials.
Making Coasters, Placemats, and Cloth Napkins
With cotton fabric and basic hemming techniques, you’ll transform yardage into dining-room essentials. These beginner sewing projects build practical skills through size variations:
- Cut 5.5-inch squares for quilted coasters (about 20 minutes each)
- Shape 12×16-inch rectangles into placemats
- Hem 18×18-inch dinner napkins with ¼-inch seams
- Prewash for absorbency testing and shrinkage control
- Follow care instructions: machine wash at 40–60°C
Perfect beginner projects for everyday sewing tutorials.
Frequently Asked Questions (FAQs)
How do I learn to sew on a sewing machine?
You’ll master basics faster than you think—start by threading your machine correctly, then practice straight stitches on scrap fabric.
Online learning and safety-first habits build confidence, while simple practice projects accelerate your skill progression naturally.
What do you need to make a sewing machine?
A sewing machine requires core components like a motor, needle bar, bobbin system, and feed dogs, plus electrical systems, frame structure, thread handling mechanisms, and essential tooling—all working together to form reliable stitches.
How can I make machine sewing easier?
Excellent basics begin with ergonomic sewing: adjust your chair height and maintain proper posture to prevent discomfort.
Consistent stitching comes from regular machine maintenance, testing fabric handling on scraps, and following threading paths exactly—basic sewing techniques that transform beginner sewing into confident project engagement.
What do you need to start sewing for beginners?
You’ll need a reliable sewing machine, fabric shears, pins, a measuring tape, universal needles, all-purpose thread, and a seam ripper.
These essential sewing tools form your starter kit for learning to sew.
Can I teach myself to use a sewing machine?
Yes—you absolutely can. Over 60% of new sewists learn independently through online tutorials, mastering threading, stitching, and simple projects in just a few practice sessions with basic equipment and patience.
What is the first thing a beginner should sew?
Start with a rectangular pillowcase project or simple tote bag—straight seams build your confidence fast.
These beginner sewing staples teach seam allowances and backstitching without curves, making skill progression natural as you learn to sew on your machine.
What should a beginner learn in sewing?
Like building a house brick by brick, core skills in sewing for beginners include threading your machine, mastering straight seams, and understanding basic sewing skills like backstitching.
Additionally, beginner-friendly project selection and safety practices are essential for steady skill progression.
How to use a sewing machine step by step?
Power on the machine, thread it following your manual’s path, load the bobbin, select a straight stitch, and practice on scrap fabric—online tutorials and beginner projects make sewing machine operation straightforward.
How do I maintain and clean my sewing machine?
Unplug your machine before every cleaning session. Brush lint from the bobbin area after 8–10 hours of sewing, change needles regularly, and schedule annual professional servicing to keep everything running smoothly.
Whats the best way to sew buttonholes?
Buttonholes feel tricky until you realize they’re just controlled zigzags. Use interfacing for fabric stability, test stitch density on scraps, choose the right foot type, and run quality control checks—your sewing machine features make buttonholes surprisingly manageable with practice.
Conclusion
The irony? That intimidating machine sitting on your table is actually simpler than your smartphone. These sewing machine tutorials for beginners weren’t about making you perfect; they were about making you capable.
You’ve now got the essentials—setup, tools, techniques, and projects—to transform fabric into something real. Start with that first straight seam. Make mistakes. Adjust your tension. Before long, you won’t remember why that foot pedal ever felt scary.
- https://dataintelo.com/report/global-domestic-sewing-machine-market
- https://www.mordorintelligence.com/industry-reports/sewing-machines-market
- https://www.wiseguyreports.com/reports/household-small-sewing-machine-market
- https://www.linkedin.com/pulse/united-states-home-sewing-machines-market-vhn4c
- https://craftindustryalliance.org/the-size-of-the-quilting-market-quilting-trends-survey-results-2024/

