This site is supported by our readers. We may earn a commission, at no cost to you, if you purchase through links.
Pick a simple pattern—think of it as your sewing appetizer—and pair it with a friendly fabric like cotton that won’t slip away faster than a cat in a bath.
Equip your space with sharp scissors and a measuring tape—tools that make you feel like a crafting ninja! As you stitch, remember: even a wonky seam teaches you something new.
Curious about perfecting those professional finishes? There’s more to discover as you sew on!
Table Of Contents
- Key Takeaways
- Getting Started With Dressmaking
- Selecting The Perfect Pattern for Your Dress
- Preparing Your Fabric and Pattern
- Basic Sewing Techniques for Dressmaking
- Constructing The Bodice of Your Dress
- Adding a Skirt to Your Dress
- Finishing Your Dress With Professional Touches
- Troubleshooting Common Sewing Mistakes
- Taking Your Dressmaking Skills to The Next Level
- Showcasing Your Finished Dress and Future Projects
- Frequently Asked Questions (FAQs)
- Conclusion
Key Takeaways
- Start with the basics by learning to thread your machine and master the essential stitches, such as straight stitching, backstitching, and sewing curves.
- Equip your workspace with sharp fabric shears, assorted needles, and a reliable measuring tape for precision and efficiency.
- Choose the right sewing machine features that fit your projects and budget, ensuring regular maintenance for smooth operation.
- Practice creating and finishing different dress components, including sewing darts, attaching sleeves, and perfecting necklines for a professional look.
Getting Started With Dressmaking
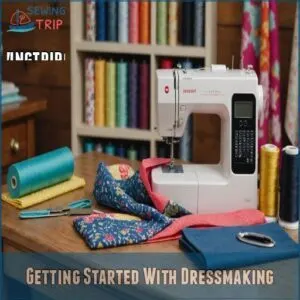
To kick off your dressmaking adventure, you’ll need to choose a sewing machine that’s just right for your crafting needs.
You’ll also need to gather essential tools and notions.
And set up a workspace that won’t make you trip over the ironing board.
It’s like finding the perfect dance partner; once everything’s in place, you’re ready to spin those beautiful fabrics into stunning outfits!
Choosing The Right Sewing Machine
When diving into dressmaking, picking the right sewing machine can feel like choosing a dance partner.
Focus on sewing machine features that suit your projects.
With so many options, consider your budget and explore brand recommendations.
Remember, regular sewing machine maintenance keeps it running smoothly, just like a reliable friend.
Your perfect sewing machine for dressmaking, such as a vintage Dressmaker model with all-metal construction features, is out there waiting!
Essential Tools and Notions for Dressmaking
Starting with dressmaking? You’re in for a creative journey!
Equip yourself with sharp fabric shears, assorted sewing machine needles, and reliable measuring tape.
These tools will help you create accurate measurements and markings on your fabric, using tools like flexible measuring tapes.
Pins and threads are your sidekicks, ensuring everything stays put.
When selecting a sewing machine, consider factors like user-friendly stitch selection, adjustable foot pressure, and durability through customer reviews from brands like Brother sewing machines. Start exploring sewing patterns for beginner sewing, and check out sewing machine tutorials.
These sewing tools will turn your project ideas into reality, one stitch at a time!
Setting Up Your Workspace for Efficient Sewing
Imagine your sewing machine as the heart of your workspace.
Placing it at a comfortable height boosts efficiency and minimizes strain.
Good lighting is essential—natural light if possible.
Tidy storage solutions keep fabrics and tools at hand, reducing clutter and stress.
Mastering these workspace organization tips, including understanding the sewing machine parts and their functions like the power switch and thread tension guide, makes threading a sewing machine more enjoyable, transforming dressmaking into a delightful experience!
Selecting The Perfect Pattern for Your Dress
Choosing the right pattern is half the battle, so let’s find one that fits you perfectly!
Consider your skill level and the fabric you’ve got in mind – you wouldn’t want to tackle a ball gown if you’re just starting out, right?
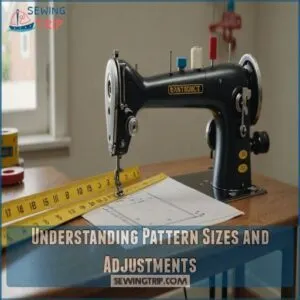
Understanding Pattern Sizes and Adjustments
Get a handle on pattern adjustments by understanding your body measurements and fitting issues.
Simplify size conversions to make pattern drafting a breeze.
With sewing patterns for beginners, you can master pattern adaptation using simple sewing techniques.
A handy sewing guide keeps you on track, ensuring your dressmaking journey is smooth and enjoyable—just like chatting over coffee with a friend!
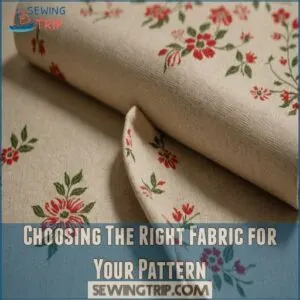
Choosing The Right Fabric for Your Pattern
Choosing the right fabric for your pattern can feel like selecting ice cream flavors on a hot day—exciting but tricky!
When deciding, consider the recommended fabric type from your sewing pattern and what to ask when choosing fabric.
Consider fabric weight and drape.
Delicate silk fabric screams elegance, while a sturdy knit fabric offers comfort.
Mind your budget too.
Match the fabric texture and print with your dressmaking patterns.
Get started, sewing for beginners can be thrilling!
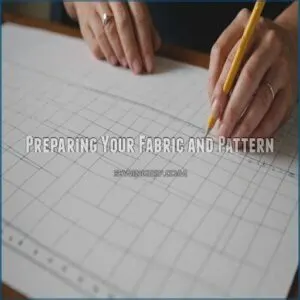
Preparing Your Fabric and Pattern
Before you can start sewing, you’ll need to prepare your fabric and pattern just right, or you might end up with a skirt that resembles a lopsided tent!
First things first, make sure to cut your fabric with precision.
Trace your pattern pieces carefully.
Transfer those markings like they’re secret treasure maps guiding you to sewing success.
Cutting and Preparing Fabric for Sewing
Before you create your dress masterpiece, get cozy with your fabric.
Start by preparing it; wash and iron to pre-shrink.
Make friends with the grain lines, ensuring they’re lined up straight, or your dress might sashay sideways!
Gather your cutting tools and layout the pattern carefully.
This prep work sets the stage for worry-free dressmaking.
Enjoy!
Tracing and Cutting Out Pattern Pieces
Tracing your pattern pieces onto fabric is like outlining your dress’s future.
Keep your fabric types in mind and maintain measuring accuracy.
Use quality cutting tools to guarantee clean edges.
Creativity shines as you choose a pattern layout.
Marking techniques guide you, adding precision to your dressmaking.
Remember, perfecting these steps builds the foundation for stunning creations.
- Lay out fabric flat.
- Position pattern with precision.
- Use weights or pins.
- Trace using chalk or pencils.
- Cut slowly for accuracy.
Transferring Pattern Markings to Fabric
Grab your tailor’s chalk or favorite marking tool.
It’s about transferring those essential pattern markings onto your fabric.
Using precise pin placement guarantees accuracy, even with tricky fabric types.
This step might seem routine, but it’s a game-changer in dressmaking, as mastering how to sew patterns can make the entire process smoother.
You’ll notice how smoother sewing projects become, boosting your sewing skills with confidence.
Who knew chalk could be so transformative?
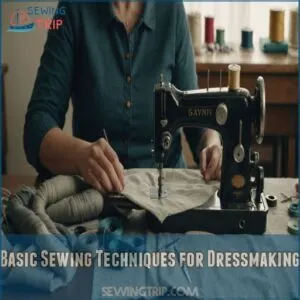
Basic Sewing Techniques for Dressmaking
Ready to tackle some basic sewing techniques?
We’ll cover threading your machine, mastering straight stitches and backstitching, and even conquering those tricky curves—it’s easier than you think, and soon you’ll be sewing like a pro (or at least, a very confident beginner!).
Threading and Operating Your Sewing Machine
You’ve got your fabric prepped, ready to tame the sewing beast, a.k.a. your machine.
Start by threading it with confidence.
Check the needle selection and bobbin winding while you’re at it—it’s all in the small details.
With tension adjustments, you’ll avoid common troubleshooting problems, making sewing smoother.
Follow these easy steps to master your sewing machine and start creating beautiful dresses, including setting up your machine by locating the power switch and spool pin, and consulting a beginner’s guide. Embrace these sewing machine tutorials for a masterful approach!
Straight Stitching and Backstitching
Ever wondered how to nail straight stitching and backstitching? Well, it’s all about control and precision. Adjust your machine settings and don’t forget stitch tension!
- Choose the right needle for your fabric type.
- Maintain a consistent seam allowance.
- Use backstitching to secure seams.
- Practice with various fabrics.
- Keep your machine tutorials handy!
Sewing Curves and Corners
Tackling the challenges of sewing curves and corners can feel like taming a wild beast on your sewing journey.
But with patience and a few tricks up your sleeve, you’ll conquer these bends with your sewing machine techniques.
Keep an eye on seam allowances, choose fabrics wisely, and master the art of garment construction with corner stitching and curved hems.
| Technique | Tools Needed | Tips for Success |
|---|---|---|
| Curved Hems | Pins, Scissors | Clip curves carefully |
| Corner Stitch | Seam Ripper | Pivot at corners |
| Seam Allowance | Seam Gauge | Measure precisely |
| Fabric Choice | Cutting Mat | Test drape and fit |
| Garment Tips | Iron | Press as you sew |
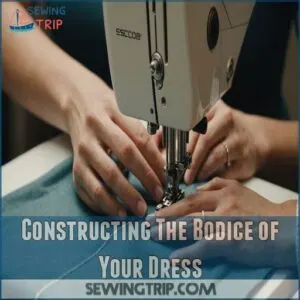
Constructing The Bodice of Your Dress
Constructing the bodice is where your dress starts to take shape, and it’s not as tricky as you might think.
By learning to sew darts and folds, attach sleeves, and craft a polished neckline, you’ll bring your creation to life, one stitch at a time.
Sewing Darts and Folds
Imagine this: your fabric’s flat, your pattern’s pinned, and you’re ready for some dart action.
Getting dart placement just right is the secret sauce to a well-fitted bodice.
With fold types and pressing techniques in your arsenal, seam allowance won’t know what hit it.
Practice on scrap fabric first, then conquer your dressmaking dreams with confidence in sewing machine tutorials.
Attaching Sleeves and Shoulder Seams
You’ve mastered darts and folds—now, let’s tackle attaching sleeves and shoulder seams!
Choose sleeve types that suit your style, then fit the sleeve cap snugly into the armhole.
Remember, seam finishing keeps everything neat and tidy.
If you’re feeling brave, try gathering sleeves for extra flair or shoulder pads for structure.
Trust your sewing machine tutorials for guidance.
Creating a Professional-Looking Neckline
A clean neckline finish truly elevates your dressmaking!
Use high-quality interfacing for extra support.
Choose a neckline finish that complements your fabric; a simple rolled hem works wonders on delicate fabrics.
Practice your sewing techniques on scrap fabric first—it’s less stressful than ruining your gorgeous new material!
Remember, even experienced sewers sometimes mess up; don’t sweat the small stuff.
With a little patience, you’ll master this essential sewing technique.
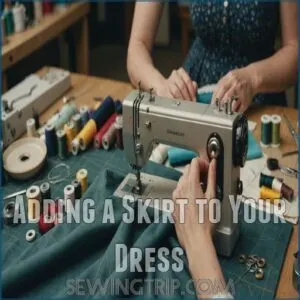
Adding a Skirt to Your Dress
Adding a skirt to your dress is like giving it a personality upgrade—transforming a basic piece into something fabulous with a few straightforward steps.
Whether you’re opting for a twirly full skirt or a sleek fitted style with darts, you’ll find that sewing on a waistline seam and zipper is easier than deciding which dessert to try next!
Gathering and Attaching a Full Skirt
Sewing the bodice with precision sets the stage for adding a full skirt.
Imagine this: your fabric billowing like a cloud as you gather it.
You can find a wealth of information on sewing machine techniques to help you master this step.
It’s all about choosing the right fabric and nailing the gathering techniques.
Secure the fullness with gentle stitches, then attach it to the bodice.
Embrace the beauty of your handmade creation, enjoying every sewing tutorial’s wisdom.
Creating a Fitted Skirt With Darts
Crafting a fitted skirt with darts might seem like a dance with fabric, but it’s simpler than you think!
Start by choosing a fabric that flatters your silhouette.
Carefully mark your dart placement to shape the curves beautifully.
With dart manipulation, you’re sculpting your custom masterpiece.
Remember, sewing is a skillful adventure, perfect for creating custom-fit dresses or custom-made sewn outfits!
Adding a Waistline Seam and Zipper
After mastering those darts, it’s time to tackle the waistline seam and zipper.
Imagine the magic of a perfectly placed zipper—nearly invisible!
Align the skirt with the bodice, ensuring your seam finishes complement the style.
Explore waistband options for added flair.
If your zipper misbehaves, just a bit of troubleshooting turns frustration into triumph.
Finishing Your Dress With Professional Touches
You’ve put in the hard work to sew your dress, so let’s add those final professional touches that make it truly shine.
Master hem finishes, button placement, and topstitching techniques that will have friends believing you’ve hired a designer!
Hemming and Seaming Techniques
You’ve sewn the perfect dress, now let’s finish it with flair!
Mastering hemming techniques and seam finishing is like adding sprinkles to a cupcake—simple but game-changing.
For a polished finish, consider learning how to quickly hem a dress using methods like hem tape or fabric glue for a no-sew hem solution.
Consider hand-stitched hems for finesse or serger seams for speed.
When hemming knits, use these sewing machine tutorials to make sure edges that won’t curl.
Remember, neat seams scream professionalism!
Adding Buttons, Zippers, and Other Fasteners
Adding the finishing touches? Let’s get those fasteners in place!
Precise button placement is key; use your sewing machine for even stitches.
Zipper installation might seem tricky, but with practice, it’s a breeze.
Consider snaps versus hooks—snaps are quicker, hooks offer a more secure closure.
Remember, fastener troubleshooting is part of the process; don’t sweat the small stuff!
Explore decorative fasteners to add a personal touch.
You’ve got this!
Topstitching and Edgestitching for a Finished Look
Topstitching and edgestitching can truly elevate your dress from homemade to haute couture.
Grab your sewing machine and explore different stitch types.
Use the right threads for a polished finished look.
A well-executed topstitch whispers sophistication, while precise edgestitching adds structure.
Remember, these techniques give your garment that refined edge, making your dress look professionally finished.
Troubleshooting Common Sewing Mistakes
Even the best seamstresses have tangled threads and wobbly seams, so don’t fret if you hit a snag.
Here, you’ll find simple tips to turn those sewing hiccups into aha moments and keep your dressmaking journey smooth and fun.
Fixing Uneven Seams and Hems
Uneven seams and hems can be a real headache, but don’t lose hope!
Start by examining your stitch length and fabric tension—if they’re off, your seams will show it.
Ensuring a balanced tension and using the recommended seam allowance guide can also help prevent these common issues.
Try out some seam ripper tricks to fix crooked lines.
Hemming tools also help smooth things out.
Remember, even seasoned pros occasionally hit a snag, so keep your chin up!
Adjusting Fit and Making Alterations
You’ve smoothed out those uneven seams; now, let’s talk fit.
Whether your bust needs a tweak, sleeves scream looseness, or that waistline isn’t quite nailing it, adjustments hold the key.
For more guidance on perfecting your dressmaking skills, check out the Dressmaking sewing machine tutorials.
Remember, alterations turn a good fit into a fantastic one.
Don’t fear the seam ripper—embrace your inner tailor!
Who knew a dress could make you feel like a magician?
Dealing With Fabric Distortion and Stretch
Ever tried adjusting that fit only to meet the stretchy beast of fabric distortion?
Fear not! Mastering stretch fabrics is just another knot to untangle.
Use stabilizing techniques or iron those pesky areas; seam allowances are your friends here.
Tackling knit fabric or a bias cut can feel like wrestling jelly—embrace it!
And remember, even pros sometimes upcycle an old dress.
Taking Your Dressmaking Skills to The Next Level
You’re ready to up your dressmaking game by exploring new fabrics and adding personal touches that show off your unique style.
Don’t be afraid to get creative and try out new techniques—after all, every sewing experiment is just another stitch in your growing skill tapestry!
Working With Different Fabrics and Textures
Because mastering different fabrics is key, let’s get started!
Experiment with various fabric types – from silky charmeuse to sturdy denim.
Notice how texture effects your sewing; a lightweight cotton needs a different needle than heavy linen.
Choosing the right needle is essential for a smooth sew.
Online sewing tutorials can help you conquer tricky textures.
Remember proper fabric care extends your garment’s life!
With practice, you’ll become a fabric whisperer.
Creating Unique Details and Embellishments
In the world of DIY dressmaking, adding unique details like embroidery or applique can transform your projects.
To bring these ideas to life, consider using the right Sewing machine for dresses.
Try machine embroidery on leather for a chic edge, or sprinkle some beads and lace for elegance.
Ruffles? Why not! These embellishments breathe life into handmade fashion.
Seek sewing tutorials online for fresh inspiration, and let your creativity flourish with each stitch.
Experimenting With New Techniques and Styles
Taking your designs further, let your creativity flourish by experimenting with fresh techniques!
Think of it as mixing flavors in a kitchen—except here, you’re adding zing to your wardrobe.
Start reconstructing old clothes or trying bold patterns.
Smarten up your skills with:
- Dress hacks and DIY embellishments
- Pattern drafting
- Sustainable sewing tips
- Upcycled fashion ideas
Showcasing Your Finished Dress and Future Projects
You’ve just finished creating a dress that’s uniquely yours and also a reflection of your growing skills, so why not show it off with a proud twirl and snap a few pictures for posterity?
As you bask in this accomplishment, start dreaming about your next project, whether it’s a chic blouse or an adventurous new fabric choice, and consider joining a sewing community that inspires and supports you along the way.
Photographing and Displaying Your Finished Dress
You’ve mastered sewing; now it’s time to showcase your creations with style.
Dress styling matters—choose a model and setting that highlights your design.
Set up a background that complements, not competes.
Use lighting techniques to bring out fabric textures.
Sharing your masterpiece on sewing vlogs and social media connects you with a community ready for inspiration.
Planning and Preparing for Future Sewing Projects
Now that your gorgeous off-shoulder dress is picture-perfect, let’s plan your next sewing adventure.
Start with Sewing Goal Setting; what’s your next dream project? Maybe a stylish maxi dress?
Then, create a Sewing Budget and organize your sewing room.
Prioritize projects, avoiding fabric hoarding! Remember, even small steps bring big sewing satisfaction.
To get started with sewing, familiarize yourself with the key components of your sewing machine, including the needle and presser foot guide. Plenty of sewing guides for beginners and sewing courses online can help.
Joining a Sewing Community for Inspiration and Support
You’re ready to tackle new sewing challenges by showcasing your finished dress.
Highlight your work and gain inspiration by joining a sewing community. Here’s why it’s great:
- Sewing forums: Share tips and projects.
- Online forums: Connect globally with other creatives.
- Sewing events: Find local gatherings.
- Creative meetups: Discover new ideas and techniques.
These groups offer support and motivation!
Frequently Asked Questions (FAQs)
How do you sew a dress?
Grab your sewing machine and fabric, then trace and cut your pattern.
Pin pieces together, sew darts and seams, and attach the zipper.
Finish by stitching the neckline and hems.
Voilà, you’ve crafted a gorgeous dress!
Can a beginner sew a dress?
Sure, why not transform a fabric blob into a fabulous dress?
As a beginner, you’ll learn with simple patterns, step-by-step guides, and a dash of patience.
Soon, friends might witness your catwalk-worthy creations!
Can you make dresses with a sewing machine?
Sewing machines are fantastic for dressmaking.
They make stitching faster and more even.
With practice, you’ll create stunning dresses!
It’s easier than you think.
Don’t be intimidated; start small and have fun!
How do I learn to sew?
Start with simple projects like a tote bag or pillowcase.
Explore online tutorials or join a local class to learn basic stitches.
Practice makes perfect, so don’t hesitate to experiment and make mistakes while you sew!
Can I teach myself to use a sewing machine?
You can absolutely teach yourself to use a sewing machine.
Start exploring online tutorials, practice with simple projects, and explore helpful resources.
Remember, every stitch is a step on the path to mastering a fun and useful skill.
What is the first thing a beginner should sew?
Did you know that nearly 80% of beginners start by sewing a pillow cover?
It’s a fantastic first project!
It’s simple, forgiving, and gives you a cozy reward at the end.
Grab some fabric and go!
Can you teach yourself dressmaking?
Start dressmaking with online tutorials, books, and beginner patterns.
It’s like crafting magic with every stitch.
Mistakes are normal, so grab your fabric and embrace your creativity—no fashion police are lurking behind your door!
What is the easiest thing to sew on a sewing machine?
Like a fearless knight tackling a dragon, start with a simple tote bag!
It’s a fantastic beginner project; straight seams, minimal fuss, maximum satisfaction.
You’ll gain confidence quickly, then conquer more complex projects!
How to choose the right sewing thread?
First, match thread type with fabric—cotton for cotton, polyester for stretch.
Next, choose a color closely matching your fabric; a shade darker blends better.
What sewing machine accessories are essential?
You’ve got to have the right accessories for smooth sewing.
A variety of needles, bobbins, seam ripper, and presser feet are the essentials that make sewing easier.
These essentials make sewing easier, kind of like having a trusty sidekick by your machine’s side.
How to adjust sewing machine tension settings?
Adjusting sewing machine tension can feel like finding the sweet spot on a guitar string.
Start by testing on a scrap cloth, tweak the tension dial slowly, and watch those stitches come together perfectly, like magic!
Which fabrics are best for beginners?
When diving into sewing, choosing forgiving fabrics is key.
Opt for cotton, linen, or chambray, as they’re like old friends—easygoing and predictable.
They won’t unravel your nerves while practicing your stitching prowess.
Happy sewing adventures!
How to care for and maintain sewing machines?
Keep your sewing machine humming smoothly!
Regularly dust and clean it, especially around the bobbin area.
Oil it sparingly, following the manual.
Check tension settings, tighten screws, and change needles often.
It’s easier than taming a wild thread!
Conclusion
So, you’ve tackled your first dress? Amazing!
Remember those early sewing machine tutorials for dressmaking? They might’ve felt like climbing Mount Everest in flip-flops, but look at you now!
You’ve mastered basic stitches, conquered tricky seams, and even managed to avoid any major fabric-related disasters (mostly). Your confidence is soaring higher than your finished hemline.
Now, go forth and sew!
Explore more advanced sewing machine tutorials for dressmaking; the possibilities are endless.
Don’t forget to share your creations—we want to see your masterpieces!

