This site is supported by our readers. We may earn a commission, at no cost to you, if you purchase through links.
Your grandmother knew something most people have forgotten: a needle, thread, and steady hands can outlast the fastest sewing machine. Hand stitching isn’t just a backup plan when your machine breaks down. It’s the foundation of craftsmanship that gives you complete control over every stitch.
Whether you’re mending a torn pocket, attaching a delicate button, or creating heirloom-quality embroidery, mastering hand sewing creates opportunities that machines simply can’t reach. The right techniques transform basic stitches into invisible repairs and decorative details that stand the test of time.
You’ll discover that strong seams, neat finishes, and professional-looking results don’t require expensive equipment—just proper form, the right tools, and practice that builds muscle memory.
Table Of Contents
Key Takeaways
- Hand stitching gives you complete control over repairs and decorative work that machines can’t replicate, from invisible hems to reinforced seams that outlast standard lockstitches.
- Matching your needle size to fabric weight, keeping thread length between 18-24 inches, and using techniques like backstitch deliver professional results without expensive equipment.
- Mastering five foundational stitches—running, backstitch, whip, overcast, and blanket—covers most hand sewing needs from mending torn seams to finishing raw edges.
- Consistent tension, secure knotting at both ends, and even stitch spacing of 2-3mm separate clean craftsmanship from sloppy work that unravels or puckers.
Essential Tools for Hand Stitching
Hand stitching doesn’t require a lot of fancy equipment, but the right tools make all the difference in your finished work. When you match your needle, thread, and accessories to your fabric and project, your stitches come out cleaner and the work feels easier on your hands.
Let’s look at the essentials that will set you up for success.
Choosing The Right Needle
Your needle choice sets the tone for every stitch. Match needle size to fabric weight—sizes 5–10 suit light to medium materials, while 2–4 tackle heavier denim or upholstery.
Point shape matters too: sharp needles pierce tightly woven fabrics, and ballpoints glide through knits without snagging.
Quality matters—hardened steel or nickel-plated needles resist bending and rust, ensuring smooth hand sewing for years. Selecting the right needle involves considering hand sewing needle sizes based on the fabric.
Selecting Thread Type and Color
Once you’ve paired your needle with the right fabric, choosing the right thread seals the deal. Polyester offers 30% higher fiber strength than cotton, making it ideal for durable seams. Thread weight between 30 wt and 40 wt works for most projects, while color schemes should complement your fabric—select a shade one tone darker for blended fabric matching and enhanced thread quality. The thread’s tensile strength impacts its suitability for various sewing tasks.
- Polyester for durability – up to 30% stronger tensile performance than cotton
- Cotton for delicate work – preferred in 42% of consumer embroidery projects
- Nylon for outdoor gear – strong abrasion resistance and flexibility
Proper Thread Length for Sewing
Thread that’s too long tangles and snags, while short pieces mean constant rethreading. Cut your thread to shoulder-to-fingertip distance—about 18 to 24 inches—to balance control with efficiency. This ergonomic length reduces tangling and fosters smooth hand stitching. For short seams, measure three times the seam length. Beginners should start conservatively: a manageable length beats fighting knots every few stitches.
| Thread Type | Recommended Length |
|---|---|
| All-purpose polyester | 18–24 inches (arm’s length) |
| Delicate or metallic | 9–12 inches (half arm’s length) |
| Heavy or waxed (leather) | 3.5× seam length |
| General mending | 2–3× seam length + allowance |
Proper thread selection paired with the correct length ensures your securing knots in sewing stay tight and your stitches remain even throughout every project.
Using Thimbles and Accessories
A thimble protects your pushing finger from calluses and pricks—studies show injury reduction by up to 60%. Choose metal for heavy fabrics or silicone for comfort. Ergonomic grips prevent slippage during precision work.
Needle threaders speed threading on size 10 or smaller needles. Beeswax cuts fraying and knotting by half.
Flexible tape measures guarantee accurate seam lines—practical sewing tips for beginners mastering hand stitching.
Lighting and Ergonomics Tips
Good lighting prevents eye strain and keeps your stitches accurate—suitable illumination at 1,000 lux or higher transforms beginner sewing into precision work. Suitable lighting paired with ergonomic posture delivers injury prevention and a productivity boost.
Hand sewing tips for workstation setup:
- Position your seat so hips align with knees for neutral spine support
- Set your stitching surface at 25–30 inches to maintain wrist comfort
- Use daylight-balanced LEDs for true color matching on dark fabrics
- Take breaks every 30–45 minutes to reduce cumulative muscle tension
- Add adjustable task lighting to eliminate shadows during detail work
Basic Hand Stitches Every Sewer Should Know
Hand stitching doesn’t have to feel like guesswork once you know a handful of reliable stitches. Each stitch has a clear purpose—whether you’re mending a seam, finishing an edge, or adding a decorative touch.
Let’s walk through five foundational stitches that will cover most of your hand sewing needs.
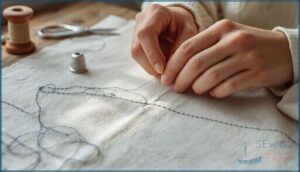
Running Stitch Instructions
Running stitch is your foundation—think of it as learning to walk before you run. Start from the fabric’s wrong side, hiding your knot.
Weave the needle up and down in short, even intervals, about 2.5–3 mm apart. Pull gently to control tension without puckering.
This basic hand stitching technique works beautifully for basting, quilting, and gathering fabric in countless sewing projects.
Backstitch for Strong Seams
When you need unbreakable seams, backstitch delivers roughly 40% more strength than blanket or running stitches. Bring the needle back half a stitch length—about 1/8 to 1/4 inch (3–6 mm)—then forward twice that distance. This overlapping motion creates a continuous line that rivals machine stitching.
Perfect for mending tears, reinforcing stress points, and creating strong seams in hand-sewn garments across any fabric type.
Whip Stitch for Joining Fabrics
Think of whip stitch as the quick connector in your hand-sewing toolkit—it loops over fabric edges to join pieces with moderate stitch strength and good seam flexibility. Insert your needle about 1/4 inch (6 mm) from the raw edge, spacing entries 3–6 mm apart for a secure join.
Space stitches closer—around 2–3 mm—to boost strength along edges.
- Hemming fabrics and turned seam allowances
- Joining fabric techniques for felt appliqué and soft toys
- Edge finish that reduces fraying on woven materials
- Closing stuffed openings where hand sewing tutorials recommend unobtrusive seams
Overcast Stitch for Edge Finishing
Overcast stitch wraps fabric edges like a protective shield, preventing fabric fraying on raw seams and hems. Space your stitches 1/8 to 3/8 inch apart—closer stitch density guide intervals for loosely woven materials boost edge durability.
Thread color choice can match your fabric or contrast for visibility during hand stitching. It’s your go-to machine alternative when sergers can’t handle delicate or bulky edges.
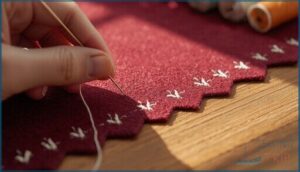
Blanket Stitch for Decorative Edges
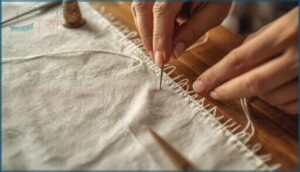
Blanket stitch locks fabric edges with perpendicular thread bites that stop fraying on felt, wool, and thick cotton for three to four years. Stitch variations like scalloped or whipped versions add visual flair to decorative stitching projects.
Material choice matters—heavier embroidery floss suits thick fabrics best. Time investment runs higher than machine edge finishing, yet market trends show growing demand for visible hand stitching in slow-fashion DIY crafts.
Techniques for Neat and Durable Stitches
Knowing your stitches is only half the battle. The real craft shows up in how you execute them—tight knots that hold, even spacing that looks professional, and thread that behaves instead of knotting up on you.
Here are the core techniques that separate clean work from messy seams.
Securing Knots at Start and End
For knotting techniques that truly last, start by tying secure knots about 1/4 inch from your thread end. You’ll want to find that sweet spot of knot tying force—about 3 Newtons—so it holds without breaking.
Try these methods for securing stitches:
- Wrap thread around your needle 5-6 times for rock-solid knots
- Use the L knot for decorative knotwork you can stitch over
- Try knotless securing with two backstitches or thread tail burying to prevent thread unraveling
Maintaining Even Stitch Length
Once your knots are set, keeping your hand stitches uniform takes a few setup factors and marking techniques. Many sewers aim for 2–3 mm on medium fabrics—that’s roughly eight to ten small stitches per inch. Try marking stitch points with tailor’s chalk or drawing parallel guidelines. Use a steady rocking motion rather than stabbing, rest your forearms for motion control, and practice on marked lines to build muscle memory for consistent stitch length.
| Practice Strategy | Hand Sewing Technique | Why It Works |
|---|---|---|
| Mark every 1/4 inch | Needle enters on each dot | Trains your eye |
| Count stitches per inch | Maintain 8–10 repeats | Builds consistency |
| Use contrast thread | See spacing errors clearly | Faster correction |
Preventing Thread Tangles
Even stitches mean nothing if your thread keeps knotting. Cut thread 18–20 inches—fingertip to elbow—to reduce abrasion and tangling. Run thread through beeswax for smoother glides and lower static cling.
Spin the needle counter to thread twist, hold gentle tension, and pause to untwist periodically.
Cotton and silk tangle more than polyester, so choose your spool of thread wisely and apply these hand sewing tips consistently.
Turning and Stuffing Fabric Shapes
Once your stitching is tangle-free, you’re ready for turning and stuffing shapes. Keep seam allowance at ¼–½ inch to prevent tears during fabric manipulation. Trim bulk on curved seams, clip concave corners, then use rounded turning tools—never sharp points—to push out tight areas.
Match stuffing density to fabric types: firm for woven cotton, softer for fleece.
Ergonomics matter: pause every hour to rest wrists and neck.
Hand Sewing Tips for Beginners
If you’re just picking up a needle for the first time, you’ll want to start with the right foundation. The best way to build your skills is to practice deliberately, work with forgiving materials, and keep your early projects simple.
Here are five practical tips to help you move from nervous beginner to confident stitcher.
Starting With a Stitch Sampler
A stitch sampler gives you a low-risk practice surface to master hand stitching basics before moving to finished garments. You’ll consolidate multiple hand sewing techniques on one fabric panel—usually 8 to 20 distinct stitch patterns—creating a visual index you can reference later.
Sampler benefits include material evaluation, error reduction, and stitch organization that builds confidence with each row you complete.
Practicing on Felt and Cotton
Both felt and cotton build distinct hand sewing skills for beginners. Felt projects offer a stable, non-fraying surface that improves stitch uniformity by 15–30% as you master tension control.
Cotton challenges you with its woven texture, demanding more precise needle placement and edge finishing.
Alternating between these materials accelerates your material skill progression, sharpening the felt stitching benefits and cotton stitching benefits that inform adaptable practice.
Marking Seam Lines Accurately
Before you thread your needle, mark seam lines so every stitch lands exactly where you intend. Using the right marking seam lines approach—Chalk vs. Pen, tailor’s carbon, or a sharp pencil—defines your seam allowance and guides Precision Techniques.
Consistent seam marks turn guesswork into craftsmanship.
- Cut card strips to match your seam allowance for parallel lines.
- Pin patterns with aligned grainlines before Tracing Methods.
- Mark on fabric’s wrong side to hide guide lines.
- Space dots every 5 mm for easier curved seam line control.
- Adopt Ergonomic Marking: good lighting reduces strain and improves accuracy.
Building Confidence With Simple Projects
You’ll grow faster by starting small. Beginner sewing projects—bookmarks, scrunchies, pouches—teach basic hand sewing techniques without pressure.
Each project you complete fuels Skill Development and builds Psychological Benefits like patience and focus.
Fabric Familiarization happens naturally as you work with cotton, linen, or felt, discovering how each behaves.
Project Variety keeps practice fresh, while Educational Benefits sharpen your fine motor control and problem-solving instincts with every stitch.
Teaching Kids Basic Hand Sewing
Starting around age four, you can introduce children to basic stitches using blunt-tipped needles and safety precautions. Teaching kids to sew builds skill development through hands-on practice with beginner sewing projects for kids.
Try these age-appropriate crafting with kids ideas:
- Felt bookmarks with running stitch
- Small pillows with blanket stitch edges
- Simple pouches for treasures
- Decorated patches
- Soft toys with overstitch
Engagement strategies like colorful threads keep kids crafts exciting.
Creative and Practical Hand Stitching Uses
Hand stitching isn’t just for learning the basics—it’s a practical skill you’ll use throughout your sewing journey. Once you’ve mastered the fundamental stitches, you can apply them to real-world projects that range from quick fixes to creative finishing touches.
Let’s explore how these techniques solve everyday sewing challenges and open doors to custom handmade work.
Mending and Repairing Clothes
Mending clothes isn’t just about fixing holes—it’s about extending garment lifespan in a world where half of U.S. shoppers now repair their damaged clothing. You’ll face skill barriers at first, but visible mending techniques like darning and decorative mending turn repairs into sustainable fashion statements.
Mending clothes extends garment life and transforms repairs into visible fashion statements that reduce waste
Simple visible mending and repair tasks increase repair frequency while reducing waste, making each stitch count toward both mastery and environmental impact.
Creating Invisible Hems
Invisible hem creation transforms repairs into finishes you can barely spot. Pick thread that matches your fabric, use sizes 9-12 needles to avoid fabric distortion, and keep stitch spacing around 0.6 to 1 cm. The blind hem stitch—where you catch only one thread—paired with tension control, produces results that last beyond 24-month repair intervals. Your hand sewing becomes almost undetectable when you:
- Match thread selection precisely to your fabric’s color and weight
- Maintain even tension control throughout every stitch to prevent dimpling
- Space stitches consistently for durability without visible lines
- Press hems flat before hand stitching for professional results
Adding Decorative Embroidery Details
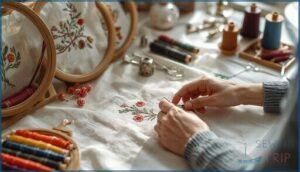
Beyond impeccable hems, hand embroidery transforms plain fabric into art that reflects your style. Satin Stitch fills shapes with smooth coverage, French Knots add textured dots, and Stem Stitch creates flowing lines for decorative stitching. Chain Stitch and Fly Stitch bring borders to life on embroidery projects.
You’ll find embellished zippers, monogrammed pockets, and embroidery stitches that turn repairs into conversation pieces when you master these techniques.
Hand Sewing Buttons and Fasteners
Embellished zippers showcase artistry, but buttons demand precision. You’ll secure four-hole flat buttons with 8-10 passes through the holes, creating a thread shank by wrapping strands beneath.
Position hooks 1/8-inch from edges using buttonhole stitches, then align snaps with pins before whipstitching through each hole 6-8 times.
Double your thread for fastener reinforcement stitches—thread knot security prevents repairs from unraveling.
Crafting Unique DIY Projects
Once buttons are secure, you’re ready for larger DIY projects. Hand sewing transforms upcycled materials into patchwork pillows, stuffed ornaments, and fabric pouches—beginner craft-kits offer structured guidance. Project personalization shines through visible stitching and decorative details.
- Felt bookmarks and sachets make quick hand sewing projects
- Multicraftual sewing combines embroidery and appliqué techniques
- Portable craft projects work anywhere, from camping trips to cozy evenings
Your stitches become your signature—no two pieces match exactly.
Frequently Asked Questions (FAQs)
How can I get better at hand sewing?
Slow down and focus on consistent tension—rushing creates uneven stitches. Practice regularly with needle control and proper thread management.
An ergonomic setup prevents fatigue, letting you hone hand sewing techniques steadily over time.
How do you sew perfectly by hand?
Perfect hand sewing requires maintaining consistent tension throughout each stitch, securing knots firmly at start and finish, and practicing accurate stitching at even 1/8-inch intervals while using proper ergonomic posture and fabric handling techniques.
How do you hand stitch like a pro?
Master hand stitching by maintaining consistent tension throughout each seam, using proper ergonomic setup with good lighting, and practicing complex stitches regularly.
Professional techniques develop through deliberate repetition and attention to stitch quality in every project application.
What are the 4 basic hand stitching?
Think of hand stitches as your foundation—running stitch for basting, backstitch for strong seams, whip stitch for joining fabrics, and overcast stitch for edge finishing.
These essential hand stitching patterns form hand stitching basics every beginner needs.
How do I start a sewing project?
Gather your needle, thread, scissors, and pins first. Press your fabric with a steam iron, mark seam lines clearly, then thread your needle and tie a secure knot before beginning your first stitch.
What fabric is best for beginners?
Cotton fabric is your best starting point—stable, affordable, and easy to press.
Linen benefits include natural grip that reduces pinning.
Chambray softness and flannel’s forgiving weave help beginners build confidence without frustration.
How to maintain tension while sewing?
Like tuning a guitar string—too loose or tight ruins the sound—thread tension in hand stitching demands balance.
Control finger pressure, choose proper needle size and thread type, and adjust stitch length for smooth fabric handling and secure knots.
Can hand sewing replicate machine stitches?
Hand stitching can mimic machine seams surprisingly well. Backstitch strength rivals lockstitch durability in garment construction techniques, though uniformity challenges arise.
Application success depends on technique replication—handsewn seams achieve professional results with practice and precision.
How do I sew without a pattern?
Start with body measurements and trace existing garments to create templates. Freehand cutting works well for simple DIY sewing projects like skirts.
Practice direct drafting on inexpensive fabric as your learning progression develops confidence.
How do I fix a broken stitch midway?
Oh sure, just ignore that snap in your seam—what could go wrong?
Thread a sewing needle with matching thread material, backstitch slightly beyond the break using repair stitch techniques, and secure the repair end with a knot.
Avoid puckering by maintaining ergonomic repair posture throughout hand stitching.
Conclusion
Before Bluetooth headphones and touchscreens, there was thread—and it still matters. These sewing tips for hand stitching give you precision that no machine can match.
You’ve learned the stitches, tools, and techniques that transform fabric into something lasting. Now your hands hold the same skills tailors have trusted for centuries.
Pick up your needle. Start with one seam, one button, one repair. Every stitch you practice builds the kind of quiet confidence that never goes out of style.
- https://pubmed.ncbi.nlm.nih.gov/25658674/
- https://pmc.ncbi.nlm.nih.gov/articles/PMC5373915/
- https://www.tandfonline.com/doi/abs/10.1080/00140139.2014.891053
- https://www.academia.edu/112464197/Right_and_Left_Hand_Motion_Analysis_of_Sewing_Machine_Operator?uc-sb-sw=15209801
- https://www.maggieframes.com/blogs/embroidery-blogs/ultimate-hand-needle-size-chart-guide-match-needles-to-fabric-thread

