This site is supported by our readers. We may earn a commission, at no cost to you, if you purchase through links.

Pre-wash raw silk with vinegar and gentle detergent, then stabilize it for workability.
Cut pieces with a rotary cutter or sharp shears, using lightweight pins and needles.
Opt for cotton or polyester thread.
When pressing, use low heat and an up-and-down motion to prevent stretching.
For sheer fabrics, try a French seam.
Consider a baby hem or rolled hem tutorial for a polished finish with lightweight silk.
Take breaks to maintain accuracy, and plan ahead – intricate silk projects require patience.
Master these sewing techniques, and you’ll be creating breathtaking silk garments.
Table Of Contents
- Key Takeaways
- Pre-Washing and Fabric Preparation
- Cutting and Sewing Techniques
- Pressing and Finishing
- Use Low Heat Setting, Press Cloth
- Up and Down Pressing Motion
- Avoid Back and Forth Ironing to Prevent Stretching
- French Seam for Sheer and Semi-sheer Fabrics
- Pinked Seams for Lined Garments
- Serger With 3-thread Set-up
- Baby Hem or Rolled Hem for Lightweight Silks
- Hand-sewn Hem With Hem Tape for Heavier Silks
- Fabric Preparation
- Cutting Techniques
- Stitching Tips
- Hemming Techniques
- Time Considerations
- Frequently Asked Questions (FAQs)
- Conclusion
Key Takeaways
- Pre-wash raw silk with vinegar and a gentle detergent for fabric preparation
- Use French seams or baby hems for a polished finish with lightweight silk
- Take breaks to maintain accuracy and plan ahead for intricate silk projects
- Use sharp, lightweight pins, needles, and cotton or polyester thread for sewing delicate silk fabrics
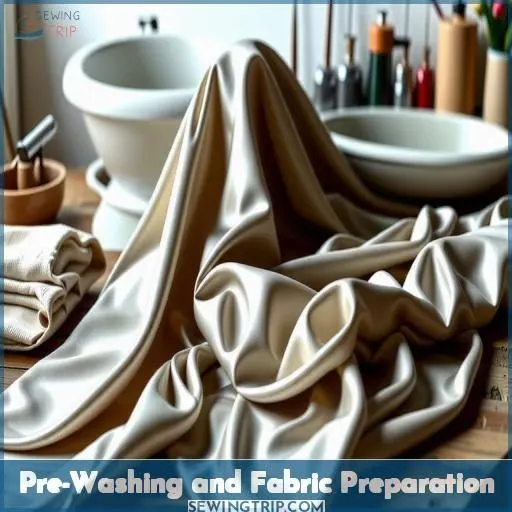
Pre-Washing and Fabric Preparation
For manufactured silk garments, dry-cleaning is recommended to maintain the fabric’s quality.
However, if you plan to sew with silk fabric, start by soaking it in lukewarm water mixed with vinegar and a gentle detergent.
Then rinse thoroughly with lukewarm water and gently squeeze out the excess moisture.
After that, press the damp fabric with a low heat setting and a press cloth.
Dry-clean Only for Manufactured Garments
When working with manufactured silk garments, it’s best to dry-clean them to avoid any unwanted changes to the fabric. The dry-cleaning process helps maintain the fabric’s original luster, texture, and shape. However, if you plan to hand-wash the finished garment, it’s essential to pre-wash the silk fabric before sewing to guarantee consistent results.
Soak in Lukewarm Water With Vinegar and Gentle Detergent
After dry-cleaning your silk garments, it’s time to give your raw silk fabric a gentle pre-wash. Soak the fabric in lukewarm water mixed with a bit of white vinegar and a mild detergent. This will help remove any sizing or impurities without damaging the delicate fibers.
Rinse in Lukewarm Water, Gently Squeeze Out Excess
After your silk fabric has soaked in a mixture of lukewarm water and vinegar, it’s time to gently rinse it in lukewarm water. Make certain to cautiously squeeze out the excess water, being gentle to avoid damaging the delicate fabric. This step prepares the silk for further processing like hemming and sewing, maintaining its quality and integrity throughout.
Press While Damp, Low Setting, Press Cloth
When pressing silk, use a low heat setting and a press cloth like silk organza. Press the fabric while it’s still slightly damp, using an up-and-down motion to avoid stretching. Take your time and press each seam or area thoroughly. For best results:
- Use a smooth, flat pressing surface
- Press for 10-15 seconds per area
- Avoid back-and-forth ironing motions
Cutting and Sewing Techniques
For cutting silk fabrics, use a rotary cutter or sharp shears to achieve clean, precise edges; spray stabilizer can help prevent slippery fabrics from shifting during cutting. When sewing silk, opt for sharp, lightweight pins and needles like silk pins or Microtex needles, and choose cotton or polyester thread for the best stitch quality.
Use Rotary Cutter or Sharp Shears
When cutting silk, use a rotary cutter with a sharp blade to make clean, precise cuts. Avoid scissors, which can snag the delicate fabric. Cut one layer at a time to minimize waste, and consider mirror-cutting pieces intended for folding to conserve fabric. Take your time and allow ample space for cutting to guarantee a smooth process.
Spray Stabilizer for Slippery Fabrics
Spray stabilizer directly onto your silk fabric to enhance its workability and tame slippery challenges. Test the stabilizer on a scrap first to assess any potential effects on the fabric. The added stiffness will make cutting, sewing, and pressing the silk much easier, resulting in a smoother, more professional finish to your silk sewing projects.
Sharp, Lightweight Pins and Needles (silk Pins, Microtex Needles)
When handling delicate silk fabrics, selecting the appropriate pins and needles is paramount in obtaining professional-grade outcomes.
Verify that you have silk pins or Microtex needles available for sharp, lightweight tools.
These specialized pins and needles aid in preventing snags or harm to the fragile fabric.
Take note of the needle sharpness and pin size to ensure their suitability for the silk types you’re working with.
Cotton or Polyester Thread
When sewing with delicate silk fabrics, you’ll want to choose a high-quality thread that won’t damage the material. Cotton thread is less durable than polyester, but it’s less likely to cut into the fabric during wear. Polyester thread offers superior strength and durability, making it a great choice for silk finishing and construction.
Pressing and Finishing
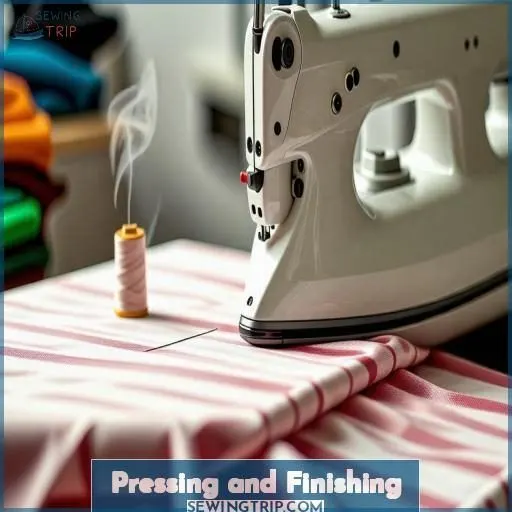
When pressing silk, you’ll want to use a low heat setting and a press cloth to protect the delicate fibers. Avoid back-and-forth motions that can stretch the fabric; instead, use an up-and-down pressing motion.
Use Low Heat Setting, Press Cloth
When silk pressing, employ a low heat setting and a press cloth to safeguard the delicate fabric.
This ensures effective straightening without the risk of burning or damaging the silk.
Utilizing appropriate pressing techniques and ironing techniques is essential for fabric preservation and achieving a professional finish without jeopardizing the integrity of the silk fabric.
The press cloth functions as a barrier between the iron and the silk, preventing direct heat damage.
Up and Down Pressing Motion
When pressing silk, use an up and down motion rather than sliding the iron back and forth. This gentle, vertical pressing helps maintain the fabric’s delicate drape without stretching or distorting the material. Take your time and handle the silk with care – the extra time investment is worth it for the beautiful results.
Avoid Back and Forth Ironing to Prevent Stretching
When pressing silk, avoid back-and-forth ironing motions which can stretch the delicate fabric. Instead, use an up-and-down pressing technique with light pressure. Adjust your steam setting and iron temperature based on the silk’s thickness and quality – lightweight silks require lower heat to prevent scorching. Take care to preserve the fabric’s natural drape and sheen.
French Seam for Sheer and Semi-sheer Fabrics
When sewing with sheer or semi-sheer fabrics, a French seam is the ideal finish. This technique encloses the raw edge, creating a clean, inconspicuous look on delicate materials. Start by stitching the wrong sides together, trim the seam, then fold and stitch the right sides for a professional, lightweight result.
Pinked Seams for Lined Garments
For lined garments, pinked seams offer a simple yet effective finishing touch. This technique involves using pinking shears to create a zigzag edge along the seam allowance, which helps prevent fraying on delicate fabrics like silk. The pinked seams also add a subtle decorative element while keeping the interior clean and tidy. Give it a try for your next lined silk project!
- Pinked seams provide a quick, no-fuss finish for lined garments.
- The zigzag edge helps contain fraying on sheer and delicate fabrics.
- This technique adds a touch of visual interest to the interior.
- Pinked seams keep the lining looking neat and professional.
Serger With 3-thread Set-up
When working with delicate silks, mastering the serger with its 3-thread set-up is essential.
Make certain you’re using the appropriate serger thread types and needle size.
Adjust the serger stitch settings and tension accordingly for silk fabrics.
Proper pressing and finishing with the serger will result in seams that look professional.
Take your time and practice to refine your serger skills on different silk fabric types.
Baby Hem or Rolled Hem for Lightweight Silks
When finishing lightweight silks, the baby hem or rolled hem technique is ideal for preserving the fabric’s delicate drape and quality. To achieve this, consider the following:
- Use a small stitch length to create a discreet hem
- Take your time to guarantee a neat and professional finish
- Avoid bulky hems that can alter the fabric’s drape
- Consider a baby hem tutorial for detailed instructions
Hand-sewn Hem With Hem Tape for Heavier Silks
When hand-sewing hems with hem tape for heavier silks, guarantee precise stitching techniques. Select appropriate hem tape for invisible hems, and consider bias tape for decorative embellishments. Avoid bulky hems to maintain the fabric’s integrity. Take your time for a professional finish, combining the tape’s convenience with the finesse of hand-stitching. Achieve a seamless blend of practicality and elegance in your sewing project.
| Tips for Hand-Sewn Hem with Hem Tape for Heavier Silks |
|---|
| 1. Select appropriate hem tape type |
| 2. Uphold precise stitching techniques |
| 3. Consider bias tape for decorative elements |
Fabric Preparation
Before working with silk, you should spray a stabilizer onto the fabric to enhance its workability and prevent distortion. Be sure to pre-wash the silk prior to applying the stabilizer; this step guarantees consistent results by removing any residues that could interfere with the stabilizer.
Spray Stabilizer Onto Silk to Enhance Workability
Spraying a stabilizer onto silk can work wonders for enhancing its workability. This helps prevent slippage and distortion during cutting and sewing. Be sure to pre-wash the silk first to guarantee consistent results. Test the stabilizer on a scrap to assess any potential effects on the fabric. Allow the stabilized silk to air-dry outdoors to dissipate any fumes.
Pre-wash Silk Before Applying Stabilizer to Ensure Consistency
Before applying stabilizer, it’s essential to pre-wash your silk fabric. This guarantees consistency in the final result, as pre-shrinking the fabric prevents unwanted changes later on. Use lukewarm water and a mild detergent, then gently squeeze out excess moisture. This step lays the foundation for a successful sewing project.
| Fabric Preparation | Description |
|---|---|
| Pre-Wash Silk | Soak in lukewarm water with mild detergent |
| Squeeze Out Excess | Gently remove excess moisture |
| Consistency | Prevents shrinkage and changes after sewing |
| Pre-Shrunk Fabric | Provides a stable base for your project |
Air-dry Stabilized Silk Outdoors to Dissipate Fumes
After applying the stabilizer to your delicate silk fabric, it’s essential to air-dry it outdoors. This facilitates the dispersal of any remaining fumes, guaranteeing that your fabric is secure and prepared for subsequent procedures. Dedicate sufficient time to allow the stabilized silk to absorb fresh air, prioritizing your safety and the fabric’s well-being.
Test Stabilizer on a Scrap to Assess Potential Effects
Before applying the stabilizer, be sure to test it on a small fabric scrap. This will help you assess any potential effects, such as changes in texture, color, or drape. Conduct this test after pre-washing the silk to guarantee consistency. Allow the stabilized fabric to air-dry outdoors to fully dispel any fumes.
Cutting Techniques
When cutting silk fabric, work on a smooth surface and cut one layer at a time to minimize wastage. Use a sharp rotary cutter or scissors, and consider mirror-cutting folded pieces to conserve material; allow ample time for this careful process to guarantee clean, precise cuts.
Cut Fabric in a Single Layer to Minimize Waste
Essential for minimizing fabric waste is the single layer technique for cutting silk. This method enables accurate fabric alignment and efficient pattern layout, reducing excess material. By cutting the fabric in a single layer, you exert greater control over the process, ensuring neat and precise cuts while optimizing the utilization of silk fabric.
Mirror-cut Pieces Intended for Folding to Save Fabric
When working with delicate silk fabrics, mirror-cutting pieces intended for folding can be a game-changer for saving precious material. This clever technique involves strategically arranging your pattern pieces to maximize fabric usage.
- Visualize how the fabric will fold and orient pieces accordingly
- Nest smaller pieces within larger ones to minimize waste
- Experiment with different layouts to find the most efficient arrangement
- Pay close attention to grainline and pattern matching
- Embrace the challenge – mirror-cutting takes practice, but the payoff is worth it!
Allow Ample Time for Cutting to Minimize Frustration
To guarantee efficient cutting and minimize frustration, allocate ample time for the process.
Utilize a rotary cutter with a fresh blade for precise cuts, especially when dealing with delicate silk fabric.
Implement pre-cutting preparation techniques like fabric waste minimization through single-layer cutting.
By giving attention to these details and taking your time, you can achieve clean and accurate cuts for your silk projects.
Use a Sharp Blade to Ensure Clean, Precise Cuts
To achieve precise cutting, confirm that you use sharp blades when working with delicate silk fabric.
Sharp blades are indispensable to maintaining cutting precision, resulting in clean and accurate cuts.
Investing in quality cutting tools will make a significant difference in achieving the desired outcomes for your silk sewing projects.
Confirm that you prioritize the sharpness of your blades for a smooth and precise cutting experience.
Stitching Tips
When sewing with delicate silk fabrics, it’s important to pay close attention to your stitching techniques. Start by checking your thread tension and adjusting it as needed to prevent puckering or gathering. A slightly longer stitch length, around 2.5-3mm, can also help the fabric feed smoothly through your machine.
- Choose a sharp, lightweight needle like a Microtex or Sharps in a size 60/8 or 70/10 to minimize fabric damage.
- Handle the fabric gently, avoiding excessive tugging or stretching, which can distort the delicate fibers.
- Maintain accurate seam allowances, as silk frays easily, and any variations can affect the final fit and appearance of your garment.
Hemming Techniques
For the perfect finish on your silk garment, opt for a narrow, lightweight hem to maintain the fabric’s delicate drape and flow. A baby hem or rolled hem tutorial can provide detailed guidance on achieving a discreet, professional-looking hem that complements the airy quality of silk fabrics.
Avoid Bulky Hems That Can Alter the Fabric’s Drape
Avoid bulky hems that can alter the fabric’s delicate drape. Opt for a narrow hem to preserve the silk’s floaty quality and maintain its graceful movement. A slim, discreet hem will keep the focus on the fabric’s natural beauty without adding unwanted bulk or disrupting the garment’s overall silhouette. Minimize stitch visibility for a clean, professional finish.
Consider a Baby Hem Tutorial for Detailed Instructions
When sewing delicate silk fabrics, opt for precise baby hem techniques or detailed hand-sewn hems. Consider using silk thread for a professional finish. Explore a rolled hem tutorial for detailed guidance on technique differences. Delicately crafted baby hems enhance the fabric’s floaty quality compared to rolled hems. Choose wisely between these two hemming styles for a polished silk garment.
Time Considerations
When sewing with delicate silk fabrics, it’s essential to take breaks periodically to avoid frustration and maintain precision. Plan ahead by allocating sufficient time for the project, as working with silk often necessitates a longer time commitment due to its delicate nature.
Take Breaks to Avoid Frustration and Ensure Accuracy
Take breaks to recharge and refocus when sewing delicate silk fabrics. This will help you avoid frustration and maintain accuracy. Try these tips:
- Set a timer for 5-10 minutes to step away from your project periodically.
- Practice deep breathing exercises to calm your mind.
- Treat yourself to a healthy snack or drink to re-energize.
Remaining patient and focused will guarantee your silk sewing projects turn out beautifully.
Plan Ahead to Accommodate the Extended Time Commitment
When planning to sew delicate fabrics like silk, considering time is imperative.
Estimate 8-10 hours for intricate projects with fabric changes and lining.
Take intervals to preserve precision and avert frustration.
Plan in advance to accommodate the extended time requirement.
Be attentive to fabric storage to prevent damage.
Select fitting needle sizes and thread type.
Consider seam allowance when choosing patterns.
Frequently Asked Questions (FAQs)
Can you sew silk with a regular sewing machine?
Yes, you can sew silk with a regular sewing machine! Over 90% of sewists use their home machines for delicate fabrics. With some adjustments like using sharp needles, stabilizers, and gentle handling, your silk projects will turn out beautifully.
What is the best way to sew silk?
Use sharp pins, silk thread, a small needle, and stabilizer. Sew with a slightly shorter stitch length and press seams using low heat. Consider French seams or baby hems for a professional finish.
What is the best thread to use for sewing silk?
When sewing silk, opt for polyester thread or silk thread. Polyester offers strength, while silk matches the fabric’s luxurious feel. Choose a lightweight, high-quality thread to prevent snagging and skipped stitches.
Is silk hard to sew with for beginners?
Sewing silk beckons an intrepid spirit akin to taming a graceful yet willful stallion. It takes patience and perseverance, but with the right tools and techniques, even beginners can master this delicate fabric.
How do I choose the right silk fabric for my project?
Choose a lightweight silk like chiffon or habotai for flowy garments, charmeuse or satin for structured pieces. Consider the drape, sheen, and opacity you desire, then test swatches to verify the fabric meets your needs.
What are the best seam finishes for sheer silk garments?
You’ll want to use French seams or narrow hems for sheer silk garments. French seams enclose the raw edges, while narrow hems preserve the delicate drape. Both techniques enhance the garment’s polished, elegant appearance.
How do I prevent silk from slipping during construction?
You’ll need to use a stabilizer spray on the silk to prevent slippage while cutting and sewing. Also, opt for silk pins or microtex needles to minimize fabric distortion.
Can I use a regular sewing machine to sew silk?
You’re in luck – silk can absolutely be sewn with a regular sewing machine! Just thread your machine with a sharp needle like a Microtex and use a lightweight stabilizer on the silk to help it glide smoothly under the presser foot.
How do I store silk fabric to maintain its quality?
Store silk fabric by folding or rolling it loosely and placing it in an airtight container away from moisture and sunlight. This protects the delicate fibers from degradation.
Conclusion
Ultimately, mastering tutorialssewing silk requires unwavering patience and precision. Although intricate projects demand substantial time commitments, the rewards are breathtaking garments that showcase your refined skills. Embrace the delicate nature of silk, follow proven techniques, and persist through challenges. With diligent practice and a willingness to learn, you’ll create exquisite silk pieces that garner admiration.

