This site is supported by our readers. We may earn a commission, at no cost to you, if you purchase through links.
 Your first garment turned into a puzzle when the pattern instructions mentioned "ease" and "bias cut" without explanation. Sewing terminology is the specialized vocabulary that describes fabrics, techniques, tools, and construction methods—a language that transforms confusing pattern directions into clear action steps.
Without knowing these terms, you’re left guessing whether to clip curves before or after stitching, or how much seam allowance to leave. Once you understand terms like selvage, basting, and backstitch, patterns become readable blueprints. You’ll recognize which edge needs finishing, when to use temporary stitches, and how to lock your seams.
This guide breaks down essential sewing terms alphabetically, giving you the vocabulary to execute any project with confidence.
Table Of Contents
Key Takeaways
- Sewing terminology transforms confusing pattern instructions into clear action steps by teaching you the specialized vocabulary for fabrics, techniques, tools, and construction methods—without it, you’re left guessing at critical decisions like seam allowances and stitch timing.
- Core terms like selvage, basting, backstitch, seam allowance, and fabric grain form the foundation for reading patterns accurately and executing projects with professional-level precision instead of trial-and-error guesswork.
- Understanding fabric behavior—including grain direction, bias cuts, thread count, and weave types—lets you control how material drapes, stretches, and holds shape rather than fighting against its natural properties.
- Mastering this vocabulary accelerates your work, prevents costly mistakes, and shifts you from blindly following instructions to understanding the craft’s underlying logic so you can troubleshoot problems before they appear.
What Are Sewing Terms?
You can’t build a house without knowing the difference between a hammer and a nail—and you can’t master sewing without understanding the language that holds every stitch together. Sewing terminology is your foundation for garment construction and fabric cutting.
Sewing terminology is the foundation that transforms confusion into confidence, turning technical jargon into practical knowledge you’ll use every time you thread your machine
These terms cover everything from thread types to sewing machines, helping you communicate techniques with precision. When you know your sewing basics—from seam allowances to presser feet—you’ll work faster and avoid costly mistakes.
This sewing glossary transforms confusion into confidence, turning technical jargon into practical knowledge you’ll use every time you thread your machine.
A – Z Sewing Guide
Understanding sewing terminology is like learning a new language—one that unlocks your ability to follow patterns, communicate with other sewists, and tackle projects with confidence.
This alphabetical guide breaks down essential terms you’ll encounter from your first stitch to your most ambitious creation. Let’s start with the letters A through E, covering foundational concepts every sewist should know.
A
Applique, awl, and anchor stitch—the "A" section of sewing terminology covers everything from decorative techniques to tools that punch through the toughest canvas. You’ll find adaptor pieces that let you swap presser feet in seconds and arm scye markings that guide sleeve attachment. Master these sewing basics, and you’ll build confidence with every project:
- Applique Art – Layering fabric shapes using satin stitch for decorative designs
- Anchor Stitch – Zero-length machine stitch that locks threads before topstitching
- A-Line Skirt – Fitted waist that flares gently toward the hem
- Awl Tool – Sharp punch for marking heavy canvas or leather
B
Backstitch, bobbin, and binding—the "B" section brings you the building blocks that turn loose fabric into structured, finished pieces. You’ll rely on backstitch to lock seams and baste for temporary holds before committing. Bias edge cuts give stretch and drape, while batting adds warmth between quilt layers.
- Backstitch Strength – Reverse sewing at seam ends to prevent unraveling
- Basting Hold – Long, temporary stitches that position fabric before final seams
- Bias Edge Flexibility – 45-degree cuts that stretch and wrap curves smoothly
- Batting Layer – Insulating fill sandwiched between quilt top and backing
- Binding Finish – Folded fabric strips that enclose raw edges cleanly
C
Once you’ve locked your seams with backstitch and wrapped curves with bias, you’re ready for the "C" collection—clip, cording, and contrast—that refines fit, adds dimension, and finishes edges with precision.
Clip edges around curves to prevent puckering. Cording techniques wrap cotton cord in bias-cut fabric for crisp piping. Use your cutting mat for crossgrain cutting accuracy.
Contrast fabrics bring visual interest to any construction project, turning basic crafting into polished work the community admires.
D
After curves come corners—your darts, drapes, and dimension that transform flat fabric into three-dimensional form. Dart construction sculpts fitted garments by folding fabric into strategic points. Draping techniques let you shape material directly on dress forms, visualizing how cloth flows around the body.
Double stitching reinforces seams in domestic sewing projects. Add decorative stitches—embroidery and decorative stitches—to enhance DIY sewing from basic construction to finished craft.
E
Ease—the extra fabric you work into a seam—gives garments the room they need to fit and move without pulling or binding. Elastic waist construction simplifies clothing for comfort. Edgings complete hems and necklines cleanly.
Edge finishing prevents fraying with techniques like zigzag or serged seams.
Embroidery stitches and embellishment techniques add decorative touches to evening wear and everyday pieces. Use embroidery and decorative sewing to personalize projects.
Blanket Stitch
Once you move past basic stitches, you’ll encounter techniques that give your projects shape and polish.
These five terms cover essential skills—from finishing edges to creating contours in fabric.
Each one plays a specific role in turning flat material into fitted, professional-looking pieces.
Clip Corners
Clipping corners isn’t just a nice-to-have step—it’s what separates lumpy, homemade-looking projects from pieces that could pass for store-bought. When you trim away excess seam allowance at corners before turning fabric right side out, you eliminate bulk that creates puffiness.
Here’s what you need to master:
- Cut diagonally across corner seam allowances, staying two threads away from your stitching line
- Remove fabric notches strategically without compromising seam finishes
- Check your hem allowance—less fabric means sharper sewing miters
This corner cutting technique guarantees your seams lie flat and your curved edges turn crisply every time.
Clip Curves
When fabric rounds a curve, the inner and outer edges don’t travel the same distance—and that’s where your scissors become the peacemaker. Clip notches into the seam allowance perpendicular to your stitching line, spacing them every half-inch along tight curves. This fabric manipulation prevents puckering when you press seams open. Apply these sewing techniques before turning garments right side out—your curved edges will lie flat without wrestling fabric into submission.
| Curve Type | Clipping Strategy |
|---|---|
| Inward curves (necklines) | Make straight cuts perpendicular to stitching |
| Outward curves (collars) | Cut small V-shaped notches to remove bulk |
| Tight curves | Space clips closer together (every ¼–½ inch) |
| Gentle curves | Fewer clips needed (every ¾–1 inch) |
| Corner intersections | Combine corner cutting with curve clipping techniques |
Dart
A dart transforms flat fabric into three-dimensional form—think of it as origami for your body’s curves. This garment construction technique uses a triangular fold stitched from the wide base to a tapered point, pulling excess fabric into the seam.
You’ll find darts shaping bust lines, waists, and hips in pattern making. Stitch from the fabric edge toward the point, securing with a backstitch before tapering off the edge—never tie a knot at the dart tip, or you’ll create puckering instead of smooth garment shaping.
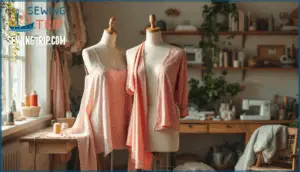
Dressmaker Dummy
Your dressmaker dummy isn’t just a mannequin—it’s your silent fitting partner that never complains about pinpricks or endless adjustments. These tailoring aids serve as three-dimensional dress models during garment construction, letting you assess drape and improve seams without constant try-ons.
Essential functions of sewing forms:
- Pin adjustments directly on the dress model while checking fabric selection and weaving alignment
- Test garment construction techniques before committing stitches to your actual piece
- Match thread colors against the fabric while viewing the full drape in natural light
- Perfect tailoring details like shoulder slopes and waistline curves using these fitting tools
Adjustable mannequin types accommodate various body measurements for precise work.
Ease
Moving from static form to real body, the space between pattern and skin—that breathing room called ease—determines whether your finished piece feels wearable or restrictive. You’ll add garment ease through pattern fitting adjustments that account for fabric stretch and comfort factor. Proper sewing margins and seam allowance work with fabric grain during garment construction techniques to prevent binding.
Master these sewing techniques and sewing terms to balance fit with freedom.
| Ease Type | Purpose | Typical Amount |
|---|---|---|
| Wearing Ease | Basic movement | 2-4 inches |
| Design Ease | Style effect | Varies by design |
| Negative Ease | Fitted garments | Stretch fabrics only |
The Fundamental Terms and Phrases
Seam allowance, fabric grain, and marking tools form the backbone of pattern work. You can’t draft or alter a garment without understanding how these elements interact. Seam allowances—usually 5/8 inch in home sewing—give you room to adjust fit and reinforce stress points. Fabric grain determines how your pieces hang and stretch; align your pattern parallel to the selvage for stability, or cut on the bias for drape. Marking tools like tracing wheels and tailor’s tacks transfer critical points from paper to cloth, so you know exactly where darts end and seams meet.
Stitch length matters too—2.5 mm is standard, but you’ll adjust for topstitching or gathering. Master these sewing terms and sewing techniques, and you’ll move from guesswork to precision. That control opens the door to garments that fit your vision, not just a generic pattern. Understanding sewing glossary terms is essential for effective communication and accurate execution of sewing projects.
Basic Terms
Once you’ve nailed how patterns work, the next step is mastering the language that shows up in every instruction sheet and tutorial you’ll touch. These sewing terms aren’t decoration—they’re your toolkit for precision. Here’s where you start:
- Selvage edge is the tightly woven border that keeps fabric from unraveling. It’s your reference point for finding grain.
- Seam allowance gives you the margin between your stitch line and raw edge—usually 5/8 inch. It’s your buffer for adjustments.
- Baste means temporary long stitches that hold layers in place before you commit. Think of it as a test run.
- Backstitch locks thread at seam starts and ends. Skip it, and your work unravels.
Terms like bias edge (that stretchy 45-degree cut), facing fabric (the inner finish at necklines), and hem (the folded bottom edge) will show up constantly. Learn them now, and you’ll read patterns like a native language instead of a translation.
Fabric Terms
Beyond understanding how stitches and seams function, you need to recognize what makes one fabric behave differently from another. Thread count—measured in threads per inch—determines whether your material feels coarse or fine. Weave types like plain, twill, or satin directly affect drape and durability. Fiber production methods influence stretch and structure, while yarn thickness (measured in denier) signals resistance under stress. Understanding fabric types is essential for selecting the right material for your sewing project.
| Term | Definition | Practical Impact |
|---|---|---|
| Fabric Grain | Direction of threads parallel (lengthwise) or perpendicular (crosswise) to selvage | Controls stretch and hang |
| Bias | 45-degree angle to selvage | Maximum stretch and drape |
| Selvage | Finished edge preventing unraveling | Alignment reference point |
| Fabric Density | Tightness of weave structure | Affects weight and opacity |
| Weave Types | Plain, twill, satin patterns | Determines texture and strength |
Cutting on-grain versus bias changes everything—stability versus fluidity. Match fabric behavior to your design intent, and you’ll control the outcome instead of fighting it.
Words and Phrases
Master the everyday language of sewing, and you’ll navigate patterns, troubleshoot problems, and communicate with other makers like a professional. Your sewing glossary expands with stitch types: zigzag for stretch, backstitch for strength, slip stitch for invisible seams. Garment construction relies on darts to shape fabric and armscyes where sleeves attach.
Notions—small tools like thimbles, seam rippers, and bobbins—keep your workspace functional. Fabric texture and weaving methods determine how your material behaves under the needle. Measurement tools guarantee precision, while seam allowances create clean finishes.
This sewing terminology isn’t jargon—it’s your foundation for translating ideas into finished work. When you speak this language fluently, you’ll troubleshoot faster and execute designs with confidence.
Do You Want to Learn Basic Starting Tools for Sewing?
If you’re ready to turn fabric into something real, you’ll need just a handful of tools to begin your journey. Start with these essentials:
- Sewing Machine – Your primary workhorse for straight, zigzag, and specialty stitches
- Measuring Tools – Tape measure and ruler for accurate seam allowances and pattern markings
- Fabric Cutter – Sharp scissors or rotary cutter paired with a cutting mat
- Sewing Kit – Pins, needles, thread types, seam ripper, and basic sewing notions
Master thread tension using your machine’s dial. Press seams as you work. Mark fabric with chalk before cutting. These sewing tools transform raw material into finished garments with precision and control.
Frequently Asked Questions (FAQs)
What are some tips for choosing fabric for a sewing project?
Think of fabric selection like matchmaking—you need chemistry between material and vision. Start by examining fiber content, weave types, and drape analysis to understand how textile arts come alive.
Test texture choice by touching samples—check the hand, sheen, and weight. Let your sewing tips include matching fabric types to pattern requirements, ensuring thread count backs your construction methods.
How can I troubleshoot issues with my sewing machine or serger?
Check thread tension first—uneven stitches mean it’s too tight or loose. Replace your needle if it’s dull or bent.
Clean lint from feed dogs and bobbin area. Oil moving parts per your manual.
Adjust presser foot pressure for fabric thickness. Test on scrap fabric after each fix.
What sewing books or online resources do you recommend for beginners?
Beginner’s Guide to Free-Motion Quilting by Natalia Bonner offers excellent sewing tutorials and techniques.
For online courses, explore platforms like Craftsy and Skillshare for sewing for beginners.
Free resources, beginner patterns, and sewing communities provide helpful tips and tricks to build your skills.
How do I start a career or business in sewing?
Starting a Sewing Entrepreneur venture sounds glamorous—until you’re pricing thread at 2 AM. Build solid Fashion Design skills first, then craft Business Planning around your niche.
Learn Sewing Patterns and Designs, invest in quality Sewing Tools and Equipment, and tap into the Sewing Community and Resources for guidance.
What advice do you have for fitting garments and adjusting patterns?
Pattern alterations demand precision. Start with body measurements and create a muslin prototype before cutting your fabric.
Use darts and princess seams for shaping. Adjust seam allowance and respect fabric grain for proper garment construction and tailoring success.
How do you calculate fabric yardage needed?
Calculating fabric yardage is easier when you measure by the book. Check your sewing patterns for fabric estimates based on garment size and width.
Add extra for seam allowances, grain alignment, and cutting layouts—usually 10-15% more fabric than listed guarantees you’re covered.
What tension settings work best for stretchy fabrics?
Lower your thread tension slightly for stretchy fabrics. Fabric resistance differs with knit settings—too-tight tension causes puckering or thread breaks. Test on scrap fabric first.
Most sewing machines need adjustment when sewing elastic or high fabric stretch materials.
When should you use a serger vs sewing machine?
Serge ahead: your sewing machine manages most projects, but a serger excels at finishing seams, preventing fraying, and working with knits.
Serger benefits include faster sewing speed and professional edges. Machine comparison shows sewing machines offer adaptability, while sergers deliver specialized serge stitch techniques for stretchy fabric choice.
How do you transfer pattern markings accurately?
You transfer pattern markings accurately using marking tools like tailor’s chalk, fabric pencils, or tracing paper. Mark notches, darts, and seam allowances directly onto fabric before cutting.
These sewing terms and notions guarantee precise pattern making and accurate cutting for professional seams.
What are seam allowances and standard measurements?
Seam allowance is the fabric between your stitch line and the raw edge. Standard measurements are 5/8 inch for garments and 1/4 inch for quilting.
Measurement tools help you mark sewing margins accurately along the fabric grain for clean seam finishes.
Conclusion
Without sewing terminology, every pattern becomes a foreign language—you’d spend hours deciphering what "grade seams" or "stay stitch" actually means. Now you’ve got the entire vocabulary mapped from A to Z.
These terms aren’t just definitions; they’re your toolkit for reading any pattern like a professional. When you encounter "topstitch," "notions," or "grainline," you’ll know exactly what action to take.
Master what’s sewing terminology, and you transform from someone following instructions blindly into a maker who understands the craft’s logic, anticipates next steps, and troubleshoots problems before they appear.
- https://www.grandviewresearch.com/industry-analysis/sewing-machine-market-report
- https://straitsresearch.com/report/industrial-sewing-machine-market/united-states
- https://textileexchange.org/knowledge-center/reports/materials-market-report-2024/
- https://www.futuremarketinsights.com/reports/needlecraft-patterns-market
- https://irispublishers.com/jtsft/fulltext/the-educational-impact-of-clothing-construction-in-secondary-and-post-secondary-curriculum.ID.000635.php


