This site is supported by our readers. We may earn a commission, at no cost to you, if you purchase through links.
 Stitching woes begone! First, check your thread’s path—it might’ve wandered off-course. Make sure it’s snug in the tension discs and bobbin case.
Got skipped stitches? Swap out that needle; it might be duller than a rainy day. Adjust the tension to avoid a tug-of-war with your fabric.
Clean your machine regularly; lint loves to party inside, causing chaos. Use high-quality threads and make sure your bobbin’s tight and right.
Ever heard of annual cleaning? It’s a thing, just like spring cleaning! Expert tip: make sure your needle is high enough to avoid fabric wrestling.
Curious for more mastery tips? Stay tuned!
Table Of Contents
- Key Takeaways
- Common Sewing Machine Problems
- Causes of Fabric Bunching
- Resolving Thread Issues
- Needle Troubleshooting Tips
- Machine Performance Troubleshooting
- Strange Noises and Other Issues
- Troubleshooting Fabric Feeding Issues
- Wavy Seams on Stretch Fabrics
- Thread Tension and Stitch Quality
- Regular Maintenance and Cleaning
- Frequently Asked Questions (FAQs)
- Conclusion
Key Takeaways
- Regularly clean your sewing machine to prevent lint buildup, which can cause noise and performance problems.
- Adjust thread tension to suit different fabric types, balancing for smooth, consistent stitches.
- Replace sewing machine needles every 8-10 hours of use or when switching projects to maintain stitch quality and prevent fabric damage.
- Ensure proper threading and bobbin placement to avoid thread jamming and uneven stitching.
Common Sewing Machine Problems
In your sewing adventures, you’ll likely encounter some common machine problems, such as thread issues, needle mishaps, or fabric troubles.
Don’t worry; understanding these glitches will equip you with the know-how to keep your sewing smooth and enjoyable.
Thread Issues
Wrestling with your sewing machine? Thread issues like a bird’s nest or knotted thread can unravel your plans.
Start by checking the threading path and adjusting thread tension—too high or too low can spell trouble.
For bobbin issues, make sure it’s placed correctly.
Rethreading might save the day.
Regular maintenance helps prevent thread shedding and those pesky tangles.
Needle Issues
If you’ve ever felt like your sewing machine has a vendetta against you, it might just be a needle issue.
Make sure you’re using the right needle type and size for your fabric.
Check needle alignment regularly to avoid breakage.
Needle threading can be tricky—be patient.
Fabric Issues
You’re not alone if fabric bunching or puckering has you puzzled.
Check your thread and bobbin tension for comfort, like adjusting a seatbelt.
Make sure the fabric feeds smoothly by lifting those feed dogs and setting your stitch length to at least 2.5.
Try different pressing techniques and seam finishes, and learn about your fabric types and grain direction for a smooth ride!
Machine Performance Issues
Fabric issues got you tangled up? It’s often about machine performance. Keep your machine humming by checking for skipped stitches and slow speeds. Watch out for loose bottom stitches too. Remember, it’s all about balancing speed control with needle timing.
Regular sewing machine cleaning helps prevent machine noise, jamming, and motor problems.
- Inspect stitch consistency.
- Examine needle timing.
- Clean the machine regularly.
Causes of Fabric Bunching
Are you tired of dealing with fabric bunching while sewing?
Understanding the common causes like high thread tension, dull needles, or incorrect fabric handling can help you prevent this frustrating issue.
High Thread Tension
High thread tension effects your sewing, leading to frustrating fabric bunching.
To fix any sewing machine problem, it’s crucial to have the right tools, such as common sewing machine repair tools. Let’s tackle this common sewing machine problem!
Too much tension pulls the fabric, creating puckers.
Here’s a quick guide to help you out:
| Problem | Cause | Solution |
|---|---|---|
| Bunching | High top thread tension | Reduce top tension |
| Uneven Stitches | Incorrect bobbin tension | Adjust bobbin tension |
| Poor Stitch Quality | Tension imbalance | Adjust both tensions |
Dull Needles
Solving fabric bunching isn’t always about high thread tension; often, dull needles are the sneaky culprits.
Dull needles lead to fabric damage and poor stitch quality, wrecking your sewing projects.
As a general rule of thumb, replace your sewing machine‘s needle every 8-10 hours of use or when starting a new project to avoid these issues, by following the proper needle replacement steps.
Keep up with your sewing machine maintenance, replacing needles regularly to sidestep these sewing machine problems.
Incorrect Fabric Handling
When fabric bunches like a hiker lost in the woods, you might be handling it incorrectly.
Watch out for these pitfalls:
- Pushing fabric instead of gently guiding it can cause tension issues.
- Pulling fabric might create unwanted fabric slippage.
- Check the fabric tension to make sure it’s just right.
These small tweaks can solve your sewing machine problems.
Prevention Tips
Think of preventing fabric bunching as sewing peace of mind.
Regular preventive maintenance, like needle care and thread selection, is essential.
Prepare your fabric properly and adjust the thread tension right.
For smooth stitching, keep up with machine cleaning and oiling.
Here’s a quick tip chart:
| Issue | Solution |
|---|---|
| Dull Needles | Replace regularly |
| Incorrect Tension | Adjust to fabric needs |
| Dust Build-Up | Clean machine frequently |
هذه هي العينة من النصوكات الخاصة بالمجموعة الثانية. هذه هي العينة من النصوكات الخاصة بالمجموعة الثانية.
Resolving Thread Issues
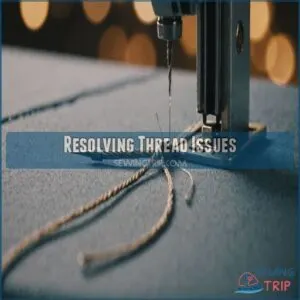
Thread issues can disrupt your sewing, leading to frustration and unfinished projects.
Thread jamming, breaking, or bunching are common problems that can be frustrating.
By understanding these issues and using effective troubleshooting steps, you’ll sew smoothly in no time.
Thread Jamming
Thread jamming often strikes fear into even the savviest sewists, but you can tackle it.
Start by checking your thread tail length—ensure it’s at least six inches.
Skipped stitches can often be resolved by consulting a comprehensive guide on Singer sewing machine troubleshooting. Look at the bobbin tension and needle size—they’re common culprits of sewing machine problems.
Guide your thread along the correct path to fix this all-too-common sewing machine error swiftly.
Thread Breaking or Shedding
Few things are more frustrating than thread breaking mid-project.
Adjust thread tension first; too tight is a common villain.
Check your spool’s notch—threads love to snag there.
Properly maintaining your bobbin case by regularly cleaning out lint can also prevent frequent thread breaks.
Bobbin issues often mean an unwelcome guest is a damaged one, so swap it out.
Don’t forget to choose the right needle type for your fabric to avoid unnecessary drama.
Thread Bunching Under Fabric
Many sewists face the dreaded "bird’s nest" of tangled threads under their fabric.
When troubleshooting your sewing machine, it’s also essential to inspect the machine’s electrical connections for signs of wear or damage, as faulty internal connections can lead to electrical issues in motors. To fix this common sewing machine problem, start by checking your bobbin placement and thread path.
You’ll need to completely unthread your machine, make sure your bobbin’s correctly seated, and rethread following your machine manual’s guide.
Double-check that your top thread spool faces the right direction.
Prevention and Troubleshooting
When those pesky thread problems pop up, you’ll want quick solutions to keep your sewing projects moving.
Regular cleaning of your bobbin area prevents most thread mishaps.
Keep your needle sharp and properly threaded, with the presser foot down before starting.
If you notice thread bunching, stop immediately and recheck your tension settings.
Remember, a well-maintained machine is a happy machine!
Needle Troubleshooting Tips
You’ll find that needle problems are among the most common issues you’ll face when sewing, from bent needles to frustrating thread snags.
Whether you’re dealing with broken needles or mysterious unthreading during your project, these practical solutions will help you get back to smooth sewing in no time.
Bent or Broken Needles
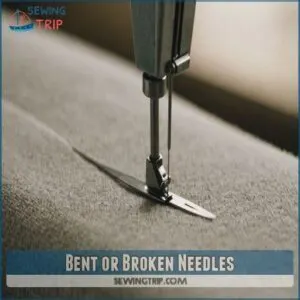
Anyone can accidentally bend or break a sewing machine needle, but don’t let it ruin your project.
Check your needle size matches your fabric type, and replace needles after eight hours of sewing.
For proper needle insertion, push it up as far as possible with the flat side facing back.
Keep spare needles handy, and always turn the power off before making needle changes.
Needle Snagging on Fabric
Just like a bent needle can snap, a snagging needle can turn your fabric into Swiss cheese.
Your needle’s size should match your fabric type – use smaller ones (60/8 or 70/10) for delicate silks and larger ones (90/14 or 100/16) for denim.
Make sure to check your needle’s condition regularly, adjust your sewing speed, and be sure you’re using the right thread type to prevent those pesky snags.
Needle Unthreading During Sewing
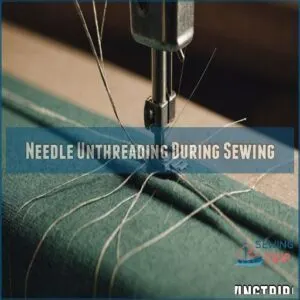
Needle unthreading can turn your sewing project into a stop-and-start frustration.
To keep your thread in place, leave at least 6-inch thread tails before you begin.
Hold these tails gently as you start stitching, and maintain proper thread tension for your fabric type.
Double-check that your needle’s eye isn’t damaged and you’ve threaded it correctly from front to back.
Prevention and Maintenance
Taking care of your sewing machine helps prevent those pesky needle problems from popping up again. You’ll save time and money by keeping your machine in top shape through regular cleaning and maintenance. Think of it like giving your trusty machine a spa day – it’ll thank you with smooth, trouble-free sewing.
- Clean your bobbin area daily with a small brush to remove lint buildup
- Replace needles after 8 hours of sewing or when they become dull
- Apply sewing machine oil to designated spots monthly, checking your manual for guidance
Machine Performance Troubleshooting
Is your sewing machine behaving like a mischievous toddler?
Let’s tackle common performance issues like skipped stitches, slow running, loose bottom stitches, and fabric release problems to get your trusty machine back on track.
Skipped Stitches
Your sewing machine’s tension settings control the balance between the upper thread and the bobbin thread, often causing skipped stitches, gathering, or puckering. Your sewing machine’s skipped stitches can be a real head-scratcher.
Don’t worry, though – we’ve got you covered with some quick fixes.
Check out this table for common culprits and their solutions.
Consider using a specialized sewing machine foot to help improve your machine’s performance and prevent skipped stitches.
| Problem | Solution |
|---|---|
| Dull needle | Replace with a fresh, sharp needle |
| Wrong needle type | Use the correct needle for your fabric |
| Improper threading | Rethread the machine carefully |
| Dirty machine | Clean lint from bobbin area and feed dogs |
Remember, a stitch in time saves nine!
Slow-Running Machine
Is your sewing machine running slower than a turtle in molasses? Don’t fret!
First, check for dust build-up – it’s like cholesterol for your machine. Give it a good clean, focusing on nooks and crannies.
Next, inspect the foot control and speed settings. If they’re fine, motor problems might be the culprit.
Regular machine cleaning is key to keeping your trusty sidekick humming along at top speed.
Loose Bottom Stitches
Speed issues fixed.
Now, let’s tackle those pesky loose bottom stitches. They’re often caused by bobbin tension problems or low upper thread tension.
You can also try checking the bobbin tension spring.
Clean your bobbin area and rethread it carefully.
Then, adjust the upper thread tension to a medium setting.
Don’t forget to check your needle size and stitch length too.
With a bit of tweaking, you’ll be stitching like a pro in no time.
Machine Not Releasing Material
After finishing a seam, the fabric won’t budge.
Don’t panic! This common hiccup is often due to the take-up lever being stuck in its lowest position.
To free your fabric and get back to sewing:
- Turn the hand wheel forward until the take-up lever rises
- Check for tangled thread in the bobbin area
- Make sure the presser foot is raised
- Verify the feed dogs are up and moving
Remember, patience is key. Gently coax the fabric free without forcing it to prevent damage.
Strange Noises and Other Issues
You’ll hear strange noises from your sewing machine when something’s not right. Let’s fix those rattles, clunks, and other odd sounds to keep your machine running smoothly.
Lint Build-up
Ever wondered why your sewing machine sounds like it’s crunching gravel?
Lint build-up might be the culprit.
To keep your machine purring, establish a cleaning routine.
After each project, remove lint from the bobbin area and under the needle plate.
Use a small brush or vacuum for dust control.
Regular lint removal prevents build-up, extends your machine’s lifespan, and helps you achieve smooth stitching.
Remember, a clean machine is a happy machine!
Needle Hitting Metal Plate
While you’re clearing out lint, don’t forget about that pesky needle hitting the metal plate. It’s like your machine’s having a mini tantrum. Bent needles can be a real issue, and learning why sewing machine needles bend can help you identify the root cause.
Here’s how to calm it down:
- Check for bobbin case damage
- Reposition the needle precisely
- Clear any obstructions in the needle’s path
- Make sure the needle plate is secure
These steps will help prevent needle plate damage and keep your sewing smooth.
Remember, proper hook timing and regular sewing machine maintenance are key to avoiding these hiccups.
Machine Seizing Up
Is your sewing machine suddenly grinding to a halt? Don’t panic. Machine seizing up can be caused by various issues.
Check for thread tangles around the bobbin or needle area.
Inspect and replace worn-out sewing machine parts to make sure smooth operation.
Make sure proper machine lubrication to prevent parts from sticking.
Listen for unusual noises that might indicate motor overheating or a jammed bobbin.
Inspect for signs of needle breakage or severe tension issues.
Remember, regular maintenance keeps your machine humming smoothly!
Troubleshooting and Maintenance
Strange noises from your sewing machine? Don’t panic!
First, check for lint buildup in the bobbin area and under the needle plate. Clean these spots with a small brush.
If the racket persists, inspect your thread path and remove any snags.
A quick needle change might solve the problem too.
Remember, regular oiling keeps your machine purring like a kitten.
Tackle these steps, and you’ll be back to smooth sewing in no time!
Troubleshooting Fabric Feeding Issues
Is your fabric refusing to budge under the needle? You’ll find that dropped feed dogs or incorrect stitch length settings are often the culprits behind fabric feeding issues.
Dropped Feed Dogs
Now that we’ve tackled those pesky noises, let’s talk about fabric feeding issues.
Dropped feed dogs can turn your sewing project into a standstill.
These little metal teeth move your fabric through the machine.
When they’re down, your fabric won’t budge.
Here’s how to get things moving again:
- Check your machine’s feed dog lever
- Clean out lint buildup around the feed dogs
- Make sure the presser foot is lowered
- Verify the stitch length isn’t set to zero
- If all else fails, consult your machine’s manual for model-specific troubleshooting
Incorrect Stitch Length
Once you’ve checked your feed dogs, let’s tackle stitch length.
It’s like finding the perfect stride for your fabric.
Too short, and you’ll end up with a pucker party.
Too long, and your seams might fall apart faster than a house of cards.
Here’s a quick guide to help you nail that Goldilocks zone:
| Fabric Type | Ideal Stitch Length | Needle Size |
|---|---|---|
| Lightweight | 1.5 – 2.0 mm | 9 – 11 |
| Medium | 2.0 – 2.5 mm | 12 – 14 |
| Heavy | 2.5 – 3.0 mm | 14 – 16 |
| Stretch | 2.5 – 3.5 mm | 11 – 14 |
| Quilting | 2.5 – 3.0 mm | 11 – 14 |
Wavy Seams on Stretch Fabrics
You’ve sewn a seam on your stretchy fabric, but it looks wavy and puckered. Don’t worry, this common issue can be fixed by adjusting your sewing technique and machine settings.
Causes of Wavy Seams
So, you’ve conquered fabric feeding woes, great job.
Using the right sewing machine thread types can also affect the quality of your seams.
Let’s tackle wavy seams on those stretch fabrics.
It’s often one of these:
- Using a straight stitch instead of a zigzag stitch.
- Stretching the fabric as you sew.
- Incorrect zigzag stitch settings.
- Wrong needle size for your stretch fabric types.
- Too much fabric tension.
Proper stitch settings and a gentle hand will fix this!
Troubleshooting and Correction
You’ve faced those pesky wavy seams on stretch fabrics, right?
To smooth them out, switch to a zig-zag stitch around 2.5mm long.
Keep your tension medium and guide the fabric gently—no stretching!
A twin needle can work wonders here too.
These adjustments make sure the sewing machine cooperates, offering neat, professional-looking seams.
Happy sewing, my friend!
Thread Tension and Stitch Quality
When your sewing machine’s stitches look wonky, thread tension is often the culprit.
Adjusting it just right can make the difference between a masterpiece and a mess, so understanding its impact on stitch quality is key.
Importance of Thread Tension
Thread tension can make or break your sewing project’s stitch quality.
Think of it like a handshake—too tight, and it puckers; too loose, and it’s awkward.
Balancing tension impacts how your stitches appear across different fabric types, needle sizes, and bobbin settings.
It’s the unsung hero in achieving smooth, consistent lines without frustrating hiccups in your work.
Adjusting Thread Tension
Tension woes often snag your sewing joy, don’t they?
Start by checking your machine’s tension guide and tweak the top thread tension dial.
For a more precise approach, refer to the thread tension guide for mastering sewing machine thread tension.
If your stitches flutter or pucker, adjust bobbin tension slightly, balancing the act like a tightrope walker.
Remember, each fabric type has its tension sweet spot, so test on scraps for that perfect stitch harmony.
Impact on Stitch Quality
Imagine sewing with perfect harmony!
Unmatched thread tension affects your stitch quality and can throw a wrench in your sewing dreams.
Here’s how to keep it neat:
- Check needle selection based on fabric thickness.
- Use high-quality thread type.
- Balance bobbin tension.
- Experiment on scrap fabric to perfect adjustments.
These steps guarantee stitches sing!
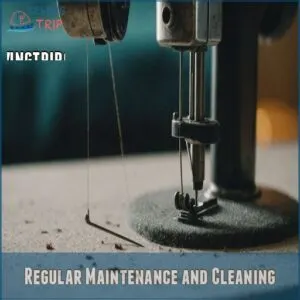
Regular Maintenance and Cleaning
Regular maintenance and cleaning are essential for keeping your sewing machine running smoothly and preventing future issues.
By regularly removing lint, dust, and debris, and lubricating moving parts, you’ll guarantee your machine stays in top condition, sparing you from unexpected frustrations.
Importance of Regular Maintenance
Regular cleaning and maintenance can help prevent issues like thread bunching up under fabric, and adhering to tips on troubleshooting sewing machine problems is key. A well-maintained sewing machine is a happy sewing machine!
Regular preventative care dramatically increases your machine’s lifespan.
Think of it like a car—regular oil changes keep it running smoothly.
Consistent cleaning prevents lint buildup, a major cause of troubleshooting nightmares.
This simple habit boosts machine longevity and saves you from costly repairs.
You’ll enjoy fewer frustrating sewing sessions, too!
Investing time in preventative maintenance is key to sewing success.
Cleaning The Sewing Machine
Keeping your sewing machine humming smoothly is all about regular cleaning.
Dust and lint can sneak in like uninvited guests, so grab your sewing machine cleaning tools and get busy.
Focus on the bobbin case and needle plate.
If it’s a vintage machine, a little extra care goes a long way.
Check the cleaning frequency to maintain peak performance.
Lubricating The Machine
Think of lubrication as your sewing machine’s love language.
Keep it smooth by checking lubrication frequency—every few months is ideal.
Use oil designed for sewing machines; don’t grab the nearest can of WD-40!
Use the right lubricating tools like an oil applicator to avoid spills.
Remember, lubrication benefits include smoother operation and longer lifespan, so avoid lubrication mistakes by consulting your manual.
Preventing Future Issues
A well-oiled sewing machine is a happy machine!
Regular maintenance helps avoid headaches later.
Keep it running smoothly by creating a checklist:
- Clean dust and lint: A quick brush prevents clogging.
- Check needle and thread: Match them to your fabric for best results.
- Test on scrap fabric: Make sure everything’s set before you start sewing.
Frequently Asked Questions (FAQs)
What are the most common sewing machine problems?
Even the best sewing machines get cranky.
Common issues include thread bunching, fabric not feeding, and needle troubles, like breaking or skipping stitches.
Keep your machine clean, adjust tension, and check threading to avoid headaches.
Why is my sewing machine not working?
Is your sewing machine acting up? Check the thread, needle, and bobbin. A quick clean might fix it! If not, consult your manual or a repair expert. You’ve got this!
How to prevent sewing machine problems?
Picture your sewing machine as a loyal friend; regular cleaning, timely needle changes, and proper threading keep it happy.
Check tension settings and avoid fabric bunching by guiding gently.
A well-maintained machine stitches smoothly without drama.
How to diagnose sewing machine problems?
Start by checking thread tension and needle condition.
Listen for strange noises, clean out lint, and inspect threading paths.
Make sure feed dogs are up and no obstructions exist.
A little detective work reveals clues for fixing issues.
What are the 7 common sewing machine troubles?
You’ll often run into fabric bunching, thread jamming, needle breaking, skipped stitches, strange noises, slow machine performance, and wavy seams.
Adjust tension, replace needles, clean lint, and follow proper threading are key first steps.
What is the most common problem when a machine doesn’t sew correctly?
A well-known sewing machine issue is improper threading, often resulting in thread tension fixing sewing machine tension. A well-known sewing machine issue is improper threading.
It causes skipped stitches, thread jams, or fabric bunching.
Double-check the threading path, make sure the bobbin’s seated correctly, and test with scrap fabric for smooth sewing.
Why is the thread not going through fabric?
Thread not going through fabric likely means a dull needle, incorrect needle type, or tight top tension.
Check for fabric jamming or dropped feed dogs.
Adjust needle, tension, and feed dogs to make sure fabric feeding is smooth.
Why is my thread looping underneath?
Like a magician’s trick gone wrong, thread loops underneath when the machine isn’t threaded correctly or the bobbin isn’t aligned.
Retrace the threading steps, make sure all paths are clear, and align the bobbin properly.
What causes uneven stitch lengths intermittently?
Uneven stitches? Check your bobbin winding, then your machine’s tension. A bent needle or clogged bobbin area can also cause this. Clean it and try a new needle!
Why is my fabric puckering at seams?
Fabric puckering at seams often happens due to high thread tension or incorrect needle size.
Lower the tension, match needle to fabric weight, and use a walking foot to guide your fabric smoothly for flat seams.
How can I reduce machine vibration?
To reduce sewing machine vibration, make sure it’s on a sturdy, level surface.
Tighten all screws.
Regularly clean for lint buildup.
Using a rubber mat or pads can absorb vibrations.
Regular maintenance keeps it purring smoothly.
What are solutions for uneven thread tension?
You’d think tension issues might stem from faulty threading, wouldn’t you?
Adjust the top thread tension, rethread if necessary, make sure the bobbin is properly wound, and check for lint to keep stitching smooth and consistent.
Why does the needle keep unthreading itself?
Make sure your thread tails are at least 6 inches long to prevent needle unthreading.
Hold them gently as you start sewing.
If unthreading persists, check for bent needles or incorrect threading paths.
Always recheck your settings.
Conclusion
Learn the secrets of your sewing machine just like Sherlock Holmes solves mysteries.
By mastering these sewing machine troubleshooting tips, you’ll tackle common issues like skipped stitches or thread dilemmas with confidence.
Keep up with routine cleaning and inspect your needles regularly to guarantee smooth performance.
Remember, understanding your machine’s quirks will keep fabric bunching and machine noise at bay.
Armed with this knowledge, your sewing projects will run smoothly, and you’ll enhance your crafting joy.

