This site is supported by our readers. We may earn a commission, at no cost to you, if you purchase through links.
A bobbin that looks right can still wreck your stitches. Grab one off the shelf that’s close enough in size, drop it in, and you’ll get skipped stitches, thread nests, or a tension mess that has you blaming the machine. The truth: your bobbin case doesn’t care about "close enough."
Class 15, L-Style, M-Style—each one has an exact diameter, depth, and thread capacity your hook system expects. Mix them up and even a brand-new machine will fight you.
Knowing how to choose the right bobbins means matching case, material, and winding style to your machine, not guessing. Get that right, and half your tension headaches disappear before you thread a needle.
Table Of Contents
Key Takeaways
- Your bobbin has to match your machine’s exact case type, size, and depth—Class 15, L-Style, and M-Style aren’t interchangeable, even when they look close enough.
- Check your manual and your exact brand/model number before buying, since variants within the same brand often need different bobbin styles.
- Material matters as much as size: plastic suits home machines, metal handles industrial speeds, magnetic bobbins stop embroidery overspin, and sideless designs give you more usable thread.
- Always inspect for cracks or warping, seat the bobbin securely, and run a test seam before starting your real project, since most jams and tension problems trace back to a fit issue you could’ve caught early.
Check Your Machine’s Bobbin Requirements
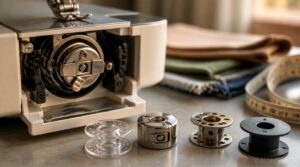
Grabbing any bobbin off the shelf and hoping for the best is a good way to end up with jammed thread and a bad afternoon. Your machine was built for a specific bobbin type, and that spec is non-negotiable. Here’s exactly what to check before you buy or wind another one.
If you’re unsure where to start, this guide on proper bobbin winding techniques walks through getting tension and thread type right from the first wind.
Consult The Manufacturer’s Manual
That little booklet buried in your sewing desk drawer? It’s your first stop, not a last resort. Read the manual thoroughly before guessing bobbin size.
It reveals:
- Bobbin case compatibility
- Correct installation steps
- Safety warnings for your model
- Operating limits for tension and speed
Skipping this step causes most fit problems technicians see daily.
Match Exact Brand and Model
Once you’ve read the manual, write down your exact brand and model number — not just "Singer" or "Brother." Brand model verification matters because families split into variants: a Brother 4000 takes Class 15, while the 4500 needs L-Style.
Skip variant code matching and you risk buying a bobbin that’s close, but wrong for bobbin case compatibility.
Identify Bobbin Case Configuration
Now pop the cover plate and look inside. Is your bobbin a drop-in system sitting flat, or a front-loading metal case? That tells you the hook system—oscillating or rotary—and whether orientation marks, the case latch, or seating security matter for correct bobbin installation and tension adjustment.
Proper case alignment using markers ensures secure seating and prevents tension issues during operation.
Alignment markers must match for correct case insertion and machine function.
Check Vintage or Industrial Specifications
Got an old Singer or an industrial machine? Don’t guess. Confirm exact bobbin class using ISMACS or your manual—vintage specifications vary wildly.
For industrial machines:
- Verify industrial bobbin compatibility (G, U, Style 58)
- Match machine model number exactly
- Consult legacy compatibility charts for Consew, Juki, Pfaff
Never assume Class 15 fits everywhere—check vintage model specs first.
Compare Bobbin Styles and Dimensions
Not all bobbins that look alike are actually interchangeable, and that’s where most tension headaches start. Size, shape, and weight all play a role in how your machine feeds thread, so getting familiar with the differences matters. Here’s how the major styles stack up against each other.
Class 15 Versus L-Style
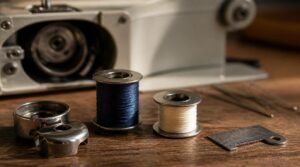
Class 15 and L-Style share the same 20mm diameter, but height gives it away: Class 15 stands about 7/16", L-Style closer to 5/16". That Bobbin Height Comparison drives real Thread Capacity Differences—83 yards versus 66 in Enhanced Threads’ testing.
Using the wrong bobbin height can also strain your upper thread, so if you’re chasing snags or breaks, this guide on preventing upper thread breaking walks through the likely culprits.
L-Style sometimes fits Class 15 cases; reverse rarely works. Always run a Fit Test for proper thread tension control and sewing machine compatibility.
M-Style for Larger-capacity Machines
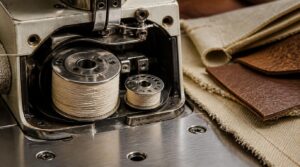
When your machine chews through bobbins fast, M-Style is the upgrade. At 24.9mm—quarter-sized—it holds nearly double an L-Style’s capacity, some prewound versions rated 240 yards.
- Longarm quilters
- Industrial/commercial machines
- Heavy fabric: canvas, upholstery, leather
Check your bobbin case fit before switching; matching brand and model prevents tension headaches and skipped stitches down the line.
Industrial U and Style 58
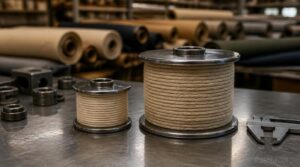
When quilting frames give way to tarps and tents, you’ve moved past M-Style entirely. Style U measures 28mm in diameter, built for canvas and net sewing. Style 58 jumps to 36.6mm, handling heavy covers commercial shops churn out daily.
These aren’t domestic-machine parts—verify machine compatibility with your manual before ordering, since industrial bobbin durability only helps if the fit’s correct from the start.
Measure Diameter and Width Accurately
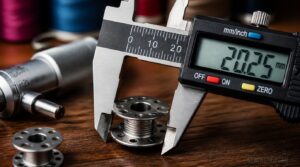
Eyeballing it won’t cut it. Grab calipers, zero them first, and close the jaws gently across the widest point—diameter one way, width the other.
- Check roundness by rotating the bobbin
- Use a micrometer for finer 0.01mm precision
- Compare against Class 15’s 20.6mm standard
- Inspect the bobbin case while you’re at it
Never Substitute Similar-looking Bobbins
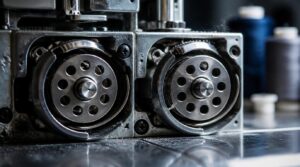
That "close enough" bobbin sitting in your drawer? It’ll cost you a jammed hook race. Tolerance limits run tight—±0.005 inches—so brand-specific fit isn’t negotiable.
With tolerances as tight as ±0.005 inches, a close-enough bobbin is a jammed hook race waiting to happen
| Bobbin Trait | Why It Matters |
|---|---|
| Weight | Affects spin, tension |
| Flange angle | Determines case seating |
| Notch/tab | Prevents free spinning |
Class 15 bobbins look identical across brands but rarely are. Always verify machine compatibility before threading up.
Choose The Right Bobbin Material
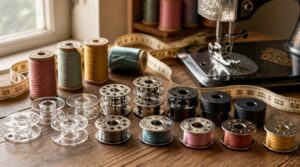
Getting the size right is only half the battle—material matters just as much. Plastic, metal, magnetic, and sideless bobbins each behave differently under the needle, and your machine has opinions about which one it wants. Here’s how to match the material to the job.
Plastic Bobbins for Domestic Machines
Most home machines run on Class 15 plastic bobbins — about 20mm across, 11mm deep. They’re lightweight, cheap, and let you check thread levels at a glance.
- Clear visibility for thread tracking
- Consistent tension in matched cases
- Reusable across projects
- Easy storage in multipacks
Durability matters, though: cracked or warped plastic throws off installation and tension fast.
Metal Bobbins for High-speed Sewing
Plastic works fine at home speeds, but push a machine hard and it starts to falter. That’s where metal bobbin weight earns its keep.
| Feature | Benefit |
|---|---|
| Rigid metal shell | Consistent rotation stability |
| Polished surface | Smooth thread unwind |
| Added mass | Vibration reduction |
| Industrial-grade build | Better tension adjustment |
Industrial machines rely on this durability for long runs without losing thread capacity or control.
Magnetic Bobbins Prevent Embroidery Overspin
Metal controls speed, but embroidery machines fight a different battle: overspin. When the needle stops, the bobbin keeps turning, spilling loose loops into the hook race.
Magnetic bobbins fix this through a magnetic braking effect against the metal case, delivering:
- Antioverspin braking
- Thread tension stability
- Reduced thread looping
That’s commercial embroidery efficiency, straight from bobbin winding precision.
Sideless Bobbins Increase Usable Capacity
Magnetic bobbins fight overspin, but sideless bobbins fight waste. Ditch the paper or plastic sides, and that freed-up center space becomes pure thread capacity. Some sideless L-style bobbins pack 142–150 yards. That’s 15-40% more than standard Class 15 winds.
Bonus: the open design visibility lets you eyeball remaining thread instantly—no more guessing mid-seam. It’s sideless bobbin benefits in action: less waste, more sewing.
Avoid Material Compatibility Problems
Sideless bobbins save thread,ins save thread, but the wrong bobbin case material pairing wastes your whole day. Mixing metal bobbins with cases built for plastic throws off spring tension fast. Magnetic and conductive bobbins need machines rated for them, too—check your manual first. Inspect the bobbin case for wear before swapping materials, since mismatches cause tension imbalance, thread breaks, and skipped stitches.
Decide Between Pre-Wound and Reusable Bobbins
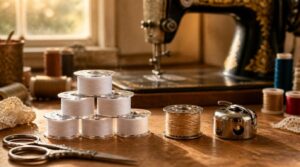
Winding your own bobbins feels economical, but it’s not always the smart move. Pre-wound options save time and often perform better, especially under heavy use. Here’s what to weigh before you settle on one approach for your machine.
Self-wound Versus Factory Pre-wound
Wind it yourself or buy it ready-made? Prewound bobbins offer tension consistency and big setup time savings—no winding step, straight from the pack. Self-wound bobbins cost less if you’ve got bulk thread, and give you full thread selection flexibility.
- Tension: prewound wins
- Speed: prewound wins
- Cost per unit: self-wound wins
- Control: self-wound wins
- Downtime: prewound wins
Estimate Thread Capacity Needs
Before buying anything, run the math. Sew a 10 cm test seam, pull it apart, measure the thread, and divide by seam length—that’s your consumption factor. Multiply by total seam length across the project, factoring stitch density and fabric plies, then add a 5% waste allowance. That number tells you exactly how many bobbins, in what size, your run demands.
Choose Paper-sided Embroidery Bobbins
Cardboard casing, not chance, is what makes these bobbins worth stocking. Paper edges resist wear against metal bobbin cases, cut lint, and keep color consistency tight—black and white dominate for a reason.
- Crisp, jam-free embroidery runs
- Neat drop-in loading, every time
- Thread weight selection (70D/2 or 75D/2) matched to your design
- Storage protection that keeps thread clean until installation
Consider Speed, Cost, and Waste
Time is money, but so is wasted thread. Pre-wound bobbins cost more upfront yet cut changeover time up to 90%. Reusable bobbins save cash long-term with bulk thread.
| Factor | Pre-Wound | Reusable |
|---|---|---|
| Speed | Fast, ready-loaded | Slower, hand-wound |
| Cost | Higher per unit | Lower long-term |
| Waste | Minimal leftover | Depends on fill |
Match your downtime tolerance to budget reality.
Match Bobbin Thread to Project
The right bobbin size means nothing if the thread inside it fights your fabric. Match fiber content to your project: polyester for stretch knits, cotton for stable quilting cottons, denim calls for tougher polyester in both bobbin and needle.
For embroidery, go fine—60 wt keeps the underside flat. On quilts, pick backing-color thread so stitches disappear.
Verify Bobbin Fit Before Sewing
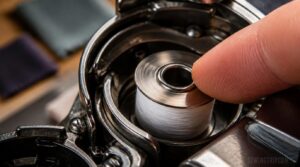
You’ve picked the right size and material, but that bobbin still needs to earn its place in the machine. Fit isn’t just about matching numbers on a chart—it’s about how the bobbin sits, spins, and feeds once it’s actually installed. Here’s what to check before you let the needle drop.
Inspect Cracks, Warping, and Chips
Grab that bobbin and hold it under a bright light before it ever hits the case.
Inspect bobbin damage first: fine cracks near the rim, a warped, oval shape, or jagged edge chips all spell trouble. Check for warping with a flat-surface test—if it rocks, it’s bent. Assess crack severity honestly; even hairline fractures spread under tension. When in doubt, replace it.
Seat The Bobbin Case Securely
A clean bobbin passes inspection—so now it needs a home.
For front-loading systems, align the horn with the groove, then engage the latch until it clicks.
Drop-in setups need the plastic triangle pressed against the spring.
Either way, verify flat seating: no tilt, no gap. Wiggle it—rattling means it’s not locked in yet.
Thread and Install Correctly
Seating gets you halfway there—now check the thread itself.
Pull the tail through the case slot, under the tension spring, confirming the unwinding direction matches the case diagram. Leave a 3-4 inch tail. Close the cover fully; partial closure stops the hook from catching thread. Wiggle for a secure fit—no rattle, no snag.
Test Tension on Scrap Fabric
Now sew a test seam before touching your project. Use a scrap matching your fabric’s weight and layer count—thread tension balance shows differently on different materials.
- Thread both paths correctly
- Sew a 3-inch seam
- Check top and bottom visibility
- Adjust one dial notch
- Re-test on the same scrap
Bobbin thread showing on top means tighten; upper thread underneath means loosen.
Troubleshoot Jams and Skipped Stitches
Once your test seam looks right, jams and skipped stitches usually trace back to one culprit. Check thread tension balance first, then needle condition—a bent tip over 0.5mm causes skips on knits.
Verify feed dog alignment (0.2mm clearance) and inspect the bobbin case for cracks or debris. Wrong bobbin size or worn material accelerates tension issues fast.
Frequently Asked Questions (FAQs)
How do I know if my bobbin is class 15?
Like checking a rotary phone’s dial before trusting it works, start with the manual confirmation method. Compare against a nickel for visual size comparison (3mm), then run a case fit test—smooth seating means you’ve got a true Class
What is the difference between L and M style bobbins?
L-style runs about 3mm across and 9mm wide; M-style measures 9mm and 7mm. M-style holds nearly double the thread, making it common on long-arm quilters, while L-style suits multi-needle embroidery and industrial straight-stitch machines.
Do all bobbins fit all sewing machines?
No — that’s a universal bobbin myth. Even a drop-in loading system needs the exact match: Class 15, L-style, or M-style. Always run a machine compatibility verification against your manual before assuming interchangeability by brand.
Are class 15 and J bobbins the same?
Close, but not identical. Class 15 bobbins have flat flanges; Class 15J bobbins curve slightly and run about 4mm by 3mm versus 3mm by 7mm. Always run a bobbin compatibility check against your manual before swapping styles.
How often should I replace my bobbins?
If it ain’t broke, don’t fix it: bobbin lifespan depends on wear, not the calendar. Replace only when you spot cracks, chips, warping, or when tension problems persist after cleaning—otherwise, a smooth bobbin can last years.
Can I mix thread brands within one bobbin?
Mixing brands invites thread tension imbalance — fiber diameter and elasticity differ, so tension force varies. Brand A’s 8oz pull versus Brand B’s 1oz throws off delivery consistency, causing breakage, skipped stitches, or uneven bobbin winding direction.
Stick to one brand per bobbin.
Why does my bobbin thread keep looping?
Wrong size, worn spring, misaligned path, dirty case—each causes loops differently. Usually it’s tension spring wear or a thread path off by 30 degrees. Check bobbin case cleaning, winding direction, and the tension screw first.
How long does a pre-wound bobbin last?
Expect 30-50% more thread than self-wound bobbins, roughly 130 yards for Class 15/L-style, 230 for M-style. Real-world life varies by stitch density, but many embroiderers report 40,000-45,000 stitches before swapping.
Is it safe to store bobbins long-term?
Yes, storage won’t ruin bobbins if you do it right. Use opaque, closed containers to block dust and UV, keep humidity moderate, secure thread tails, and separate plastic bobbins from metal ones to prevent scratches or cracks.
Conclusion
A bobbin is small, but it’s the heartbeat of every stitch your machine makes—get the size wrong, and that heartbeat skips.
Now you know how to choose the right bobbins: match the case, respect the material, and test before you trust a seam.
Skip the guesswork, and your machine rewards you with clean, even stitches every single time.
That’s not luck. That’s precision, spool by spool, stitch by stitch.
- https://help.singer.com/en-US/how-do-i-choose-the-right-singer-bobbin-389067
- https://blog.wawak.com/post/bobbin-size-chart
- https://www.maggieframes.com/blogs/embroidery-blogs/ultimate-guide-to-bobbin-sizes-choosing-the-perfect-fit-for-your-sewing-machine
- https://www.singer.com/collections/singer-bobbins
- https://www.singersewinginfo.co.uk/technical/parts/bobbins/