This site is supported by our readers. We may earn a commission, at no cost to you, if you purchase through links.
 Ready to turn that intimidating sewing machine into your creative sidekick? Basic sewing machine tutorials aren’t just about threading needles—they’re your ticket to crafting magic.
You’ll start by understanding your machine’s anatomy, practicing straight stitches that won’t make your grandma cringe, and learning thread tension that’s smoother than butter.
Don’t stress about perfection; every pro started exactly where you’re standing. With a bit of patience and practice, you’ll be whipping up everything from quirky pillowcases to custom tote bags.
Your sewing machine isn’t just a tool—it’s your gateway to releasing creativity, one stitch at a time. Curious about those first transformative techniques?
Table Of Contents
- Key Takeaways
- Setting Up Your Sewing Machine
- Mastering Basic Sewing Techniques
- Choosing The Right Fabric and Thread
- Avoiding Common Sewing Mistakes
- Basic Sewing Projects for Beginners
- Troubleshooting Common Sewing Issues
- Essential Sewing Tools and Accessories
- Practicing and Improving Your Sewing Skills
- Advanced Sewing Techniques for Beginners
- Taking Your Sewing to The Next Level
- Frequently Asked Questions (FAQs)
- Conclusion
Key Takeaways
- You’ll transform your sewing machine from an intimidating device to a creative tool by understanding its basic parts, threading techniques, and practicing simple stitches. Don’t fear the mistakes – they’re part of your learning journey.
- Your success depends on matching the right needle and thread to your fabric type, ensuring smooth stitching and preventing common beginner errors like thread breakage and tension issues.
- Start with beginner-friendly projects like pincushions, tote bags, and simple pouches to build confidence and practical skills. These quick wins will help you master fundamental sewing techniques without overwhelming you.
- Practice and community are your secret weapons – seek out online tutorials, join sewing groups, and consistently work on your skills. Your sewing machine becomes an extension of your creativity with patience and persistent learning.
Setting Up Your Sewing Machine
Setting up your sewing machine might seem challenging, but with the right guidance, you’ll be stitching like a pro in no time.
Learning the basics of your machine’s parts, threading techniques, and essential setup steps will transform you from a nervous beginner to a confident sewer ready to tackle your first project.
Locating and Understanding Machine Parts
Ready to release your inner sewing superhero?
Let’s demystify your machine’s anatomy!
Your sewing journey starts with understanding key machine parts.
Locate the power switch—your command center—and explore the spool pin where thread begins its magical journey.
Check out the presser foot, your fabric’s trusty sidekick, and peek at the tension dial that keeps stitches smooth.
Each component is a puzzle piece in your sewing machine’s masterful design, waiting to transform fabric into art.
Choosing The Right Needle and Thread
Your sewing machine’s success hinges on matching needles and thread like a pro.
Different fabrics demand specific needle sizes and thread weights. Got a lightweight cotton? Grab a fine needle and thin thread. Working with denim? Choose a heavy-duty needle and stronger thread.
Pro tip: Your sewing machine manual is your roadmap to perfect pairings.
Thread Types and Needle Materials can make or break your project. By selecting the right combo, you’ll transform from a beginner to a sewing machine wizard, creating flawless stitches every time.
Understanding the needle size basics is essential for achieving professional results in your sewing projects.
Threading The Machine Correctly
Threading your machine isn’t rocket science—it’s an art you’ll master quickly.
Threading your sewing machine is an art form—embrace the journey, and soon you’ll be stitching with confidence and grace.
After selecting your perfect needle, trace the thread’s journey through carefully marked guides. Your thread needs a smooth path from spool to needle, dancing through tension discs and take-up levers with precision.
- Check spool placement for tangle-free glide
- Follow color-coded threading paths
- Make certain the bobbin sits snug
- Inspect thread tension settings
- Practice makes perfect alignment
Mastering Basic Sewing Techniques
You’re about to discover the secrets of sewing machine magic, transforming from a novice to a confident stitcher in no time.
With practice and patience, you’ll master basic techniques like straight stitches, backstitching, and maneuvering corners that will set the foundation for all your future sewing adventures.
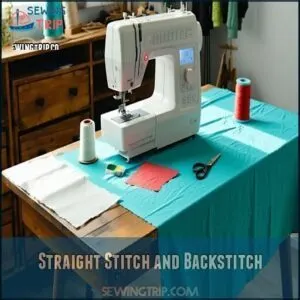
Straight Stitch and Backstitch
Now that you’ve set up your machine, it’s time to master your first power moves: straight stitches and backstitching. Think of these as your sewing machine’s dynamic duo—simple yet mighty.
Adjust your stitch length like a pro, matching it to your fabric’s personality. Your straight stitch is your foundation, creating clean lines with steady forward motion.
The backstitch? It’s your secret weapon for locking seams tight, like reinforcing a promise. Practice makes perfect, so don’t sweat the wobbles.
Control your thread tension, guide your fabric gently, and watch your confidence grow. Remember, every sewing hero started exactly where you’re now—one straight stitch at a time.
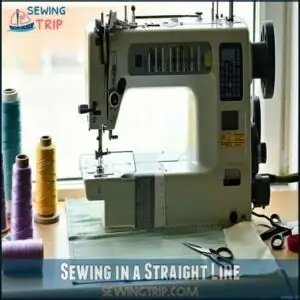
Sewing in a Straight Line
Your sewing machine’s needle is the paintbrush, and the fabric is your canvas.
Mastering the straight stitch transforms your creative vision into reality. Here’s how to sew a perfect line every time:
- Follow Seam Guides: Trace those trusty lines on your needle plate like a GPS for fabric.
- Let Fabric Flow: Allow feed dogs to guide your material smoothly without manual interference.
- Adjust Thread Tension: Fine-tune your machine so threads glide like silk, creating impeccable straight stitches.
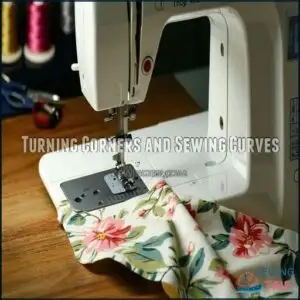
Turning Corners and Sewing Curves
Every sewist faces their sewing machine fears head-on when tackling corner and curve techniques.
When turning corners, your secret weapon is precision: stop with the needle down, lift the presser foot, pivot the fabric smoothly, then lower the foot.
For curved edges, shorten your stitch length and handle fabric like you’re guiding a delicate dance partner.
Practice on scrap material builds confidence in your curve stitches and pivoting techniques, transforming beginner hesitation into sewing machine mastery.
Choosing The Right Fabric and Thread
Choosing the right fabric and thread can make or break your sewing project, so it’s essential to get these basics right.
By understanding fabric types, thread weights, and pre-washing techniques, you’ll set yourself up for sewing success and create professional-looking garments that’ll make you proud.
Solid and Elastic Fabrics
Mastering fabric selection elevates your sewing game. Understanding different fabric types opens a world of creative possibilities.
As you continue learning sewing machine tutorials, you’ll discover the magic of textile diversity. Fabric adventures await with these four fabric personalities:
- Cotton: The reliable beginner’s best friend
- Jersey knits: Stretch with attitude
- Linen: Crisp and breathable elegance
- Canvas: Strong and structured canvas champion
Solid fabrics like cotton offer predictable behavior for basic sewing skills. Elastic fabrics demand respect—they stretch, twist, and challenge your technique. Your sewing machine is your trusty companion, ready to help you navigate the intricate world of fabric drape and texture.
When working with cotton, considering cotton fabric types is essential for superior results. Embrace the journey!
Choosing The Right Thread for Your Project
Threads are the secret sauce of your sewing project.
Threads weave the magic, transforming fabric from mere cloth to a canvas of creative expression.
When selecting yarn for your machine, match thread weight to fabric thickness—lightweight threads dance with delicate chiffon, while sturdy strands conquer denim.
Consider fiber types that complement your material: cotton threads pair perfectly with quilting cotton, polyester works magic on stretchy fabrics.
Color matching elevates your creation, but don’t shy away from bold contrasts that make stitches pop.
Smooth thread texture guarantees your sewing machine glides effortlessly, transforming your project from amateur to awesome with each stitch.
Understanding the right needle size guidelines is vital for a successful sewing project.
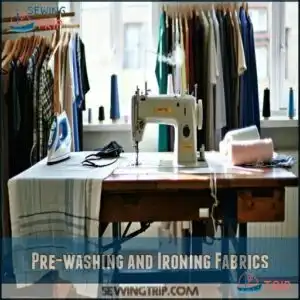
Pre-washing and Ironing Fabrics
Wrinkled fabric can sabotage your sewing project faster than a rookie mistake! Prewashing isn’t just a step—it’s your secret weapon against unexpected shrinkage and fabric drama.
- Wash fabrics before cutting to prevent future warping
- Iron while slightly damp for crisp, professional results
- Test iron settings on a scrap piece first
- Match wash temperatures to your specific fabric type
- Steam out stubborn wrinkles like a sewing ninja
Your fabric preparation strategy determines the difference between a homemade look and a professional finish. By taking these simple steps, you’ll transform raw materials into a perfectly prepped canvas for your creative sewing journey. Embrace the prep, and watch your projects shine!
Avoiding Common Sewing Mistakes
You’re bound to make a few mistakes when you’re just starting out with sewing, but don’t worry – every expert was once a beginner.
By learning to recognize and avoid common pitfalls like incorrect threading, sewing over pins, and using the wrong needle, you’ll quickly build confidence and skill with your sewing machine, and become proficient in sewing machine operations.
Incorrect Threading and Tension
The dreaded tension nightmare can turn your sewing project into a frustrating mess.
Threading errors often cause stitch distortion, making your machine rebel against smooth stitching. Check that your thread snaps perfectly into tension discs, adjusting the dial until your stitches look balanced.
For sewing machine tutorials targeting beginners, mastering thread tension is essential. When in doubt, consult your manual or seek expert guidance.
Sewing Over Pins and Not Backstitching
Ever accidentally sewn over a pin and heard that dreaded snap? Nothing kills a sewing project faster than a broken needle or mangled fabric.
Here’s your rescue plan:
- Remove Pins Strategically: Pull them out just before your needle approaches, keeping your fabric smooth and your needle intact.
- Backstitch Like a Pro: Lock your seams at the start and end of each stitch line for rock-solid security.
- Practice Pin Removal: Develop muscle memory by practicing pin placement and removal on scrap fabric.
Your sewing machine isn’t a pin cushion—treat it with care, and you’ll create professional-looking projects every time.
Not Using The Correct Needle Size
Sewing machine needles are your silent heroes, and picking the wrong size can sabotage your entire project.
From lightweight cotton to denim, each fabric demands a specific needle size.
Needle breakage and fabric damage lurk when you ignore this golden rule. Your sewing machine tutorials won’t mean much if you’re constantly battling thread tension and sewing errors.
Match that needle like a pro!
Basic Sewing Projects for Beginners
You’re about to transform your sewing skills from zero to hero with three beginner-friendly projects that’ll boost your confidence and creativity.
Whether you’re making a practical pincushion, crafting reusable produce bags, or designing a stylish zipper pouch, these simple projects will help you master your sewing machine and discover your inner DIY enthusiast.
Simple Pincushion
From the depths of your sewing adventure springs the mighty pincushion—your first crafty companion!
Here’s how to nail this beginner-friendly project:
- Select vibrant fabric scraps that spark joy
- Choose soft cotton batting for plush filling
- Stitch with confidence, embracing imperfections
Grab your sewing machine and jump into this fun, practical project.
With gentle stitches and a playful spirit, you’ll create a functional masterpiece that celebrates your newfound sewing machine basics, and this is a great way to start your sewing journey with a beginner-friendly project.
Reusable Produce Bags
When you’re ready to level up your eco-friendly game, explore reusable produce bags.
These handy accessories transform your sewing machine tutorials into practical skills.
Choose lightweight cotton or mesh fabrics, master straight stitches, and create bags that reduce waste.
Perfect for beginner sewing lessons, these projects help you gain confidence while supporting sustainable living.
Easy Zipper Pouch
Practically, you’ll breeze through creating a custom zipper pouch that’ll boost your sewing confidence! This beginner-friendly project lets you showcase your emerging skills with flair.
- Select complementary fabrics that spark joy
- Match zipper length to desired pouch size
- Cut precise fabric pieces with sharp scissors
- Pin carefully before machine stitching
Whether you’re organizing craft supplies or gifting a handmade treasure, this zipper pouch transforms fabric scraps into functional art. Your sewing machine becomes a magic wand, turning simple materials into a personalized accessory that screams "I made this!"
Pro tip: go slow, breathe, and enjoy the creative process.
Troubleshooting Common Sewing Issues
When your sewing machine starts acting up, don’t panic—these hiccups are just part of the learning process.
By understanding common issues like thread breakage, machine jamming, and stitch inconsistencies, you’ll quickly become a sewing troubleshooter and boost your confidence behind the machine.
Thread Breakage and Tangles
Just finished a pillowcase and hit a snag with thread breakage? You’re not alone! Thread troubles can derail even the most promising sewing project.
Here’s your rescue plan for smooth stitching:
- Check thread tension carefully to prevent unraveling
- Use high-quality thread matched to your fabric type
- Wind bobbins evenly using your machine’s threader
- Replace old or bent needles before they cause damage
- Clean lint buildup to guarantee clean thread movement
Thread breakage often signals something’s off in your machine setup. By paying attention to these key details, you’ll transform potential frustration into fabric-crafting confidence. Remember, every professional started exactly where you’re now—learning, adjusting, and mastering the art of sewing, one stitch at a time.
To resolve common issues like top thread tangling, consider checking the thread tension settings for a smoother sewing experience. This will help you achieve professional results and avoid common mistakes. With practice and patience, you’ll become a skilled sewer, capable of creating beautiful and durable products with ease and precision.
Machine Jamming and Not Moving
Hit the brakes when your sewing machine jams—it’s a common frustration for sewists of all levels.
Machine jamming often stems from threading issues, lint buildup, or mechanical problems.
Check your bobbin, re-thread carefully, and clean around feed dogs and needle plate.
When the motor hums but fabric won’t budge, it might need oiling or professional attention.
Quick maintenance can prevent most sewing machine problems, keeping your creative flow smooth and uninterrupted.
Incorrect Stitch Length and Width
When machine jamming leaves you frazzled, incorrect stitch length and width can make sewing feel like wrestling an octopus.
Here’s your rescue plan:
- Fine-tune tension for silky-smooth stitches that don’t pucker or loop
- Match needle to fabric like a detective matching clues
- Experiment with stitch settings before committing to your final project
- Test on scrap fabric to avoid heartbreak on your masterpiece
Understanding thread tension issues is essential for achieving perfect stitches.
Your sewing machine’s not the boss—you are! Master those settings and watch your confidence soar.
Essential Sewing Tools and Accessories
You’ll need a few key tools to transform from a sewing novice to a confident creator, so let’s equip you with the essential accessories that’ll make your journey smooth and enjoyable.
From rotary cutters and measuring tapes to your trusty iron and specialized machine accessories, these tools will become your best friends as you learn to stitch, create, and craft with precision and passion.
Rotary Cutters and Mat
After wrestling with troublesome seams, you’ll need precision tools to conquer fabric cutting.
A sharp rotary blade and sturdy self-healing mat become your new best friends in the sewing journey.
Understanding the importance of self healing technology is essential for extending the life of your cutting mat.
| Tool | Purpose | Care Tips | Skill Level | Recommendation |
|---|---|---|---|---|
| Rotary Cutter | Precise Cutting | Replace Blades Regularly | Beginner | Highly Recommended |
| Cutting Mat | Surface Protection | Clean After Use | All Levels | Must-Have |
| Blade | Sharp Edges | Sharpen/Replace | Intermediate | Essential |
| Measurement | Accurate Cuts | Use Grid Lines | Beginner | Recommended |
| Safety | Careful Handling | Use Protective Gloves | All Levels | Critical |
Get ready to slice through fabric like a pro—your sewing machine tutorials start here with the right tools and techniques for a successful sewing experience, ensuring accurate cuts and safe handling.
Sewing Machine Accessories
The versatility of sewing machine accessories can transform your crafting experience from frustrating to fabulous.
Your sewing toolkit isn’t complete without these essential accessories:
- Presser Feet: Your secret weapon for precision stitching
- Bobbin Cases: Tame thread tangles like a pro
- Needle Assortment: Match fabric types with surgical accuracy
- Thread Cutters: Snip threads with lightning speed
- Machine Lights: Illuminate every intricate detail
Specialized presser feet open up a world of creative possibilities. From zipper attachments to hemming guides, these sewing machine parts are your ticket to professional-looking projects.
Each accessory is designed to make your sewing journey smoother, giving you the confidence to tackle any project that comes your way. Investing in quality sewing machine accessories can greatly enhance your overall sewing experience.
Iron and Ironing Board
Your iron is the unsung hero of sewing perfection! Choose a sturdy ironing board with a smooth cover that can handle your crafting adventures.
Check your iron’s steam settings and heat control to protect delicate fabrics. Pro tip: Keep that soleplate clean – regular maintenance means crisp seams and professional-looking projects every time.
A suitable ironing board cover is essential for efficient ironing and sewing tasks, ensuring sewing perfection.
Practicing and Improving Your Sewing Skills
You’re undertaking a sewing journey that’s all about consistent practice and continuous learning.
By exploring online tutorials, tackling beginner projects, and connecting with fellow sewists, you’ll rapidly build confidence and transform your basic skills into impressive craftsmanship.
Online Tutorials and Classes
Sewing skills are just a click away! Discover your creative potential with online learning resources that transform beginners into confident crafters.
Here’s your roadmap to sewing success:
- Video Lessons: YouTube channels packed with sewing machine tutorials
- Web Classes: Interactive online courses for hands-on learning
- Tutorial Blogs: Step-by-step guides from experienced sewists
- Sewing Apps: Pocket-sized skill builders for on-the-go learning
Dive into beginner sewing lessons and watch your confidence stitch together, one tutorial at a time!
Simple Projects for Beginners
Fabric scraps and a dream—that’s all you need to kickstart your sewing journey!
Begin with beginner-friendly sewing machine projects that build confidence.
Jump into quick wins like crafting a pincushion, sewing a tote bag, or creating cloth napkins.
These simple projects teach sewing machine basics without overwhelming you.
Ready to transform those scraps into something awesome?
Joining a Sewing Community
Ready to level up your sewing skills? Join the vibrant world of sewing communities and watch your passion soar!
Discover connection through:
- Local sewing meetups
- Online forums
- Virtual classes
- Community events
These spaces offer more than just tutorials—they’re your launchpad to mastering techniques, sharing triumphs, and finding inspiration.
Whether you’re a newbie or a seasoned stitcher, there’s a spot waiting for you to grow, learn, and connect.
Advanced Sewing Techniques for Beginners
Ready to take your sewing skills beyond the basics?
You’ll learn pro techniques like creating buttonholes, mastering zippers, and adding beautiful ruffles that’ll transform your homemade projects from simple to stunning.
Buttonholes and Zippers
With a dash of determination, master buttonholes and zippers to elevate your sewing game.
These closures transform amateur projects into professional-looking masterpieces. Here’s your roadmap to success:
- Learn your sewing machine’s buttonhole function for precise, uniform closures
- Practice zipper installation using a dedicated zipper foot on scrap fabric
- Reinforce garment openings with lightweight interfacing for durability and a polished finish
Conquer these techniques, and you’ll discover a world of sewing possibilities!
Gathering and Ruffles
After mastering zippers, you’ll love creating eye-catching ruffles. Learn gathering techniques that transform ordinary fabric into stunning details.
Start by setting your machine’s stitch length longer, then sew two parallel lines without backstitching. Gently pull the bobbin threads to scrunch fabric, creating beautiful gathered seams.
Experiment with different gathering methods—some projects need gentle waves, others dramatic puffs. Practice makes perfect, and soon you’ll add professional-looking ruffles to everything from pillows to skirts.
Free Arm and Blind Hemming
Ever wrestled with narrow spaces like pant legs or shirt cuffs? Your free arm sewing technique is about to become your secret weapon! The machine’s arm attachment lets you slide tight spots under the needle with ninja-like precision.
When it comes to blind hemming, you’ll want to:
- Embrace scrap fabric practice
- Keep edges crisp and folded
- Follow your sewing machine’s beginner guide
- Watch online tutorials for pro tips
Transforming those tricky curves becomes a breeze with the right techniques and a bit of confidence.
Taking Your Sewing to The Next Level
You’ve mastered the basics, and now it’s time to reveal your creativity by exploring pattern design and customization.
As you expand your sewing skills, you’ll learn to craft unique garments, alter existing patterns, and develop your personal style through innovative techniques and creative problem-solving.
Creating Your Own Patterns
How do you transform fabric dreams into reality?
Pattern design starts with your imagination and some key tools.
Check out this quick guide to turning sketches into wearable art!
| Tool | Purpose | Level |
|---|---|---|
| Transparent Tape | Pattern Drafting | Beginner |
| Slopers | Block Creation | Intermediate |
| Digital Software | Design Elements | Advanced |
Embrace pattern making techniques, measure precisely, and watch your unique designs come to life with wearable art!
Altering and Customizing Patterns
Reshaping patterns from generic to genius means releasing your creative potential in sewing! Your unique body deserves a perfect fit.
Here’s how to customize like a pro:
- Feel the power of tailoring patterns to your shape
- Embrace your curves with strategic seam adjustments
- Redefine darts to flatter your individual silhouette
- Break design boundaries with bold fabric swaps
Your sewing journey starts here!
Exploring Different Sewing Styles and Techniques
Ready to level up your sewing game? After crafting custom patterns, you’re primed to explore exciting sewing styles!
Your creative journey continues with fabric manipulation techniques that transform simple materials into stunning designs.
Try quilting for cozy layers, embroidery for artistic flair, or appliqué to add unique textures.
Patchwork turns fabric scraps into beautiful masterpieces, while tailoring helps you create professional-looking garments.
Each new technique builds confidence and expands your sewing skills. Grab your machine, release your creativity, and watch your sewing prowess soar!
Frequently Asked Questions (FAQs)
How do I start a sewing machine?
Plug in your sewing machine, place it on a sturdy surface.
Thread the upper section and bobbin carefully.
Lower the presser foot, select your stitch, and gently press the foot pedal to begin sewing smoothly.
How do I learn to use a sewing machine?
Start by reading your sewing machine’s manual.
Practice threading the machine, inserting the bobbins, and testing stitches on scrap fabric.
Watch online tutorials, take a beginner’s class, and don’t be afraid to experiment with simple projects.
How to choose a sewing machine for beginners?
Like threading a needle through life’s fabric, choose a beginner sewing machine with simple controls, adjustable settings, and basic stitch options.
Look for lightweight models with user-friendly features that’ll boost your confidence from the first seam.
How can I make machine sewing easier?
Practice on scrap fabric first, watch online tutorials, and invest in quality tools.
Take it slow, breathe, and don’t fear mistakes.
Adjust your machine’s tension, use the right needle, and enjoy learning at your own pace.
How to start a sewing project for a beginner?
Choose a simple project like a pillowcase or tote bag.
Gather your materials, read the pattern carefully, and set up your machine.
Take it slow, breathe, and remember: every stitch is a step toward mastering your craft.
What do you need to make a sewing machine?
You’ll need a reliable sewing machine, quality fabric scissors, measuring tape, pins, thread, bobbins, needles, a seam ripper, and fabric chalk.
Get comfortable with your machine’s parts and threading techniques before diving in.
What is the first thing a beginner should sew?
Start with a simple pillowcase to build confidence.
You’ll learn straight stitches, cutting fabric, and basic machine skills.
Grab cotton fabric, follow a beginner pattern, and enjoy creating something functional for your home.
Can I teach myself to use a sewing machine?
Ironically, mastering a sewing machine isn’t rocket science—it’s totally doable.
You’ll discover your inner DIY guru by watching online tutorials, practicing consistently, and embracing mistakes as learning opportunities.
Patience and curiosity are your greatest sewing companions.
How to use a sewing machine step by step for beginners?
You’ll unbox your machine, read the manual, practice threading, and start with a simple straight stitch.
Insert the bobbin, adjust tension, choose the right needle, and start your first beginner-friendly project with confidence.
What is the easiest thing to sew with a sewing machine?
Like a blank canvas awaiting its first brushstroke, a pillowcase is your gateway to sewing mastery.
You’ll breeze through this beginner-friendly project, building confidence with every stitch and transforming simple fabric into a personalized treasure.
Conclusion
Ultimately, your basic sewing machine tutorials journey transforms you from a novice to a crafting wizard.
You’ll realize that every stitch tells a story, and your machine is your trusty companion.
With practice, you’ll conquer threading, master tension, and create projects that’ll make your friends say, "Wow, you made that?"
Remember, sewing isn’t just a skill—it’s an art.
Keep learning, stay curious, and watch your confidence grow, one seam at a time.
- https://support.brother.com/g/b/faqend.aspx?c=ae&lang=en&prod=hf_jv1400eas&faqid=faqh00100036_011
- https://www.justanswer.com/small-appliance/o7kce-top-thread-gets-tangled-bobbin-area-sews.html
- https://www.quora.com/Why-is-my-thread-tangling-on-the-bottom-My-Singer-201-was-working-splendidly-then-started-doing-this-A-complete-cleaning-and-adjusting-tension-doesnt-seem-to-help
- https://www.nationalsewingcircle.com/video/prevent-thread-breaks-and-tangles-009027/
- https://stitchfloral.blogspot.com/2017/06/how-to-prevent-thread-tangling-and-save.html


