This site is supported by our readers. We may earn a commission, at no cost to you, if you purchase through links.
First, you’ll need a basic set of tools and supplies like a sewing machine, fabric scissors, pin cushion, and threads.
Don’t worry if you’re new to sewing – I’ve got you covered with the essential techniques and tips to get you started.
From threading your machine to backstitching seams, we’ll cover it all.
Of course, you’ll also need some sewing-friendly fabrics like cotton, fleece, and quilting cotton.
Take a look at some simple sewing projects to build your confidence, and don’t be afraid to make mistakes – they’re all part of the learning process.
Next up, we’ll explore sewing patterns, terminology, and even tips for organizing your sewing space and troubleshooting common issues.
Happy sewing!
Table Of Contents
- Key Takeaways
- Essential Sewing Machine Features for Beginners
- Choosing the Right Sewing Machine for You
- Must-Have Sewing Tools and Supplies
- Selecting Fabrics for Beginner Sewing Projects
- Basic Sewing Techniques Every Beginner Should Master
- Simple Sewing Projects to Build Confidence
- Understanding Sewing Patterns and Terminology
- Sewing Machine Maintenance and Troubleshooting
- Organizing Your Sewing Space for Efficiency
- Frequently Asked Questions (FAQs)
- Conclusion
Key Takeaways
- Get ready to sew with the basics: To start sewing, you’ll need a basic set of tools and supplies, including a sewing machine, fabric scissors, threads, and a few other essentials. Don’t worry if you’re new to sewing; these tools will make it easy to get started and create your first projects.
- Know what features to look for in a sewing machine: Not all sewing machines are created equal. When choosing a machine, look for essential features like straight and zigzag stitches, automatic buttonholes, adjustable stitch length and width, and a free-arm feature. These features will make your sewing journey a breeze.
- Understand the must-have tools and supplies: In addition to a sewing machine, you’ll want to stock up on fabric scissors, rotary cutters, measuring tapes, and pins. These tools will help you cut, measure, and assemble your projects with ease. Don’t forget to also have a good iron and ironing board on hand.
- Practice those stitches and skills: The key to mastering sewing is practice. Start with simple projects like pillowcases and tote bags, and gradually work your way up to more complex projects. Don’t be afraid to make mistakes; they’re an essential part of the learning process, and you’ll learn a lot from them.
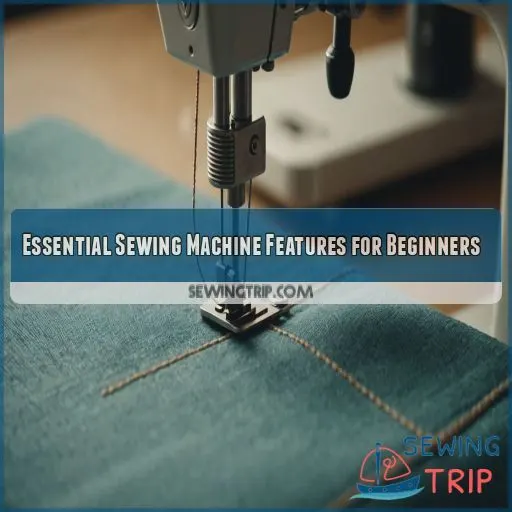
Essential Sewing Machine Features for Beginners
Ready to start your sewing journey? Let’s explore the must-have features for beginner-friendly sewing machines that’ll make your crafting adventures a breeze.
Straight and Zigzag Stitches
The dynamic duo of stitches! You’ll use straight stitches for most seams, while zigzags are your go-to for stretch fabrics and finishing edges. Master these, and you’re halfway to sewing stardom!
Automatic Buttonhole Function
You’ve mastered straight stitches, now it’s time to button up your skills! An automatic buttonhole function is a game-changer. It’ll save you time and frustration, making perfect buttonholes a breeze.
Adjustable Stitch Length and Width
You’ve mastered buttonholes, now let’s adjust those stitches! With variable length and width, you’ll:
- Create delicate seams
- Reinforce heavy fabrics
- Add decorative touches
- Tailor stitches to your project
It’s like having a Swiss Army knife for sewing!
Free Arm Capability
You’ll love the free-arm feature on your sewing machine! It’s a game-changer for tackling tricky spots like cuffs and sleeves. Just slide off the storage compartment, and you’re ready to conquer those narrow seams.
Built-in Needle Threader
You’ll love this time-saving gem! A built-in needle threader is your secret weapon against squinting and frustration. It’s like having a tiny assistant that whisks the thread through the needle’s eye effortlessly.
Choosing the Right Sewing Machine for You
Picking the perfect sewing machine can feel like a tough choice, but don’t worry, we’ve got your back! Whether you’re a budget-conscious beginner or a feature-hungry enthusiast, we’ll help you find the right sewing machine for you.
Budget And Features
Now that you know the key features, let’s talk money and bells and whistles. Your sewing journey doesn’t have to break the bank! When choosing your machine, balance your budget with the features you’ll actually use. Here’s a quick checklist to help you decide:
- Must-haves: straight stitch, zigzag, buttonhole
- Nice-to-haves: adjustable speed, automatic needle threader
- Splurge-worthy: decorative stitches, computerized display
- Future-proof: expandable presser foot options
Mechanical Vs. Computerized
While choosing your sewing machine, you’ll face the mechanical vs. computerized dilemma. Mechanical machines are like trusty old cars – simple, durable, and easier to repair. Computerized ones, though pricier, offer more features and precision. Consider your budget, tech-savviness, and long-term sewing goals. Remember, the best machine is one you’ll actually use!
Beginner-Friendly Options
When choosing your first sewing machine, don’t get overwhelmed by fancy features. Look for beginner-friendly options that won’t break the bank. Consider machines with basic stitches, an automatic buttonhole function, and a free arm for easy maneuvering. Remember, even a simple machine can help you create amazing projects as you learn the ropes.
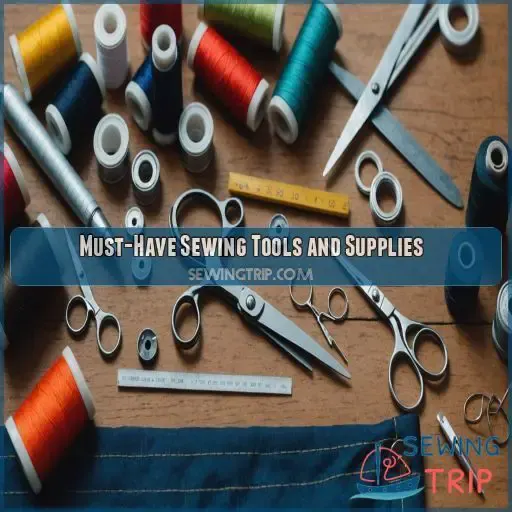
Must-Have Sewing Tools and Supplies
Now that you’ve picked your dream machine, it’s time to gather your toolkit. You’ll want to stock up on the essentials to kickstart your sewing journey. From snipping threads to measuring hems, these tools will become your crafty companions.
Fabric Scissors and Rotary Cutter
Now, let’s talk about fabric scissors and rotary cutters, a hot topic among sewing enthusiasts!
Both tools are great to have, but they serve different purposes.
Fabric scissors are the traditional choice, offering precision and comfort for cutting detailed designs, curves, and tight angles.
On the other hand, rotary cutters are perfect for slicing through long straight lines and wide curves with ease.
Seam Ripper and Measuring Tape
A seam ripper is a small tool that’s essential for undoing mistakes and removing stitches. It’s designed specifically for this task, so it’s more effective than using small scissors or a razor.
Measuring tapes are indispensable for taking body measurements, drafting patterns, measuring fabric, and more. They’re usually flexible strips made from reinforced polyester or fiberglass, with linear-measurement markings.
- Unpick a few stitches at the beginning of the seam.
- Slice through stitches every inch or so.
- Turn the fabric over and unpick a few more stitches.
- Release the end of the bobbin thread and pull to release the stitches on the other side.
Pins, Needles, and Pin Cushion
Whether you’re a novice or a pro, pins and needles are essential for sewing. Here are some tips to help you get started:
| Type of Pin | Purpose |
|---|---|
| Straight Pins | Most common type of pin, used for a variety of sewing projects |
| Glass Head Pins | Won’t melt when ironed, ideal for delicate fabrics like silk |
| Plastic Head Pins | Easy to grab and see, but may melt under an iron |
| Flat Head Pins | Good for hand sewing and ironing, but can be hard to spot on textured fabric |
| Ballpoint Pins | Best for knit fabrics, as they push fibres aside instead of piercing them |
| Safety Pins | Useful for quilting and thick fabric layers |
When it comes to needles, there are many types to choose from, depending on your project:
| Type of Needle | Use Case |
|---|---|
| Sharps | Most common type of hand sewing needle, suitable for medium to heavy fabrics |
| Darning Needles | Used for mending and layering fabrics |
| Leather Needles | Specialised needles for leather, suede and tough materials |
| Tapestry Needles | Large eye and blunt point, ideal for embroidery with coarse materials |
| Embroidery Needles | Large eye for easy threading, suitable for most sewing projects |
| Quilting Needles | Short and fine with a round eye, ideal for quick and even stitching |
| Beading Needles | Very fine and long with a long eye, used for threading beads and sequins |
| Machine Needles |
Come in various types depending on fabric, e.g. ballpoint for knit fabrics, denim for thick denim
Lastly, a pin cushion is a must-have to keep your pins organised and within easy reach. You can buy one or make your own using a simple pattern. Magnetic pin cushions are also available, which help to keep pins secure and can be useful for picking up stray pins from surfaces.
Iron and Ironing Board
When shopping for an ironing board, consider a compact model with a removable cover, like a foldable board or a portable, compact ironing surface with a stay-cool feature.
Thread Selection and Storage
Naming your thread types after your fabric choices will help with storage, such as "Cotton Blue" or "Flannel White", making it easier to find the right color in your stash.
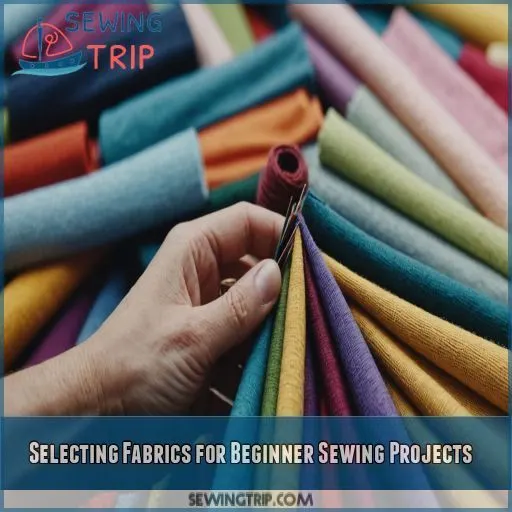
Selecting Fabrics for Beginner Sewing Projects
You’re about to start a sewing journey, and choosing the right fabric is a key step.
Too often, beginners get bogged down by the sheer variety of fabrics available, which can be overwhelming.
In this section, we’ll explore the essential fabrics for beginner sewing projects, from cotton and cotton blends to linen and quilted fabrics.
This will help you make informed decisions and create projects you’ll love.
Cotton and Cotton Blends
Now that you’ve got your sewing tools and supplies squared away, let’s talk about fabrics – specifically, cotton and cotton blends. These versatile fabrics are perfect for beginner sewing projects.
Linen and Linen Blends
You’re making great progress with your sewing skills. Now, let’s explore the wonderful world of linen and linen blends for your projects.
Fleece and Flannel
When choosing fleece or flannel for your sewing project, consider fleece care and how it’ll hold up to wear and tear, and pick flannel patterns that match your desired style.
Quilting Cotton
When selecting qu lting cotton for your beginner sewing projects, choose brands known for durability and softness, like Cotton Craft or Aurifil, for a beginner-friendly experience.
Avoiding Slippery or Stretchy Fabrics
Avoiding Slippery or Stretchy Fabrics: Choosing the right fabric for your project is really important. Opt for solid, non-stretchy cotton, linen, or denim for best results.
Basic Sewing Techniques Every Beginner Should Master
Now that you’ve selected your sewing machine and gathered the basics, it’s time to learn the fundamental techniques that’ll make you a confident sewer. Threading the machine, sewing straight lines and curves, and backstitching are just a few of the essential skills that’ll become second nature with practice.
Threading the Machine and Bobbin
Threading the machine and bobbin is a fundamental step in sewing. Owning a sewing machine with a built-in needle threader can make life easier. You still need to know how to Master Bobbin Winding correctly.
.
Sewing Straight Lines and Curves
To master the art of sewing straight lines and curves, start with simple projects like straight-stitched pillowcases and practice with a walking foot on your sewing machine.
Backstitching and Reinforcing Seams
As you’re learning to sew straight lines, it’s time to master backstitching and reinforcing seams to prevent fraying and make sure your projects last, just like the families who learned sewing have done to achieve financial stability.
, it’s time to master backstitching and reinforcing seams to prevent fraying and make sure your projects last.
To make your seams robust and prevent fraying, backstitching is a technique every sewer should master.
- What is backstitching? It’s a type of stitch that runs in the opposite direction of the main seam. This creates a strong stitch that prevents the seam from coming undone.
- How to backstitch? To backstitch, you’ll sew two parallel lines with a 1/4 inch space in between. The second line will be in the opposite direction of the first line, hence the name backstitching.
- Why backstitch? Backstitching strengthens the seam by crisscrossing the thread, making it more difficult to fray or come undone.
- Tips and tricks:
- Use a shorter stitch length for backstitching as it can add extra strength to the seam.
- You can use any stitch type for backstitching, but a longer stitch will be easier to see.
- Make sure to backstitch at the beginning and end of the seam to prevent it from coming undone.
- Thread your machine: Before starting it’s always a good idea to thread your machine to make sure it’s empty. Insert a thread into the spool case on your sewing machine and pull the thread until it reaches the take-up lever.
- Select the correct stitch: Choose a stitch type that’s suitable for the fabric you’re working with. A basic zig-zag stitch is a good option for most fabrics.
- Backstitch in beginning and end of the seam: Instead of starting and finishing a seam with a straight stitch, use backstitching to add extra security.
- Press the seams: After completing the backstitching and sewing the seam, press it with an iron to set the stitches and make the seam lie flat.
By mastering the backstitch and reinforcing seams, you’ll create a wide range of home decor projects and garments that will last for years to come.
What’s your experience with backstitching? Do you have any tips to share with the community?
Preventing fraying with backstitching and reinforcing seams is a fundamental skill that takes time and practice to master, but with
Pressing Seams Open
| Seam Type | To achieve a professional finish, invest in a quality Pressing Tool Essentials like a pressing tool. | Tips |
|---|---|---|
| Straight | Iron | Use steam for crisp folds |
| Curved | Tailor’s ham | Ease fabric with gentle pressure |
| Delicate | Seam roll | Prevent scorching with a pressing cloth |
Hand Sewing Basics
Learning hand-sewing basics is a fundamental step in mastering sewing skills. Develop a solid foundation by mastering the following four essential stitches: running, whipstitch, ladder stitch, and blanket stitch.
Simple Sewing Projects to Build Confidence
To build your sewing confidence, you should start with simple projects that’ll get you hooked. Try beginning with a pillowcase or a tote bag – these easy peasy projects will give you a feel for working with fabric and using your sewing machine.
Pillowcases and Throw Pillows
Making pillowcases and throw pillows is a great way to start building confidence in your sewing skills – start with simple patterns and adjust sizes as you gain experience.
Tote Bags and Drawstring Bags
Now that you’ve mastered the art of sewing a pillowcase, it’s time to move on to more exciting projects like the awesome tote bags and drawstring bags.
Placemats and Table Runners
Getting started with placemats and table runners is a wonderful way to build confidence in your sewing skills, and you can make a beautiful table setting with just a few simple stitches.
Basic Skirts and Elastic Waistbands
Let’s start with a simple skirt pattern, beginning with a basic mild-mannered fitted skirt, then work our way up to more complex designs with elastic waistbands to build sewing confidence gradually.
Zippered Pouches
Taking your sewing skills to the next level, try creating a zippered pouch – a simple project that’s perfect for practicing closure techniques and mastering zipper installation with precision.
Understanding Sewing Patterns and Terminology
Learning to understand sewing patterns and terminology is a key step in your sewing journey. It might seem tricky at first, but don’t worry, with some practice and patience, you’ll be figuring out pattern markings and symbols like a pro, taking accurate body measurements, and understanding fabric layout and cutting in no time.
Deciphering Pattern Markings and Symbols
To navigate sewing patterns, focus on five key symbols: the seam allowance, grain lines, arrows, markings for specific stitches, and notations for grain type (such as cotton or stretch).
Taking Accurate Body Measurements
Now that you’ve mastered deciphering pattern markings and symbols, it’s time to take accurate body measurements without guesswork or pinching yourself. Grab your tape measure and let’s get started, folks!
Fabric Layout and Cutting
Now that you’ve taken accurate body measurements, let’s focus on fabric layout and cutting. Think of it like arranging a puzzle, matching the pattern grain to the fabric’s texture.
Common Sewing Terms Explained
When you start sewing, get familiar with essential terms like grain, slant, and bias to make your projects look great.
- Grain: refers to the direction of the fabric’s weave or yarns, which affects the look and drape of your finished project.
- Slant: describes the diagonal stitching used to finish seams and edges.
- Bias: refers to the 45-degree diagonal folding and cutting of fabric to create a specific shape or seam allowance.
Mastering these terms will help you create beautiful, professional-looking projects!
Sewing Machine Maintenance and Troubleshooting
Keeping your sewing machine in top condition is really important for smooth operation and long-lasting results. By learning the basics of sewing machine maintenance and troubleshooting, you’ll be able to identify common issues, fix minor problems, and extend the life of your machine, saving you time, money, and frustration in the long run.
Regular Cleaning and Oiling
Regular cleaning and oiling of your sewing machine helps your machine stitch smoothly, prevents damage, and prolongs its lifespan. Do it every 3-6 months, using a gentle cloth and recommended lubricant.
Changing Needles and Presser Feet
- Clean your machine regularly to make sure a smooth change.
- Always use the correct needle size and type for the fabric you’re sewing.
- Grease your sewing machine’s feed dogs grip to make pressing feet interchangeable easier.
.
- Refer to your machine’s manual for instructions on attaching and detaching presser feet.
Tension Adjustment
The threads to finesse in sewing machine maintenance involve adjusting tension and making informed choices when working with different fabrics and thread types can help make sure your stitches turn out perfectly.
Common Issues and Solutions
To troubleshoot sewing machine issues, start by checking and adjusting thread tension, which can cause jams or poor seam finishing. Consult your user manual for guidance.
When to Seek Professional Servicing
Know when to seek professional help for your sewing machine’s unusual noises, stitch problems, or oil leaks. Here are the telltale signs and what to do:
- Unusual noises or vibrations
- Broken needles or excessive thread breakage
- Oil leaks or inadequate lubrication
- Frequent repairs or adjustements
Organizing Your Sewing Space for Efficiency
Now that you’re excited to start sewing, it’s time to set up your sewing space for efficiency. You’ll want a dedicated area where you can sit comfortably, with plenty of room to spread out your fabric, patterns, You’ll want a dedicated area where you can sit comfortably, with plenty of room to spread out your fabric, patterns, and Essential Sewing Supplies, and where you can easily access storage solutions for your notions and yarns.
, and where you can easily access storage solutions for your notions and yarns.
Dedicated Sewing Table or Area
Create a dedicated sewing space with a well-organized tabletop for efficient sewing experiences and reduced clutter lastingly.
Having a designated sewing area or table can help you focus on your projects without distractions or clutter. A dedicated workspace can also help you maintain ergonomics, which is a major part of sewing. Good ergonomics can reduce eye strain and back pain while sewing, allowing you to be productive for longer periods.
Organizing Your Sewing Space for Efficiency
| Area | To begin sewing, fashion students should gather essential tools and supplies, including a reliable sewing kit Best Sewing Kits, quality fabric, needles, threads, scissors, and a sewing machine. |
|---|---|
| Working Surface | Iron and ironing board, tape measure, scissors, pins, sewing machine |
| Fabric Storage | Bolts of fabric, fabric scraps, notions, threads |
| Cutting Station | Rotary cutter, cutting mat, rulers, pattern weights |
| Pressing Station | Iron, ironing board, pressing ham, tailors ham |
| Tool Organizer | Drawer dividers, pegboard, storage bins, baskets |
A well-designed workspace also includes proper lighting, which can really impact your sewing experience. Make sure the lighting in your workspace is sufficient and adjustable to reduce eye strain. You can use general overhead lighting or task lighting specifically for sewing.
Keep your workspace organized by implementing a system for storing tools and supplies. This can include using bins, baskets, or drawers to keep items off the floor and out of the way. You can also use a pegboard to hang frequently used tools and accessories.
Finally, make sure your workspace is comfortable and adapted to your needs. This includes having a comfortable sewing chair, a good back support, and enough space to move around easily.
Storage Solutions for Fabric and Notions
Optimize your sewing space with clever fabric storage ideas and notion organization tips for maximum efficiency.
Proper Lighting and Ergonomics
Proper lighting and ergonomics are really important in your sewing space to prevent eye strain and ease discomfort.
To create a comfortable and efficient sewing area, consider the following key elements:
- Ample Task Lighting: Make sure you have good lighting around your sewing machine and work surface.
- Ergonomic Workspace: Invest in a comfortable, adjustable chair and footrest.
- Best Posture: Maintain a straight back and relaxed shoulders while working.
- Clear Clutter: Keep your workspace organized to reduce distractions and stress.
When setting up your sewing space, remember that good lighting and ergonomics are essential for productivity and long-term comfort. Try to position your sewing machine and chair to allow for easy access to all necessary tools and supplies. If possible, use a sewing table or desk with built-in storage to keep your workspace clutter-free.
Cutting and Pressing Stations
Transform your sewing space into a well-organized haven with a cutting and pressing station designed to perfectly meet your needs.
Tool Organization and Accessibility
Now that you’ve set up your cutting and pressing stations, it’s time to tackle tool organization and accessibility in your sewing space rightfully.
Local Sewing Classes and Workshops
Once you’ve organized your sewing space, it’s time to explore local sewing classes and workshops.
Sewing Books and Magazines
As you’ve been refining your sewing skills in local classes, it’s time to expand your knowledge with engaging sewing books and magazines.
Sewing Communities and Forums
As you explore sewing communities, inspiration grows – join online forums to connect with fellow sewers and find motivation.
Practice Projects and Skill-building Exercises
To practice sewing consistently, you’ll want to dedicate a specific space for your craft near your main workspace.
Frequently Asked Questions (FAQs)
What are the best tips for storing sewing supplies?
You’ve got a mountain of supplies, and they’re multiplying faster than a sewing machine on overtime! Tame the chaos with labelled containers, a pegboard, and a tidy storage bin for each type, like notions, threads, and fabrics.
How can I prevent sewing-related eye strain and fatigue?
Hey there, seamstress! To prevent sewing-related eye strain and fatigue, work in a well-lit area, take regular breaks, and follow the 20-20-20 rule: every 20 minutes, look away from your project for 20 seconds to focus on something 20 feet away.
What are the most common mistakes beginners make with yarn?
Hey there, yarn lover! Don’t let common mistakes trip you up. Check your tension, as uneven stitches are a major culprit. Also, watch for too much yarn on the hook, leading to puckering and a sloppy finish.
What are the pros and cons of using synthetic vs natural fibers?
Learning about synthetic vs natural fibers for sewing is like choosing between a bouquet of roses and a bunch of daisies – both have their pros and cons.
Can I sew on a commercial sewing machine using hand-dyed fabric?
You can definitely sew on a commercial sewing machine using hand-dyed fabric, but be mindful of the dye’s density and potential bleed-through; consider choosing a machine with advanced tension control to handle variable thread weights and dye-soaked fabric.
Conclusion
You’ve just dived into sewing, and it’s exhilarating! Imagine yourself whipping up a cozy throw pillow with freshly pressed fabric, the soft give of the cotton caressing your fingertips. You’re no longer a beginner, you’re a crafty creator. With these 9 essential tips, you’ll conquer sewing milestones. Practice those straight stitches and create something cozy you’ll thank yourself for it.

