This site is supported by our readers. We may earn a commission, at no cost to you, if you purchase through links.
Cotton shrinks. Sometimes a lot. Skip the prewash, and that perfectly cut quilt block or shirt panel can pull tight after its first trip through the dryer, throwing off every seam you worked hard to get right.
That single step trips up more beginners than a tricky zipper ever will. Cotton fibers absorb moisture and settle into a new shape once washed, which means the fabric you cut isn’t always the fabric you end up with. Good sewing cotton fabric advice starts before the scissors even come out.
From needle size to seam finishes, small choices at each stage keep your stitches straight and your fabric behaving the way you expect.
Table Of Contents
Key Takeaways
- Prewash cotton before cutting since it commonly shrinks 3 to 5 percent, and skipping this step can throw off your seams and grainlines after the first wash.
- Match your needles, thread, and machine settings to your fabric weight—universal needles for wovens, sharps for quilting, 50-weight cotton thread for piecing, and stitch length between 1.8mm and 3.5mm depending on thickness.
- Cut and pin along the fabric grain, using the selvage as your reference, since off-grain cuts cause skewed seams and wavy hems that stitching can’t fix later.
- Finish raw edges with a method suited to your project, such as zigzag stitching, French seams, or clean-finished seams, to prevent fraying and keep seams looking professional.
Prepare Cotton Fabric Before Sewing
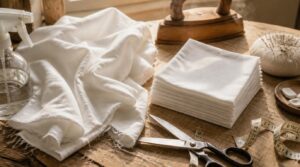
Cotton has a mind of its own until you get it ready. A little prep work now saves you from crooked seams and shrunk garments later. Here’s what you need to do before that fabric ever meets your scissors.
Start by prewashing, pressing, and squaring the edges, since these essential fabric prep steps for neater seams keep your cotton from fighting you at the cutting table.
Prewash to Prevent Shrinkage
Skip this step and your finished garment might shrink right off the hanger. Cotton commonly shrinks 3 to 5 percent on its first wash.
- Match detergent and cycle to final care
- Dry using your planned method
- Inspect fabric afterward for defects
This prewash routine stabilizes fibers before cutting, so your sewing machine works with fabric that won’t surprise you later. It is also important to pre wash fabric to remove manufacturing chemicals.
Check for Color Bleeding
Red and dark cotton bleed easiest, especially with direct dyes. Run a dye fastness test: wet a hidden corner, press with a white cloth, check for pink transfer. Hot water speeds bleeding, so test cold.
A color catcher sheet helps trap stray dye during your actual wash, keeping your fabric and sewing notions safe from surprise stains later.
Finish Edges Before Washing
Once your dye test passes, protect those raw edges before they hit the washer. Loose threads love to tangle and fray during agitation.
Pick your method:
- Serger/overlock – strongest fray resistance, encases edges completely
- Zigzag stitch – accessible, preserves fabric width, moderate protection
- Pinking shears – quick decorative cut, trims 1-3mm, less effective on tight weaves
Finishing edges now keeps your fabric width and shape stable through the wash.
Press Fabric Before Cutting
Edges finished, fabric dry — grab your iron. Wrinkles cause skewed cuts, so use medium steam on cotton settings, never high heat, to avoid scorch or shine.
| Tool | Purpose | Tip |
|---|---|---|
| Pressing cloth | Prevents shine | Use damp cotton |
| Seam roll | Smooths curves | No compression |
| Sleeve board | Narrow pressing | Before cutting |
Let fabric cool before laying out patterns.
Align Grainlines Carefully
Grain runs the show once your pattern hits the fabric. Line up that arrow parallel to the selvage edge — lengthwise grain for stability, crossgrain for symmetry at notches. Skip this step and hems twist after washing.
If you’re unsure which arrow matters where, this guide to reading sewing pattern markings breaks down grainlines, notches, and fold lines before you cut.
Curved pieces need bias grain drape, cut at 45 degrees. Directional prints? Layout every piece the same direction before pinning.
Choose Needles, Thread, and Tools
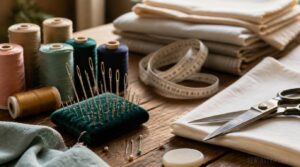
Good sewing starts with the right gear in hand. Your needles, thread, and cutting tools all play a part in how your project turns out. Here’s what you need to know before you sit down at the machine.
Universal Needles for Woven Cotton
A rounded needle tip and extended scarf design make universal needles the go-to choice for woven cotton. They pierce fabric cleanly, avoiding distortion, and prevent skipped stitches on standard sewing machine operation.
Choose size 80/12 for lightweight cotton, 90/14 for shirting weight. Wrong sizing causes puckering—so match your needle to your fabric before you sew.
Sharps Needles for Quilting
Nine layers of cotton and batting need a needle that won’t bend. Sharps handle it, with tempered steel durability and a slender shaft for clean piercing through thick batting.
Pick needle size 9 to 12 for quilting—smaller numbers mean larger needles. The oval eye threads easily and makes hand applique precision possible without fraying thread.
Cotton Thread for Piecing
Fine, flat seams start with the right spool. Stick to 100% cotton, 50-weight thread—it blends into fabric, resists heat during pressing, and sheds less lint than blended options. Two-ply construction offers solid strength without bulk.
Grab a 1000-meter spool for big projects; fewer thread changes means fewer stops. Quality cotton thread keeps seams strong, even after washing.
Sharp Scissors or Rotary Cutters
Which cutting tool fits your project? Rotary cutters slice fast through long, straight lines and multiple layers, but need a mat and steady hand for safety.
Scissors give you better control on curves and tight corners, with less fatigue on small cuts. Keep blades sharp—dull edges snag fabric. Sharpen scissors regularly; replace rotary blades when worn.
Chalk Wheels for Marking
Marking darts and seam lines? A chalk wheel rolls fine, erasable powder right onto cotton or linen without leaving impressions.
Pick refillable cartridge types to cut waste, and choose chalk color based on fabric shade for visibility. Ergonomic grips ease long marking sessions.
For precision marking, keep the wheel clean and check for nicks—dull edges skip and blur your lines.
Set Up Your Sewing Machine
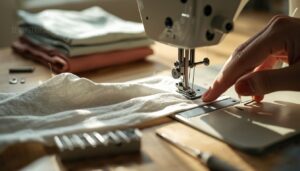
Your machine needs the right setup before it touches cotton. A few small adjustments make the difference between smooth seams and skipped stitches. Here’s what to check first.
Best Tension for Cotton
Why do puckered seams happen even with a straight stitch? Usually, it’s machine tension. Set top tension at 4 to 5 for medium cotton, lower for lightweight, higher for cotton canvas. Balance the bobbin too.
Test stitch samples on scraps first—checking both sides for even seam construction and no puckering before starting your real project.
Ideal Cotton Stitch Length
Get tension right, then set stitch length. Start at 2.5 mm for medium cotton—shorten to 1.8-2.0 mm for lightweight, lengthen to 3.0-3.5 mm for heavy canvas or topstitching.
- Short stitches: strength on lightweight seams
- Medium (2.5mm): everyday durability
- Long stitches: less bulk, less puckering
Basting? Set 4.0-5.0 mm. Always test on scraps before your final seam allowance.
Zigzag Settings for Edges
Once your stitch length feels right, tackle raw edges. For woven cotton, set width 2.5-3.5 mm and length 1.0-2.0 mm—narrower for delicate fabric, wider for knits needing stretch. Balance zigzag tension around 4-5 so bobbin thread stays hidden.
Test on scrap pieces first; a good edge resists fraying without curling or puckering your seam allowance.
Replace Dull Machine Needles
Skipped stitches, popping sounds, or fabric that snags mean your needle’s gone dull. Replace it after 8-10 hours of sewing.
Safe swap steps:
- Unplug the machine, raise the needle fully
- Loosen the clamp screw, slide the old needle out
- Insert the new needle flat-side back, push up fully, tighten firmly
Proper needle alignment prevents poor stitch formation before you even start testing.
Test Stitches on Scraps
Never trust your settings until fabric proves it. Grab a scrap, run a straight stitch, then a zigzag, and check both sides for puckering or loose loops.
| Check | Look For |
|---|---|
| Tension | No spool show |
| Density | No bulk or shed |
Label scraps with thread and tension used. This habit fixes most sewing machine troubleshooting before it starts.
Cut and Sew Cotton Accurately
Your machine is set, so now it’s time to work with the fabric itself. Cutting and sewing cotton with care keeps your project looking sharp and fitting right. Here’s what to focus on at this stage.
Pin Pattern Pieces Securely
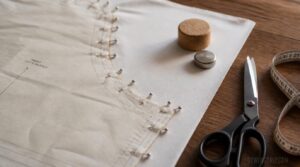
Pins hold the whole layout together, so placement matters. Along seam lines, space them two to three centimeters apart, perpendicular to the edge for quick removal. Add extra pins at corners and curves to stop shifting.
Prefer no holes? Try pattern weights instead—cork or magnetic ones keep grain aligned without piercing fabric. For slippery cotton, parallel pins reduce sliding and keep everything flat.
Cut Along The Fabric Grain
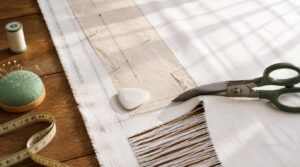
Grain runs the show once your pins are set. The selvage marks your reference point for the lengthwise grain, so check it before the blade touches fabric.
- Confirm warp/weft direction
- Match pattern arrows to grain
- Avoid bias unless intended
- Watch for weave drift
- Cut slowly, staying aligned
Off-grain cuts cause skewed seams and wavy hems—problems no amount of stitching fixes later.
Cut off-grain and no amount of stitching later will fix the skewed seams and wavy hems
Backstitch at Seam Ends
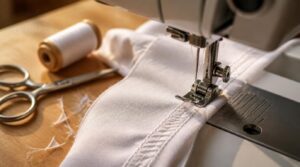
Every seam needs a lock at start and end, or it’ll come apart with the first wash. Backstitch 2 to 3 stitches in reverse, then move forward again—simple machine trick, no puckering if your tension’s set right.
Hand sewers get extra control at corners this way. Cotton tolerates a moderate length; lighter fabrics need shorter stitches. Trim threads clean when you’re done.
Press Seams as You Sew
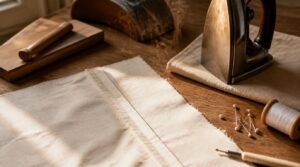
Skip the pressing-at-the-end habit. Press each seam flat right after stitching, before crossing it with another—this sets the stitches and flattens bulk early.
Use medium heat with a cotton press cloth to avoid shine. Steam relaxes fibers for a smoother lay. A tailor’s clapper or pressing ham helps set curves and corners cleanly, locking seams in place as they cool.
Keep Fabric Layers Flat
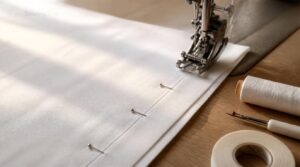
Flat layers make straight seams. Use a walking foot to feed multiple layers evenly, and baste along the center first to lock alignment.
Pin perpendicular to the seam every 2 to 3 inches, working outward from center. Smooth fabric along the grain only—pulling off-grain causes puckers. For knit blends, add light stay tape to stabilize the seam before stitching.
Finish Cotton Seams Neatly
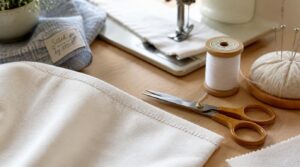
Raw edges won’t stay neat on their own. You need a finishing method that fits your fabric weight and project type. Here are five ways to keep those seams clean and strong.
Zigzag Raw Seam Edges
Taming raw edges keeps your seams strong and your fabric from unraveling wash after wash.
- Set stitch width to medium
- Keep length short and dense
- Stitch just inside the seam allowance
- Test on scraps first
This method works great on cotton and skips serger costs entirely. Press seams after stitching to set them flat.
Use French Seams
Want a seam with zero raw edges showing, inside or out? That’s the French seam trick.
| Pass | Sides Together | Seam Allowance |
|---|---|---|
| First | Wrong sides | 3/8 inch |
| Second | Right sides | 1/4 inch |
| Result | Fully enclosed | No fraying |
Great for sheer fabrics and unlined blouses. Press between passes to avoid bulk.
Try Clean-finished Seams
Not every seam needs a French finish. Clean-finished seams turn the raw edge under and stitch it close to the fold, giving a tidy interior without the bulk of a double pass.
Works best on light to medium cotton and curved seams alike. Try a turned edge, narrow hem, or edge stitching for extra durability — each keeps things simple with a standard machine and fine stitch.
Prevent Fraying After Sewing
Once the seam is sewn, protect the edge. A narrow zigzag stitch or overcast stitch locks fibers in place, while pinked edges cut fraying strands shorter.
For stubborn spots, dab on liquid sealant and let it cure. Bias binding or a Hong Kong seam wraps raw edges cleanly, especially on bulky curves prone to unraveling.
Press Finished Seams Open
Push seam allowances flat and open with your fingers or a seam roll, then set the iron with light heat, lifting rather than sliding.
A clapper locks fibers flat and prevents shine. Starch adds stability at corners. Let fabric cool before moving on, this keeps bulky intersections flat, edges sharp, and your garment construction looking professionally finished.
Frequently Asked Questions (FAQs)
What is the best stitch for cotton fabric?
Like a tailor’s steady hand, the right stitch keeps every project grounded. For woven cotton, the straight stitch wins for clean, flat seams. Choose zigzag for stretch or durability; balance machine tension to prevent puckering and skipped stitches.
What tension should my sewing machine be on for cotton fabric?
Set machine tension between 3 and 4 for most cotton. Lightweight cotton needs around 3; heavier cotton canvas needs 4 to Match thread weight to fabric, test on scraps, and adjust in 5 increments if seams pucker or loop.
Do I need to pre-wash 100% cotton fabric before sewing?
Yes. Cotton shrinks 3 to 5 percent on its first wash, so skipping this step risks skewed grainlines and ill-fitting seams. Prewashing also reveals dye transfer risks and softens texture, giving your finished garment consistent, predictable laundering results.
How to sew with cotton without it unraveling?
Fraying is cotton’s Achilles’ heel. Pinking shears or a zigzag stitch seals edges fast; overcast stitching locks threads by hand or machine. Add Fray Check for stubborn spots, trim thread tails close, and serge seams when possible for lasting durability.
Can you sew cotton fabric?
Absolutely, cotton is one of the most beginner-friendly fabrics around. It presses easily, holds stitches well, and works with universal needles on nearly any machine. Its texture variety suits quilts, garments, and home projects, making it a reliable choice for building sewing skills.
How do you sew cotton fabric?
Prewash, press, and pin with purpose—cotton rewards patience. Managing tension settings, choosing the right thread weight, and using a straight stitch build clean seams. Backstitch, finish edges, and press as you go for professional seams every time.
Why is cotton a good fabric for sewing?
Cotton stays put under pins and chalk, giving you beginner friendly stability while cutting patterns. It breathes, wicks moisture, and suits sensitive skin. With weights from voile to poplin, it fits any season—no wonder it’s a sewing room staple.
What thread should I use to sew a cotton knit?
Reach for a polyester stretch thread for most knit sewing — it accommodates 20-30% stretch. Need extra elasticity? Try nylon stretch thread. For lightweight knits, pick 40-50 weight; cotton thread works fine for topstitching only.
What fabrics are used in sewing?
Sewing patterns call for many fibers: breathable cotton canvas, crisp linen, and drapey silk. Wool brings warmth, synthetics add durability, and blends improve stretch. Each fabric shapes your fabric manipulation choices and final garment feel.
What changes should I make for different types of cotton?
Adjust for fiber length and weave: Pima and Supima need gentler handling, upland cotton wrinkles more, sateen wants sharp needles and higher heat, twill needs looser seams, and dark colors demand a colorfastness test first.
Conclusion
Cotton behaves like a living thing, shifting and settling until you teach it to hold still. Every step you’ve learned, from prewashing to pressing seams open, works together to build that steadiness into your project.
Solid sewing cotton fabric advice isn’t a checklist you finish once; it’s a habit you carry into every new pattern. Master the fabric’s nature, and your stitches will always land exactly where you planned. Your seams will thank you.
- https://www.mhthread.com/blog/products/what-size-sewing-machine-needle-for-cotton-fabrics
- https://www.sewessential.co.uk/blogs/sewing/how-to-choose-the-right-sewing-machine-needle
- https://snugglesquilts.com/needles-and-thread-tips-facts
- https://www.bsewinn.com/blogs/inspiration/best-threads-for-sewing
- https://whip-stitch.com/how-to-preshrink-fabric-for-sewing