This site is supported by our readers. We may earn a commission, at no cost to you, if you purchase through links.
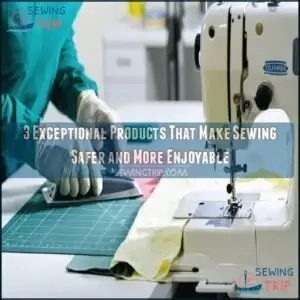
The Sew Safe Presser Foot creates distance between your fingers and the needle, preventing painful pokes. Heat-resistant Ironing Thimbles protect your fingertips from burns when pressing seams or handling hot fabric.
Rotary Cutter Safety Gloves shield your hands from accidental slips, a common injury even experienced sewists face. These simple tools act like your personal bodyguards in the sewing room, allowing you to focus on creativity rather than caution.
The right safety equipment doesn’t just prevent injuries—it transforms how confidently you approach each project.
Table Of Contents
- Key Takeaways
- Essential Safety Features for Sewing Machines
- Top Safety Accessories for Sewing
- Life-Saving Sewing Machine Attachments
- Safety Considerations for Sewing Enthusiasts
- Top Safety Tips for Sewing at Home
- Sewing Safety for Beginners
- Advanced Sewing Safety Techniques
- Safety Precautions for Hand Sewing
- Creating a Safe and Ergonomic Sewing Space
- Frequently Asked Questions (FAQs)
- Conclusion
Key Takeaways
- You’ll prevent needle injuries with the Sew Safe Presser Foot, which creates distance between your fingers and the needle during sewing projects.
- You’ll protect your fingertips from burns with Heat-resistant Ironing Thimbles when pressing seams or handling hot fabrics.
- You’ll shield your hands from accidental slips with Rotary Cutter Safety Gloves, preventing a common injury even experienced sewists face.
- You’ll sew with more confidence when your machine includes essential safety features like automatic needle threaders, built-in walking feet, and safety stitch functions.
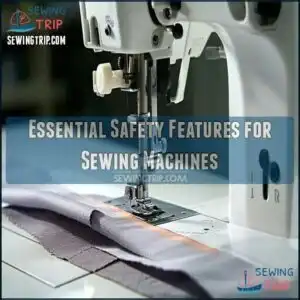
Essential Safety Features for Sewing Machines
You’ll sew with more confidence when your machine includes essential safety features.
Automatic needle threaders, built-in walking feet, and safety stitch functions work together to reduce risks and improve your sewing experience.
Automatic Needle Threader With Cut-Off
Threading needles can be frustrating and risky, but the automatic needle threader with cut-off solves this effortlessly.
Designed for sewing safety, it protects your fingers while ensuring smooth operation. Built-in finger guards prevent accidents, and precise cut-off mechanisms eliminate thread waste.
Ideal for beginners, this sewing safety tool minimizes eye strain and works with various needle sizes.
- Benefits:
- Protects fingers during threading
- Reduces eye strain on long projects
- Minimizes thread waste with precision cuts
- Beginner-friendly and compatible with embroidery needles
Built-in Walking Foot for Easy Fabric Handling
A built-in walking foot is a game-changer for fabric feeding and sewing safety.
This handy feature guarantees both layers of fabric move together, preventing slippage and promoting even stitching. If you’ve ever struggled with bunched fabrics or mismatched edges, you’ll appreciate how it keeps everything aligned, especially for tricky materials like velvet or quilts with multiple layers.
For quilting applications, it’s a must-have. A walking foot smoothly glides through thick layers, preventing puckering and keeping your project as neat as you imagined.
It’s perfect for slippery or bulky fabrics like corduroy or denim too. The walking foot prevents fabric layers from shifting, making it ideal for these tasks.
Plus, it adds an extra layer of sewing machine safety by minimizing the need to reposition fabric near the needle. It’s precision you can rely on!
Safety Stitch Function to Prevent Accidents
The safety stitch function is like having an extra layer of protection on your sewing machine, ensuring both safety and durability.
It helps reduce the chance of sewing accidents while making your fabric stronger and long-lasting.
- Seam reinforcement prevents fabric from falling apart if a stitch breaks.
- It strengthens stitches with consistent stitch strength and proper tension.
- Adds a neat overcast edge for improved fabric integrity.
- Works well with other sewing machine safety features, like the Sew Safe Presser Foot.
This feature is an unsung hero in sewing safety. By using your machine’s manual to set it up properly, you’ll enjoy stress-free, reliable, and accident reduction stitching.
Top Safety Accessories for Sewing
You can make sewing safer with the right tools that protect your hands and fingers during tasks.
From needle threaders with built-in cutters to safety guards, these accessories help prevent accidents and improve your sewing experience.
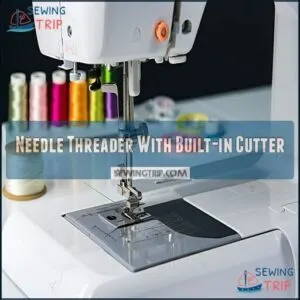
Needle Threader With Built-in Cutter
A needle threader with a built-in cutter is a game-changer for sewing safety.
These handy tools combine Threader Benefits and Cutter Precision, ensuring you can thread needles without stress or injury.
With a recessed blade, they prevent accidental cuts, while the Ergonomic Design reduces hand fatigue.
Say goodbye to eye strain—automatic threading makes the job quicker and easier.
Plus, the thread waste catcher keeps your space tidy, cutting down on clutter.
Find the perfect needle threader cutter for your needs.
These sewing safety tools are perfect for anyone, especially beginners or those with shaky hands, and offer efficient threading and improved sewing needle safety with this must-have accessory.
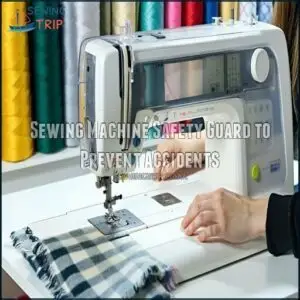
Sewing Machine Safety Guard to Prevent Accidents
A sewing machine safety guard is essential for keeping your fingers safe and sewing stress-free.
This handy tool places a transparent shield between you and the needle, reducing the risk of sewing accidents.
Here’s why it’s a must-have:
- Guard Effectiveness: Prevents accidental needle pricks while letting you see your work clearly.
- Installation Methods: Easy to attach—no special tools required, just clip and sew.
- Material Choices: Built with durable, impact-resistant plastic made to last through years of use.
- Retrofit Options: Compatible with most machines, whether they’re new or vintage.
Consider browsing available sewing machine guards for various options.
Paired with a Sew Safe Presser Foot, this guard upgrades sewing safety, keeping every project accident-free.
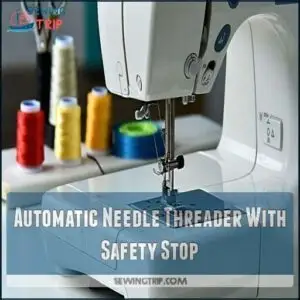
Automatic Needle Threader With Safety Stop
An automatic needle threader with a safety stop adds precision and peace of mind to your sewing routine.
It boosts threading speed while reducing finger injuries, making it a game-changer for sewing safety.
These tools are beginner friendly, helping you avoid the frustration of threading tiny needles.
The built-in safety feature offers needle protection, ensuring smooth operation.
Plus, ergonomic threading handles prevent wrist strain, adding comfort during long projects.
To maximize threader longevity, clean and maintain it regularly.
This sewing machine accessory delivers threading benefits and simplifies sewing, making it an essential addition for every safety-conscious sewist.
Life-Saving Sewing Machine Attachments
You can make sewing safer and easier by using the right attachments. These tools, like safety-equipped buttonhole, hem, and zipper attachments, protect your fingers while improving accuracy.
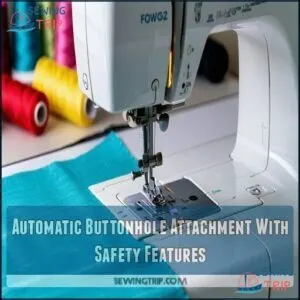
Automatic Buttonhole Attachment With Safety Features
The automatic buttonhole attachment is a must-have for safer and more precise sewing.
It combines advanced technology with thoughtful design to improve both safety and ease of use. The Buttonhole Safety Design and other features reduce risks while achieving flawless buttonholes.
Here’s why it works so well:
- Attachment Injury Prevention: Safety stoppers stop the needle if obstacles arise.
- Buttonhole Stitch Consistency: Offers accurate, repeatable stitching across fabrics.
- Automated Sewing Safety: Quick-release mechanisms facilitate smooth transitions.
- Safe Attachment Usage: Clear visibility guards let you monitor without exposing fingers.
It’s a solid upgrade for anyone focused on sewing machine safety.
You can find a variety of attachment options online.
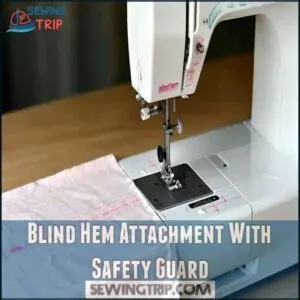
Blind Hem Attachment With Safety Guard
After creating neat buttonholes, you’ll love tackling invisible hems confidently and safely.
A blind hem attachment with a safety guard is perfect for achieving clean, professional hems while protecting your fingers from accidental needle pricks. It guarantees your hemming projects are both precise and safe.
The sewing machine safety guard is a standout feature, keeping your fingers away from the needle while stitching. It’s also beginner-friendly and saves time.
- Attachment Benefits: Easily snaps on to most machines for hassle-free setup.
- Hemming Precision: Adjustable guides work well with different fabric thicknesses.
- Guard Design: Shields your hands while sewing, offering extra peace of mind.
With this tool, hemming safety meets flawless stitching quality!
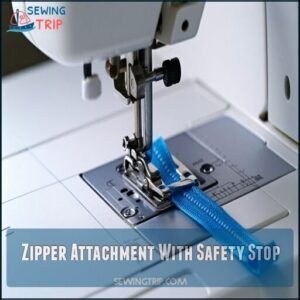
Zipper Attachment With Safety Stop
Zippers often feel like a sewing challenge, but a zipper attachment with a safety stop simplifies things.
This clever tool keeps your fingers safe and guarantees smooth, reliable zipper installation. It’s perfect for aligning tricky fabrics or fitting into tight spaces without frustration.
The safety stop prevents sudden movements while a built-in guide keeps your fabric stable. This means fewer mistakes and more consistent results. Designed for beginners and experienced sewists alike, it fits most machines, making it one of the most versatile sewing machine safety accessories.
| Feature | Purpose | Benefit |
|---|---|---|
| Safety Stop | Keeps movement controlled | Prevents needle injuries |
| Guard System | Protects fingers | Improves sewing safety |
| Smooth Fabric Alignment | Stabilizes materials | Better zipper outcomes |
| Universal Fit | Compatible with most machines | Broad usability |
| User-Friendly Mechanism | Easy to maintain and operate | Saves time and effort |
Safety Considerations for Sewing Enthusiasts
You need to keep safety in mind anytime you sew, whether you’re a beginner or experienced.
Regular machine upkeep, good posture, and careful use of tools can help prevent accidents and keep your projects on track.
Importance of Regular Machine Maintenance
Your sewing machine is like a trusty sidekick—it needs care to stay reliable.
Regular maintenance guarantees smooth operation and enhances sewing machine safety.
Keep these safety tips in mind:
- Lint Removal: Clean the bobbin area every 8–10 hours to stop buildup from causing jams.
- Oiling Mechanisms: Add oil monthly to keep parts moving effortlessly and prevent overheating.
- Part Inspection: Check cords and components often, as frayed wires can be dangerous.
- Needle Replacement: Switch needles frequently to reduce strain on your fabric and machine.
Follow these sewing machine precautions to avoid accidents and extend its life!
Risks of Poor Posture and Eye Strain
Your body takes a toll if you don’t pay attention to posture and lighting while sewing. Poor posture strains your back, shoulders, and neck, while dim lighting can harm vision health over time.
Follow these tips to create an ergonomic sewing space:
- Ergonomic seating keeps your spine aligned, reducing aches.
- Make certain your machine is at elbow height for smoother, comfortable sewing posture.
- Use flexible lighting solutions, like LED task lamps, to avoid eye strain.
- Add a magnifying lamp for intricate details, boosting sewing precision.
Schedule breaks every hour to stretch and reset posture, giving your eyes much-needed rest. Taking regular breaks is important to avoid blurred vision signals.
Smart ergonomic sewing tools and posture exercises help you stay safe and productive during crafting sessions.
Dangers of Electrical Overload and Fire
While good posture protects your body, electrical safety protects your life. Sewing machines can create dangerous electrical overloads when not handled properly.
Your sewing room needs these electrical safety measures:
- Surge protectors are must-haves, not just for power strips but specifically designed for sewing equipment
- Cord management prevents tripping hazards and potential fire risks from damaged cords
- Outlet safety means using one machine per outlet and avoiding overloading circuits
- Extension cords should be temporary solutions only—never permanent fixtures
Check your machine cords monthly for fraying or damage. Unplug everything when you’re done sewing. Keep a small fire extinguisher nearby just in case.
Remember, fire prevention is simpler than dealing with the aftermath of electrical hazards in your creative space.
Top Safety Tips for Sewing at Home
You’ll need to protect your fingers from machine needles and keep your workspace clean to prevent accidents while sewing at home.
Using products like the Sew Safe Presser Foot, Ironing Thimbles, and Rotary Cutter Safety Gloves can make your sewing experience both safer and more enjoyable.
Keeping Fingers Away From The Needle
After discussing proper machine maintenance, let’s focus on your most valuable tools—your fingers.
Keeping fingers away from the needle is the number one rule in safe sewing practices. The sewing machine needle moves at lightning speed and doesn’t distinguish between fabric and flesh.
For effective finger protection while sewing:
- Install a Sew Safe Presser Foot that creates a physical barrier between fingers and needle
- Use needle safety shields with built-in stopers that prevent accidental contact
- Wear finger protection devices like silicone guards when working close to the needle
- Invest in presser foot guards that improve visibility while maintaining safety
Slow down your sewing speed when working on tricky sections. Your project isn’t a race, and those extra seconds can save you from painful needle pricks and emergency room visits, which is a key aspect of proper machine maintenance and overall sewing safety.
Avoiding Sewing Over Pins and Loose Threads
Steer clear of sewing over pins to prevent needle breakage and potential injuries.
Try pin alternatives like Wonder Clips or hand basting within the seam allowance for safer fabric securing.
Remove pins at least two inches ahead of your needle path, and keep thread tails neatly trimmed to avoid bobbins tangles.
Consider using fabric weights instead of pins for certain projects.
Proper thread management and careful attention to loose threads will protect your fingers and keep your sewing machine needle in perfect condition.
Maintaining a Clean and Clutter-Free Workspace
Behind every safe sewing project lies a clean, clutter-free workspace.
You’ll prevent accidents and enjoy your hobby more when your sewing area stays organized.
- Install magnetic tool organizers on walls to keep scissors and metal implements secure and within reach, not scattered where they can cause injury.
- Use labeled bins for waste disposal to separate fabric scraps, thread clippings, and broken needles for proper disposal.
- Implement cord management solutions to prevent tripping hazards and protect electrical components.
Regular surface cleaning and smart storage solutions transform your sewing environment into a sanctuary where creativity flows without safety concerns.
Sewing Safety for Beginners
You’ll need proper safety tools like a Sew Safe Presser Foot, Ironing Thimbles, and Rotary Cutter Safety Gloves to protect your fingers from common sewing hazards.
These essential products create a protective barrier between you and sharp needles, hot irons, and cutting blades, allowing you to focus on your creativity rather than worrying about injuries.
Understanding Basic Sewing Machine Safety
After learning those home safety tips, it’s time to master your sewing machine basics.
Start by reading your machine’s manual to understand built-in safety features. Always install needle guards and finger shields to protect yourself from unexpected pricks.
Maintain a steady, safe speed rather than racing through projects. Keep both hands on your fabric for proper control, away from the needle area.
Check for frayed power cords and position your foot pedal where it won’t slip. These simple precautions prevent common sewing machine safety hazards.
Common Mistakes to Avoid as a Beginner
Five common mistakes can turn your first sewing projects into frustrating experiences if you’re not careful:
- Rushing projects without proper preparation increases the risk of needle injuries and messy stitches.
- Using dull or incorrect needles for your fabric type damages materials and makes sewing unnecessarily difficult.
- Ignoring your sewing machine manual means missing essential safety features and proper setup instructions.
- Choosing incompatible fabric and thread combinations results in weak seams and thread breakage.
- Setting incorrect thread tension causes tangled threads, puckered fabric, and machine jams.
Take your time to measure twice and cut once.
Proper seam allowance and careful fabric selection make a huge difference in your finished product.
Always consult your manual before starting – it’s not just a boring booklet but your safety guide.
Testing thread tension on scrap fabric first saves hours of frustration later.
Remember, even experienced sewers started as beginners, so don’t be hard on yourself for making these common sewing mistakes, and try to avoid frustration by being more careful with your thread tension and following the manual instructions carefully to ensure proper setup.
Advanced Sewing Safety Techniques
You can sew smarter and safer with a few advanced techniques that reduce risks and improve precision.
Using the right tools and paying attention to details will help you avoid common hazards.
While keeping your projects on track will be the result of using these techniques and paying attention to the details provided.
Mastering The Art of Backstitching Safely
Now that you understand the basics, it’s time to perfect your backstitching technique with safety in mind.
Backstitching safely starts with proper hand placement, keeping your fingers a safe distance from where the needle enters the fabric. Maintain controlled speed on your sewing machine to prevent sudden movements that could lead to injury.
Proper fabric tension is key—hold it firmly but not too tight to guarantee consistent seams while protecting your fingers. Set an appropriate stitch length for your project type to maintain control.
Remember these sewing safety tips:
- Always use needle protection when not stitching
- Position hands away from needle path
- Keep a steady, controlled pace
- Maintain even fabric tension throughout
Using The Correct Needle for The Job
After mastering backstitch techniques, selecting the right needle becomes your next safety focus.
Choosing the correct needle for your fabric isn’t just about stitch quality—it prevents breakage and sewing injuries.
Use ballpoint needles for knits, sharp needles for wovens, and denim needles for heavy fabrics.
Always check needle condition before starting; bent or dull needles cause skipped stitches and fabric damage.
Your sewing machine will thank you with smooth operation, and needle protection accessories like finger guards add extra safety.
Replace needles regularly for best results.
Avoiding Common Safety Hazards for Advanced Sewists
Now that you’ve mastered proper needle selection, let’s tackle the safety challenges that come with advanced sewing.
Even seasoned sewists encounter hazards during complex projects. Here’s how to protect yourself when pushing your skills:
- Shield your hands with rotary cutter safety gloves when cutting intricate patterns or working with power tools
- Always unplug your machine before changing parts to prevent unexpected starts that could lead to finger injuries
- Use specialized presser feet with guards when speed sewing to maintain fabric handling control
- Position your foot pedal correctly to avoid accidental acceleration during detailed work
Don’t let your confidence lead to shortcuts. Always be sure to practice proper electrical safety to prevent accidents.
Remember, even experts need finger protection strategies when working with industrial-grade equipment or challenging materials.
Take breaks regularly—your precision depends on it!
Safety Precautions for Hand Sewing
You’ll protect your fingers and eyes with the right tools when hand sewing, such as needle threaders with built-in cutters and silicone thimbles.
Good lighting and proper seating help prevent strain, allowing you to enjoy your projects safely.
Handling Needles and Pins Safely
Sharp needles and pins are essential tools that require careful handling. You’ve moved beyond basic techniques, so now let’s talk about managing these tiny hazards safely.
Never store needles in your clothing or furniture—a practice that prevents painful surprises later. Use proper Needle Storage systems like magnetic Pin Cushions that keep your workspace organized and fingers safe.
When it comes to Broken Needles, always dispose of them in sealed containers to prevent sewing hazards.
| Safety Tool | Benefit | When to Use |
|---|---|---|
| Magnetic pin holder | Prevents lost pins | During all projects |
| Finger thimbles | Provides finger protection | When hand stitching |
| Needle threader | Reduces eye strain | For difficult Threading Techniques |
Remember to count your pins before and after each sewing session—this simple sewing precaution guarantees no dangerous strays remain in your fabric or carpet.
Preventing Eye Strain and Fatigue
Tired eyes can ruin your sewing joy. Protect your vision with proper lighting solutions and smart habits.
- Use adjustable LED lamps positioned over your shoulder to eliminate shadows
- Take ergonomic breaks every 20-30 minutes to reduce eye fatigue
- Install screen filters on digital pattern devices to cut harmful blue light
- Practice vision exercises like focusing on distant objects between stitches
Stay hydrated and guarantee good ventilation to prevent dry eyes during extended sewing sessions. Regular eye exams can help with early vision changes. This is crucial for maintaining good eye health.
Maintaining Good Posture for Hand Sewing
The right posture during hand sewing prevents painful injuries that can cut your crafting time short.
Your body will thank you for these simple adjustments:
- Position your chair at elbow height with proper back support to maintain natural spine alignment
- Keep your neck straight by placing your project at eye level with adequate lighting ergonomics
- Take short breaks every 20-30 minutes for quick posture exercises to relieve tension
- Support your wrists with a small cushion to maintain proper hand position while stitching
These sewing ergonomics aren’t just precautions—they’re investments in your long-term sewing enjoyment.
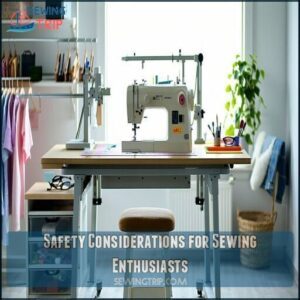
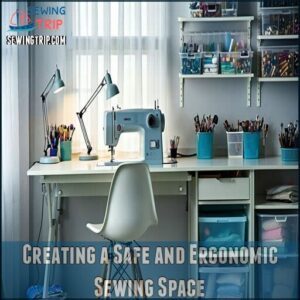
Creating a Safe and Ergonomic Sewing Space
You’ll prevent painful injuries and reduce fatigue when you set up your sewing area with proper lighting, an adjustable chair, and organized tool storage.
Your body will thank you for creating a workspace that keeps everything within easy reach and uses ergonomic products designed to support long sewing sessions, which will also help in reducing fatigue.
Setting Up a Comfortable Sewing Station
I’ll create an improved version of the content about setting up a comfortable sewing station following all the requirements.
After protecting your hands during sewing projects, you’ll need a properly arranged workspace for comfort and safety.
Your sewing station should include:
- An adjustable ergonomic chair that supports your back during lengthy projects
- A table at elbow height to prevent shoulder strain
- Clearly labeled bins for quick tool access
- Anti-fatigue floor mats to reduce leg fatigue
Good posture prevents injuries and keeps your creativity flowing!
Using Good Lighting and Ventilation
Now that you’ve set up a comfortable sewing station, let’s look at how proper lighting and ventilation can protect your eyes and lungs while sewing.
Good lighting isn’t just helpful—it’s a safety essential. Position your workspace near a window to harness natural light, which shows fabric colors accurately and reduces eye strain.
For evening work, invest in ergonomic lighting with adjustable LED lamps that provide ideal illumination without harsh shadows.
Don’t forget about air quality. When you cut and iron fabrics, you’re dealing with dust, lint, and sometimes chemical fumes. To prevent accidents, always unplug the machine when cleaning it.
A ventilation system or even a simple fan can keep fresh air flowing in your sewing space.
| Feature | Safety Benefit |
|---|---|
| Natural Light | Prevents eye fatigue and shows true colors |
| Task Lighting | Illuminates detail work to avoid mistakes |
| Fans/Air Purifiers | Removes fabric dust and chemical fumes |
Your eyes and lungs will thank you for these simple sewing safety measures.
Maintaining a Clean and Organized Workspace
Now that you have good lighting, let’s tackle workspace organization.
A clean sewing area isn’t just about looking tidy—it’s about safety and productivity too. Your creative flow stops when you’re hunting for scissors under fabric piles.
- Tool Organization: Place frequently used items within arm’s reach on magnetic strips or pegboards
- Material Storage: Use clear bins to quickly identify fabrics and notions
- Waste Disposal: Keep a thread catcher nearby to prevent slippery floor hazards
- Surface Cleaning: Wipe down your machine and tables after each session to prevent dust buildup
- Ergonomic Layout: Position your machine, cutting area, and iron station to minimize unnecessary movement
Frequently Asked Questions (FAQs)
What are the best tools for sewing?
You’ve probably experienced the frustration of searching for reliable sewing tools.
Your best options include sharp fabric scissors, quality needles, a reliable sewing machine, pin cushions, measuring tape, and safety accessories like thimbles.
What are the handy sewing tools?
You’ll need basic handy sewing tools like thimbles, needle threaders, rotary cutters with safety guards, seam rippers with caps, magnetic pin cushions, and ergonomic scissors.
And presser feet with finger guards for safer, more efficient projects.
What are sewing tools and equipment?
Your sewing toolkit includes both basic and specialized items.
You’ll use cutting tools (scissors, rotary cutters), measuring devices (tape, rulers), stitching implements (needles, pins), and machines (sewing, sergers) for various fabric projects.
What are 3 guidelines when using a sewing machine?
Like a pilot’s pre-flight checklist, always unplug your machine when changing needles, keep your fingers away from the needle area while sewing, and maintain regular cleaning to prevent lint buildup.
Are sewing machines safe?
Modern sewing machines are generally safe when used correctly.
You’ll want to follow proper maintenance, use safety features, and stay alert.
Unplug when not in use to prevent accidental activation and potential injuries, this is a key step to prevent accidental activation.
What is the most important sewing machine safety rule?
Better safe than sorry! Always unplug your machine when not sewing or when changing needles, threading, or doing maintenance. This prevents accidental starts that could lead to serious finger injuries.
What is the most dangerous tool in a sewing room?
The rotary cutter is your most dangerous sewing tool.
Its razor-sharp circular blade can easily slice through fabric and skin.
Always engage the safety lock when not in use to prevent accidents.
What should you avoid when sewing with a sewing machine?
You should avoid distractions, wearing loose clothing, placing fingers near the needle, sewing over pins, looking away while operating, and using damaged needles.
Always unplug when not in use or making adjustments, to ensure safety and prevent potential hazards.
How do you prevent sewing accidents?
Use proper safety tools like finger guards, maintain your machine regularly, keep your workspace organized.
Wear protective gloves when cutting, and always stay focused while sewing.
Never sew when you’re tired.
How do you protect your sewing skills?
Coincidentally, your hands are your most valuable sewing tools.
Practice regularly, take breaks to prevent strain, keep your workspace organized, and maintain proper posture.
Don’t forget to update your knowledge with new techniques and remember that your hands are crucial, so practice regularly.
Conclusion
Investing in these 3 exceptional products that make sewing safer will revolutionize your crafting experience.
You’ll sew with newfound confidence when your fingers are protected from needles, your hands are shielded from rotary cutters, and your fingertips are safe from burns.
These simple tools eliminate the constant worry of potential injuries, letting your creativity flow freely.
Remember, the best sewists aren’t just skilled—they’re smart about safety.
Your fingers (and your projects) will thank you!
- https://shrsl.com/37zjf
- https://www.allfreesewing.com/Reference-Information/Health-and-Safety-in-the-Sewing-Room
- https://www.fibre2fashion.com/industry-article/7044/sewing-machine-important-safety-rules-and-instructions
- http://yesterdaysthimble.com/articles/sewing-room-safety-14-tips/
- https://wunderlabel.com/en-gb/blog/p/14-essential-sewing-safety-tips-beginners/

