This site is supported by our readers. We may earn a commission, at no cost to you, if you purchase through links.
Turn this dial to higher numbers (4-6) to reduce pressure on your fabric, which is essential when working with thick materials like denim or canvas.
Lower pressure prevents fabric distortion and allows smoother feeding through the machine.
For thin fabrics like silk, you’ll want lower numbers (1-2) for increased pressure.
The standard setting of 3 works perfectly for most everyday sewing projects.
Always test your pressure adjustment on scrap fabric first—this simple step prevents costly mistakes on your actual project.
Proper pressure control transforms your stitching from amateur to professional quality, but there’s much more to mastering this technique than just turning a dial.
Table Of Contents
- Key Takeaways
- Adjusting Presser Foot Pressure
- Optimal Pressure for Different Fabrics
- Resetting Pressure for Standard Sewing
- Importance of Presser Foot Pressure
- Methods for Lowering Foot Sewing
- Location of Pressure Adjustment
- Understanding The Impact of Pressure Adjustment
- Troubleshooting Sewing Problems
- Enhancing Sewing Machine Capabilities
- Frequently Asked Questions (FAQs)
- Conclusion
Key Takeaways
- You’ll find the presser foot pressure dial on your machine’s back or side panel – turn it to higher numbers (4-6) for thick fabrics like denim to prevent distortion, and lower numbers (1-2) for thin fabrics like silk
- Always test your pressure adjustments on scrap fabric first to prevent costly mistakes on your actual project – this simple step saves time and materials while ensuring proper settings
- Use the standard setting of 3 as your baseline for most everyday sewing projects, then adjust up or down based on your specific fabric’s thickness and texture
- Proper pressure control directly impacts stitch quality and fabric feeding – too much pressure causes puckering and damage, while too little creates uneven stitches and fabric slippage
Adjusting Presser Foot Pressure
You’ll always benefit from mastering your sewing machine’s presser foot pressure settings.
The pressure dial controls how firmly your presser foot grips fabric during stitching.
Adjust presser foot pressure based on your material’s thickness and texture.
Testing pressure settings on scrap fabric prevents costly mistakes.
Machine model differences mean your adjustment method might use a dial, lever, or digital control.
Proper presser foot pressure guarantees superior fabric feed control and stitch quality impact.
Start with medium settings, then fine-tune for ideal results.
Optimal Pressure for Different Fabrics
Different fabrics demand specific pressure settings to achieve professional results without damage.
You’ll need higher pressure for thin materials like silk or chiffon, while thick fabrics such as denim or canvas require lower settings to prevent distortion.
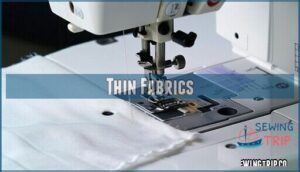
Thin Fabrics
When working with thin fabrics, you’ll need to lower presser foot pressure to around 1-2 on your sewing machine’s dial. This gentler approach prevents puckering and seam wandering that plague delicate materials like chiffon and silk.
Gentle pressure on delicate fabrics prevents puckering—treat silk like the treasure it is
Think of it as giving your fabric room to breathe—too much pressure crushes these lightweight beauties. Lower presser foot pressure, combined with proper needle choice and tension settings, creates smooth seams.
Consider using a stabilizer underneath particularly troublesome fabrics. You may want to explore options for purchasing fabric stabilizer for best results.
Your sewing machine foot should guide, not bulldoze, thin materials for professional results.
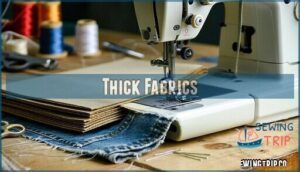
Thick Fabrics
When dealing with thick fabrics like denim or canvas, you’ll need higher presser foot pressure settings, typically between 4 and 6.
Adjust presser foot pressure to prevent skipped stitches and maintain consistent fabric feed through multiple layers. Lower presser foot firmly to grip heavy materials.
Consider needle selection and thread choice for superior results. A walking foot helps manage layer management while maintaining proper seam allowance.
This sewing machine foot technique guarantees smooth fabric feed without machine strain. Finding the right presser for fabrics can greatly improve your sewing experience.
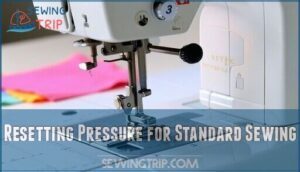
Resetting Pressure for Standard Sewing
Getting back on track with ideal pressure settings will transform your sewing experience. When you adjust presser foot pressure to the standard setting of 3, you’re establishing the foundation for consistent results across standard fabrics.
Here’s your step-by-step approach:
- Locate the presser foot pressure setting dial on your machine’s back panel
- Turn the dial to position 3 for perfect pressure on most fabric weights
- Test the adjust foot pressure with scrap fabric before starting your project
- Perform regular checks to maintain machine performance throughout extended sewing sessions
This sewing machine foot pressure adjustment serves as your baseline for most projects. Proper adjustments can also help you find related products. The standard setting guarantees proper fabric feeding without excessive compression that could damage delicate materials or insufficient grip that causes slipping. When you adjust presser foot through this systematic approach, you’ll notice improved stitch quality and reduced fabric distortion, making your sewing machine foot adjustment a reliable foundation for successful projects.
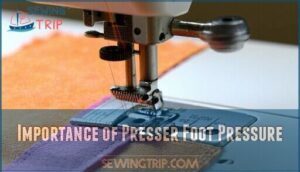
Importance of Presser Foot Pressure
Mastery in sewing starts with understanding one fundamental truth: presser foot pressure controls everything. When you adjust foot pressure correctly, you’re setting the foundation for professional results that’ll make you wonder why you struggled before.
Perfect pressure equals perfect results—no guesswork, just professional stitching every time
Think of presser foot pressure as your fabric’s best friend. Too little pressure creates fabric feeding issues and uneven stitches that’ll drive you crazy. Too much pressure damages delicate materials and creates puckered seams. Finding that sweet spot guarantees consistent feeding and seam precision every time.
| Fabric Type | Pressure Setting | Key Benefits |
|---|---|---|
| Lightweight silks | Higher (3-4) | Prevents shifting, better control |
| Medium cottons | Standard (2-3) | Balanced feeding, even stitches |
| Heavy denims | Lower (1-2) | Reduces strain, smooth operation |
| Stretchy knits | Lower (1-2) | Minimizes distortion, flat seams |
| Delicate laces | Higher (3) | Secure hold without damage |
Your sewing machine foot pressure directly impacts stitch quality and fabric control. Exploring different options like the walking foot functionality can further enhance your control over challenging fabrics. Master this adjustment, and you’ll prevent damage while achieving the consistent results that separate amateur work from professional craftsmanship.
Methods for Lowering Foot Sewing
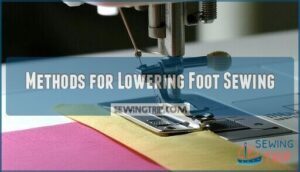
Your sewing machine’s presser foot lever serves as the gateway to perfect stitching control. Located typically on the machine’s right side or back, this lever operates through simple up-and-down movements.
To lower the presser foot, gently press the lever downward until you hear a soft click—this engages consistent pressure against your fabric.
For fabric insertion, raise the lever completely, slide your material beneath the foot, then lower again.
Height adjustment happens automatically as the lever moves, ensuring proper foot attachment to the presser bar.
Remember: smooth lever operation prevents fabric bunching and maintains even tension throughout your project.
Location of Pressure Adjustment
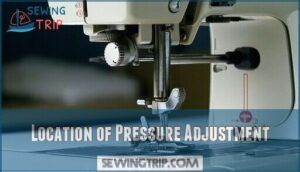
Finding your sewing machine’s pressure adjustment controls isn’t like searching for buried treasure – they’re designed for easy access. Most modern machines position the dial location on the front or top of the machine head, marked with numbers or pressure icons for quick identification.
Your lever position varies by manufacturer. High-end brands like Bernina and Janome often place controls on the side or integrate digital settings into LCD panels. Entry-level machines typically use a simple screw placement above the needle area, sometimes requiring a screwdriver for adjustments.
Look for button access on computerized models, where touchscreens allow preset changes. The sewing machine foot lever and presser foot lever work together with these controls to manage fabric handling.
Check your manual’s diagrams – they’ll show your specific pressure adjustment location. Some machines hide controls inside faceplates or side covers. Bold plastic or colored markings often highlight the sewing machine adjustment dial. Industrial models may feature external levers near the presser bar for quick sewing machine foot pressure changes during operation.
Understanding The Impact of Pressure Adjustment
When you adjust your sewing machine’s presser foot pressure, you’re controlling far more than just how firmly the foot holds fabric.
You’re not just pressing fabric—you’re orchestrating precision, control, and professional-quality results with every stitch.
Think of pressure adjustment as your machine’s fine-tuning dial—it directly affects stitch consistency, fabric control, and overall seam quality.
Too much pressure creates a domino effect of problems.
Your fabric experiences distortion as it’s squeezed too tightly, leading to puckering and uneven feeding problems.
The excessive force can even cause needle breaks when your machine struggles against the resistance.
You’ll notice your stitches become dense and irregular, compromising the professional look you’re after.
Conversely, insufficient pressure lets fabric float freely, destroying stitch consistency.
Without proper fabric control, your material shifts and moves unpredictably, creating crooked seams and skipped stitches.
The sewing machine foot adjustment becomes your secret weapon for achieving that sweet spot where everything flows smoothly.
Mastering sewing machine adjustment means understanding how pressure changes transform your entire sewing experience.
Troubleshooting Sewing Problems
When your sewing machine starts acting up, don’t panic—most problems stem from incorrect presser foot pressure settings.
You’ll need to identify the root cause before making adjustments to your machine’s pressure dial or lever.
Common pressure-related issues include:
- Fabric Slippage – Increase pressure to secure material during stitching
- Thread Breakage – Reduce excessive pressure that’s straining your thread
- Skipped Stitches – Check if insufficient pressure is preventing proper needle penetration
- Machine Noise – Adjust presser foot pressure to eliminate grinding sounds
Start your sewing machine troubleshooting by testing pressure settings on scrap fabric.
If you’re experiencing needle issues alongside pressure problems, make certain your needle’s properly inserted and matches your fabric weight.
When you lower presser foot pressure gradually, you’ll often resolve puckering and distortion.
Remember, sewing machine foot adjustment isn’t just about fixing problems—it’s about preventing them from happening in the first place.
Enhancing Sewing Machine Capabilities
Beyond troubleshooting common issues, you can tap into your machine’s full potential through strategic presser foot pressure mastery. Modern sewing machines offer remarkable versatility when you understand their pressure control systems.
Specialty Feet require precise pressure adjustments—your walking foot needs different settings than your zipper foot. Machine Maintenance keeps pressure mechanisms responsive, while Advanced Techniques combine pressure control with Needle Selection and Thread Choices for professional results.
Mastering sewing machine foot positioning transforms ordinary projects into polished masterpieces. You’ll discover that sewing machine control isn’t just about speed—it’s about precision.
- Pressure Calibration: Test different settings on fabric scraps to find your machine’s sweet spot for each material type
- Systematic Approach: Document successful pressure combinations for future projects, creating your personal sewing reference guide
Frequently Asked Questions (FAQs)
How do you physically lower the presser foot lever?
Like threading a needle with precision, mastering your machine’s lever becomes second nature.
Simply locate the presser foot lever on your machine’s left side and gently push it down until it clicks into position, securing your fabric for perfect stitching.
What happens when presser foot stays raised accidentally?
When you accidentally leave the presser foot raised, your fabric won’t stay in place, causing uneven stitches, fabric slippage, and potential thread jams.
You’ll lose control over feeding, creating messy, inconsistent seams that’ll frustrate any project.
Can you sew without lowering the presser foot?
You can’t sew properly without lowering the presser foot.
Raised presser foot allows fabric to shift freely, creating uneven stitches, skipped stitches, and poor seam quality, making your project look unprofessional.
How to tell if presser foot is properly lowered?
When your presser foot’s properly positioned, you’ll feel gentle resistance as fabric slides beneath it.
The foot should contact fabric evenly without gaps, creating consistent pressure across the material’s surface for smooth, controlled stitching.
Why wont my presser foot lever stay down?
Your presser foot lever mightn’t stay down due to a broken internal spring mechanism, worn lever components, or incorrect foot attachment.
Check if the foot’s properly seated and consider professional repair if the lever mechanism is damaged internally.
How do you manually lift the presser foot lever?
Mastering this seemingly impossible task requires precise technique!
Locate the presser foot lever on your machine’s right side or back.
Simply push or pull it upward with gentle, steady pressure until you hear a satisfying click, indicating proper engagement.
What causes presser foot to stick or jam?
Lint, thread buildup, or oil residue typically causes your presser foot to stick or jam.
Clean around the foot mechanism, remove accumulated debris, and apply a tiny drop of sewing machine oil to moving parts for smooth operation.
How to clean debris under the presser foot?
Like cleaning cobwebs from a forgotten corner, you’ll need precision to banish debris hiding beneath your foot.
Raise the foot, turn off your machine, and gently brush away lint using tweezers or a small brush for superior performance.
Why wont my presser foot stay down properly?
Check if the presser foot lever is fully engaged, inspect for thread or debris blocking the mechanism, and verify the foot attachment isn’t worn or damaged requiring replacement.
Conclusion
Picture yourself standing before your sewing machine, confident and ready to tackle any fabric that crosses your path.
Mastering how to lower the foot sew through proper presser pressure control transforms your stitching quality dramatically.
You’ve learned that thick fabrics need reduced pressure while delicate materials require firmer contact.
Testing adjustments on scraps prevents fabric damage and guarantees professional results.
With practice, you’ll instinctively know which pressure setting works best for each project, making every seam perfectly balanced and beautifully executed.

