This site is supported by our readers. We may earn a commission, at no cost to you, if you purchase through links.
 Channel your inner fashion designer and sew a dress designed for your unique style!
Start by selecting a beginner-friendly pattern that matches your skill level.
Carefully study the instructions, choose the perfect fabric, and precisely cut the pieces.
Pay close attention when stitching darts for shaping, installing that sleek zipper, and attaching those crisp facings – they’re game-changers.
Don’t sweat minor hiccups; troubleshooting is part of the process.
Once you’ve mastered those techniques, you’ll be ready to customize and add those personal touches.
Excited to transform fabric into wearable art? This guide has you covered.
Table Of Contents
- Key Takeaways
- Choosing the Right Pattern
- Fabric Selection and Preparation
- Sewing Darts for Shaping
- Installing the Back Zipper
- Attaching the Neckline Facing
- Sewing the Armhole Facings
- Sewing the Shoulder Seams
- Hemming the Dress
- Troubleshooting Common Issues
- Customizing Your Dress
- Frequently Asked Questions (FAQs)
- Conclusion
Key Takeaways
- Choosing the Right Pattern: Select a simple dress pattern that aligns with your skill level and desired style, considering pattern types like shifts, A-line, or empire waists.
- Fabric Selection and Preparation: Pay attention to fabric weight, drape, care instructions, and print direction, and press pattern pieces flat before accurately cutting them out.
- Stitching Techniques: Master dart stitching for proper shaping, install back zippers with precision, and attach neckline and armhole facings for a polished finish.
- Customization and Troubleshooting: Explore customization options such as altering necklines, sleeve lengths, and dress hemlines, while also troubleshooting common issues like uneven stitches, puckered seams, and twisted fabric.
Choosing the Right Pattern
As a beginner, start by choosing a simple dress pattern that aligns with your skill level and desired style. Carefully consider pattern types like shifts, A-line, or empire waists, and select one that provides clear instructions suitable for your experience.
Beginner-friendly Patterns
As a beginner, start with a simple shift dress pattern. Online resources offer guidance on different pattern types and styles to select the best fit for your skill level and desired look. Explore pattern hacks and style inspiration to customize the basic shift dress to your preferences.
Pattern Types and Styles
When choosing a dress pattern, consider:
- Cultural influences
- Historical significance
- Designer trends
These factors can help you match the pattern to your personal style and the dress’s seasonal appropriateness.
Explore various dress styles such as:
- Shift
- Trapeze
- Sheath
- A-line
Find the perfect pattern that aligns with your vision. Whether you prefer a:
- Vintage look
- Modern design
- Timeless classic
The right pattern sets the tone for your sewing journey.
Selecting Based on Skill Level
As a beginner, choose a simple shift dress pattern that aligns with your body measurements and desired style. Look for patterns with:
- Straightforward construction
- Minimal details
- Forgiving fabrics like jerseyT
his will guarantee your first dressmaking project is both achievable and flattering. With the right pattern, you’ll be sewing your dream dress in no time!
Fabric Selection and Preparation
Fabric selection is essential; consider the weight, drape, care instructions, and print direction to guarantee a successful dress. Properly prepare the pattern pieces by pressing them flat and identify required pieces according to layout diagrams.
Fabric Properties and Characteristics
Fabric selection is pivotal for both the aesthetic and functional aspects of your dress. Consider the fabric’s drape, texture, care instructions, weight, and stretch properties. Jersey fabric is an excellent beginner-friendly option due to its forgiving nature. Properly finishing seams, facings, and armholes is key for a polished result.
Preparing the Pattern Pieces
Once you’ve selected your pattern, take a moment to press the tissue paper pieces flat. This guarantees accurate cutting and layout on the fabric. Identify all the required pieces, referring to the pattern instructions and diagrams. With your pattern ready, you’re one step closer to sewing your dream dress!
Laying Out and Cutting the Fabric
Lay your fabric out on a clean, flat surface, ensuring the grain direction is aligned properly. Carefully place your pattern pieces, matching any directional prints or stripes. Inspect the fabric for flaws, then use sharp fabric scissors or a rotary cutter to precisely cut out each piece. Secure the pattern with pins before cutting to prevent shifting.
Sewing Darts for Shaping
Transferring the dart markings from the pattern pieces to the fabric is a vital step in achieving proper shaping. Once the darts are marked, you’ll carefully stitch them from the wider end in the direction of the point, then press them downwards for a smooth, contoured fit.
Transferring Dart Markings
When transferring dart markings for shaping, precision is key. Utilize tailor’s chalk or fabric markers for clear, accurate markings.
Verify alignment by matching the pattern markings to the fabric. After transferring, press the darts downwards for a smooth fit.
Common mistakes include inaccurate marking methods leading to misaligned darts. Attention to details and accuracy in marking are indispensable for a well-shaped dress.
Stitching Darts Accurately
To accurately stitch darts and enhance shaping techniques, focus on precision and alignment:
- Proper Dart Placement: Guarantee dart markings are accurately transferred from the pattern to the fabric.
- Stitching Technique: Sew darts from the wider end to the point, maintaining even stitches for a clean finish.
- Shaping Expertise: Follow the pattern instructions diligently to achieve the desired shaping effect.
- Attention to Detail: Press the stitched darts downwards for a smooth fit.
Pressing Darts for a Smooth Fit
Once you’ve sewn your darts, it’s time to press them for a smooth, polished appearance. Position the dart over a tailor’s ham or rolled towel, then press the seam allowance to the side, taking care to press the dart point firmly. This helps the dart lay flat and prevents puckering. Proper pressing is key for darts that flatter your figure.
Installing the Back Zipper
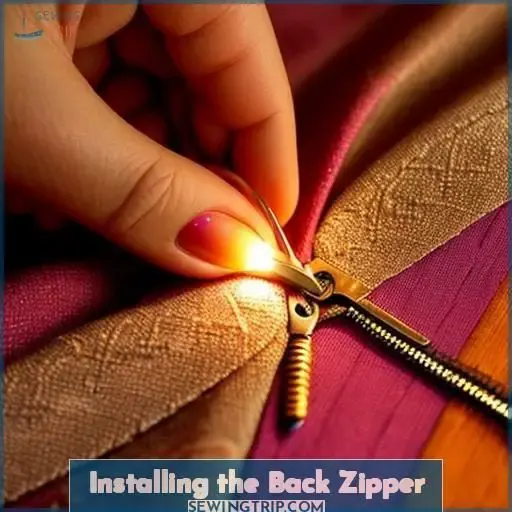
When addressing the installation of the back zipper, you have three main options: centered zippers, invisible zippers, or lapped zipper applications. Each type has its own advantages and installation method, so carefully review the pattern instructions to determine the best choice for your dress design and skill level.
Centered Zippers
When installing a centered zipper, measure the zipper length and coordinate the color to match your fabric. Carefully align the zipper teeth with the seam, pinning it in place. Use a zipper foot to stitch along the seam allowance, pivoting at the zipper stop. Take care to maintain even seam allowances for a professional finish. (Source)
Invisible Zippers
Invisible zippers offer a sleek, seamless look for your dress. Select the right zipper foot, carefully prepare the tape, and stitch close to the teeth to conceal the zipper. Master these techniques, and your dress will exude effortless sophistication.
- Precise zipper foot positioning
- Thorough tape preparation
- Stitching close to zipper teeth
- Concealing zipper edges
- Achieving an invisible finish
Lapped Zipper Application
For a lapped zipper, position the zipper with the left side aligned to the folded fabric edge. Stitch the zipper tape, then fold the right side over the zipper, pinning in place. Topstitch the left side close to the zipper teeth for a polished, bespoke look. Troubleshoot any puckering or misalignment.
Attaching the Neckline Facing
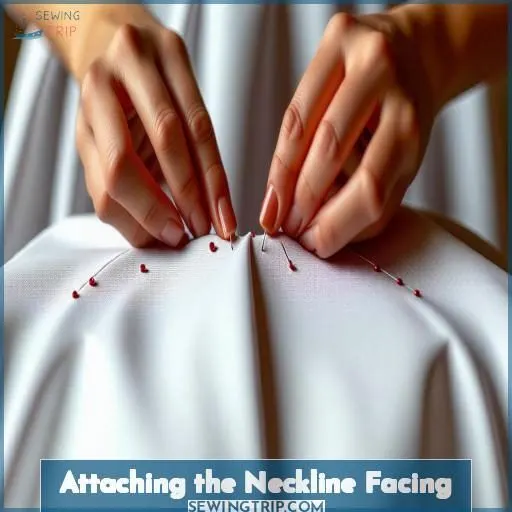
To give your dress a polished, professional finish, you’ll need to attach the neckline facing. First, prepare the facing pieces by applying interfacing to them, then join the front and back facings at the shoulder seams, ensuring they’re right sides together.
Preparing the Facing Pieces
Prepare the facing pieces by fusing lightweight interfacing to provide stability. Verify the facing width matches the neckline, then clip curves and finish the outer edges before pressing the facing pieces flat.
Joining Facing Pieces
Next, align the shoulder seams of the facing pieces and stitch them together. This creates a continuous neckline facing that can be secured to the dress for a polished finish.
- Align shoulder seams of facing pieces
- Stitch facing pieces together
- Form continuous neckline facing
- Secure facing to dress neckline
- Prepare for finishing facing edges
Finishing Facing Edges
To finish facing edges, consider these options:
| Facing Type | Edge Finish |
|---|---|
| Woven | Serge, fold under, topstitch (Source) |
| Knit | Zigzag, fold under, coverstitch (Source) |
| Bias | Fold under, press, topstitch |
Finish edges neatly for a professional look and secure facing in place.
Aligning and Stitching Facing to Neckline
When aligning and stitching the neckline facing, make certain the facing width matches the receiving neckline. Carefully select appropriate interfacing to provide stability. Utilize precise clipping techniques to manage curves. Explore various edge finishing and topstitching options.
Understitching and Pressing
When attaching the neckline facing, under-stitching guarantees edge stability by stitching the facing to the seam allowance. Press the seam in the direction of the facing for a smooth finish. Follow facing application steps, including seam finishing and fabric manipulation techniques.
Sewing the Armhole Facings
To sew the armhole facings, carefully align the facing pieces to the armhole openings, matching notches and raw edges. Clip the curved areas, trim the seam allowances evenly, and understitch the facing to secure it, preventing it from rolling in the direction of the garment’s exterior.
Aligning Facing to Armhole
When aligning facing to the armhole, guarantee precise placement for a professional finish. Clip curves to allow the facing to lay smoothly against the garment. Trim the seam allowance to reduce bulk and achieve a clean look. Understitch the facing to create a crisp edge that stays in place. Secure the facing at the shoulder seam for durability.
- Align facing accurately
- Clip curves for a smooth fit
- Trim seam allowance carefully
- Understitch facing for a crisp edge
- Secure facing at shoulder seam
Clipping Curves and Trimming
When sewing the armhole facings, ensuring the curves are properly trimmed is essential. Use small, angled snips through the seam allowance, being careful not to cut the stitching. This allows the fabric to lie flat and prevents puckering. Trim any excess seam allowance to reduce bulk before pressing the facing in place.
Securing Facing Edges
To secure the facing edges, stitch in the ditch along the shoulder and side seams. This hidden technique catches the facing underneath, keeping it in place. For a professional finish, use:
- Precise seam alignment
- Sharp needle and thread tension
- Careful stitching close to the seamline
Sewing the Shoulder Seams
You’ll sew the shoulder seams by aligning the front and back pieces of the dress, right sides together, ensuring the seam allowances match. Press the seams open once sewn to distribute the fabric evenly and reduce bulk, creating a smooth finish.
Aligning Front and Back Pieces
With the neckline and armhole facings securely in place, it’s time to align the front and back pieces of your dress at the shoulder seams. Match the pattern markings carefully, pinning the pieces right sides together.
Stitch the shoulder seams using your usual seam allowance, taking care to keep the fabric layers aligned. Clip any curved areas to release tension and allow the seam to lie flat.
Now you’re ready to press those shoulder seams open, creating a smooth, polished connection between the front and back of your dress. This step sets the stage for the final hemming touches.
Pressing Seams Open
With the front and back pieces aligned, it’s time to press those shoulder seams open. This step is essential for creating a smooth, professional finish. Be sure to use the appropriate iron temperature for your fabric – too hot can scorch delicate materials, while too cool won’t set the seam properly. Invest in pressing tools like a seam roll or point presser to make this task a breeze. Remember to press the seams open, not just flat, to distribute the bulk evenly and prevent puckering. Precise seam allowances are key here – take your time and enjoy the satisfying crispness of a well-pressed shoulder seam.
- Proper iron temperature is essential
- Pressing tools make the job easier
- Distribute bulk evenly to avoid puckering
- Precise seam allowances create a polished look
- Enjoy the satisfaction of a well-pressed seam
Hemming the Dress
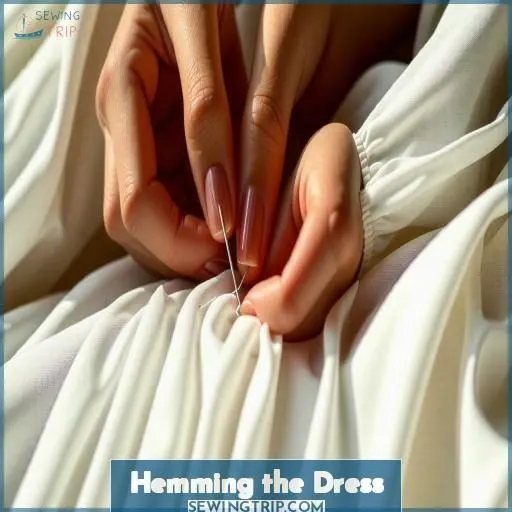
Hemming adds the finishing touch to your dress, securing the raw edge and preventing fraying. You have two options: hand stitching for a couture-inspired look, or machine stitching for a quicker, more casual finish; either method requires precision to achieve an even, professional-looking hem.
Hand Stitching
When hand stitching to hem the dress, consider the fabric’s weight and type for suitability. Select a fine, sharp needle suitable for the fabric type and weight, along with a thread that complements the dress color.
Adjust the tension on your sewing machine to guarantee even stitching for a professional finish.
Various stitching styles, such as slip stitch or blind hem, can be used to secure the hem neatly.
Machine Stitching
When machine stitching the dress hem, make tension adjustments to prevent puckering. Choose the right needle and thread type for your fabric. Adjust the stitch length to create a smooth, even line. Select the appropriate presser foot to guarantee the fabric feeds evenly under the needle. With the right techniques, you’ll achieve professional-looking results.
Achieving an Even Hem
uneven stitches, puckered seams, twisted fabric, tension issues, needle selection.
Troubleshooting Common Issues
Even the most seasoned sewists can encounter frustrating hiccups like uneven stitches, puckered seams, or twisted fabric when assembling a dress. By staying vigilant and employing proper techniques, you can troubleshoot these common issues before they escalate, ensuring your dream dress turns out flawless.
Uneven Stitches
Uneven stitches can arise from tension issues, incorrect machine settings, or worn feed dogs. Check your bobbin tension, make sure the thread is feeding smoothly, and inspect the feed dogs for wear. Adjusting these elements can often resolve pesky uneven stitches and get your sewing back on track.
Puckered Seams
To troubleshoot puckered seams, verify correct thread tension and make adjustments as needed. Use the appropriate fabric for your dress to avoid tension issues.
Check for any fabric and thread mismatch that might be causing the problem.
Press the fabric carefully before sewing to create a smooth surface.
Consider the presser foot you’re using; sometimes, a change in presser foot can help improve seam quality.
Twisted Fabric
Twisted fabric can ruin your dress sewing project. Causes include improper grain alignment, uneven feeding, or tension issues. Prevent twists by carefully pinning and cutting fabric, using the right presser foot, and maintaining even tension. If twists occur, gently straighten the fabric and press or steam to set the stitches.
Customizing Your Dress
Once you’ve mastered the basics of dressmaking, you can explore endless customization options to create a one-of-a-kind garment that perfectly suits your style.
Play with different neckline styles like V-necks, sweetheart, or asymmetrical cuts.
Adjust sleeve lengths from cap sleeves to long sleeves, and experiment with various dress lengths, from mini to maxi.
You can even add design elements like embellishments, ruffles, or pockets.
Altering Necklines
Altering the neckline is a simple way to customize your dress and create a flattering, personalized look. Try these 3 techniques:
- Scoop out the neckline for a relaxed, casual style.
- Raise the neckline for a more modest, formal shape.
- Add embellishments like ruffles or lace for a stylish touch.
Changing Sleeve Lengths
When customizing sleeve lengths in dress sewing, consider varying styles such as puff, fitted, and layered sleeves for different looks. Make adjustments based on personal preference and envisioned styling, ensuring the final length complements the dress design and allows for comfortable movement. Use a mix of accessible, descriptive vocabulary to guide the audience through this process.
| Sleeve Style | Description | Styling Tips |
|---|---|---|
| Puff Sleeve | Adds volume at the shoulder and tapers down. | Pair with fitted waist for a balanced silhouette. |
| Fitted Sleeve | Hugs the arm closely without excess fabric. | Ideal for layering under jackets or sweaters. |
| Three-quarter Length | Ends midway between the elbow and wrist. | Suitable for casual and formal dress styles. |
Adjusting Dress Length
Adjusting the dress length allows you to tailor it to your personal preferences. Consider hemline options like mini, midi, or maxi to suit your style. Length alterations are straightforward – simply trim the fabric or add a contrasting panel for design modifications.
- Hemline options
- Style considerations
- Length alterations
- Personal preferences
- Design modifications
Adding Embellishments
Elevate your dress with eye-catching embellishments! Sew on lace accents for a romantic touch. Incorporate button details for a polished look. Trim the edges with vibrant ribbon. Experiment with unique pocket styles. Express your creativity through fabric painting – the possibilities are endless!
Frequently Asked Questions (FAQs)
How do you sew a dress step by step?
Simply said, sew straps, sides, arm openings—shape shifts smoothly. Carefully craft clean curves; circumscribe couture crafting. Creating chic clothes comes capably.
How long does it take to sew a dress for beginners?
For beginners, sewing a dress can take 1-3 days, depending on complexity. Start with simple patterns and easy fabrics, focus on learning techniques, and take breaks as needed. With practice, your speed and skill will improve.
Is it difficult to sew a dress?
Surprisingly, sewing a dress is more approachable than it appears. While precision and patience are key, modern patterns provide clear instructions, making the process manageable for motivated beginners.
How much fabric do you need to sew a dress?
The fabric needed depends on your size, style, and desired length. As a rule, you’ll need 2-4 yards of 45-60 wide fabric for an average adult dress.
How do I choose the right sewing machine for dressmaking?
For dressmaking, consider a machine with adjustable stitch length and width, automatic needle threader, top-loading bobbin, and various presser feet for zippers, buttons, and specialty stitches. A sturdy metal interior and longer arm space also facilitate sewing garments efficiently.
What are the best sewing tools for a beginner dressmaker?
As a beginner, you’ll need quality fabric shears, pins, a measuring tape, chalk, and a seam ripper. Invest in a beginner sewing machine with basic stitches. Having the right tools will guarantee a smooth dressmaking journey.
How do I alter a commercial sewing pattern to fit my body?
Visualize your dream dress as you pin the pattern to your body. Trace new side, shoulder, and bust lines. Then cut, splice pieces for a *custom-fit, empowering creation you’ll proudly wear.
What are the common mistakes to avoid when sewing a dress?
Avoid common pitfalls like skipping prep steps, pulling fabric, uneven stitches, and incorrect pattern sizing. Take your time, use the right tools, and double-check measurements for a polished, well-fitting dress.
Where can I find affordable yet high-quality dress fabrics?
You’ll find affordable gems at fabric stores, warehouses, and online outlets. But first, examine swatches for quality – skip synthetics, opt for natural fibers to guarantee your dress drapes beautifully.
Conclusion
You’ve stitched the dress of your dreams, channeling your inner sartorial savant. By mastering techniques like darts, zippers, and facings through this tutorialssew a dress guide, you’ve elevated a humble bolt of fabric into a wearable work of art. Revel in your accomplishment, then start plotting your next stylish creation – the world is your runway!


