This site is supported by our readers. We may earn a commission, at no cost to you, if you purchase through links.

When you cut fabric, you’re creating these exposed edges along seam allowances, hems, and trimmed areas that naturally want to come apart over time.
Different fabric types behave differently – knits tend to curl and stretch while wovens fray in straight lines.
You’ll find raw edges wherever scissors or rotary cutters have sliced through your material.
These unprotected edges can cause problems like fraying threads, weakened seams, and even skin irritation from loose fibers.
Professional sewers know that proper edge finishing transforms amateur-looking projects into polished garments that last longer and look better with each wear, making them more durable and attractive, with a clear emphasis on preventing fraying and ensuring overall quality.
Table Of Contents
Key Takeaways
- You’ll recognize raw edges as the unfinished, cut edges of fabric that naturally fray and unravel without proper treatment, making them the weak spots in any sewing project.
- You can choose from multiple finishing techniques, like zigzag stitching, serging, French seams, or pinking shears, depending on your fabric type and desired durability level.
- You’ll transform amateur-looking projects into professional garments by properly finishing raw edges, which prevents fraying, reduces skin irritation, and extends your garment’s lifespan.
- You don’t need expensive equipment to achieve quality results – your regular sewing machine’s zigzag stitch, pinking shears, or simple turn-under methods work effectively for most fabrics.
Understanding Raw Edges
When you cut fabric, you create raw edges – those unfinished, exposed ends that love to fray.
Raw edges are fabric’s rebellion waiting to happen – those fraying troublemakers that turn perfect projects into messy disasters
These fabric edges are basically loose threads waiting to unravel, especially in woven materials.
Think of raw edges as your fabric’s weak spots where fabric strength diminishes without proper edge finishing.
Different raw edge types behave differently: knits stretch and curl, while wovens simply fray straight across.
Your seam allowance contains these troublesome edges that need attention.
Without edge finishing techniques, fabric fraying will turn your beautiful project into a messy disappointment.
Understanding how your specific fabric edges behave helps you choose the right seam finishes to tame them.
To prevent fraying, using proper seam finishing techniques that secure the raw edges of your fabric is necessary.
Importance of Proper Seam Finishing
When you don’t finish raw edges properly, your sewing projects can look homemade instead of professionally crafted.
Unfinished seams instantly reveal amateur work – proper edge finishing separates professionals from beginners
Proper seam finishing prevents fraying, extends garment life, and keeps loose threads from irritating your skin during wear, which is crucial for a complete and satisfying sewing experience.
Clean Seams
Clean seams represent the gold standard of seam finishing techniques.
You’ll create this professional finish by folding each raw edge under along the seam allowance, then stitching it down with a straight line of thread.
This method prevents fraying while adding seam reinforcement without bulk.
Perfect for lightweight fabrics like cotton and silk, clean seams provide fabric stabilization and fray prevention.
The technique requires no special equipment—just careful pressing and edge finishing skills that transform homemade projects into polished garments.
For a more detailed guide on achieving a professional finish, consider using clean finish seam techniques to enhance your sewing skills.
Homemade Vs. Professional
Professional seam finishing sets apart well-made garments from obvious homemade projects.
You’ll notice the difference immediately – unfinished raw edges create fraying that screams "amateur hour."
Quality seam finishes showcase your attention to detail and elevate your fabric choice, whether you’re working with delicate silk or sturdy denim.
Professional touch comes from consistent edge finishing techniques that pass any durability test.
Your aesthetic appeal improves dramatically when seams look clean and intentional rather than rushed, which is a result of consistent edge finishing techniques and attention to detail, making a garment look like it was made with a professional touch and quality seam finishes.
Preventing Irritation
Discomfort becomes a distant memory when you properly finish raw edges.
Unfinished seams create scratchy surfaces that rub against skin, causing irritation during wear. Smart edge finishing transforms rough fabric ends into smooth, comfortable surfaces.
- Skin Protection: Serged or bound edges eliminate harsh fabric threads that scratch sensitive skin
- Fray Prevention: Zigzag stitching or pinking shears stop loose threads from creating irritating bumps
- Seam Comfort: French seams and flat-fell techniques enclose raw edges completely for ultimate smoothness
Overlocked/Serged Seam and Alternatives
When you need fast, professional seam finishes, overlocked or serged seams are your best friend. These techniques work on any fabric type and save you time while preventing fraying effectively.
Quick and Convenient Method
When you want speed without sacrificing quality, serging delivers unmatched results.
This powerhouse technique trims raw edges while wrapping them with thread in one swift motion.
Don’t own a serger? Your regular machine’s zig zag stitch works beautifully too.
Edge trimming happens automatically with sergers, making fast finishing a breeze.
For exceptional results, understanding serging machines is essential for professional seam finishing.
| Serging Tips | Fast Finishing | Seam Wrapping |
|---|---|---|
| Trim excess fabric | Complete in seconds | Thread encases edge |
| Adjust stitch width | One-step process | Prevents fraying |
| Test on scraps first | Works on any fabric | Creates clean finish |
These sewing techniques transform your seam finishes from amateur to professional-grade without breaking a sweat.
Suitable for All Fabrics
Overlocked seams work beautifully across all fabric types, making edge finishing a breeze.
Whether you’re tackling stretchy jersey or crisp cotton, the three-thread overlock handles woven and knitted fabrics with ease.
For stress-prone areas, four-thread overlocking adds extra seam durability.
You can adjust settings based on fabric thickness and texture, ensuring raw edges stay secure.
From lightweight silk to heavyweight denim, this versatile technique prevents fabric fraying while delivering professional results.
No matter your fabric choices, overlocked seams provide consistent thread selection and reliable fabric preparation for lasting garments.
To achieve professional results, understanding seam finishing techniques is essential for any sewing project, ensuring lasting garments with secure raw edges and reliable fabric preparation.
Alternative Methods Without a Serger
Don’t let missing serger equipment stop your seam-finishing journey. You’ve got several reliable alternatives that’ll keep raw edges from fraying beautifully.
- Zigzag stitch on your regular machine creates secure, stretchy edges perfect for knits
- Fray Check liquid brushed along raw edges prevents unraveling without bulk
- Fusible interfacing ironed onto fabric edges adds stability and fray prevention
These edge finishing techniques work across fabric types. Heat sealing works for synthetics, while fabric glue offers quick fixes. Edge trimming with pinking shears creates decorative zigzag patterns. Your seam finishes don’t need fancy equipment—just the right technique for your project’s needs.
Alternative Seam Finishes
When you don’t have a serger, these alternative finishing methods will save your seams from fraying without breaking the bank.
Each technique offers a unique way to protect raw edges while adding your own creative touch to any project, and each method will help you achieve a professional finish with alternative finishing methods.
Pinking Shears
Pinking shears create a zigzag edge that reduces fraying on raw edges.
This cutting tool prevents threads from unraveling while adding a decorative touch to fabric edges.
The serrated blades work best on tightly woven fabrics and straight-grain cuts.
Pinking shears are often used with pinking shear tools.
- Pro tip: Add a straight stitch 2-4mm from the pinked edge for extra fray prevention on frequently washed items.
Rotary Cutters With Wavy Blades
Creativity meets functionality when you reach for rotary cutters with wavy blades.
These specialized tools transform mundane fabric edges into decorative zigzag patterns while preventing fraying.
Unlike scissors, they maintain consistent pressure and create uniform waves across long seams.
Perfect for quilting cotton or home décor projects where you want functional beauty.
| Feature | Wavy Blade | Straight Blade |
|---|---|---|
| Edge Pattern | Zigzag waves | Clean straight cut |
| Fraying Prevention | Excellent | Requires finishing |
| Best Fabrics | Tightly woven cotton, linen | All fabric types |
| Decorative Value | High visual interest | Minimal decoration |
Remember blade maintenance and rotary safety—always retract blades after use and replace when dull for superior edge finishing results.
Zigzagging
Zigzag stitches work wonders for securing raw edges without specialized equipment.
Your standard sewing machine handles this edge finishing technique perfectly, creating flexible seam finishes that prevent fraying on various fabrics.
Here’s what makes zigzagging effective for fabric protection:
- Adjustable width – Control thread coverage from 2-3mm for desirable results
- Versatile application – Works on lightweight cotton through heavy denim
- Curve-friendly – Navigates irregular seam shapes where sergers can’t reach
- Budget-conscious – No additional equipment needed beyond basic sewing techniques
Position your zigzag stitch 1/16 to 1/8 inch from the raw edge for best thread control.
Overcast Seams
Overcast seams mimic serged finishes without specialized equipment. Your regular sewing machine’s overcast stitch wraps thread around raw edges, providing excellent fray prevention and fabric stabilization.
This technique works on most fabric types, creating durable seam finishes that protect thread integrity while maintaining edge finishing quality.
| Seam Security Feature | Benefit |
|---|---|
| Thread Protection | Prevents unraveling during wash cycles |
| Fabric Stabilization | Maintains garment shape over time |
| Edge Finishing | Creates clean, professional appearance |
| Fray Prevention | Eliminates loose threads and fabric fraying |
The overcast stitch basically creates a barrier around sewing edges, locking threads in place while adding subtle bulk that actually strengthens seam construction. It provides thread protection, fabric stabilization, and ensures edge finishing quality, making it an essential technique for achieving professional-looking results with excellent fray prevention.
French Seam
French seams create professional finishes perfect for delicate fabrics like silk and chiffon. This sewing method completely encases raw edges within two seams, preventing fraying while maintaining elegance.
Start by placing fabric pieces wrong sides together and sew with a ¼-inch seam allowance. Trim seam to ⅛ inch, then flip pieces so right sides face together. Press flat and sew again with ⅜-inch seam allowance, fully enclosing the raw edges.
French Seam Success Tips:
- Use fine pins – Prevents snagging delicate materials during fabric positioning and alignment
- Press between steps – Creates crisp folds that guarantee clean, professional-looking seam enclosure
- Trim precisely – Accurate cutting prevents bulk and maintains smooth fabric edges
- Practice first – Test French techniques on scraps before working on your final project
This edge finishing method works best on lightweight fabrics where traditional seam finishing might create unwanted bulk.
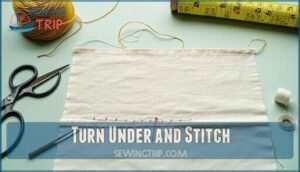
Turn Under and Stitch
You can use the turn under and stitch method when working with light to medium-weight fabrics that need a clean, professional finish.
This technique involves folding each seam allowance toward the wrong side of the fabric and stitching it down, creating a neat edge that won’t fray over time.
Suitable for Light and Medium-Weight Fabrics
When working with light and medium-weight fabrics, this edge finishing technique becomes your go-to solution.
These fabric choices respond well to the turn under method because they’re manageable without creating excessive bulk in your seam allowance.
Light cottons, linens, and silks work beautifully with this approach.
The key lies in selecting fabrics that won’t overwhelm your seams with thickness.
Medium weight methods like this one prevent fraying while maintaining a clean finish.
Your fabric edges stay secure without the heaviness that comes with thicker materials.
This lightweight technique keeps raw edges under control, stopping fabric fraying before it starts.
The edge treatments you choose should match your fabric’s weight for best results.
Understanding the properties of lightweight fabrics is essential for achieving a professional finish.
Stitching and Pressing Open
Your seam’s success hinges on proper stitching and pressing techniques.
First, sew your seam together using standard seam allowance measurements.
Next, press the seam open to create a flat foundation for edge finishing.
Here’s your step-by-step approach:
- Use a pressing cloth to prevent fabric stabilization marks on your garment’s right side
- Apply steady pressure while pressing to guarantee open stitching lies completely flat
- Work systematically along the entire seam length to prevent fraying issues
This pressing technique prepares your raw edges for the final finishing step, guaranteeing clean edge treatments that’ll make your sewing techniques shine.
Pressing Under The Raw Edge
Precision meets patience when pressing raw edge management into place.
You’ll fold your seam allowance under by ¼ to ⅜ inch, creating clean fabric edges that prevent fraying.
Use pressing techniques with steam to set sharp creases.
This sewing technique transforms unfinished edges into professional-looking seams through proper edge folding and fabric stability control.
| Fabric Type | Seam Allowance | Pressing Temperature | Special Notes |
|---|---|---|---|
| Cotton | ⅜ inch | High heat with steam | Press firmly for crisp edges |
| Silk | ¼ inch | Medium heat, no steam | Use pressing cloth to protect |
| Linen | ⅜ inch | High heat with steam | May need extra pressing time |
| Polyester | ¼ inch | Low-medium heat | Avoid overheating to prevent melting |
By following these steps, you can achieve clean fabric edges and ensure your seams are well-constructed, which is essential for fabric stability.
Serging or Zig Zag (on a Home Sewing Machine)
When you need to finish raw edges, turn to your sewing machine’s zigzag stitch – it’s your best friend for preventing fraying.
Set the stitch width to 3-4mm and length to 2-3mm for most fabrics. If you’ve got a serger, even better – it’ll trim and finish edges simultaneously.
Using the right serging tools can make a substantial difference in the quality of your seams.
Serging Tips:
- Adjust thread tension based on fabric weight – lighter fabrics need less tension to avoid puckering.
Test your settings on fabric scraps first.
The zigzag stitch creates a barrier that locks threads in place, while proper thread tension guarantees smooth, professional-looking edge finishing.
Both techniques work on various fabrics and prevent those pesky raw edges from unraveling after washing.
Flat Fell
You’ll create the toughest seam in sewing with flat felled seams – perfect for denim and heavy fabrics that need serious fabric durability.
This seam finishing technique trims one seam allowance, folds the longer edge over raw edges, then stitches down for double reinforcement.
The result completely eliminates fraying prevention concerns while boosting fabric strength. You’ll see two parallel rows of stitching that scream professional quality and provide unmatched seam reinforcement for edge finishing excellence.
Mastering a strong seam like the faux flat felled technique can elevate your sewing projects to achieve sewing excellence.
Using Binding: Bound Seam
When you’re looking for superior seam finishing, binding transforms raw edges into polished perfection.
This bound edge technique wraps fabric strips around your seam allowances, creating durable edge finishing that prevents fraying.
You’ll stitch bias tape or decorative trims along the raw edges, fold over, then secure with another line of stitching.
This seam binding method works brilliantly on medium-weight fabrics, adding both strength and style to unlined jackets where bound edges remain visible.
The bound seam finish technique utilizes seam finishing methods to achieve professional results.
This method is particularly useful for creating a polished perfection in your sewing projects.
Frequently Asked Questions (FAQs)
What are some common mistakes to avoid when securing raw edges?
Don’t think raw edges can wait – they’ll unravel faster than you expect! Avoid using too tight zigzag stitches, skipping test scraps, or choosing wrong techniques for your fabric type.
How can I prevent fraying and unraveling when working with delicate fabrics?
Use French seams for delicate fabrics like silk and chiffon—they enclose raw edges completely within two sewn seams, preventing fraying while maintaining a clean, professional finish.
Can raw edges be left intentionally unfinished?
Like a frayed rope slowly unraveling, raw edges can absolutely stay unfinished for intentional design effects.
You’ll find this technique in deconstructed fashion, distressed denim, and avant-garde pieces where controlled fraying creates textural interest and edgy aesthetics.
Which fabrics fray most after cutting?
Loosely woven fabrics like linen, burlap, and lightweight cottons fray most readily after cutting. You’ll find that fabrics with loose weaves unravel quickly, while tightly woven materials resist fraying better.
How long do raw edges last without finishing?
Like a delicate flower exposed to harsh winds, your fabric’s raw edges face an inevitable countdown.
Without finishing, loosely woven fabrics fray within days, while tightly woven materials last weeks before serious unraveling begins, which can be a delicate issue due to the fabric’s raw edges.
Do knit fabrics need raw edge treatment?
Knit fabrics don’t fray like woven fabrics since their construction creates interlocking loops rather than straight threads.
You’ll still want to finish raw edges for a polished look and to prevent curling.
What causes some edges to curl after cutting?
Curling happens like a fabric rebellion! You’ll notice knit fabrics curl more than wovens because their stretchy structure naturally wants to roll inward when cut, creating those annoying curled edges.
Conclusion
Mastering what’re raw edges in sewing transforms your needlework from acceptable to exceptional.
You’ve discovered multiple techniques to tame those unruly fabric edges, from simple pinking shears to sophisticated French seams.
Choose methods that match your fabric weight and project goals.
With practice, you’ll instinctively select the right finish for each situation, and your garments will look professionally crafted and withstand countless wears and washes.


