This site is supported by our readers. We may earn a commission, at no cost to you, if you purchase through links.
 Finding the best sewing machine tutorials for beginners can transform your sewing journey from intimidating to delightful.
Start by selecting a machine with beginner-friendly features like easy stitch selection and adjustable foot pressure.
Our tutorials guide you through sewing basics, from threading and winding bobbins to mastering the straight stitch.
You’ll also learn to handle fabrics with confidence, ensuring smooth turns and proper needle selection.
These tutorials aren’t just about the basics; they’re your passport to creating stunning projects with ease.
Ready to unravel more sewing secrets? Stay tuned for tips that turn your stitching skills from novice to nifty!
Table Of Contents
- Key Takeaways
- Choosing The Right Sewing Machine
- Basic Sewing Machine Parts
- Threading and Winding Bobbins
- Essential Sewing Techniques
- Managing Fabric and Thread
- Mastering Basic Stitches
- Working With Sewing Patterns
- Common Sewing Mistakes and Solutions
- Beginner-Friendly Sewing Projects
- Advanced Sewing Techniques
- Frequently Asked Questions (FAQs)
- Conclusion
Key Takeaways
- You’ll pick up essential skills like threading your machine and winding bobbins, making the basics a breeze.
- Start with beginner-friendly sewing machines that offer easy stitch selection and adjustable foot pressure for smooth sewing.
- Dive into simple, fun projects such as pillowcases or easy garments to build your confidence and practice new techniques.
- Address common sewing mistakes by mastering thread tension and needle size, ensuring even stitching and fabric handling.
Choosing The Right Sewing Machine
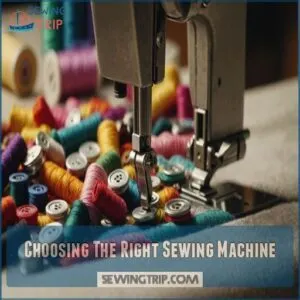
Choosing the right sewing machine doesn’t have to be overwhelming; focus on features like user-friendly stitch selection and adjustable foot pressure to make sewing a breeze.
Consider the brand’s price and durability, then try out a few models to find one that feels just right for you.
Features for Beginners
When diving into sewing, start with a machine that offers easy-to-use features.
Following proper sewing machine instructions will make sure you’re on the right track.
Stitch selection options make creativity a breeze.
Built-in needles save you from fiddling around.
Make sure it has adjustable foot pressure and thread tension control for tackling various fabrics.
This combo transforms challenging tasks into delightful experiences, turning sewing machine basics into pure joy.
Ready to sew?
Brand Comparison
Deciding on the right sewing machine brand involves considering what each offers.
Look for beginner-friendly features that make learning easier and gauge durability through customer reviews.
Brands like Brother, Singer, and Janome are popular in sewing circles for their reliable warranty coverage.
Try out models yourself to make sure a comfortable fit, because each machine feels a bit like choosing your trusted sidekick.
Price and Durability
Finding the right sewing machine is like finding the perfect pair of shoes—comfort and longevity matter!
Consider your budget; budget-friendly machines offer great value for money.
Look for durable brands known for their sewing machine lifespan.
A long-term investment in a quality machine means fewer repairs and more sewing time.
Remember, proper sewing machine maintenance extends the life of your sewing machine, so factor that into your decision.
Basic Sewing Machine Parts
Understanding the basic parts of your sewing machine, like the power switch, spool pin, and bobbin winder, is essential for getting started.
You’ll also want to know about the needle and presser foot, as these parts are vital for creating smooth, even stitches.
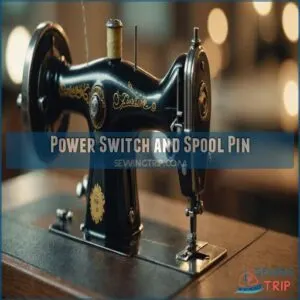
Power Switch and Spool Pin
You’ve picked a great machine. Now, understanding the power switch location and different spool pin types helps in mastering basics.
- Locate the power switch for easy on/off control.
- Identify spool pin types, whether vertical or horizontal.
- Ensure proper machine maintenance by keeping parts dust-free.
- User reviews in your sewing machine guide, which often cover topics such as setting up the sewing machine and threading the sewing machine correctly Sewing Basics for Beginners, offer handy tips.
Bobbin Winder and Thread Path
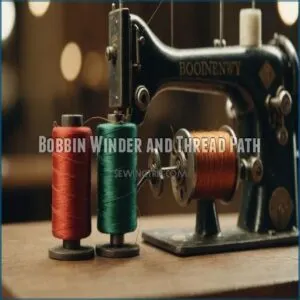
With the sewing machine powered on and spool pin ready, the next step is mastering the bobbin winder.
Make sure winding consistency by checking bobbin tension and choosing the right bobbin types.
Follow the thread path variations carefully to avoid threading mistakes.
These sewing basics set the stage for smooth operations, letting you stitch away with confidence!
Needle and Presser Foot
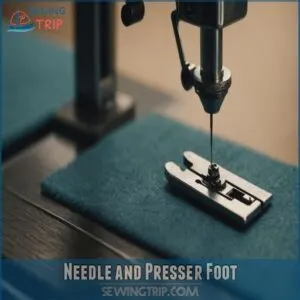
After handling the bobbin winder and thread path, let’s chat about the needle and presser foot.
For smooth sewing, choose the right needle size and foot type.
Here’s how:
- Needle types: Match needle to fabric.
- Foot pressure: Adjust for fabric weight.
- Foot selection: Use the correct foot for each stitch.
These tips are sewing secrets you’ll love!
Threading and Winding Bobbins
Threading your sewing machine and winding bobbins might seem intimidating at first, but by following a step-by-step guide on how to thread a sewing machine, you can master the process, but with a little practice, you’ll get it right.
Make sure even thread distribution by following the correct threading path, dialing in the perfect tension, and mastering bobbin winding techniques to avoid common mistakes.
Thread Tension and Distribution
Understanding thread tension and distribution is like finding the sweet spot in your favorite pizza – too much or too little can mess things up.
Tension adjustment impacts your sewing projects and the fabric type matters, too.
Consider checking out detailed sewing machine tutorials for solutions to thread tension problems, ensuring even thread distribution for smoother stitching.
Bobbin Winding Techniques
Now that you’ve got the hang of thread tension, let’s wind those bobbins! It’s easier than it looks. Here’s how:
- Place the bobbin on the winder.
- Guide the thread through the designated path.
- Let the machine do its thing!
Soon you’ll be a bobbin-winding pro, ready to tackle any sewing project.
Remember, consistent bobbin tension is key for even stitching.
Common Threading Mistakes
Getting that bobbin winding right is just the start, isn’t it?
Watch out for threading mistakes, a tangled thread path or improper spool placement.
Needle threading problems can be pesky too, leading to thread tension issues.
Keep your sewing gear, like sewing clips or thread nippers, handy, and refer to sewing machine tutorials for guidance along the way.
Essential Sewing Techniques
You’ll master essential sewing techniques that are the backbone of every project, like perfecting your straight stitch and backstitching to make sure strong seams.
Keep your fabric smooth and stitches neat by choosing the right needle size and stitch length, and remember to slow down for those tricky curves.
Straight Stitch and Backstitching
Threaded your bobbin? Time to explore straight stitch and backstitching—the bread and butter of sewing techniques.
The straight stitch is a versatile stitch used for construction sewing, machine quilting, topstitching, gathering, and basting, as you can learn more about in what is a straight stitch used for.
Imagine stitching up that makeup bag, each seam secure thanks to these methods.
The straight stitch lays the groundwork, while backstitching adds durability.
Adjust for different fabric types and watch tension control—these small tweaks help your project shine.
Keep experimenting with backstitch variations!
Stitch Length and Needle Size
You’re mastering the straight stitch, so let’s chat about stitch length and needle size—it’s like baking a perfect cake!
Adjust stitch length based on fabric type: shorter for delicate fabrics.
Match needle gauge to fabric weight to avoid needle breakage.
Here’s a quick guide:
- Stitch Length: Adjust as needed.
- Needle Gauge: Match to fabric.
- Avoid Breakage: Check tension.
Fabric Guidance and Curve Sewing
So you’ve mastered stitch length and needle size.
Now, let’s tackle the curves.
For additional guidance, visit the tutorial website for sewing machine tutorials online.
Guiding fabric around corners can be like steering a tightrope.
Use the fabric guide to maintain seam allowance, and adjust machine settings for smooth turns.
Imagine sewing a round potholder or a stylish sunglasses case, where controlling fabric tension is key.
Practice makes perfect on these projects!
Managing Fabric and Thread
Managing fabric and thread might seem tricky at first, but you’ll soon find it’s all about making smart choices and taking simple steps.
You’ll want to pick the right thread for your fabric, pre-wash and iron it to prevent surprises, and understand fabric types and stretch to make sure your projects turn out just right.
Choosing The Right Thread
Now that you’ve mastered basic stitches, let’s talk thread!
Choosing the right thread is key.
Consider thread weight; heavier fabrics need heavier thread.
Thread color should complement your fabric.
Experiment with different thread types – cotton is great for beginners.
Proper thread tension helps create even stitching and durability.
Remember, the right thread makes all the difference in your projects, from baby quilts to dishtowels!
Pre-Washing and Ironing Fabric
Choosing the right thread is just the start.
Don’t skip pre-washing your fabric to avoid unexpected shrinkage.
It’s like washing jeans before wearing them.
To get started, you might find a beginner-friendly sewing machine like this one helpful.
Once that’s done, grab your iron.
For smooth sailing, this combo banishes wrinkles, setting the stage for projects like a kitchen boa towel or a fleece ear warmer.
Remember, practice makes perfect!
Fabric Types and Stretch
After prepping your fabric, understanding fabric types and stretch is key to successful sewing.
Some fabrics stretch like a rubber band, while others remain firm.
Consider these tips:
- Fabric weight impacts project suitability.
- Stretch properties affect cutting and sewing.
- Fabric care guarantees durability and color retention.
- Choosing fabric wisely makes projects like denim pouches and stuffed animals pop.
Mastering Basic Stitches
Mastering basic stitches is your gateway to sewing success, letting you create everything from simple hems to intricate designs.
You’ll start with the essential straight stitch and move to the versatile zigzag, learning to troubleshoot any stitch issues along the way.
Straight Stitch Tutorial
Getting the hang of fabric and thread is your ticket to mastering stitches.
A straight stitch tutorial might seem simple, but tweak stitch length, needle size, or tension, and watch magic happen.
Here’s a quick guide:
| Tip | Details |
|---|---|
| Stitch Length | Adjusting for fabric flexibility |
| Needle Size | Impact on stitch integrity |
| Backstitching Tips | Securing seams |
| Troubleshooting | Fixing uneven seams |
Match that with projects like a knot bow scrunchie, and you’re set!
Zigzag Stitch and Serging
Mastering the zigzag stitch opens a world of possibilities, giving you flexibility in sewing, mending edges, and even creating decorative designs.
This stitch adapts well, making it a favorite in sewing machine tutorials.
If you’ve explored this basic stitch, consider a serger for beginners—it streamlines finishing edges.
Whether serger vs. overlock, understanding their distinctions frees your creativity.
Troubleshooting Common Stitch Issues
You might feel like you’re threading a needle in the dark, but don’t worry—stitch issues are common.
Check thread tension problems first, as they often cause uneven stitch length or fabric puckering.
For instance, issues with your sewing machine stitch problems can be fixed by adjusting the bobbin case or replacing a damaged bobbin.
If you’re confronting needle breakage or skipped stitches, switch to the right needle size and make sure you’re threading correctly.
Remember, even seasoned sewists started with tangled threads!
Working With Sewing Patterns
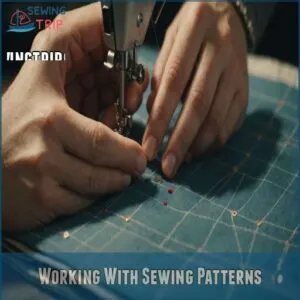
Now you’ll learn to work with sewing patterns, which might seem overwhelming at first, but it’s really just like following a recipe!
You’ll learn how to pin your pattern pieces to fabric correctly and even make adjustments for a perfect fit, so get ready to become a pattern pro.
Pinning Patterns to Fabric
Imagine you’ve got your favorite fabric laid out. It’s time to pin patterns like a pro. Smart people don’t skip pinning, and using the right pinning techniques can be a game-changer – learn pinning tips for sewing success.
Choose the right pin placement, use pattern weights for stability, and make sure you’re working with the right fabric types.
Safety pins are your friends to keep everything secure.
Here’s a quick guide:
- Pin placement matters
- Safety pins are essential
- Use pattern weights wisely
- Consider fabric types
Altering Patterns for a Better Fit
Tailoring a sewing pattern to fit just right is like finding your perfect cup of tea—personal and satisfying.
Start by tweaking the bust adjustments and sleeve length for comfort,
then smooth out the waist shaping and hip alterations.
Don’t forget neckline changes to match your style.
With each alteration, you gain freedom, ensuring your projects reflect true personal flair.
Common Sewing Mistakes and Solutions
Even experienced sewers run into snags, but don’t worry—they’re all part of the learning process.
Understanding common mistakes like thread breakage or tension issues, and knowing how to fix them, will boost your confidence and refine your sewing skills.
Thread Breakage and Tension Issues
Nailing sewing patterns is great, but let’s unravel those nagging thread breakage and tension issues next.
Here’s a handy checklist:
- Thread Tension Troubleshooting: Adjust tension settings based on fabric.
- Needle Selection: Choose the correct needle for your project.
- Bobbin Winding: Make sure winding is even to prevent breaks.
- Sewing Machine Maintenance: Regularly clean and oil your machine.
Fabric Damage and Needle Breakage
Experiencing thread breakage could mean something’s amiss with your tension or needle.
From there, consider needle size and pin placement to dodge fabric damage and needle breakage.
Too-small needles can’t handle thick fabric, bending like a spoon in hot soup.
Check the table below for tips:
| Needle Size | Fabric Type | Sewing Speed |
|---|---|---|
| 11 | Light cotton | Slow |
| 14 | Denim | Medium |
| 16 | Canvas | Fast |
Solutions for Common Sewing Errors
Just dealt with fabric damage or needle breakage? Let’s tackle common sewing errors like thread tension issues and stitch skipping.
Adjust tension settings to avoid fabric or seam puckering.
Use the right needle and thread combination to prevent breakage.
If stitches skip, check the needle size and alignment.
Practice makes perfect—you’ll thread the needle of expertise soon enough!
Beginner-Friendly Sewing Projects
Now that you’ve mastered the basics, it’s time to explore your creativity with some fun beginner-friendly projects!
You’ll find plenty of simple patterns for things like cozy pillows, stylish pouches, or even adorable pet accessories, all perfect for building your confidence and skills.
Simple Projects for Home Decor
After tackling common sewing errors, let’s brighten your home with simple projects.
Try making these fun, beginner-friendly items:
- DIY throw pillows: Easy to sew, and they add personal flair to any room.
- Fabric storage bins: Handy for organizing, and they look great too!
- Easy curtains: Quickly update windows with your choice of fabric.
- Quilted wall art: Create a unique piece with leftover fabric.
Easy Garment Patterns for Beginners
Starting out with sewing, you’d want to focus on easy garment patterns like an Easy T-shirt or a Simple Skirt.
These projects give you a fantastic opportunity to practice basic skills.
Don’t shy away from a Beginner Dress or Cozy Pajamas, either.
If you’re in a rush, the No-Sew Scarf offers a quick win and stylish piece!
Fun and Creative Projects for Kids
Transforming scraps into treasures can be a child’s delight, and sewing offers perfect opportunities for creative play.
DIY toys, like felt animals, are simple yet engaging projects.
Crafting animal costumes can spark imagination, while fabric painting allows for colorful expression.
Upcycled projects encourage resourcefulness.
With these ideas, kids create art but also learn valuable skills.
Advanced Sewing Techniques
You’re ready to tackle advanced sewing techniques like working with knits and stretchy fabrics, sewing buttons and zippers, and creating professional-looking seams and edges.
These skills will take your projects from amateur to expert, making every stitch count as you expand your sewing repertoire.
Working With Knits and Stretchy Fabrics
When handling stretchy fabrics, get comfortable with their unique demands.
First, select a stretch stitch for durable seams; it lets your fabric flow without snapping threads.
To make sure you’re using the right fabric, consider checking the fabric stretch percentage, as discussed in stretch fabric sewing techniques.
Second, choose the right kind of knit fabric: jersey or interlock works well for beginners.
Sewing Buttons and Zippers
Diving into sewing buttons and zippers can make your projects pop!
Start with understanding button types and zipper sizes; both matter.
If you want to learn more about sewing machine techniques, you can find helpful classes on sewing machine classes.
Use a zipper foot for neat stitches, and master your buttonhole stitches to achieve polished finishes.
Sewing button plackets might seem tricky, but patience pays off.
Here’s a handy table to guide you:
| Task | Tools Needed | Tips |
|---|---|---|
| Button Sewing | Needle, Thread | Match colors for a neat look |
| Zipper Insertion | Zipper Foot, Pins | Align edges carefully |
| Buttonhole Stitch | Buttonholer | Practice first on scrap |
Creating Professional-Looking Seams and Edges
Neatly finishing seams elevates your sewing.
Learn seam finishing techniques like using a serger for a professional look, or try simple edge stitching styles.
Proper pressing techniques are key; consistent seam allowances make a difference.
Mastering these skills gives you control and freedom in your projects!
Frequently Asked Questions (FAQs)
How can I make machine sewing easier?
Start by organizing your sewing space to avoid tangled threads and misplaced tools.
Maintain your machine regularly, practice with different stitches, and use fabric guides.
Don’t rush; take time to learn and enjoy the process.
How do I learn to sew on a sewing machine?
Discover how to sew on a machine by familiarizing yourself with its parts and threading it correctly.
Practice basic stitches like straight and backstitching.
Then explore beginner projects like pillowcases or tote bags to gain confidence.
Which sewing machine is best for beginners?
Look for simple, user-friendly features; consider adjustable settings; check reviews for ease of use; and prioritize a machine that feels comfortable. You’ll master sewing in no time!
What do you need to start sewing for beginners?
You need a basic sewing machine, understanding your sewing machine is crucial, fabric, thread, scissors, pins, and a seam ripper.
Add patterns for guidance, and a tape measure for accuracy.
Practice patience, embrace mistakes as learning, and soon you’ll sew confidently.
What is the first thing a beginner should sew?
Why not start with something simple, like a pillowcase?
It’s a great beginner project, teaching you straight stitching and fabric handling basics.
Plus, feeling that personal touch on your bed is incredibly satisfying and inspiring!
Can I teach myself to use a sewing machine?
Sure, you can teach yourself to use a sewing machine!
Start with a simple project.
Read guides or watch beginner tutorials online.
Practice stitching on scrap fabric.
With patience and practice, you’ll improve quickly.
What is the easiest sewing machine to learn on?
Is finding the perfect sewing machine a breeze?
Absolutely, try a beginner-friendly model like the Brother CS7000X.
It offers easy threading, built-in stitches, and user-friendly controls, making sewing feel like a walk in the park.
What should I start making with a sewing machine?
Start with simple projects like a fabric tray or a pillowcase.
These build confidence and teach basic skills.
Once you’re comfortable, try sewing a tote bag or apron, which are fun and functional beginner-friendly projects.
How to maintain tension in sewing machines?
Imagine this: you’ve got a sewing machine ready, but keeping tension right feels tricky.
Adjust the tension dial slowly, test on scrap fabric, and match the thread and needle to the fabric’s weight for smooth stitching.
How do I clean my sewing machine?
Cleaning your sewing machine involves unplugging it, removing lint with a brush or vacuum, and oiling the prescribed parts.
Regular cleaning helps the machine run smoothly and extends its lifespan, saving you from frustrating tension issues later.
What attachments should beginners use?
Ever wonder which attachments make sewing easier?
Start with a zipper foot for installing zippers, a buttonhole foot for perfect buttonholes, and a walking foot for even stitching.
They simplify tricky tasks and boost your confidence fast!
How to troubleshoot sewing machine noise?
Start by checking if your sewing machine’s needle is bent or dull, as this can cause noise; for a smooth performance, ensure you’re using the right Singer sewing machine needle, as this can cause noise.
Make sure it’s threaded correctly, and clean out lint.
Adjust the bobbin and tension for smooth sewing without clatter.
How to store sewing machine safely?
Treat your sewing machine like a treasure chest—store it in a dust-free, dry spot.
Cover it to protect from dust and damages.
Keep cords organized.
Make sure it’s easily accessible when inspiration strikes!
Conclusion
Imagine your grandmother’s old sewing tips guiding you, combined with modern support—these best sewing machine tutorials for beginners make your journey smooth.
By now, you’ve learned to choose machines wisely, thread effortlessly, and tackle stitches confidently.
With projects lined up, you’re ready to create with flair.
Whether it’s mending a ripped sock or crafting a new piece, your sewing machine is no longer an intimidating gadget but a trusty companion.
Keep stitching, and enjoy the creative ride!

