This site is supported by our readers. We may earn a commission, at no cost to you, if you purchase through links.
 Ready to tap into your inner seamstress? Finding simple sewing machine tutorials for beginners is easier than you think!
Start with the basics: threading your machine, understanding stitch types (like straight and zigzag), and practicing on scraps of fabric.
Don’t worry about mistakes—they’re part of the learning process! YouTube is your friend; tons of free videos break down complex steps into manageable chunks.
Remember, even a small project, like a simple pillowcase, builds confidence. Soon, you’ll be whipping up creations like a pro.
We’ll cover essential tools and techniques next—get ready to be amazed by what you can create!
Table Of Contents
- Key Takeaways
- Setting Up Your Sewing Machine
- Mastering Basic Sewing Techniques
- Understanding Fabric and Thread Types
- Avoiding Common Sewing Mistakes
- Essential Sewing Tools and Accessories
- Practicing and Improving Your Skills
- Troubleshooting Common Issues
- Advanced Sewing Techniques for Beginners
- Choosing The Right Sewing Machine
- Taking Your Sewing to The Next Level
- Frequently Asked Questions (FAQs)
- Conclusion
Key Takeaways
- Don’t stress over mistakes; practice makes perfect when learning simple machine stitching like straight and zigzag stitches.
- Set up your machine correctly by mastering threading, understanding stitch types, and controlling tension for smoother operations.
- Quickly build confidence with beginner projects like tote bags and pillowcases, focusing on neat, straight sewing.
- Use online resources and join a sewing community to find support, new techniques, and project inspiration, enhancing your skills.
Setting Up Your Sewing Machine
Setting up your sewing machine can feel like cracking a code, but it’s simpler than you think once you know the parts, match the needle and thread correctly, and master threading.
Understanding tension control will help you stitch smoothly, and soon you’ll be sewing like a pro without breaking a sweat.
Locating Machine Parts
Before diving into sewing projects, familiarize yourself with your machine’s anatomy, including the various stitch options like straight stitch basics.
With an essential parts checklist, locate the power switch, spool pin, and bobbin winder.
Explore a parts diagram guide specific to your model, helping you identify key parts and understand each function.
This understanding boosts confidence and control, ensuring your machine fits like a glove.
Choosing The Right Needle and Thread
Choosing the right needle and thread for your sewing project is like picking a perfect dance partner. Consider these factors:
- Needle types: Match the size and type to your fabric.
- Thread weight: Lighter threads for soft fabrics.
- Thread color: Pick for contrast or blend.
- Fabric compatibility: Make sure they work well together.
- Tension control: Keeps stitches snug.
Happy sewing!
Threading The Machine Correctly
With needle threaded, follow your machine’s threading path; it’s usually illustrated in your manual.
This involves guiding the thread through the tension guide and then onto the spool pin.
Don’t forget the bobbin winding!
A properly wound bobbin is key to preventing frustrating tangles.
Needle threading might seem tricky at first, but with practice, it’ll become second nature.
Remember, even experienced sewers occasionally need troubleshooting tips!
Understanding Tension Control
Grasping tension control is like mastering the art of balance in sewing.
Your stitches should be smooth and even, not too tight or too loose.
Consider these tips:
- Check tension settings before starting a project.
- Test on scrap fabric to see results.
- Match tension to fabric type.
- Troubleshoot tension issues diligently for perfect stitches.
Mastering Basic Sewing Techniques
To effectively use a sewing machine, it’s essential to understand your machine’s components, such as the thread path and bobbin winder. You’re ready to master basic sewing techniques, like straight stitches and backstitches, for creating neat, durable seams.
Even if your first attempt looks like a wobbly line, remember that every beginner’s road to sewing perfection is a little zigzag!
Straight Stitch and Backstitch
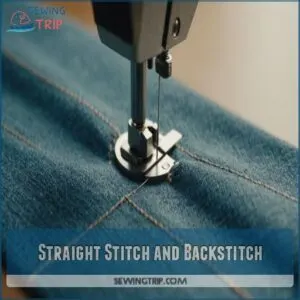
Now that your machine’s set up, it’s time to master the straight stitch and backstitch.
These two techniques are your sewing staples, like peanut butter and jelly.
Adjust the stitch length and maintain tension control for perfect seams.
Select the right needle size based on fabric types, ensuring your projects look neat and professional.
| Needle Size | Fabric Type | Stitch Length |
|---|---|---|
| 70/10 | Lightweight | Short |
| 80/12 | Medium Weight | Medium |
| 90/14 | Heavyweight | Long |
Sewing in a Straight Line
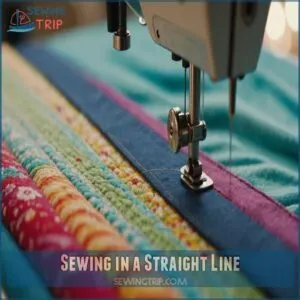
Imagine a straight line running through your fabric like it knows exactly where it’s going.
To master this, practice your straight stitch.
Keep watch on the seam allowance and fabric tension.
Let the feed dog control move the fabric smoothly.
You, guiding the fabric, are like a conductor leading an orchestra to a beautiful finish.
Turning Corners and Sewing Curves
Many new sewists dread turning corners and sewing curves, but it’s easier than it seems.
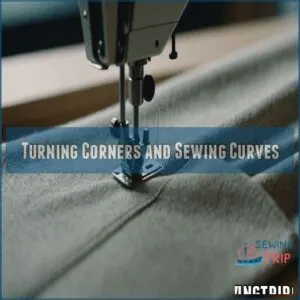
Start by sewing curves smoothly using shorter stitches for control.
If you’re just starting out, investing in the right tools, such as those found in a sewing machine beginner kit Sewing Machine Starter, can make a big difference.
As you master curves, maintain steady fabric tension to prevent puckering.
When corner stitching, stop with the needle down to pivot fabric neatly, just like perfecting a dance move with practice.
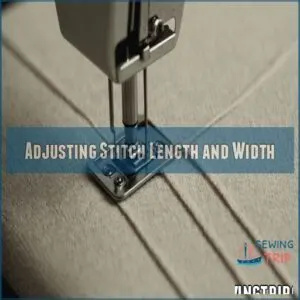
Adjusting Stitch Length and Width
Stitch length and width can feel like adjusting the volume on a radio; it’s about hitting the right note.
To achieve balanced seams, learning how to use the stitch length mechanism can help you get the best results.
Depending on your fabric type and project goals, tweak these settings to achieve balanced seams.
A shorter stitch length suits curves, while broader widths may strengthen seams.
Remember, finding the sweet spot harmonizes your seam allowance with precision.
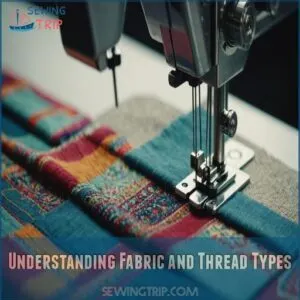
Understanding Fabric and Thread Types
Choosing the right fabric and thread is super important, so let’s learn about different types!
We’ll explore which fabrics work best for beginners and how to match your thread to your fabric for great results.
Solid and Elastic Fabrics
Choosing the right fabric sets the tone for your sewing projects.
Solid fabrics like cotton are perfect for beginners, offering sturdiness and ease.
If you’re feeling adventurous, try stretch fabrics like jersey knits—they require a bit more finesse but offer rewarding flexibility and comfort.
Always pre-wash and care for your fabrics to prevent any surprises later!
Choosing The Right Thread for Your Project
Imagine you’re sewing a cozy sweater; the right thread can make all the difference.
Match the thread type to your fabric—cotton thread for natural fibers, polyester for synthetics.
Consider thread weight: lightweight for delicate fabrics, heavier for denim.
Choose a color that either matches or contrasts beautifully.
Pre-washing and Ironing Fabrics
Ever wash a shirt and it shrinks?
That’s why pre-washing fabrics stops surprises like fabric shrinkage and color bleeding.
Choose steam or dry ironing techniques for crisp results.
Some fabrics love steam, while others prefer dry heat.
Experiment and see what works best for your project.
Feel like you’re mastering magic as fabric types transform under your skilled hands!
Matching Thread Weight to Fabric Type
In sewing, matching thread weight to fabric type isn’t just "sew-sew" advice—it’s essential!
Match light threads for delicate fabrics to avoid tension issues.
For your denim or canvas projects, opt for heavy-duty thread.
Here’s a quick list to guide you:
- Thread weight chart
- Fabric types
- Delicate fabrics
- Thread tension
- Project examples
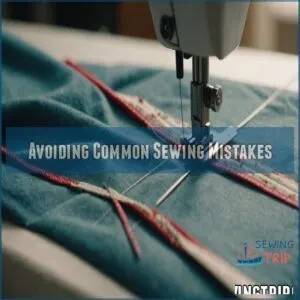
Avoiding Common Sewing Mistakes
We all make sewing mistakes, but knowing how to avoid them can save you a lot of fabric—and frustration!
From tangled threads to broken needles, let’s tackle these common pitfalls with a smile, so you can focus on creating your masterpiece.
Incorrect Threading and Tension
Let’s tackle fixing an annoying problem: incorrect threading and tension.
You’ve probably seen loopy stitches or puckered fabric, right?
That’s often due to poor thread tension or threading mishaps.
When threading your machine, ensure the bobbin is wound correctly and inserted into the compartment with the thread running counterclockwise, as described in this sewing machine tutorial. Check your machine’s guide for proper threading and adjust tension according to fabric types.
Troubleshooting thread loop issues may feel tricky, but mastering it boosts your sewing confidence!
Sewing Over Pins and Not Backstitching
Right then, avoiding bent needles is key! Never sew over pins; you’ll risk needle damage and fabric tears.
Remove pins before sewing each section.
Backstitching at the beginning and end of each seam creates stitch security, preventing seam unraveling.
It’s a small step for better machine maintenance and a giant leap for your sewing projects! Trust me, your future self will thank you.
Not Using The Correct Needle Size
Choosing the wrong needle size is like using a spoon to cut steak—it just won’t work! Here’s why it matters:
- Fabric damage: Too big, and it tears; too small, and it skips.
- Thread breakage: Mismatched sizes cause snapping.
- Stitch quality: Poor needle choice leads to messiness.
- Needle breakage: Wrong size, inevitable disaster.
Be mindful and save your fabric!
Common Thread Breakage and Tangles
You’ve just avoided a needle mismatch, but threads keep snapping like an old guitar string.
Fixing this calls for checking thread tension, which involves holding threads taut and removing pins while stitching, similar to developing consistent sewing habits and checking thread tension and bobbin winding.
You can find a great resource on sewing machine basics for more detailed information.
Make sure needle and thread compatibility too.
Using the wrong match can tangle your masterpiece.
| Issue | Fix | Check |
|---|---|---|
| Thread Breakage | Adjust tension | Correct needle for thread |
| Tangles | Proper winding | Fabric and thread match |
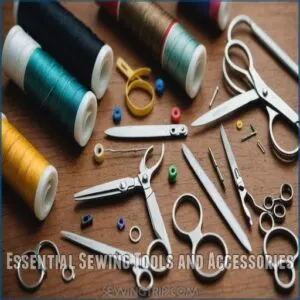
Essential Sewing Tools and Accessories
Before you thread your first needle, make sure you’ve got the essential sewing tools and accessories ready.
With rotary cutters, mats, and an iron at hand, you’ll be cutting like a pro in no time—just try not to mistake the seam ripper for a snack!
Rotary Cutters and Mat
If you’re tired of uneven cuts, a rotary cutter and mat are must-haves.
They’re perfect for cutting fabric cleanly and quickly.
Make sure to use a non-slip mat to keep your fabric steady for rotary cutter safety.
Regularly clean and store them properly to maintain sharpness and longevity.
This dynamic duo makes pattern cutting feel like a breeze!
Iron and Ironing Board
Next up, tackle those wrinkles with an iron and ironing board.
Opt for sturdy ironing board types with quality covers to keep fabrics smooth.
A steam iron tips the scales in your favor by easing out stubborn creases.
Brands vary, but research the best ironing board brands for reliability.
Try ironing board hacks like using a sleeve board for tricky spots.
Sewing Machine Accessories
While diving into sewing, your machine’s accessories are your trusty sidekicks.
Think presser feet—vital for working with different fabrics.
Knowing presser foot types means understanding the mechanism of a sewing machine, including the feed-dog and needle control. Knowing presser foot types means mastering sewing machine feet for those perfect stitches.
Don’t forget bobbin cases and various sewing machine needles.
They’re essential accessories for tackling any project efficiently.
These essentials keep your creative journey smooth and enjoyable.
Scissors and Seam Ripper
Now you’ve got your sewing machine accessories, let’s talk about scissors and seam rippers.
Choosing the right scissors is key; sharp ones make clean cuts.
A seam ripper helps you fix mistakes.
Remember these tips:
- Use sharp scissors for precise cuts.
- Practice gentle seam ripper techniques to avoid damaging fabric.
- Care for your tools; clean them regularly.
Practicing and Improving Your Skills
Start honing your sewing skills with easy projects that you can complete in an afternoon and gradually tackle more complex ones.
You’ll find inspiration and guidance from online tutorials.
Join a community for support.
Create a dedicated space, making practice enjoyable and productive.
Simple Projects for Beginners
You’ve gathered your tools, so let’s tackle simple projects like pillowcases and tote bags.
These projects build confidence without overwhelming you.
Try making scarves or simple skirts to refine your skills.
Imagine gifting a friend an easy dress you sewed yourself.
Practicing these basics is rewarding, like seeing your garden bloom, and gives you freedom in creating.
Online Tutorials and Classes
Stacks of half-finished projects got you in a heap? It’s time for some online tutorials and classes to boost those skills!
Explore free online resources and sewing class reviews.
Find a teacher who suits your style.
Learn new skills and understand class structure without leaving home.
Check out these options:
- YouTube tutorials
- Craftsy classes
- Skillshare lessons
- Tilly and the Buttons
- Seamwork classes
Joining a Sewing Community
After watching tutorials, it’s time to embrace real-world connections.
Joining a sewing community sparks fresh ideas and offers valuable advice.
Whether facing sewing challenges or seeking project inspiration, you’re never alone.
Local classes and online groups provide pattern sharing and friendships that last.
Here’s a glimpse of community vibes:
| Emotion | Benefit | Connection |
|---|---|---|
| Inspiration | Project Ideas | Online Groups |
| Support | Local Classes | Shared Knowledge |
| Encouragement | Pattern Sharing | New Friendships |
Setting Up a Home Sewing Space
When choosing a space for sewing, think Goldilocks: not too big, not too small, just right.
Organize essentials like scissors and thread neatly.
Good lighting is essential—avoid squinting like a pirate!
Prioritize ergonomics to keep your back happy.
Decorate your space, but don’t overdo it. You’ll spend lots of time here, so make it inspiring!
Troubleshooting Common Issues
Even the best sewing machine can throw a few tantrums, and learning to manage these hiccups is part of the fun!
You’ll tackle common issues like thread breakage and fabric jams with ease, so don’t let a rogue needle ruin your sewing adventure.
Thread Breakage and Tangles
Frustrated with thread breakage and tangles? Don’t worry, it happens to the best of us! Let’s get those threads behaving.
If you’re new to sewing, you might find a sewing machine kit helpful for getting started.
Here’s what you can do:
- Check your thread tension.
- Make sure your needle is compatible with your fabric type.
- Rewind your bobbin; uneven winding is a common culprit.
- Choose the right thread type for your fabric.
- Make sure your thread isn’t knotted or damaged. You’ve got this!
Machine Jamming and Not Moving
Ever experience thread breakage woes that knot your creativity?
Let’s tackle machine jamming and not moving.
To avoid these issues, you should check your thread tension issues.
Imagine your machine freezing like it’s stubborn in rush hour.
Check for thread jams, needle stuck in fabric bunching, or misaligned bobbin winding.
It’s like traffic—clear the blockages, restart, and you’re ready to sew smoothly again!
Incorrect Stitch Length and Width
Sewing machines jam like highways at rush hour, but incorrect stitch length and width create their own chaos.
Adjust the stitch length and width to match your fabric type and seam needs.
Think of it as traffic control on your sewing highway.
Test on scrap fabric first, as it’s better to experiment than unpick stitches later.
Common Fabric Problems
Oh, those pesky fabric troubles! You’ll find fabric shrinkage, color bleeding, or even thread snagging isn’t just a myth; it happens.
To tackle these issues, pre-wash your fabrics to prevent surprises.
Adjust your tension to avoid fabric puckering and uneven textures.
Keep an eye on fabric types, and you’ll sew smoothly, avoiding any unexpected fabric drama.
Advanced Sewing Techniques for Beginners
You’re ready to tackle advanced sewing techniques that might seem tricky but are totally doable with practice.
Start with buttonholes and zippers, mastering gathering, ruffles, and even working with knits for stretchy projects.
Buttonholes and Zippers
Mastering buttonholes and zippers can transform a simple garment into something special.
Start by exploring various buttonhole types and practice zipper placement for a polished finish.
Your machine’s zipper foot will be a valuable ally, ensuring smooth zipper installation.
If issues arise, check out buttonhole troubleshooting.
With patience, your sewing projects will open new doors, quite literally!
Gathering and Ruffles
Imagine this: creating fabulous gathering and ruffles doesn’t require wizardry—just the right gathering techniques!
Choose light fabrics like cotton or chiffon for best results.
To effectively use your sewing machine, follow the choosing the right sewing machine tips for the best results. Adjust your sewing machine’s tension and stitch length to gather fabric effectively.
Avoid common mistakes by testing on scrap fabric.
With practice and patience, you’ll add stunning texture and flair to your garments in no time!
Free Arm and Blind Hemming
Ready to tackle some more advanced techniques?
Let’s move on to free arm and blind hemming!
You’ll find the free arm incredibly handy for sewing cuffs and hemming pants.
Here are a few blind hem tips to get you started:
- Use a blind hem stitch on your machine.
- Practice on scrap fabric first.
- Don’t be afraid to experiment! Finishing hems neatly takes practice.
Working With Knits and Stretchy Fabrics
Blind hemming’s a handy skill, but when you sew knits, things get stretchy.
To tackle stretchy fabrics, use a ballpoint needle and stretch stitch.
Keep a light tension and try using a walking foot—your fabric will glide smoothly!
These tips will help your knit projects stay bouncy and neat, turning fabric challenges into cherished creations.
Happy sewing!
Choosing The Right Sewing Machine
Choosing the right sewing machine can feel like picking a best friend, so to get started, consider looking into the top picks for beginners, including the Singer M1000 Sewing Machine 32 Stitch, which is known for being lightweight and portable sewing machines, so let’s make it simple.
You’ll want to think about whether a mechanical or computerized model suits you,
while keeping an eye on features, brand reputation, and budget.
Mechanical Vs Computerized Machines
As you get into more advanced sewing techniques, you’ll face the decision of choosing between mechanical and computerized machines.
Mechanical machines offer reliability and simplicity at a reasonable price, giving you a straightforward experience.
On the other hand, computerized machines boast advanced features but come with a steeper learning curve and higher price tag.
Consider your needs and comfort level to pick the right one.
Features to Consider for Beginners
Choosing the right sewing machine can feel overwhelming, but focus on beginner-friendly features to simplify things.
Look for built-in needles that save time, adjustable foot pressure for various fabrics, and easy stitch selection to suit different projects.
Don’t forget thread tension control; it’s essential for smooth sewing.
These features make learning fun and frustration-free, like discovering a shortcut on a treasure map!
Brand Reputation and Customer Service
When you’re choosing a sewing machine, think about brand reputation.
Check customer reviews to see how others feel.
A good warranty can save headaches, and knowing your repair options is essential.
Local dealers often provide quicker service—no mailing hassles.
Remember, a machine with great support will stitch through any problem like a thread through fabric!
Budget and Price Range
So, you’ve got your eye on the brand. Let’s talk budget!
A good sewing machine doesn’t have to break the bank.
Affordable sewing machines are out there, and budget sewing essentials can keep your wallet happy.
Check sewing machine deals online or consider secondhand sewing machines, and keep in mind that machines in the budget friendly machines under $200 range can offer great value for money.
Utilize price comparison tools to find the best fit for your pocket.
Taking Your Sewing to The Next Level
Ready to move beyond the basics?
This section shows you how to create your own patterns.
It also shows you how to customize existing ones.
And it explores exciting new sewing techniques, so you can confidently tackle more challenging projects.
Creating Your Own Patterns
You’ve got the right machine; now let’s tackle pattern-making.
To create your own patterns, start by taking accurate body measurements and using essential tools like a measuring tape, ruler, and quality pattern paper as explained in the essential tools for pattern making basics.
Creating your own patterns offers freedom and creativity, allowing you to draft designs that fit just right.
Start with basic measurements and gradually refine your skills.
Tutorials can guide you through drafting and fitting, ensuring your creations are both unique and perfectly suited.
Why not give it a shot?
Altering and Customizing Patterns
Ready to take your sewing up a notch?
Jump into pattern adjustments and explore fit modifications to make sure a perfect fit.
Experiment with style changes, like fabric swaps or sleeve alterations, to bring your unique flair to every piece.
Remember, every tweak and twist you master brings you closer to designing standout garments that fit and flatter beautifully.
Exploring Different Sewing Styles and Techniques
Starting a sewing adventure takes patience and curiosity.
You’ll explore diverse styles and techniques, from sewing for fashion to vintage styles.
Practice these to enhance your skills:
- Quilting Techniques: Create patterns by layering fabrics.
- Embroidery Stitches: Add flair with artistic designs.
- Hand Sewing Techniques: Perfect for delicate projects.
Each style offers a chance to elevate your craft!
Sewing for Others and Gift Ideas
So, you’ve mastered stitches and styles, and now you’re ready to wow with personalized gifts.
Imagine your handmade items bringing joy to family and friends!
Here are some fun ideas:
| Item | Occasion | Fabric Suggestions |
|---|---|---|
| Tote Bag | Birthdays | Cotton, Canvas |
| Apron | Housewarming | Denim, Twill |
| Pillow Cover | Holidays | Linen, Velvet |
| Table Runner | Dinner Parties | Polyester, Satin |
| Baby Blanket | Baby Showers | Fleece, Flannel |
Get creative and sew with love!
Frequently Asked Questions (FAQs)
What is the first thing a beginner should sew?
Start with a tote bag—it’s a piece of cake!
Tote bags are simple, practical, and perfect for practicing straight seams.
You’ll enjoy creating something useful and personalized.
Plus, they make thoughtful gifts once you master them.
Can I teach myself to use a sewing machine?
Absolutely, you can teach yourself to use a sewing machine!
Start with simple online tutorials or guides that explain machine parts and basic stitches.
Like threading a needle, practice makes perfect—so don’t rush, enjoy the journey!
What is the easiest thing to sew on a sewing machine?
Sewing your first project is like baking cookies—fun and rewarding.
Start with simple projects like pillowcases or tote bags.
They’re straight-line sewing tasks, helping you build skills without frustration.
Enjoy the satisfaction of creating something useful!
How do you teach a beginner to use a sewing machine?
Guide your beginner by showing the machine parts, threading paths, and needle setup.
Encourage practicing straight stitches with scrap fabric.
Emphasize patience and fun, reminding them it’s okay to make mistakes—every stitch is a step forward.
How to clean and maintain sewing machines?
Think of a sewing machine like a car; keep it running smoothly with regular tune-ups.
Clean dust and lint from bobbin case, oil moving parts as instructed, and cover it when not in use to protect machinery.
What are common sewing machine safety tips?
Always unplug your machine before cleaning or maintenance.
Keep your fingers away from the needle!
Use a thimble to protect yourself from pricks.
Never force fabric; let the machine do the work.
How to sew different types of closures?
Let’s unzip the mystery of closures with zippers, buttons, and snaps.
Sew zippers with a zipper foot, attach buttons with a buttonhole foot, and hand-sew snaps for a neat finish.
Start simple and practice precision.
How to organize sewing projects efficiently?
Tidy up your sewing space to boost focus.
Use clear bins for tools, and label each project bag with fabric, thread, and pattern details.
A calendar or planner can track deadlines and make sure nothing gets forgotten.
What are tips for using sewing patterns?
Understanding sewing patterns can be like a treasure hunt.
First, understand the symbols and markings.
Pin the pattern carefully, cutting precisely.
Adjust for fit by adding or trimming sections.
Enjoy the journey, learning as you sew.
Conclusion
What’s stopping you from diving into your first project with these simple sewing machine tutorials for beginners?
With the basics at your fingertips, you’re geared up to tackle projects with growing confidence.
Don’t worry if your first attempt isn’t perfect; practice makes perfect.
Explore different fabrics, experiment with stitches, and soon you’ll surprise yourself with what you can create.
Remember, every expert was once a beginner.
So grab your machine and start sewing today!

