This site is supported by our readers. We may earn a commission, at no cost to you, if you purchase through links.
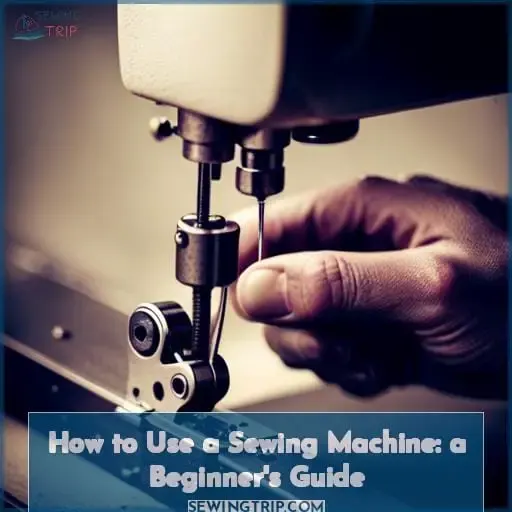 Imagine yourself sitting at your sewing machine, ready to embark on a creative journey. With this beginner’s guide, you’ll unlock the secrets of using a sewing machine with confidence and finesse.
From understanding its parts to selecting stitches and adjusting settings, we’ll take you step by step through the process.
Table Of Contents
- Key Takeaways
- Sewing Machine Parts and Functions
- Setting Up Your Sewing Machine
- Selecting Stitches and Adjusting Settings
- Preparing Fabric for Sewing
- Starting and Sewing a Straight Line
- Sewing Curves and Corners
- Backstitching and Securing Seams
- Finishing Techniques
- Troubleshooting and Maintenance
- Frequently Asked Questions (FAQs)
- Conclusion
Key Takeaways
- Choose a flat, stable surface.
- Install the needle and presser foot.
- Insert and wind the bobbin.
- Set the thread tension.
Sewing Machine Parts and Functions
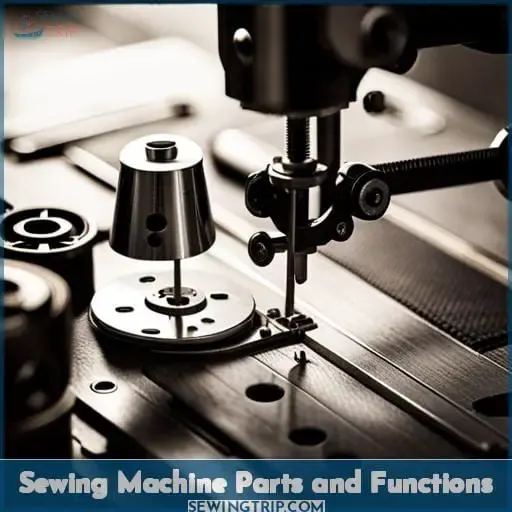
Now that you have familiarized yourself with the basics of using a sewing machine, it’s time to delve into understanding its various parts and functions. Each component plays a crucial role in the stitching process, from powering the machine to guiding the fabric.
By identifying and comprehending these different parts, you’ll gain confidence in operating your sewing machine effectively.
Understanding the Components of a Sewing Machine
First, let’s take a look at the different parts and functions of a sewing machine that you’ll encounter frequently.
- Presser foot: This two-pronged metal piece holds your fabric in place while you sew, ensuring smooth and accurate stitching.
- Bobbin winder: The bobbin winder is responsible for winding thread onto the bobbin, providing the lower thread necessary for stitching.
- Thread tension dial: This dial allows you to adjust the tension of your upper thread, ensuring balanced stitches by controlling how tightly it pulls against the lower thread.
Understanding these components will help demystify machine anatomy and clarify their purpose in achieving successful sewing results.
Identifying the Purpose of Each Part
Now that you understand the components of a sewing machine, let’s delve into identifying the purpose of each part so you can confidently navigate your way through using it.
As you learn the functionality of essential parts like the power switch, thread guide, hand wheel, and needle clamp, you build essential identification and component understanding.
Purposeful parts comprise a sewing machine – grasp their individual purposes through hands-on learning to unlock your inner mastery.
Setting Up Your Sewing Machine
Before you can start sewing, you need to properly set up your machine.
First, choose a flat, sturdy surface like a table or desk to place it on so it doesn’t shake as you use it.
Next, carefully insert and secure the needle and attach the presser foot according to your model’s specifications.
An important but often overlooked component is the bobbin – you’ll need to correctly insert an empty one and wind it with thread.
Finally, locate the tension dial and set it to the recommended level based on the type of thread and fabric you’ll be working with.
Choosing a Stable Surface for Your Machine
As you set up your machine, it’s vital to place it on a sturdy, flat surface like a table or countertop.
- Hard, level table or desk
- Sturdy sewing cabinet
- Smooth countertop space
Installing the Needle and Presser Foot
You’ll install the needle and presser foot before threading your machine.
Ensure the presser foot lever is raised before inserting the needle fully into the clamp.
Lower the presser foot before starting to sew.
| Needle Type | Recommended Fabrics |
|---|---|
| Universal | Most fabric types |
| Stretch | Knits, spandex, Lycra |
| Denim | Denim, canvas, upholstery |
| Leather | Leather, suede, vinyl |
Inserting and Winding the Bobbin
Place the empty bobbin on the spindle.
Slide the winder towards you.
Thread the machine to fill the bobbin with ease.
Master efficient winding techniques for trouble-free bobbin loading.
Learn thread tension tips to avoid common sewing woes.
Engaging the Tension Dial for Proper Thread Tension
Adjust the tension dial to balance the needle and bobbin threads for smooth stitch formation.
Mastering tension nuances is key to avoiding common issues.
Learn adjusting techniques for proper thread tension.
Inserting the Thread Through the Needle Eye
Thread the needle, ensuring smooth and even insertion for optimal stitching performance.
Pay attention to thread tension and troubleshoot any issues with needle or bobbin winding.
Select appropriate stitches and consider reverse stitching for secure seams.
Selecting Stitches and Adjusting Settings
Now that you have a good understanding of the basic setup and operation of your sewing machine, let’s explore the different stitch options available to you.
With a variety of stitches at your disposal, such as straight stitch, zigzag stitch, and decorative stitches, you can easily customize your projects. Additionally, adjusting the length and width of these stitches allows for even more versatility in creating professional-looking finishes on garments or home decor items.
Don’t forget to take advantage of special features like buttonholes or stretch stitches for specific sewing needs.
Exploring Different Stitch Options
Now that you’ve familiarized yourself with setting up your sewing machine, let’s delve into the exciting realm of stitching possibilities by exploring different stitch options and adjusting settings to suit your creative needs.
- Stitch Variety: Unleash your creativity with a plethora of stitches, from straight lines to intricate patterns.
- Creative Embellishments: Elevate your projects with decorative flair using unique stitch combinations.
- Decorative Patterns: Add charm to your creations by experimenting with stitches that create beautiful patterns.
- Stitch Customization: Tailor your stitches to perfection, adjusting length and width for personalized outcomes.
Adjusting Stitch Length and Width
To achieve the desired stitching outcome, you need to make adjustments to the stitch length and width on your sewing machine.
Consider fabric compatibility when selecting stitches, as different fabrics may require different settings.
Remember to also check thread tension for optimal results with decorative stitches.
Using Special Features Like Buttonholes or Zigzag Stitches
Explore the versatility of your sewing machine by utilizing special features such as buttonholes or zigzag stitches. These functions offer endless possibilities for advanced embellishments, creative embroidery, and decorative stitching.
Experiment with stitch customization to add unique touches to your projects.
Unleash the power of these specialty functions and master the art of sewing with style and precision!
Preparing Fabric for Sewing
Before threading your machine, ensure your fabric is prepped.
- Measure and cut your pieces.
- Secure them together using pins or basting to prevent shifting.
- Mark any pattern guidelines or notches to guide your stitching accurately.
These steps pave the way for a smoother sewing process on your machine.
Cutting and Measuring Fabric Pieces
Measuring and cutting fabric pieces is crucial for precise sewing. Here are key fabric cutting techniques to master:
| Cutting Tools | Measurement Techniques | Pattern Layout |
|---|---|---|
| Scissors | Measuring Tape | Pinning |
| Rotary Cutter | Rulers | Pattern Matching |
| Fabric Shears | Folding Methods | Grainline Awareness |
Pinning or Basting Fabric Layers Together
Start by securing your fabric layers together using either pins or basting stitches to prepare for sewing.
Achieve fabric stability, ensuring temporary fastening for seam alignment.
This step guarantees layer preparation and stitch security, crucial in a beginner’s guide to sewing machine fabric preparation.
Marking Pattern Notches or Guidelines
To mark pattern notches or guidelines, use tailor’s chalk or fabric markers for precise placement before stitching.
Align fabric edges using pins or clips and match notches and markings before sewing.
Starting and Sewing a Straight Line
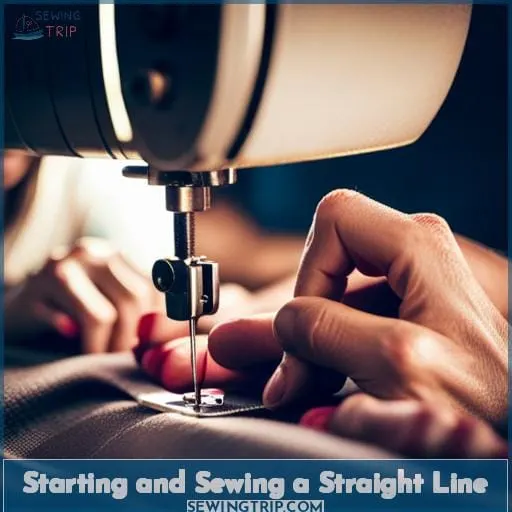
Once the fabric is prepared, you can start sewing a straight line.
- Position the fabric under the presser foot.
- Lower the presser foot and engage the foot pedal to begin sewing.
- Guide the fabric in a straight line while sewing.
Positioning the Fabric Under the Presser Foot
With your fabric prepared, you’re ready to position it under the presser foot and begin sewing a straight line.
Ensure proper fabric alignment and adjust the needle position as needed.
Lower the presser foot with gentle pressure to secure the fabric in place.
Engage the foot pedal to activate the machine’s feed dogs, allowing for smooth fabric movement while sewing.
Adjust stitch length and width according to your desired outcome.
Lowering the Presser Foot and Engaging the Foot Pedal
With the fabric positioned under the presser foot, lower the presser foot and engage the foot pedal with your right foot to begin sewing.
- Apply gentle pressure on the foot pedal to control stitching speed.
- Guide the fabric in a straight line as it moves under the needle.
- Maintain proper thread tension by adjusting it according to your machine’s settings.
Guiding the Fabric in a Straight Line While Sewing
Once you’ve started sewing, guide the fabric in a straight line with your hands for precise stitching.
Keep a ruler nearby to help maintain an even seam allowance.
Stitch slowly and steadily, allowing the machine to feed the fabric through smoothly.
For added stability, consider using a walking foot or guide foot attachment to ensure straight lines every time you use a sewing machine.
Sewing Curves and Corners
Once you can sew a straight line, you can tackle curves and corners!
To sew a curve, start by sewing a straight line, then pivot the fabric and continue sewing.
To sew a sharp angle, sew a straight line and pivot the fabric at a 90-degree angle.
Techniques for Sewing Curves Smoothly
After sewing a straight line, you can sew curves by pivoting the fabric at the corners.
To do this, slowly lower the presser foot and adjust the needle position so that it’s centered over the fabric.
Then, pivot the fabric at the corner and continue sewing.
To avoid puckering, test the fabric first on scrap fabric and use a walking foot for more control.
Pivoting at Corners for Sharp Angles
When sewing curves, you can also pivot at corners to create sharp angles.
To do this,
- Lower the needle into the fabric at the beginning of the curve.
- Raise the presser foot.
- Pivot the fabric.
- Lower the presser foot again.
Continue sewing until you reach the end of the curve.
Backstitching and Securing Seams
Now that you’ve learned the basics of using a sewing machine, let’s talk about backstitching and securing your seams.
Backstitching is an essential technique used to reinforce the beginning and end of your seams, preventing them from unraveling over time.
By stitching in reverse for a few stitches at the start and finish of each seam, you create a stronger hold that will withstand wear and tear.
This simple step ensures the longevity of your projects and gives them a professional touch.
Backstitching at the Beginning and End of Seams
Backstitch a few stitches at the beginning and end of each seam to secure it.
To backstitch,
- Lower the presser foot,
- Engage the reverse stitch button or lever,
- Sew a few stitches in reverse.
Raise the presser foot and use the handwheel to raise the needle.
Trim the threads.
Reinforcing Seams With Additional Stitches
You can reinforce seams with additional stitches to ensure they’re strong and durable.
- Hand sew a backstitch at the beginning and end of each seam.
- Use a machine zigzag stitch or blind hem stitch to secure the seam allowances.
- Topstitch seams for a professional finish.
- Use a serger to create a clean edge finish.
Finishing Techniques
Once you’ve finished sewing your project, you’ll need to complete some finishing touches to give it a professional finish.
This includes:
- Trimming excess threads
- Pressing seams
- Removing basting stitches or pins
Trimming Excess Threads
After backstitching, frequently trim excess threads to prevent them from tangling or becoming loose.
Use sharp scissors to carefully cut the threads close to the fabric without causing any damage.
If you accidentally sew through a thread, use a seam ripper to carefully remove it.
A handy lint brush can be used to clean up any stray fibers.
Consistent trimming of excess threads will ensure neat and professional-looking seams in your sewing projects.
Pressing Seams for a Professional Finish
Press seams flat with an iron to create a professional finish.
You can press seams:
- Open
- To one side
- With steam
Removing Basting Stitches or Pins
To remove basting stitches or pins, gently pull them out using your fingers or a seam ripper.
- Carefully grasp the thread of the basting stitch and give it a gentle tug until it comes loose.
- If using a seam ripper, slide the pointed end under each stitch and lift upward to cut through the thread.
- Remove any remaining pieces with your fingers or small scissors.
Troubleshooting and Maintenance
Now that you have learned how to use a sewing machine, it’s important to understand troubleshooting and maintenance.
Identifying common issues such as thread jams or skipped stitches can help you solve problems quickly.
Regular cleaning and oiling of the machine will ensure optimal performance.
If more complex issues arise, knowing when to seek professional repairs or adjustments is key in keeping your sewing machine running smoothly.
Identifying Common Sewing Machine Issues and Solutions
If you encounter common issues with your sewing machine, such as thread tension problems or needle jams, easily troubleshoot and resolve them.
- Adjust the bobbin thread tension by tightening or loosening the screw on the bobbin case.
- Check if the needle is properly inserted and not bent.
- Ensure that you’re using a compatible needle for your fabric type to prevent skipped stitches or uneven stitching.
- Clear any obstructions causing a jammed needle before continuing to sew smoothly again!
Cleaning and Oiling the Machine for Optimal Performance
Once you have identified and fixed common issues, maintain your sewing machine’s optimal performance by regularly cleaning and oiling it.
Clean the machine after every project to remove lint and debris using a small brush or vacuum attachment.
Apply a few drops of sewing machine oil to designated areas, such as the bobbin case and needle bar, once a month for smooth operation.
Avoid using too much oil as it can attract more dirt.
Knowing When to Seek Professional Repairs or Adjustments
There are times when it’s best to leave the repairs and adjustments to a professional.
If you encounter issues like a broken needle, damaged bobbin case, or bent presser foot, seek assistance from an expert.
Incorrect tension can cause problems like jammed thread or uneven stitches.
For more complex adjustments such as adjusting sewing machine tension, bobbin tension, or needle position for stretchy fabric, it’s advisable to consult with a professional who can ensure accurate settings and prevent further damage.
Frequently Asked Questions (FAQs)
What are the different types of sewing machines?
There are three main types of sewing machines:
- Manual
- Electronic
- Computerized
Manual machines use knobs and levers for settings, while electronic machines use push buttons.
Computerized machines are the most complex, featuring a touch-screen display and memory cards for presets.
How do I thread a sewing machine?
To thread a sewing machine:
- Place the thread spool on the spool pin.
- Guide the thread through the guides and tension discs.
- Thread the needle.
How do I wind a bobbin?
To wind a bobbin:
- Insert the bobbin into the bobbin winder.
- Hold the thread tails as you turn the handwheel.
- Once the bobbin is full, trim the thread and insert it into the bobbin holder.
How do I choose the right needle for my fabric?
You’ll need the right needle for your fabric, just like the right tool for the job.
A sharp needle will glide through fabric with ease, while a dull needle will cause puckering and skipped stitches.
How do I sew a buttonhole?
To sew a buttonhole,
- Mark the buttonhole location on your fabric.
- Set your machine to the buttonhole stitch setting.
- Sew.
- Trim the buttonhole.
- Press to finish.
Conclusion
To sum it all up, using a sewing machine doesn’t have to be intimidating. With this beginner’s guide, you can confidently navigate through the various parts, settings, and techniques.
From setting up your machine to sewing straight lines and tackling curves, you’ll be well-equipped to unleash your creativity and bring your sewing projects to life.
So go ahead and embrace your inner seamstress, because with this guide, you’ll be able to use a sewing machine with finesse and confidence.
Happy stitching!

