This site is supported by our readers. We may earn a commission, at no cost to you, if you purchase through links.
 Start your sewing journey with five essentials: fabric, thread, pins, scissors, and a basic sewing machine. You’ll master straight stitches first, then progress to simple hand-sewing techniques like hemming and button attachment.
Begin with foolproof projects like pillowcases or tote bags that build confidence without overwhelming complexity. Practice threading your machine, adjusting tension, and maintaining steady seam allowances.
Don’t fear mistakes—they’re your best teachers. Most beginners create their first successful project within hours, not weeks. The key is starting small and celebrating each victory.
What separates successful sewists from frustrated quitters often comes down to understanding a few vital setup secrets that transform your entire experience, and it’s crucial to remember that starting small and celebrating each victory are key to progression, as mistakes are an essential part of the learning process, and confidence is built through foolproof projects.
Table Of Contents
- Key Takeaways
- Top 5 Essential Sewing Supplies for Beginners
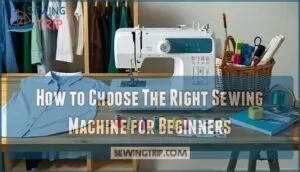
- How to Choose The Right Sewing Machine for Beginners
- Mastering Basic Sewing Machine Skills
- Essential Hand Sewing Techniques for Beginners
- Easy Sewing Projects for Beginners
- Understanding Sewing Patterns for Beginners
- Tips and Tricks for Beginner Sewists
- Building Your Sewing Skills: Intermediate Level Techniques
- Exploring Advanced Sewing Techniques
- Taking Your Sewing to The Next Level: Creating Your Own Patterns
- Frequently Asked Questions (FAQs)
- Conclusion
Key Takeaways
- Start with five essentials – You’ll need fabric, thread, pins, scissors, and a basic sewing machine to begin your sewing journey successfully.
- Master straight stitches first – You’ll build confidence by practicing threading your machine, adjusting tension, and maintaining steady seam allowances before moving to complex techniques.
- Begin with foolproof projects – You’ll avoid frustration by starting with simple items like pillowcases or tote bags that teach basic skills without overwhelming complexity.
- Embrace mistakes as learning tools – You’ll improve faster when you view errors as valuable lessons rather than failures, using your seam ripper as a trusted friend for corrections.
Top 5 Essential Sewing Supplies for Beginners
Getting started with sewing doesn’t require a massive collection of supplies, but having the right basic tools makes all the difference between frustration and success.
You’ll need just five essential items to begin your sewing journey and tackle your first projects with confidence.
Fabric
Fabric selection frees your creative freedom in sewing for beginners.
Cotton blends offer durability and easy handling, making them perfect starter materials.
Look for medium-weight fabrics with simple weave patterns – they’re forgiving and won’t fight back like slippery silks or stretchy knits.
Thread counts between 200-400 provide good structure without being too stiff.
Skip busy patterns initially; solid colors or small prints help you focus on mastering sewing basics.
Quality fabric dyes guarantee colors won’t bleed during washing.
Your fabric choice sets the foundation for successful beginner sewing projects.
It’s essential to choose fabrics that offer easy handling to ensure a smooth learning experience.
Thread
Quality sewing thread transforms your projects from amateur to amazing.
You’ll find three main thread types: cotton for natural fabrics, polyester for durability, and specialized options like silk or metallic.
Thread weight matters – lighter weights (60-80) work for delicate fabrics, while heavier weights (30-40) handle sturdy materials.
Choose fiber content that matches your fabric for best results.
Color selection doesn’t need perfection; close matches work fine.
Your top thread and bobbin thread should typically match, though creative contrast adds interest to topstitching, using a matching or specialized thread.
Pins
The humble pin becomes your trusted ally when you’re ready to tame unruly fabric layers. These tiny warriors hold everything in place while you work your magic with needle and thread.
- Pin Types: Sharp pins work best for woven fabrics, while ballpoint pins glide through knits without snagging delicate fibers.
- Pin Cushions: Magnetic pin cushions keep pins organized and easily accessible, while traditional tomato cushions offer portability for sewing on the go.
- Thimble Use: Protect your fingers when hand-sewing by wearing a thimble on your middle finger to push pins through thick fabric layers.
- Pin Storage: Store pins in containers with tight lids to prevent spills, and consider wrist pin cushions for hands-free convenience.
Master these sewing basics and you’ll find that proper pinning transforms chaotic fabric into manageable pieces. Smart pin placement prevents shifting during cutting and stitching, making your beginner sewing projects flow smoothly from start to finish.
Scissors
Your cutting game starts with choosing the right scissors for your sewing basics. Sharp blades make clean cuts without fraying fabric edges. Invest in quality fabric shears and keep them dedicated to cutting fabric only.
Blade materials like stainless steel stay sharper longer. Handle ergonomics matter during long cutting sessions. Proper scissor care means regular sharpening and storing them safely.
Here’s your cutting toolkit:
| Scissor Type | Purpose |
|---|---|
| Fabric Shears | Cutting fabric pieces |
| Thread Snips | Trimming loose threads |
| Pinking Shears | Preventing fabric fraying |
| Embroidery Scissors | Detail work and curves |
Master these cutting techniques and you’ll transform any sewing supplies into professional results.
Sewing Machine
Beyond the needle and thread lies your creative powerhouse—the sewing machine transforms tedious hand-stitching into efficient crafting adventures. For beginner sewing, choosing the right machine sets your foundation for success.
Machine Maintenance keeps your investment running smoothly. Clean lint buildup weekly and oil moving parts monthly following your manual’s guidance.
Here are five essential sewing machine fundamentals:
- Master Threading Techniques – Practice threading until it becomes second nature; most frustration stems from improper threading
- Understand Needle Types – Universal needles work for most fabrics, but ballpoint needles prevent snags on knits
- Learn Basic Stitch Settings – Start with straight stitch and zigzag; these handle 90% of beginner projects
- Know Your Sewing Machine Parts – Familiarize yourself with tension dial, stitch selector, and presser foot lever
- Practice Troubleshooting Issues – Skipped stitches usually mean wrong needle size; bunched fabric indicates tension problems
Different sewing machine types serve various needs. Mechanical machines offer simplicity, while computerized models provide precision. Both create beautiful sewing machine stitches when properly maintained.
How to Choose The Right Sewing Machine for Beginners
Selecting the right sewing machine can feel overwhelming with so many options available, but focusing on your specific needs makes the decision much easier.
You’ll want to take into account factors like your budget, the types of projects you plan to tackle, and which beginner-friendly features will help you learn without frustration.
Factors to Consider
When selecting your first sewing machine, consider your skill level and project complexity. Beginners should prioritize user-friendly features over advanced options.
Think about time commitment – will you sew weekly or monthly? Cost analysis matters too, but don’t sacrifice quality for price.
Consider fabric choice preferences since some machines handle different materials better. A good starting point is to research a beginner sewing machine.
Match the machine’s capabilities to your beginner sewing goals and planned sewing projects, focusing on quality for the best results.
Budget
Setting a beginner sewing budget doesn’t have to break the bank. Start with basic starter supplies totaling around $30 – thread, pins, seam ripper, and scissors from dollar stores offer significant savings.
Entry-level sewing machines begin at $100, with reliable models like Brother cs6000i under $200. Many models offer features such as a built-in thread cutter for convenience.
Hunt for thrift store fabric and affordable tools at garage sales. Create DIY sewing kits using free patterns downloaded online. Practice upcycling old clothes into new projects.
Focus on beginner sewing tutorials that maximize your sewing kit investment while building essential sewing tips.
Beginner-Friendly Features
Your sewing machine should feel like a helpful friend, not a confusing gadget.
Look for beginner-friendly features that make learning smoother and keep frustration at bay while you master basic tools and sewing techniques for beginners.
- Automatic needle threader saves time and reduces eye strain during simple stitching
- Speed control slider lets you sew slowly while learning basic tools and techniques
- One-step buttonhole creates perfect buttonholes without complex manual adjustments
- Clear instructions manual with diagrams makes setup and troubleshooting straightforward
Popular Beginner Sewing Machine Models
When you’ve narrowed down your must-have machine features, it’s time to explore specific sewing machine models that deliver real value.
These beginner sewing machines offer the perfect balance of functionality and affordability to get you started on your learn sewing journey.
Here are five standout beginner-friendly options:
- Brother LX3817 – Under $100 budget option with simplified three-button design
- Brother CS7000X – 70 built-in stitches with automatic needle threader and LCD display
- Brother CS5055 – 60 stitches, quiet operation, and computerized convenience
- Singer Heavy Duty 4423 – Powerful motor handles thick fabrics at around $210
- Janome 2212 – Basic reliability with front-loading bobbin system for $200
Each model comparison reveals different strengths.
The Brother models excel in machine features and brand reliability, while Singer’s heavy-duty option tackles challenging projects.
For budget options, the LX3817 gets you sewing immediately.
It’s important to note that the LX3817 features limited stitch options, so it may not be suitable for complex projects.
Maintenance tips are straightforward across these sewing machine models – regular cleaning and oiling keep them running smoothly for years.
Mastering Basic Sewing Machine Skills
Once you’ve got your sewing machine set up, it’s time to learn the basic skills that’ll turn you from a button-pusher into a confident sewist.
These fundamental techniques will become second nature with practice, and you’ll wonder how you ever lived without knowing how to adjust your stitch settings or swap out presser feet, which will help you become a sewist.
Adjusting Stitch Length and Width
Understanding your sewing machine’s stitch adjustments reveals creative possibilities and professional results.
Start with a straight stitch at medium length (2.5mm) for most beginner sewing projects.
Adjust longer for basting or topstitching, shorter for delicate fabrics.
Fabric type determines your settings—lightweight materials need shorter stitches to prevent puckering, while heavy fabrics require longer ones for seam strength.
Stitch density affects thread coverage and durability.
Practice decorative stitches by varying width settings.
When troubleshooting stitches that look uneven, check your tension first, then adjust length.
Many machines offer adjustable stitch widths for precise control.
Master these basics before tackling complex sewing techniques.
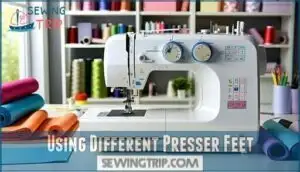
Using Different Presser Feet
Different presser feet reveal your sewing machine’s true potential like specialized tools in a craftsman’s workshop.
Your standard zigzag foot handles basic tasks, but specialty feet tackle specific challenges with precision.
The zipper foot slides close to teeth for professional installations, while the blind hemming foot creates nearly invisible hems.
A gathering foot saves hours of hand-pleating fabric.
Before switching feet, check foot compatibility with your machine model.
Most modern machines use snap-on attachments, making changes quick.
Always test adjustable presser settings on scraps first—this prevents fabric disasters and builds confidence with sewing machine accessories.
Sewing Straight Lines
When you’re ready to conquer straight lines, position your fabric edge against the presser foot’s guide.
Keep your sewing machine on a straight stitch setting and maintain consistent seam allowance by watching the seam guide markings.
Focus on fabric grain alignment—it’s your roadmap to success.
Guide fabric straight through without forcing or pulling.
If you’re getting curves instead of lines, check your machine stitch settings and slow down.
Beginners often rush, but steady wins this race.
Practice on scraps first—your future projects will thank you for the patience.
Sewing Basic Stitches
Why struggle with machine stitches when mastering just a few opens endless creative possibilities?
Your sewing machine’s basic stitches form the foundation for every project you’ll tackle.
- Straight Stitch: Your go-to workhorse for seams, topstitching, and clean construction lines
- Zigzag Stitch: Perfect for stretchy fabrics, edge finishing, and preventing fraying
- Backstitch Technique: Hand-sewing essential for strong, permanent connections and repairs
- Basting Stitches: Temporary holds that keep fabric pieces aligned before final stitching
Essential Hand Sewing Techniques for Beginners
Hand sewing forms the foundation of all your sewing skills, whether you’re fixing a loose button or creating your first project from scratch.
You’ll master essential techniques like threading a needle, making basic stitches, and securing seams that’ll serve you well even when you advance to machine sewing.
Choosing The Right Needle and Thread
Why struggle with tangled thread when the right needle-thread combo makes sewing effortless?
Match needle size to fabric weight—size 8-11 for lightweight fabrics, 12-16 for medium, and 18-19 for heavy materials.
Choose all-purpose polyester thread for most projects, cotton for natural fabrics.
Consider your sewing machine’s compatibility with different needle types.
Proper needle threading becomes simple when you match project requirements with appropriate sewing materials, using the right needle-thread combo.
Basic Hand Stitches
Once you’ve threaded your needle properly, master these fundamental hand sewing stitches that’ll release your creative potential.
Start with the running stitch—weave your needle in and out evenly for basic seams.
Practice back stitching for stronger connections, slip stitch for invisible hems, and basting stitch for temporary holds.
The blanket stitch creates beautiful finished edges on projects like napkins.
Sewing Buttons
Buttons transform ordinary sewing projects into polished pieces that showcase your growing sewing skills. Choose from flat sew-through buttons or shank buttons based on your fabric thickness and desired look.
Master these button sewing techniques to elevate your projects:
- Thread anchor: Create a small knot underneath to prevent buttons from pulling through delicate fabrics
- Shank creation: Wind thread around button stems several times for professional button placement
- Double threading: Use doubled thread for securing buttons that’ll get heavy use
- Test positioning: Mark button placement with chalk before committing to final stitches
Different button types require specific sewing techniques. Shank buttons work best with thick fabrics, while flat buttons suit lightweight materials. Consider button alternatives like snaps or toggles for unique touches. Always test your button placement on scraps first—you’ll save time and avoid frustration later.
Hemming and Mending
Hemming transforms ill-fitting clothes into perfect pieces, while mending breathes new life into damaged garments.
You’ll master invisible hemming for professional-looking pants and learn patching techniques for torn fabric. Darning socks saves money and creates unique repairs that showcase your growing skills.
| Repair Type | Best Technique | Tools Needed | Difficulty | Time Required |
|---|---|---|---|---|
| Hemming pants | Invisible hemming | Needle, thread, pins | Easy | 15-20 minutes |
| Patching holes | Decorative patch | Fabric scrap, scissors | Medium | 30 minutes |
| Darning socks | Weaving technique | Darning needle, yarn | Medium | 20-25 minutes |
| Mending tears | Ladder stitch | Fine needle, matching thread | Easy | 10-15 minutes |
| Hemline styles | Blind hem stitch | Hemming foot (optional) | Easy | 20 minutes |
Easy Sewing Projects for Beginners
Now that you’ve learned the fundamental hand sewing techniques, it’s time to put those skills into practice with some beginner-friendly projects.
These simple projects will help you build confidence while creating useful items for your home and wardrobe, using your newfound skills in complete concepts to make useful items.
Simple Pillowcase
Creating a simple pillowcase is your gateway to mastering fundamental sewing skills. Start with beginner-friendly pillowcase fabrics like cotton or flannel, cutting two rectangles matching standard pillowcase sizes (21" x 33" for standard).
Master the envelope closure technique – it’s foolproof and eliminates complicated zippers. French seams create professional-looking edges that won’t fray.
You can find various options for cotton pillowcase fabric to suit different needs. Practice straight stitching while exploring embellishment ideas like decorative trim or contrasting cuffs.
This essential sewing tutorial builds confidence for future sewing projects.
Tote Bag
Creating a sturdy tote bag puts your beginner sewing skills to practical use while crafting something you’ll actually carry. This project teaches essential techniques like straight seams, reinforcement stitching, and handle construction using your sewing machine.
Tote Bag Fabrics matter more than you’d think – canvas and denim offer durability, while cotton prints add personality. Handle Construction requires reinforcement stitching for strength.
Consider these key elements:
- Lining Options – Add interior fabric for a polished finish and extra durability
- Pocket Variations – Interior or exterior pockets boost functionality without complexity
- Custom Embellishments – Appliqué, decorative stitching, or fabric paint personalize your creation
Start with a simple rectangular design measuring 14" x 16" for everyday use. This beginner sewing project combines multiple sewing fabric pieces while building confidence. Your finished tote bag becomes both achievement and accessory.
Apron
After mastering tote bags, you’ll find aprons just as rewarding to create. This practical beginner sewing project lets you explore different apron styles while building confidence with your sewing machine.
Choose beginner-friendly fabrics like cotton or canvas in fun prints. Custom aprons make perfect gifts when you add apron embellishments like decorative stitching or rickrack trim. Focus on straight seams and basic hems – save complex features for later beginner sewing projects.
| Apron Component | Beginner Tips |
|---|---|
| Body Shape | Start with rectangular designs before curved styles |
| Pocket Designs | Add simple patch pockets for functionality |
| Ties & Straps | Use bias tape or fabric strips for easy construction |
Scrunchies
Scrunchies are your gateway to mastering elastic techniques and gathering fabric like a pro. These quick projects teach essential skills while creating stylish hair accessories you’ll actually use.
Start with cotton or lightweight fabrics in fun patterns – they’re forgiving and easy to handle. Cut fabric strips about 20 inches long and 4 inches wide, then experiment with different Scrunchie Fabrics to find your favorites.
Key techniques you’ll master:
- Scrunchie Elastic threading and securing without twisting
- Creating perfect Scrunchie Volume through proper gathering
- Exploring various Scrunchie Styles from classic to oversized
- Adding Scrunchie Embellishments like ribbons or lace trim
This beginner sewing project builds confidence with curved seams and elastic insertion. Once you’ve nailed the basics, you’ll be ready for more complex sewing projects that require similar gathering techniques.
Potholders
Potholders release your creative potential while mastering practical sewing skills.
Choose heat-resistant fabrics like heavyweight cotton or batting for safety and durability.
| Fabric Selection | Heat Resistance | Layering Techniques |
|---|---|---|
| Cotton canvas | Insulated batting | Double-layer protection |
| Quilted materials | Terry cloth backing | Sandwich construction |
| Denim scraps | Heat-resistant interfacing | Binding edge finish |
Start with simple squares, then experiment with fun shapes.
Practice Binding Methods using bias tape for professional edges.
Add Creative Designs through contrasting fabrics or decorative stitching.
These easy sewing projects build essential skills while creating useful kitchen essentials you’ll actually use daily.
Understanding Sewing Patterns for Beginners
Reading sewing patterns might seem like decoding secret instructions, but once you understand the basics, you’ll discover endless project possibilities.
These pattern pieces and step-by-step guides transform fabric into finished garments with professional results every time.
How to Read a Sewing Pattern
Reading sewing patterns releases your creative freedom, transforming flat tissue pieces into wearable art.
Start by examining the pattern envelope’s front and back for sizing, fabric requirements, and finished measurements. Inside, you’ll find the instruction sheet and pattern pieces with essential markings.
Here’s your roadmap to pattern mastery:
- Identify Pattern Symbols – Look for triangular notches, grain line arrows, and dart markings that guide construction
- Study Grainlines Explained – Follow the long arrows to align pieces correctly with fabric grain for proper drape
- Understand Cutting Layouts – Use the diagram showing how to position pieces on your fabric efficiently
- Decode Ease Explained – Note the difference between body measurements and finished garment size for comfortable fit
Commercial sewing patterns include detailed sewing instructions with step-by-step illustrations. This sewing guide approach helps beginners navigate construction confidently, making your sewing tutorial experience smooth and successful.
Adjusting Patterns for Your Size
Beyond tracing the original pattern, Taking Measurements of your body comes first.
Compare these to pattern sizing charts before making Fitting Adjustments. Try Combining Sizes if you fall between measurements – use different sizes for bust, waist, and hips.
Create a Muslin Mockup to test fit before cutting your final fabric. This Pattern Grading technique transforms basic sewing patterns into personalized masterpieces for any sewing project.
Choosing The Right Fabric for a Pattern
Pattern fabrics work best when they match your skill level and project needs.
Your fabric choice can make or break your finished piece, so don’t rush this decision.
Consider these key factors when selecting fabric:
- Fabric Weight – Heavy fabrics like denim need stronger needles, while lightweight cotton works perfectly for beginners
- Fabric Drape – Stiff fabrics hold structure well, but flowy materials like linen create beautiful movement
- Fiber Content – Cotton offers forgiveness for mistakes, while synthetic blends can be trickier to handle
Check your pattern envelope for recommended fabric types before shopping.
It’ll list suitable options like "cotton, linen, or cotton blends."
Pay attention to Print Scale too – large patterns can overwhelm small garments.
Test Colorfastness by washing a small piece first.
For sewing for beginners, stick with stable fabric types that won’t stretch or fray easily during fabric preparation.
Cutting and Marking Pattern Pieces
Pattern-cutting precision transforms your sewing dreams into reality. Once you’ve selected your perfect fabric, it’s time to cut and mark your pattern pieces with surgical accuracy.
Start by preparing your fabric with proper fabric preparation—prewash and iron to eliminate wrinkles. Next, arrange your pattern pieces according to the pattern layout instructions, paying close attention to fabric grain direction. The grainline arrows on your pattern must align with your fabric’s straight grain for proper drape and fit.
Use marking tools like tailor’s chalk or washable fabric markers to transfer all notches, dots, and construction lines onto your fabric. Sharp fabric scissors or rotary cutters guarantee cutting accuracy—dull blades create jagged edges that’ll haunt your seams later.
Here are 4 essential cutting and marking steps:
- Check pattern adjustments before cutting
- Pin pattern pieces securely to fabric
- Cut with steady pressure following pattern lines exactly
- Mark all construction details immediately after cutting.
Your sewing patterns for beginners will thank you for this thorough approach to sewing project patterns preparation.
Following Sewing Instructions
With your pattern pieces cut and marked, you’re ready to follow sewing instructions step-by-step.
Start by understanding Pattern Symbols and Cutting Layouts before beginning construction.
Read each instruction completely before acting – this prevents costly mistakes.
Pay attention to Seam Allowances and Grain Direction markers throughout assembly.
When Pattern Adjustments are needed, make them gradually.
Remember, even experienced sewists reference their sewing guide frequently.
Take breaks between complex steps to maintain focus and accuracy.
Tips and Tricks for Beginner Sewists
Starting your sewing journey means you’ll make mistakes, and that’s perfectly normal – even experienced sewists learn something new with every project.
These practical tips will help you troubleshoot common problems, develop good habits, and connect with fellow sewists who can offer encouragement when your seams go wonky.
Embracing Mistakes and Learning From Them
Mistakes aren’t roadblocks—they’re your best teachers in sewing for beginners.
Every crooked seam teaches you something new – embrace the wobbles on your way to mastery.
Every crooked seam and imperfect project reveals what needs improvement.
Practice patience with yourself during this learning curve.
When you mess up, don’t get discouraged.
Instead, analyze what went wrong and try creative solutions.
Seam ripping becomes routine, and that’s perfectly normal.
Your sewing skills grow stronger through sewing practice, not perfection.
Each sewing mistake transforms into valuable sewing learning that builds confidence for future projects.
Seam Ripper as Your Best Friend
Your seam ripper becomes your most valuable sewing tool when correcting mistakes inevitably happens.
This sharp tool carefully cuts stitches without damaging fabric when you insert it under threads and gently pull.
Choose quality rippers with sharp points and comfortable grips.
Master proper ripping techniques by working slowly and supporting fabric while cutting.
These sewing essentials prevent errors from becoming disasters, making seam ripper uses critical for sewing for beginners learning fundamental sewing tips and tricks.
Pressing and Ironing Techniques
Master pressing and ironing techniques to transform your sewing from amateur to professional. Proper heat settings and technique create crisp seams that make your projects look store-bought. Think of your iron as a magic wand—it smooths wrinkles and sets seams permanently.
- Ironing Temperatures: Match heat settings to fabric types—cotton needs high heat, synthetics require low
- Pressing Tools: Use a pressing cloth for delicate fabrics and steam for stubborn wrinkles
- Seam Pressing: Press seams open or to one side immediately after stitching for clean lines
- Garment Care: Always test iron temperature on fabric scraps before pressing your finished project
- Sewing Skills: Press as you go rather than waiting until the end—it’s easier and more effective
Building Sewing Skills Gradually
You’ll find success in sewing by taking small, deliberate steps. Start with Consistent Practice on scrap fabric before tackling real projects. This approach builds muscle memory and confidence without wasting materials.
Follow a logical Project Sequencing that matches your current abilities. Begin with straight seams, then curves, and eventually complex construction techniques. Each completed project becomes Skill Reinforcement for the next challenge.
| Skill Level | Recommended Projects | Key Focus Areas |
|---|---|---|
| Absolute Beginner | Fabric samples, straight stitching | Threading, tension, basic stitches |
| Novice | Pillowcases, tote bags | Seams, corners, finishing edges |
| Developing | Aprons, simple skirts | Curves, darts, basic fitting |
| Intermediate | Shirts, lined jackets | Buttonholes, zippers, construction order |
Incremental Learning prevents overwhelm and frustration. Master one technique before moving to the next. This methodical approach in sewing fundamentals creates lasting skills rather than temporary fixes.
Remember, Patience Essential – rushing leads to mistakes that discourage progress. Your sewing skills development flourishes when you embrace gradual improvement over quick results.
Joining Sewing Communities for Support
You’ll find tremendous support when you connect with fellow sewers through online forums and local guilds.
These sewing communities offer project feedback, skill sharing opportunities, and collaborative sewing experiences that accelerate your learning.
Join platforms where beginners ask questions freely and experienced sewers share wisdom.
Local guilds provide hands-on sewing assistance and face-to-face connections.
Whether seeking sewing support online or attending workshops, these sewing resources create lasting friendships while building your confidence with needle and thread, and provide a sense of community.
Building Your Sewing Skills: Intermediate Level Techniques
Once you’ve mastered the basics, you’re ready to tackle intermediate techniques that’ll transform your sewing from simple to sophisticated.
These skills include adding zippers, creating darts and pleats, working with stretchy fabrics, making buttonholes, and sewing smooth curved seams.
Adding Zippers to Projects
Adding zippers can feel intimidating, but it’s your gateway to professional-looking sewing projects.
You’ll discover different zipper types like invisible, exposed, and separating options, each serving unique purposes. Start with basic insertion methods using proper zipper feet – they’re game-changers for smooth installation.
Here’s your zipper success roadmap:
- Choose the right zipper type for your project needs
- Install zipper feet on your machine for precise stitching
- Pin and baste the zipper before permanent sewing
- Test stitch on fabric scraps first
- Troubleshoot common issues like puckering or misalignment
Concealed zippers create clean finishes, while exposed ones add decorative flair.
Practice these techniques on simple pouches before tackling garments.
Sewing Darts and Pleats
Now you’ll craft darts and pleats that transform flat fabric into custom perfection.
These sewing techniques shape garments by removing excess fabric strategically. Think of darts as fabric’s way of hugging curves, while pleats create structure and visual interest.
- Dart Types: Start with basic bust or waist darts before attempting curved French darts for advanced shaping
- Pleat Styles: Practice knife pleats first, then progress to box pleats and accordion styles for texture variety
- Fabric Choice: Choose cotton or linen for your first attempts – they hold creases well and forgive minor mistakes
- Placement Tips: Mark dart points precisely and use your iron to press pleats before stitching for professional results
Master these alterations and you’ll see how sewing patterns come alive with proper fit and dimension.
Working With Knits and Stretch Fabrics
Working with knit fabric types opens up a world of comfortable sewing projects, but these stretchy materials require special handling techniques.
You’ll need to switch your sewing machine to stretch stitch settings like zigzag or lightning stitch to prevent thread breakage when the fabric moves.
Use ballpoint needles specifically designed for knits – they’ll slip between fibers instead of piercing them.
Lower your presser foot pressure and avoid pulling the fabric while sewing to prevent wavy seams.
Practice stabilizing knits by supporting them fully when cutting, and consider seam finishes like serging for professional results.
Start with simple knit project ideas like t-shirts or leggings to build your sewing skills gradually.
Creating Buttonholes
Once you’ve mastered stretch fabrics, you’re ready to tackle buttonholes—the gateway to professional-looking garments.
Your sewing machine’s buttonhole foot creates perfect openings automatically. Choose the right buttonhole types for your fabric selection and adjust stitch settings accordingly.
Mark button placement carefully before cutting. Practice on scraps first—thick fabrics need wider spacing, while delicate materials require gentle handling.
These sewing techniques transform basic sewing projects into polished pieces. Master this skill and you’ll gain access to countless sewing lessons ahead.
Understanding proper hand sewing techniques is essential for creating durable and professional-looking buttonholes.
Sewing Curved Seams
Curved seams can feel intimidating, but they’re simply straight lines that happen to bend.
You’ll master sewing arcs by understanding how fabric draping affects your seam allowance and adjusting your sewing machine technique accordingly.
Here are three curved seam tips for smooth results:
- Clip your curves – Make small cuts perpendicular to the seam line every half-inch to release tension
- Ease around corners – Slow your sewing machine speed and guide fabric gently through circular hems
- Press carefully – Use steam and curve your seams over a pressing ham for professional finishing
Practice these sewing techniques on beginner sewing projects before tackling complex garments.
Exploring Advanced Sewing Techniques
Once you’ve mastered intermediate techniques, you’re ready to tackle advanced methods that transform basic projects into polished, professional-looking garments.
These sophisticated skills like working with lining fabric, creating piping, and adding decorative elements will expand your sewing toolkit and open up exciting new project possibilities, utilizing techniques such as working with lining fabric and creating piping to enhance your garments.
Sewing With Lining Fabric
Adding lining fabric to your sewing projects creates professional-looking lined garments that feel luxurious inside and out.
You’ll want to choose lightweight fabrics like cotton batiste or silk for most projects.
Cut your lining pieces using the same sewing patterns for beginners, but reduce seam allowances slightly.
Baste fabric layers together before final stitching to prevent shifting, this technique transforms basic garments into polished pieces that last longer, giving them a luxurious feel.
Making Piping and Trims
Transform your sewing projects with professional-looking piping and trims that’ll make your work stand out. These finishing touches aren’t just decorative—they’re your secret weapon for polished results.
Here are three essential Piping Techniques to master:
- Covered piping – Wrap bias-cut fabric around cotton cord for custom colors
- Inserted piping – Sandwich between seam layers for clean edge definition
- Flat piping – Fold fabric strips for subtle raised seams
Start with cotton fabrics for easier handling. Use a zipper foot when sewing piping to get close to the cord. These Decorative Stitches and Trim Styles elevate basic Sewing Projects into professional pieces.
Sewing Ruffles and Gathering Techniques
Creating ruffles transforms plain fabric into flowing, dimensional masterpieces that’ll make your projects sing.
Start with gathering stitches set to your machine’s longest stitch length, then gently pull the bobbin thread to create even gathers.
Practice on scraps first—trust me, your first ruffle might look more like a fabric accordion than elegant gathering!
| Technique | Stitch Length | Fabric Ratio | Best For | Difficulty |
|---|---|---|---|---|
| Hand Gathering | N/A | 2:1 | Delicate fabrics | Beginner |
| Machine Gathering | 4-5mm | 2:1 to 3:1 | Cotton, linen | Beginner |
| Elastic Gathering | Regular | 1.5:1 | Stretchy fabrics | Easy |
| Shirring | 4mm | 3:1 | Waistbands | Intermediate |
| Pleated Ruffles | Regular | 4:1 | Formal wear | Advanced |
Master these gathering techniques by measuring your desired finished length, then cutting fabric two to three times longer.
This ratio guarantees full, bouncy ruffles that won’t look skimpy.
It is essential to follow the techniques and ratio guidelines to achieve the desired outcome.
Working With Bias Tape
After mastering ruffles and gathering, you’ll find bias tape opens new possibilities for professional-looking finishes. This flexible fabric strip, cut at a 45-degree angle, bends smoothly around curves without puckering—making it perfect for armholes and necklines where regular binding would fight you.
Creative Bias Tape Uses:
- Finishing Edges: Create neat edges on garments, linens, and accessories.
- Decorative Accents: Embellish hems, pockets, and seams with contrasting bias tape.
- Straps and Ties: Craft stylish straps for bags, aprons, and dresses.
- Quilt Binding: Add a pop of color to quilt edges.
- Curved Finishes: Master tricky curves with bias tape for a polished look.
Here’s your step-by-step approach for sewing projects:
- Pre-stretch the tape with steam before applying
- Pin the narrow side to fabric’s right side first
- Stitch in the fold close to the edge
- Wrap to wrong side and secure with another seam
- Press carefully for crisp, professional results
Understanding sewing pattern basics is essential for working with bias tape effectively. Practice on scraps first—bias tape applications become second nature with repetition.
Applique and Embroidery
Appliqué and embroidery transform plain fabric into stunning fabric art.
Start with simple appliqué techniques, cutting shapes from contrasting fabric and stitching them down.
Basic embroidery stitches like backstitch and French knots create beautiful needle painting effects.
Thread painting adds intricate details to your sewing projects.
These sewing notions and accessories open creative doors, letting you personalize everything from pillowcases to clothing with unique designs, using techniques like thread painting.
Taking Your Sewing to The Next Level: Creating Your Own Patterns
You’ve mastered advanced techniques, but true sewing freedom comes when you break free from commercial patterns and create your own. Pattern Drafting transforms your measurements into custom-fitted templates that work perfectly for your body.
Start with basic blocks (slopers) – these foundation patterns become your blueprint for countless designs. Begin by taking accurate measurements and drafting a simple bodice block on paper. This basic template lets you experiment with Design Elements like dart placement and neckline shapes.
Once you’ve perfected your sloper through test muslins, you can modify it into dresses, tops, and jackets that actually fit. Master flat-pattern techniques first – they’re more forgiving than draping methods. Practice Garment Fitting adjustments on muslin before cutting expensive fabric.
Your Fabric Selection becomes more strategic when you understand how different materials behave with your custom patterns. Creating sewing patterns involves understanding pattern making techniques to guarantee a well-fitting garment.
Creating sewing patterns isn’t just about fit – it’s about designing exactly what you want to wear, not settling for what’s available in stores. This approach to sewing offers a high degree of customization and flexibility, allowing you to create garments that perfectly suit your style and preferences.
Frequently Asked Questions (FAQs)
What are some easy sewing projects for beginners?
Start with pillowcases, tote bags, or elastic-waist skirts.
These projects teach basic straight stitches and seams without complex techniques like zippers.
You’ll build confidence while creating useful items that don’t require perfect precision, using basic straight stitches.
How to choose a sewing machine for beginners?
Like your great-grandmother’s trusty Singer, you’ll want a machine that won’t quit on you.
Look for basic straight and zigzag stitches, automatic threading, and good reviews from beginners—reliability beats fancy features every time.
What is the best sewing machine for beginners?
You’ll find Brother HC1850 and Singer Simple 3337 are top picks. Both offer automatic needle threaders, built-in stitches, and beginner-friendly features . They’re reliable workhorses that won’t overwhelm you while learning.
What is the best way to learn how to sew?
While complex projects intimidate beginners, simple hand-sewing provides immediate skills.
Start with basic stitches on cotton fabric scraps. Practice threading needles, making straight lines, and tying knots.
Progress to small projects like pillowcases before tackling garments, utilizing the immediate skills gained from basic hand-sewing.
What is the first thing a beginner should sew?
Practice straight stitches on scrap fabric first. They’re foundational for everything else. Once you’ve nailed threading your needle and keeping stitches even, you’ll build confidence for bigger projects ahead.
How to start sewing with no experience?
Like diving into uncharted waters, start by gathering basic tools: needles, thread, scissors, and cotton fabric. Practice straight stitches on scraps, then tackle simple projects like pillowcases to build confidence.
How to sew simple step by step?
Thread your needle, tie a knot, and start with simple running stitches. Keep even spacing, pull gently to avoid bunching fabric, and secure with a final knot through the loop.
What is the easiest material to sew for beginners?
Over 80% of sewing beginners quit after their first fabric disaster, but you’ll thrive with cotton.
Start with quilting cotton or cotton canvas—they’re forgiving, don’t shift around, and handle mistakes gracefully while you’re learning the ropes.
What seam allowance should beginners use most often?
For beginners, use a 5/8-inch seam allowance most often. It’s the standard measurement for garment construction and gives you enough fabric to work with while learning proper stitching techniques.
How do you fix skipped stitches?
Check your needle first – dull or bent needles cause skipped stitches.
Rethread your machine properly, ensuring correct tension.
Slow down your sewing speed and use the right needle size for your fabric weight.
Conclusion
Sarah completed her first pillowcase in just two hours, despite never touching a sewing machine before.
Her secret? Following the step-by-step approach outlined in this guide.
Now you’ve got everything needed to start your sewing adventure. Remember, learning how to sewing for beginners isn’t about perfection—it’s about progress.
Gather your supplies, choose your first project, and take that vital first stitch. Your sewing journey starts today.
- https://www.seasonedhomemaker.com/sewing-tips-for-beginners/
- https://arrowsewing.com/blog/sewing-101-a-beginners-guide-to-sewing-basics/
- https://sewing.com/basic-sewing-skills/
- https://www.polkadotchair.com/50-fun-beginner-sewing-projects/
- http://www.madeeveryday.com/2008/07/tutorial-a-simple-skirt.html/

