This site is supported by our readers. We may earn a commission, at no cost to you, if you purchase through links.
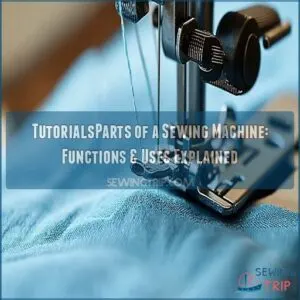
You’ve got essentials like the throat and free arm that give you room to maneuver, especially for sewing in tight circles—think hemming sleeves.
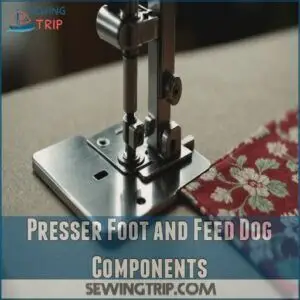
The presser foot and feed dogs keep your fabric moving smoothly, like a well-oiled assembly line.
Don’t forget thread guides and tension controls; they’re the unsung heroes that prevent tangles.
And while the bobbin winder sounds mysterious, it’s just your silent partner keeping everything threaded.
Dive deeper into these features and you’ll soon stitch your way to sewing mastery.
Table Of Contents
- Key Takeaways
- Essential Sewing Machine Parts
- Thread Path and Tension
- Stitch Control and Operation
- Sewing Machine Functions and Accessories
- Upper Thread and Needle Components
- Lower Thread and Bobbin Components
- Presser Foot and Feed Dog Components
- Stitch Selection and Control
- Advanced Sewing Machine Features
- Using Your Sewing Machine Effectively
- Frequently Asked Questions (FAQs)
- Conclusion
Key Takeaways
- You’ll find that understanding the machine’s parts—like the presser foot, tension controls, and bobbin winder—can drastically improve your sewing experience by preventing common issues like fabric jams and uneven stitches.
- Mastering the free arm and feed dogs lets you handle tubular projects and tricky tight spaces smoothly, making items like sleeves and pant hems a breeze.
- By using the stitch selection and control features, you can creatively adapt stitch length and width, allowing you to tailor any project with decorative and secure stitching.
- Regularly cleaning and maintaining components like the needle clamp screw and bobbin case ensures your machine runs smoothly and extends its lifespan, much like maintaining a car.
Essential Sewing Machine Parts
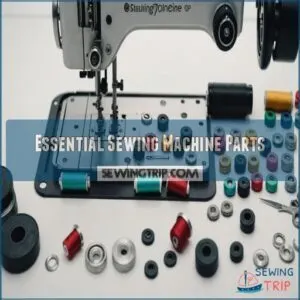
Understanding the essential parts of your sewing machine, like the throat, free arm, and bobbin winding mechanism, helps you make the most of its features.
You’ll quickly see how the arm, presser bar lifter, and presser foot all play key roles in creating perfect stitches.
Throat and Free Arm
You’ll often find the free arm incredibly useful! It’s that cylindrical section of your sewing machine, perfect for free arm sewing.
The throat plate, located above the feed dogs, provides ample space for your fabric. You can even find special sewing machine feet for specific projects, like sewing buttonholes or zippers.
Here’s what you need to know:
- Free arm sewing makes tubular projects and sewing in the round a breeze.
- It’s ideal for small projects and working in tight spaces.
- Proper use of the presser foot and feed dogs is key for smooth sewing.
Arm and Bobbin Winding Mechanism
Master the arm and bobbin winding mechanism for smooth sewing.
The arm supports bobbin winding by guiding the thread with precision.
Use the spool pin and thread guides to achieve even winding.
Control tension using the tension regulator to prevent thread snarls.
Explore different bobbin types to suit your machine, ensuring seamless needle threading and sewing experiences.
Presser Bar Lifter and Presser Foot
Lift that presser bar and watch how the presser foot smoothly lowers onto your fabric, ready to work its magic. Here’s what you need to know:
- Presser foot types vary for different tasks, like zippers and hems.
- Foot pressure adjustments help the fabric feed properly.
- Changing presser feet is quick, enhancing stitch length and width control.
Hand Wheel and Power Button
The presser foot helps guide fabric.
Now, turn your attention to the hand wheel and power button.
The hand wheel offers precise manual control for positioning stitches and making sure the needle’s in the right spot, even if the machine’s off.
Meanwhile, the power button activates electric operation, simplifying tasks—just make sure safety by checking settings before starting.
This approach minimizes troubleshooting issues.
Thread Path and Tension
Understanding the role of the bobbin thread, which forms the foundation of stitches and should be matched with the top thread, is crucial for smooth, even stitching, as explained in how to use a bobbin. Understanding the thread path and tension in your sewing machine is important for smooth, even stitching.
The thread guide, take-up lever, and tension discs all work together to make sure the thread flows correctly.
You can achieve perfect stitches every time.
Thread Guide and Thread Take-Up Lever
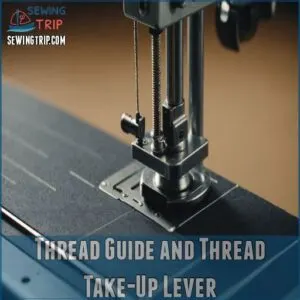
Imagine this: the thread guide and thread take-up lever are key for smooth sewing operations.
They help your sewing machine needle and thread move together seamlessly by:
- Directing the thread path.
- Regulating thread tension.
- Assisting in bobbin winding.
- Enhancing stitch quality.
Without them, your fabric feeding could become chaotic, causing tangles and poor sewing machine tension.
Tension Discs and Tension Control Dial
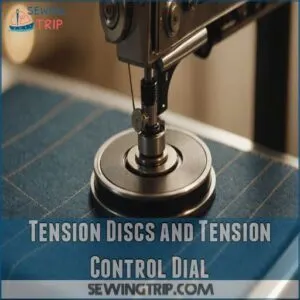
Anyone familiar with a sewing machine knows the tension discs and control dial are vital for stitch quality.
Positioned along the thread path, these elements adjust the thread’s tightness by regulating pressure between the discs.
To avoid common thread tension issues such as puckering and loose stitches, it’s important to troubleshoot thread tension.
Achieving perfect tension varies with each fabric, influencing stitch appearance and bobbin winding.
Don’t hesitate to tweak settings for flawless sewing adventures.
Needle Bar Thread Guide
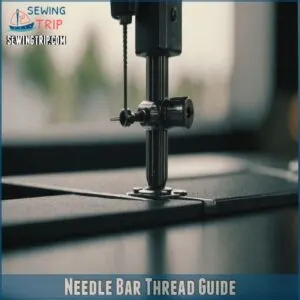
Understand your needle bar thread guide’s role.
It’s important for smooth sewing.
This guide keeps your thread aligned as it travels to the needle eye, preventing frustrating thread breakage.
Improper threading here often causes skipped stitches or tension issues.
A correctly positioned guide helps with consistent tension control, resulting in beautiful, even stitches.
Ignoring it can lead to threading issues and headaches.
Stitch Control and Operation
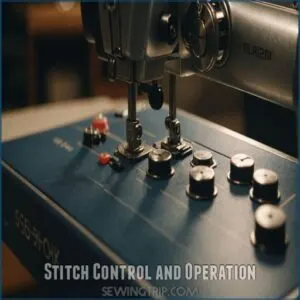
In sewing, mastering stitch control and operation is like having a superpower at your fingertips.
You can adjust the stitch width, stitch length, and pattern with ease,
allowing you to tackle any sewing project, whether you’re crafting a cozy quilt or a stylish outfit.
Stitch Width and Length Selectors
With your sewing machine’s stitch width and length selectors, you control the magic of sewing.
These features affect the finished look of your projects by adjusting stitch width impacting decorative designs, length impacting fabric type, and stitch density for strength.
For instance, when selecting a computerized sewing machine, consider the types of stitches it offers, as some models like the Janome 4120QDC Quilting Sewing Machine offer 120 built-in stitches for quilting.
Explore these adjustments for perfection.
Stitch Pattern Selector and Reverse Stitch Control
Exploring stitch width and length is just the tip of tailoring mastery.
The stitch pattern selector lets you choose decorative stitches, enhancing your creativity.
To create these stitches, you’ll need the right sewing machine thread.
Don’t overlook the reverse stitch button; it secures seams with style.
Try this table:
| Function | Purpose | Example Use |
|---|---|---|
| Stitch Selector | Choose stitch type | Decorative edges |
| Reverse Stitch | Reinforce start/end | Strong seams |
| Pattern Selection | Customize designs | Florals, geometrics |
Foot Pedal and Sewing Speed Controller
Mastering the foot pedal is like conducting an orchestra—it’s all about finesse.
Different foot pedal types help control sewing machine speed, ensuring smooth sewing through pedal sensitivity and consistent speed. Modern sewing machines, including those from Janome and Brother, often offer alternatives to traditional foot pedals, such as a start/stop button, ensuring smooth sewing through pedal sensitivity and consistent speed.
A gentle press increases speed, while easing off slows it down, essential for both vintage and antique sewing machines.
Balance this rhythm for precise stitch control and perfect sewing results.
Sewing Machine Functions and Accessories
Understanding sewing machine functions and accessories like the bobbin winder, spool pin, and thread guides, helps you achieve precise stitching and efficient sewing.
Mastering tools such as the thread cutter and removable extension table, you can enhance your sewing experience and tackle various projects with ease.
Bobbin Winder and Spool Pin
Picture your sewing machine’s bobbin winder and spool pin as a dynamic duo. To ensure they work in harmony, learning how to properly wind and insert a bobbin is essential for smooth sewing.
The spool pin holds your thread in place, preventing it from running wild.
Meanwhile, the bobbin winder expertly fills the bobbin with thread for flawless stitches.
Avoid common bobbin winder issues by regularly checking thread tension, ensuring smooth operation on your Brother sewing machine.
Second Spool Pin and Thread Guides
So, you’ve mastered bobbin winding? Great! Now, let’s look at those extra spool pins and thread guides. They’re handy for two-needle sewing projects .
Think of it like this:
- A second spool holds extra thread.
- Guides keep threads separate.
- This prevents tangles.
- It helps maintain even thread tension.
By the way, if you’re struggling with your sewing machine’s bobbin case, you can find compatible replacements and learn more about sewing machine bobbin cases here. You’ll get cleaner stitches and fewer headaches!
Thread Cutter and Removeable Extension Table
With a sewing machine, the thread cutter saves time by neatly snipping threads, reducing tangles.
The removable extension table offers extra workspace for larger projects, attaching easily to machines like the Husqvarna Viking.
This accessory provides flexibility, switching to free-arm mode for tight areas, simplifying tasks like sewing sleeves or hems, and ensuring a smoother fabric flow.
Upper Thread and Needle Components
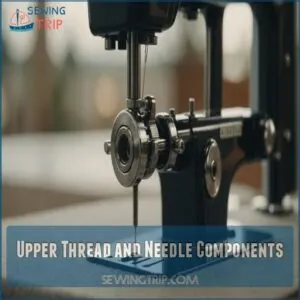
When you explore the upper thread and needle components of your sewing machine, you’ll discover two important parts: the needle clamp screw and the needle plate.
These elements work together to secure the needle firmly and guide the fabric smoothly, ensuring precise stitching every time.
Needle Clamp Screw and Needle Plate
Among sewing machine accessories, the needle clamp screw plays a pivotal role in securing your needle, ensuring it stays put while stitching.
A loose needle clamp screw can also lead to issues like a dropping sewing needle, so you need to tighten it securely.
You’ll encounter various needle types and sizes, making needle changes simple with a simple twist.
Don’t forget about the needle plate—it’s designed with precise openings to guide your needle and hold fabric steady.
Maintain proper plate alignment and remember, screw tightening is key to preventing wobble.
Regularly check these components to keep your projects running smoothly, avoiding any sewing hiccups along the way.
Throat Plate and Seam Measurement
After mastering the needle clamp screw and needle plate, it’s time to explore the throat plate.
This metal piece under the needle isn’t just there for show—it’s engraved with throat plate markings, very important for your seam allowance guide and accurate stitching.
These lines help you measure fabric properly, ensuring your seams are spot-on every time.
Think of it as a built-in ruler for your sewing machine.
Investing in understanding this simple accessory can transform your sewing precision, allowing each piece to look sharp and professional.
It’s like having a trusty sidekick on your sewing journey!
Lower Thread and Bobbin Components
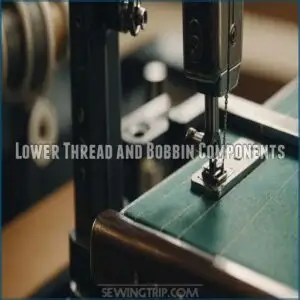
In this section, you’ll learn about the bobbin and bobbin case, important components for managing the lower thread in your sewing machine.
These parts work together to create smooth stitching.
The bobbin cover plate and slide plate make your machine’s inner workings easily accessible.
Bobbin and Bobbin Case
Think of it this way: your sewing machine’s lower thread is as essential as a car’s engine. The bobbin and bobbin case work together to keep stitches balanced and smooth. You’ll find various bobbin types, each suited for different machines. When winding a bobbin, make sure tension is just right to avoid knotty disasters. Bobbin cases hold the bobbin securely, and correct placement is key for flawless sewing.
Here’s a quick guide:
- Bobbin types: Class 15, L-style, etc.
- Winding a bobbin: Tension matters
- Bobbin tension: Balance is important
- Bobbin case types: Metal, plastic
- Placement tips: Follow manual carefully
Bobbin Cover Plate and Slide Plate
That little metal door, the bobbin cover plate, protects your bobbin.
Its removal is usually straightforward; simply slide the plate open for bobbin access.
The slide plate’s function is to provide access to the bobbin case.
Cleaning it’s essential for smooth sewing.
Proper bobbin case placement is key to preventing thread jams.
Here’s a helpful guide:
| Feature | Description |
|---|---|
| Bobbin Cover Plate | Protects the bobbin; easily removed. |
| Slide Plate | Allows access to the bobbin and case. |
| Bobbin Access | Sliding the plate reveals the bobbin. |
| Bobbin Case Placement | Correct placement prevents jams. |
| Cover Plate Cleaning | Regular cleaning helps the machine run smoothly. |
Remember, gentle handling is key!
Presser Foot and Feed Dog Components
In a sewing machine, the presser foot and feed dogs are your best friends for keeping fabric stable and moving smoothly.
They work together to apply pressure and guide your fabric evenly as you create precise stitches.
Presser Foot Lever and Presser Foot Types
Understanding presser foot lever and types is key to mastering sewing.
After inserting the bobbin, your focus shifts to selecting the right presser foot.
The lever lifts and lowers the foot, allowing fabric to glide smoothly.
Choose from:
- Zipper foot: Perfect for stitching close to edges.
- Walking foot: Ensures even feeding for quilts or thick layers.
- Buttonhole foot: Creates flawless buttonholes.
- Blind hem foot: Hides stitches for a seamless finish.
Always check foot compatibility with your machine.
Proper maintenance and adjustments will extend your presser foot’s life, making sure flawless sewing every time.
Feed Dog Position Lever and Feed Dog Function
Every sewing enthusiast should understand that the throat plate sits below the needle and has guidelines for seam allowances, as seen in various sewing machine components. Every sewing enthusiast should know the feed dog position lever is essential for controlling fabric movement during stitching.
By adjusting the lever, you can manage feed dog types and switch between normal and drop feed sewing modes, enabling free motion sewing.
If you’re facing feed dog issues, such as them not raising, check for lint or consider a feed dog adjustment.
Remember, a simple stitch can re-engage them once the lever is set correctly.
Mastery over this small component can greatly enhance your sewing efficiency and creativity.
Stitch Selection and Control
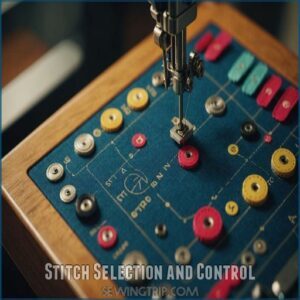
In sewing, stitch selection and control are key for creating different patterns and securing your work.
You’ll find tools like the stitch selection button, which lets you pick from various patterns, and the reverse stitch button, essential for locking stitches and preventing unraveling.
Stitch Selection Button and Stitch Chart
Ever find yourself puzzled by the various components of a sewing machine, such as the stitch selector function, the stitch selection button on your sewing machine?
Explore using the stitch chart to discover: 1. Stitch Types: Basic to decorative stitches.
- Understanding Chart: Visual guide for options.
- Choosing Stitches: Finds the perfect match for your project.
- Decorative Stitches: Add flair effortlessly.
Mastering this skill will also help when working on projects like sewing buttonholes, where choosing the right buttonhole style is important – learn more about how to do buttonholes.
Master these, and your creativity will soar!
Stitch Length and Width Buttons
Once you’ve picked a stitch pattern, fine-tuning it with the stitch length and width buttons is next.
Adjust stitch length to fit fabric types—longer for heavy materials, shorter for delicate ones.
Stitch width determines how wide the stitch spreads across the fabric, perfect for decorative stitches or buttonhole settings.
Master these settings to enhance your sewing projects.
Reverse Stitch Button and Locking Stitches
Now that you’ve mastered stitch length, let’s explore the reverse stitch button. It’s your secret weapon for securing seams and preventing unraveling! A few reverse stitches at the beginning and end lock everything in place.
The stitch length impacts the strength of this lock.
Experiment with different stitch types to find what works best for you.
- Securing seams
- Preventing unraveling
- Reverse stitch button uses
- Stitch length impact
- Types of stitches
Advanced Sewing Machine Features
If you’re ready to take your sewing skills up a notch, advanced features like the automatic thread cutter and needle threader will transform your experience.
They’ll save you time and offer convenience, especially when adjustable presser foot pressure and a handy free arm are also in play.
Automatic Thread Cutter and Automatic Needle Threader
Imagine reducing sewing hassle with the automatic thread cutter.
This nifty feature saves time by neatly trimming threads, helping you focus on your project without interruptions.
Meanwhile, the automatic needle threader eliminates the squinting challenge of threading needles, offering a smoother start to sewing sessions.
These convenience features can boost your user experience a great deal.
| Feature | Benefit |
|---|---|
| Automatic Thread Cutter | Saves time, reduces hassle |
| Automatic Needle Threader | Eases threading, quick setup |
| Convenience Features | Enhances user experience |
| Machine Comparison | Promotes informed choices |
Both features contribute to a well-rounded, efficient sewing machine.
Adjustable Presser Foot Pressure and Free Arm
If you’ve mastered automatic threading, it’s time to explore adjustable presser foot pressure and free arm benefits.
By controlling pressure, you tailor the machine’s grip to the fabric type, ensuring smooth, even stitches on delicate silks or hefty denim.
This is particularly important when working with tubular pieces, where a machine’s free arm feature can greatly simplify sewing tasks like hemming and attaching cuffs, as seen in specialized free arm machines.
Pressure control becomes your best friend in sewing techniques that demand precision.
The free arm, handy for hemming pants or crafting small items, allows access to tight areas, making even tricky tasks more manageable.
These features offer tips and tricks that elevate your sewing craft, enhancing versatility and control.
Using Your Sewing Machine Effectively
To use your sewing machine effectively, focus on several key aspects for a smooth experience. Here’s a quick guide:
- Fabric types: Select suitable fabrics for different sewing techniques to enhance quality and ease.
- Maintenance tips: Regularly clean and oil your machine to avoid common troubleshooting issues like jamming or skipping stitches.
- Project planning: Plan each sewing project with careful measurements and requirements to make sure you have success. Familiarize yourself with each component and its functions to boost your sewing mastery.
Frequently Asked Questions (FAQs)
How do you use a sewing machine?
First, thread your machine correctly.
Then, place your fabric under the presser foot, lower it, and gently push the foot pedal.
Keep your hands guiding the fabric, watching the needle.
You’ve got this!
How do I learn to sew a sewing machine?
Don’t worry about making mistakes; even seasoned sewers started somewhere.
Grab a sewing machine, some scrap fabric, and a beginner-friendly pattern.
Online tutorials, like the Simple Sewing Series, make learning accessible and engaging.
Why should you learn the different parts of a sewing machine?
Understanding your sewing machine’s parts boosts your confidence and control, making sewing smoother and more efficient.
You’ll troubleshoot issues faster, improve maintenance skills, and tackle projects with ease—a bit like driving a familiar car.
What are the most important parts of a sewing machine?
Ever wonder why the needle reigns supreme in sewing machines?
It’s because stitching relies heavily on it, but don’t forget the bobbin, tension regulator, and presser foot.
Each part works together for seamless sewing.
What are the 20 parts of a sewing machine?
To master your sewing machine, get familiar with its 20 parts: thread guide, bobbin winder tension disc, tension control dial, stitch length dial, stitch selector dial, spool pins, bobbin winder, handwheel, power source, and more.
Get familiar with the 20 parts of your sewing machine.
What are the 27 parts of a sewing machine with pictures?
Can you name all the various components like the bobbin case and thread guides understanding a sewing machine’s parts, and all 27 parts of a sewing machine?
From the Balance Wheel to the Bobbin Case, familiarize yourself with essential components like the Needle, Presser Foot, and Tension Discs, to master your sewing skills.
What are the accessories with my sewing machine?
Your sewing machine’s included accessories vary by model. Common items include different presser feet, needles, bobbins, a screwdriver, and possibly an extension table. Check your owner’s manual for specifics.
What are the upper and lower parts of a sewing machine?
Picture your sewing machine, a marvel of engineering.
The upper part includes the head, arm, and bed, controlling needle action.
Meanwhile, the lower part houses the band wheel and treadle, translating foot action into stitching magic.
How do I clean a sewing machine?
Start by unplugging your sewing machine, then remove the needle, presser foot, and bobbin.
Regular cleaning helps your machine sew smoothly and last longer.
Use a small brush to eliminate lint from the bobbin case and shuttle area.
What oil to use for my sewing machine?
Use sewing machine oil, preferably a lightweight, colorless oil like Juki Defrix or Goldstar, which prevents rust and oxidation.
Avoid using WD-40—it’s not meant for sewing machines and can cause unwanted residue buildup.
How to fix a jammed sewing machine?
First, power off your machine to prevent further damage.
Check your needle for bends, and make sure the thread isn’t tangled.
Remove any visible clogs gently, re-thread the machine, then resume sewing carefully.
Is it necessary to regularly service a sewing machine?
Regular sewing machine servicing helps keep it running smoothly, preventing wear and tear akin to car maintenance.
Professional service is recommended annually.
You can also perform routine cleaning, oiling, and listening for unusual noises yourself to keep it running smoothly.
How to troubleshoot common sewing machine problems?
Picture troubleshooting sewing machines as detective work.
Start by re-threading top and bobbin threads, ensuring correct tension.
Check the needle’s condition, listen for noises, and clean lint.
These steps usually solve common issues.
Conclusion
Now you’re ready to tackle any sewing project!
Remember, understanding the parts of a sewing machine—from the bobbin winder to the feed dogs—is key.
This knowledge, gleaned from these tutorials, parts of a sewing machine will empower you.
Think of it like learning the alphabet before writing a novel.
Mastering your machine’s functions opens up creativity.
Soon, you’ll be whipping up masterpieces, even a 1950s-style poodle skirt, with confidence.
Regular maintenance and practice will keep your sewing machine running smoothly.
So grab your fabric, and let’s sew!

