This site is supported by our readers. We may earn a commission, at no cost to you, if you purchase through links.
The metallic sequins dull your scissors, snap needles like twigs, and create bulk in seam allowances that makes your stitches look uneven. Your sewing machine struggles to feed the fabric smoothly, causing puckering and bunching that ruins the elegant drape you’re after.
Traditional marking methods either damage the delicate sequins or disappear on the shimmery surface, making pattern transfer nearly impossible.
The secret lies in using heavy-duty needles, removing sequins from seam lines, and mastering specialized techniques that pros use to overcome these challenges and achieve a professional finish with elegant drape and smooth stitches, making the project a successful and frustrating experience less likely.
Table Of Contents
- Key Takeaways
- Challenges of Sewing With Sequin Fabric
- Pattern Selection for Sequin Fabric
- Cutting and Preparing Sequin Fabric
- Sewing Machine Tips for Sequin Fabric
- Finishing Hems and Necklines
- Problems You Can Expect When Sewing With Sequin Fabric
- How to Sew Sequin Fabric Solving All These Problems
- Maintaining Your Sewing Equipment
- Tips for Sewing With Sequin
- Frequently Asked Questions (FAQs)
- Conclusion
Key Takeaways
- You’ll need heavy-duty needles (size 14-16) and keep extras handy, since sequins dull and break needles frequently, making replacements essential for project success.
- Remove sequins from seam allowances before cutting to prevent scissor damage, needle breaks, and bulky seams that create uneven stitching and unprofessional results.
- Choose simple patterns with minimal seams to avoid wrestling with sequin bulk and complexity – skip intricate details like darts or princess seams that fight the fabric’s natural properties.
- Add lightweight lining for comfort and stability to prevent skin irritation from scratchy sequin edges while reinforcing the fabric and improving drape quality.
Challenges of Sewing With Sequin Fabric
Sewing with sequin fabric presents unique challenges that can frustrate even experienced sewists.
You’ll encounter issues like needle breakage, scissor damage, fabric bunching, and marking difficulties that require specific techniques to overcome, including dealing with sequin fabric.
Needle and Scissor Damage
Needle breakage and scissor dulling are common challenges when working with sequin fabric.
The metal edges of sequins can quickly damage your equipment if you’re not prepared.
- Use size 14-16 heavy-duty needles – Sharp, denim-weight needles handle sequin thickness without bending
- Keep extra needles handy – Expect frequent needle breakage and switch to fresh ones immediately
- Reserve old scissors for sequin cutting – Dedicate worn fabric scissors to protect your good ones from dulling
- Remove sequins along cutting lines – Clear sequins from scissor paths to prevent damage and guarantee clean cuts
Tricky Marking on The Fabric
Sequin fabric’s sparkly surface creates a minefield for traditional marking methods.
Chalk vs. pen becomes irrelevant when neither shows up clearly against reflective sequins.
Smart sewers mark the backside instead, using tailor’s chalk or water-soluble markers.
Always do scrap testing first – some marking tools damage delicate sequins.
For precise placement, use tracing stitches or tailor’s tacks for temporary marks that won’t interfere with your fabric preparation.
Elasticity and Bunching
Working with stretchy sequin fabric can feel like wrestling with a sparkly snake that won’t stay put. When your fabric has elasticity, it creates sequin fabric issues that’ll test your patience and skills.
Here’s how to tackle fabric feeding issues and elasticity and bunching problems:
- Use a walking foot or Teflon foot – These attachments provide better needle walking control and prevent fabric from shifting under the presser foot
- Apply gentle fabric stretching – Stretch the material slightly as you sew, using consistent tension to maintain even fabric feeding
- Switch to zigzag stitching – A narrow zigzag accommodates fabric movement better than straight stitches, reducing bunching
- Master tension adjustment – Lower your machine’s tension settings to prevent thread pulling and fabric puckering
- Consider non-stretch alternatives – When possible, choose stable sequin fabrics to avoid elasticity challenges entirely
These sewing sequins solutions help you maintain control over unruly fabric. Adding a lining provides extra stability, while proper seam finishes guarantee your sparkly creation looks professional. Remember, patience pays off when dealing with sequin sewing problems.
Fusible Interfacing Issues
Beyond elasticity challenges, fusible interfacing creates another headache when working with sequin fabric.
Heat from your iron can spell disaster for delicate sequins.
When you apply fusible interfacing to heavily sequined areas, you’re basically playing with fire.
The adhesive can fail under the fabric’s weight, while excessive heat melts or warps sequins.
Your gorgeous sparkly material becomes stiff and loses its natural drape.
| Problem | Cause | Solution |
|---|---|---|
| Adhesive Failure | Heavy sequin weight | Use sew-in stabilizers instead |
| Sequin Damage | Excessive iron heat | Hand-baste for reinforcement |
| Fabric Distortion | Uneven heat application | Pin and baste seam lines carefully |
| Stiffness Issues | Thick interfacing layers | Choose lightweight alternatives |
| Rough Texture | Fused backing shows through | Skip fusible on sequined areas |
Alternative stabilizers work better for sewing sequin fabric.
Lightweight sew-in options provide necessary support without the risks.
You’ll maintain your fabric’s beautiful appearance and avoid common fusible interfacing issues that plague sequin fabric projects.
Bulkiness of Seam Allowances
Sequin fabric’s bulk creates seam allowance challenges that’ll make your garment look lumpy if you don’t tackle them properly.
The extra thickness from sequins stacking up in seams can turn even simple designs into puffy disasters.
Here’s how to tame those bulky seams:
- Seam grading – Cut each seam allowance layer at different lengths to create a graduated effect
- Trimming seams close to the stitching line reduces overall bulk substantially
- Lightweight linings add structure while keeping your garment comfortable against skin
- Hand-sewing seams gives you better control over sequin placement and reduces machine stress
Smart sewers know that managing bulkiness of seam allowances is vital for professional-looking results when sewing sequin fabric.
Pattern Selection for Sequin Fabric
Selecting the right pattern is essential when working with sequin fabric, as complex designs can turn your glamorous project into a frustrating nightmare.
You’ll want to choose simple patterns with minimal seams and avoid intricate details that fight against the fabric’s natural bulk and sparkle.
Choosing Simple Patterns
When working with sequin fabric, your pattern choice can make or break your sewing success.
Choose patterns featuring simple silhouettes with minimal seams to accommodate the fabric’s bulk and avoid common sewing problems.
Look for designs that work with sequin alignment rather than against it:
- Flowing A-line dresses that let sequins catch light naturally
- Straight-cut tops that showcase the fabric’s inherent glamour
Skip patterns with darts, princess seams, or complex construction details.
These create sequin dressmaking issues and fighting with fabric properties that want to lie flat.
Avoiding Patterns With Intricate Details
Complex patterns create headaches when sewing sequin fabric challenges arise.
You’ll face sequin dressmaking issues with princess seams, darts, and intricate details that don’t play well with bulky sequined surfaces.
Problems with sewing sequin fabric multiply when choosing patterns with unnecessary complexity.
Instead, embrace choosing simple patterns that showcase your fabric’s natural glamour while minimizing construction stress.
| Avoid These Details | Why They’re Problematic | Simple Alternative |
|---|---|---|
| Princess seams | Creates bulky intersections | A-line or shift silhouettes |
| Darts and pleats | Difficult to press and finish | Relaxed, flowing shapes |
| Multiple pockets | Adds unnecessary bulk | Clean, pocket-free designs |
| Collar construction | Complex layering issues | Simple neckline treatments |
| Button plackets | Challenging to execute neatly | Hidden closures or none |
Simple pattern benefits become obvious when you consider fabric property considerations.
Minimal seams preferred approach reduces bulk while maintaining consistent color direction.
Sequin alignment needs dictate your pattern choice – complex details fight against the fabric’s natural drape and shimmer.
Maintaining Sequin Alignment
When sewing sequin fabric, you’ll need to cut all pattern pieces in the same direction to maintain consistent shimmer.
Sequins catch light differently depending on their angle, so directional cutting guarantees uniform placement across your garment.
This sequin alignment technique prevents mismatched patches that can ruin your project’s polished appearance.
Considering Sequin Placement
When selecting patterns for sequin fabric, you’ll want to think strategically about where those sparkly elements will land on your finished garment. The placement can make or break your project’s visual impact.
Consider these key factors for effective sequin placement:
- Sequin Direction – Match your pattern pieces to the fabric’s natural sequin flow for consistent shimmer
- Visual Balance – Position seams to avoid awkward sequin breaks that disrupt the overall design
- Strategic Placement – Choose patterns that highlight sequins in flattering areas while minimizing bulk in less favorable spots
Sequin density varies across different fabrics, so pattern matching becomes essential for maintaining professional results. Some areas might need fewer sequins removed during construction, while others require more aggressive sequin application techniques.
Your pattern choice should work with these natural variations rather than fighting against them, helping you avoid common sequin embellishment problems before they start.
Compatibility With Sequin Fabric
Beyond sequin placement, you’ll need patterns that work with your fabric’s unique characteristics. Not every design will cooperate with those shimmery discs.
Choose patterns that match your skill level and the fabric’s demands. Here’s what matters most:
- Fabric Weight: Heavy sequin fabrics need sturdy pattern pieces with reinforced seam areas to prevent tearing
- Sequin Density: Dense sequin application techniques require patterns with fewer seams to minimize bulk and complexity
- Design Complexity: Simple silhouettes work better than intricate details that’ll fight against sequin embellishment problems
Match your pattern to reality, not wishful thinking. A beginner tackling complex pattern alterations with tricky sequin fabric care requirements is asking for trouble. Start simple and let your skills grow with your ambition.
Cutting and Preparing Sequin Fabric
Cutting sequin fabric requires special preparation to protect both your tools and the delicate sequins from damage.
You’ll need to remove loose sequins along cutting lines and use dedicated scissors to prevent dulling your good ones while ensuring clean, precise cuts.
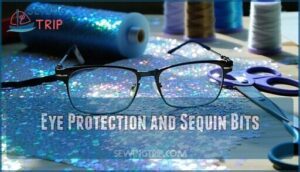
Eye Protection and Sequin Bits
When cutting sequin fabric, flying sequin projectiles can pose serious risks to your vision.
Tiny sequins can launch like glittering missiles—always shield your eyes before you cut
These tiny, sharp-edged discs become dangerous missiles during cutting and handling.
- Safety Glasses: Always wear safety goggles or protective eyewear to shield against sequin projectiles that break loose during cutting
- Workspace Shielding: Position your cutting area away from others and consider using a cutting mat to contain loose sequins
Eye protection isn’t optional when working with sequins—these metallic fragments can cause scratches or serious injury.
You can find specialized sewing protective eyewear for this purpose.
Keep first aid supplies nearby and maintain clear sight lines while cutting.
Vision protection should be your top priority before making any cuts in sequin fabric.
Removing Sequins or Beads for Cutting
When dealing with cutting lines, you’ll need to clear the path for your scissors. Start by gently removing sequins along the cutting line using small scissors or a seam ripper. This prevents bulk and protects scissors from damage.
Work slowly to avoid tearing the base fabric. Save removed sequins for later reuse – they’re perfect for patching gaps or reinforcing areas. Focus on the seam allowance too, clearing away any loose sequins that might interfere with your cutting techniques.
A seam ripper’s versatility makes it an essential tool. This sequin removal step guarantees clean cuts and preserves your tools, ensuring a successful outcome with minimal damage.
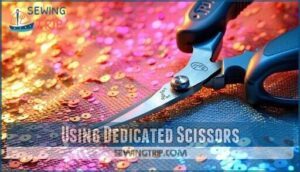
Using Dedicated Scissors
Save your good scissors’ blade sharpness by using dedicated ones for sequin fabric.
Sequins quickly dull regular scissors, reducing their scissors lifespan substantially.
Before cutting techniques begin, remove loose sequins along your cutting line to prevent damage.
Cut in the fabric direction to minimize sequin loss.
These sequin sewing tips protect your tools while ensuring clean cuts.
Consider purchasing specialized cutting tools for this purpose.
Keep old scissors specifically for sequin project difficulties—your precision shears will thank you later.
Adding a Lining for Strength and Comfort
When you’ve dealt with dedicated scissors for cutting sequin fabric, adding a lining becomes your next smart move for comfort and durability.
Lining benefits transform your sequin project from scratchy to spectacular.
Adding a lining provides:
- Fabric reinforcement that prevents sequins from sagging or pulling away from the base material
- Itch prevention by creating a barrier between rough sequin edges and your skin
Choose lightweight lining fabrics like cotton batiste or silk for bulk reduction.
Your nonirritating lining should complement the sequin fabric’s drape without adding unnecessary weight.
This stability addition makes sewing sequin fabric manageable while ensuring your finished garment feels as good as it looks.
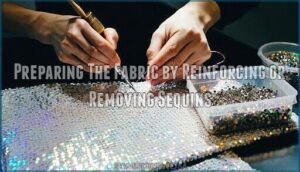
Preparing The Fabric by Reinforcing or Removing Sequins
Once you’ve added lining, focus on preparing the fabric by reinforcing or removing sequins strategically.
Remove sequins along seam allowances using a seam ripper to prevent needle damage and reduce bulk. Save removed sequins for later use in sequin salvage—you’ll need them for gaps.
Use reinforcement stitching around remaining sequins near seam lines to prevent detachment during sewing. To achieve accurate results, consider pre-washing the fabric before cutting to ensure the best outcome with your sewing projects.
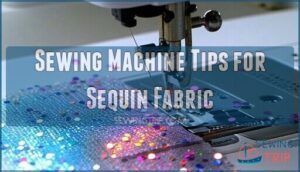
Sewing Machine Tips for Sequin Fabric
Your sewing machine needs special adjustments to handle sequin fabric’s unique challenges without breaking needles or damaging your equipment.
The right needle, thread, and technique settings will save you hours of frustration and costly repairs.
Choosing The Right Thread
Choose polyester or nylon thread for sequin fabric—cotton simply won’t cut it.
These synthetic materials offer superior thread strength and sequin compatibility that cotton lacks.
Your thread selection matters because weak thread breaks under sequin weight.
Match thread weight to your fabric density: heavier threads for thick sequins, lighter for delicate ones.
Color matching helps hide any visible stitching imperfections, ensuring a clean finish with sequin compatibility.
Selecting The Appropriate Needle
When working with sequin fabric, proper needle selection prevents costly breaks and fabric damage.
Match needle types to your fabric’s specific requirements for smooth stitching.
Consider these essential needle specifications:
- Size 14-16 for standard sequin fabric thickness
- Denim needles for thick, dense sequin applications
- Sharp needles for smaller, delicate sequins
Choose titanium needles for extended durability, as they resist bending better than standard options.
Ballpoint needles work well with stretch sequin fabrics, reducing snags and preventing sequin damage during stitching.
Keeping Extra Needles on Hand
Before sequin needle breaks derail your project, stock up on backup needles in various sizes.
Needle breakage causes include hitting thick sequins and dull points wearing against metallic surfaces.
Store different needle sizes—14, 16, and 75/11—in organized containers for quick access.
Recognizing dull needles early prevents fabric damage.
Different brands perform better with specific sequin materials, so keep variety on hand for superior results and to handle various sequin materials.
Adjusting Stitching Length and Needle Sharpness
Beyond keeping spare needles handy, you’ll need proper stitch settings for sequin success.
Set a longer stitch length—the ideal length reduces thread stress and prevents sequin needle breaks.
Check needle sharpness frequently since dull needles cause fabric feed problems and seam quality issues.
Sharp specialized needles slice cleanly through sequins, while damaged ones snag and create uneven stitches, so replace needles at the first sign of needle damage to maintain consistent results.
Tips for Sewing Elastic Sequin Fabric
Mastering elastic sequin fabric requires finesse—these materials stretch unpredictably and challenge even experienced sewers.
Here’s your roadmap to success:
- Use a stretch needle (size 75/11) with high-quality polyester thread to handle elasticity issues without breaking
- Apply a narrow zigzag stitch to accommodate fabric tension while maintaining seam flexibility
- Install a walking foot for even feeding, preventing bunching and maintaining consistent sequin alignment
Keep extra sewing machine needles handy—sequins dull them quickly.
Test your settings on scraps first.
Finishing Hems and Necklines
When you’re finishing hems and necklines on sequin fabric, standard hemming techniques won’t work because the added bulk creates lumpy, uneven edges.
You’ll need to use bias tape or hand-sewn methods to create clean, professional-looking finishes that don’t compete with your sequins for attention, allowing for a more polished and refined look with professional-looking finishes.
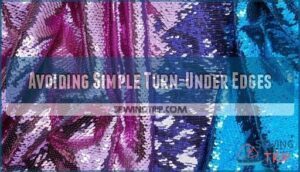
Avoiding Simple Turn-Under Edges
When you’re finishing sequin fabric edges, resist the urge to simply fold them under like regular fabric.
This approach creates bulk and distorts the sequins. Instead, you’ll need proper finishing techniques that preserve the fabric’s sparkle while creating clean edges.
| Avoid | Use Instead |
|---|---|
| Simple turn-under hems | Bias Tape finishing |
| Folded neckline edges | Facing Application methods |
| Raw edge shortcuts | Serged Edges or Lining Options |
These hemming techniques and neckline finishing methods prevent puckering while maintaining professional results with your seam allowances intact.
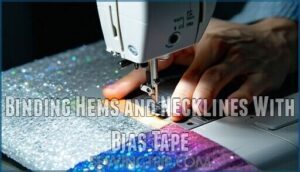
Binding Hems and Necklines With Bias Tape
Bias tape transforms rough sequin fabric edges into professional, polished finishes. This lightweight strip wraps around raw edges, creating clean barriers between your skin and scratchy sequins.
Here’s your step-by-step approach for flawless bias tape application:
- Choose lightweight bias tape types – Cotton or polyester work best to avoid adding bulk to already thick sequin fabric
- Create mitered corners by folding tape at 45-degree angles for crisp, professional-looking intersections
- Secure tape edges with small hand stitches every few inches to prevent shifting during wear
- Pin carefully around curves and corners before stitching to maintain smooth, even placement
- Press gently with a pressing cloth to avoid melting or damaging delicate sequins underneath
When sewing sequin fabric, bias tape eliminates the need for traditional hemming techniques that would create uncomfortable bulk. Start by removing sequins from your seam allowance, then attach the tape using a straight stitch. This neckline finishing method works perfectly for both curved and straight edges, giving you clean finishes without wrestling with turned-under hems that bunch awkwardly.
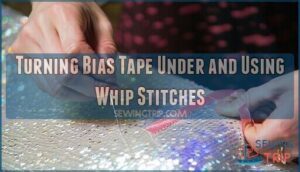
Turning Bias Tape Under and Using Whip Stitches
After securing your bias tape with careful stitching, you’ll want to create a flawless finish using whip stitches.
Fold the bias tape over the raw edge, creating a clean sandwich that encases the sequin fabric completely. Use small, diagonal whip stitches to secure both layers, keeping your needle movements gentle to avoid catching sequins.
These hand-sewing techniques work perfectly for seam allowances on sequin fabric. Choose bias tape types that complement your project weight—cotton works well for lightweight sequin fabrics, while silk bias tape suits heavier materials.
This securing bias tape method guarantees clean edge finishes without bulk.
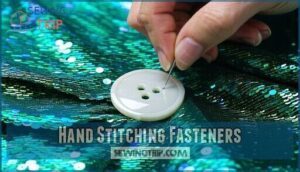
Hand Stitching Fasteners
When attaching fasteners like hooks and eyes or buttons to sequin fabric, you’ll need sharp embroidery needles and heavy-duty polyester thread.
Remove sequins along attachment areas first to prevent interference with your stitching. Place fasteners near seams where sequin density is lower for easier sewing sequins by hand.
Add backing fabric under fastener locations for reinforcement methods that prevent tearing. For garment security, functional fasteners are essential.
Use several passes through each fastener hole, securing with tight knots after each pass. This fastener attachment technique guarantees your closures stay put without damaging the delicate sequined surface.
Machine Stitching or Hand Stitching for Zippers
When installing zippers on sequin fabric, you’ll face a choice between machine stitching and hand stitching techniques.
Machine stitching offers superior stitching strength and durability, making it ideal for high-stress areas.
Use a size 14-16 needle and adjust tension settings to prevent sequin damage.
However, hand stitching provides better control and aesthetic appeal, reducing time investment concerns while ensuring precise zipper installation on delicate sewing sequin fabric, which requires careful handling to maintain its quality and delicate nature.
Problems You Can Expect When Sewing With Sequin Fabric
When sewing sequin fabric, you’ll face predictable challenges that can derail your project.
Needle damage tops the list—sequins dull needles 50% faster than cotton, causing frequent breakage and skipped stitches. Sequin loss becomes inevitable as beads catch on presser feet or fall during handling.
The itchiness factor kicks in when rough sequin edges scratch skin without proper lining. Fabric snags occur easily on jewelry or fingernails, creating pulls.
Uneven shimmer results from misaligned sequins during cutting or sewing. Thread tension requires constant adjustment to prevent bunching along seams.
How to Sew Sequin Fabric Solving All These Problems
Now you’ll tackle the trickiest part of working with sequin fabric – actually sewing it without breaking your machine or losing your sanity.
These proven techniques address every common problem from needle breaks to fabric bunching, turning your sequin project from a nightmare into a manageable task.
Choosing Patterns for Sequin Fabric
Pattern selection makes or breaks your sequin fabric project.
Choose simple patterns with minimal seams to avoid sequin bulkiness and reduce complexity.
Skip intricate details like princess seams, darts, or gathers that create unnecessary bulk.
Focus on pattern compatibility by selecting designs that maintain sequin alignment and fabric flow.
Simple designs showcase the fabric’s natural glamour while ensuring easier construction and better results, which is crucial for a successful sequin fabric project.
Marking on Sequin Fabric
Accurate marking on sequin fabric starts with scrap testing your marking tools.
You’ll want water-soluble pens or tailor’s chalk for temporary marks that won’t damage sequins.
Mark pattern pieces on the fabric’s wrong side using pins and paper patterns.
For tricky marking on the right side, use tracing stitches or tailor’s tacks around darts and design details.
This careful approach prevents sequin damage while ensuring precise pattern marking for professional results.
Cutting Sequin Fabric
Before cutting into your precious sequin fabric, remove loose sequins along cutting lines to protect your scissors from damage. A rotary cutter works better than traditional scissors for clean cuts through this tricky material.
Here’s your cutting game plan:
- Use dedicated scissors – Reserve old, sharp scissors specifically for sequin fabric to avoid dulling your good ones
- Follow sequin directionality – Cut all pattern pieces in the same direction to maintain consistent shimmer and color
- Apply pattern weights – Skip pins and use weights instead to avoid snagging delicate sequins during layout
- Remove sequins strategically – Clear sequins from seam allowances on dense fabrics to reduce bulk and prevent needle breakage
- Cut single layers – Work with one fabric layer at a time to guarantee uniformity and prevent shifting during cutting techniques
Preparing The Fabric for Stitching
Once you’ve mastered cutting sequin fabric, preparing it for stitching requires strategic planning.
Remove sequins from seam allowances to prevent needle breakage and bulk. Add stabilizing fabric or lining for strength and comfort.
| Preparation Step | Method | Benefit |
|---|---|---|
| Sequin Removal | Use seam ripper along stitch lines | Prevents needle damage |
| Stabilizing Fabric | Add lightweight lining underneath | Reduces stretch and bulk |
| Marking Methods | Water-soluble pen on fabric back | Avoids sequin damage |
Stitching Techniques for Sequin Fabric
Now that you’ve prepared your sequin fabric properly, you’ll need specific stitching techniques for sequin fabric to handle these delicate materials successfully. Slow sewing becomes your best friend when working with sequins—rushing leads to broken needles and damaged embellishments.
Use your hand wheel to manually control challenging areas where sequins cluster thickly.
Sewing machine sequins requires strategic adjustments to prevent catching and tearing:
- Install a walking foot to feed multiple layers evenly through your machine
- Practice fabric guiding with gentle pressure to avoid sequin snags
- Lengthen your stitch to 3-4mm for better penetration and less stress
- Check needle sharpness frequently—dull needles cause skipped stitches
Patience needed here pays off tremendously. These sewing sequins tips prevent the frustration of repairing damaged seams later.
Maintaining Your Sewing Equipment
When you’re sewing with sequin fabric, your equipment takes a beating from those sharp, metallic discs.
You’ll need to stay on top of maintenance to keep your sewing machine running smoothly and avoid costly repairs.
Cleaning and Replacing Needles
Needle lifespan shortens dramatically when working with sequin fabric due to constant contact with abrasive surfaces.
Replace your sewing machine needles after every project or when you notice sequins snagging or skipped stitches.
Different needle types require specific cleaning frequency—heavy-duty needles handle sequins better but still need regular replacement.
Preventative maintenance includes wiping needles clean between fabric layers to remove glue residue and sequin particles.
Keep broken needles as reminders that proper needle selection and timely sewing machine maintenance prevent costly repairs and guarantee smooth stitching through challenging materials like sequin fabric, which can be very abrasive.
Keeping Spare Needles on Hand
When sewing sequin fabric, you’ll quickly discover that broken needles aren’t just occasional hiccups—they’re inevitable companions in your crafting journey.
Smart sewers stock up on multiple needle sizes and brands before starting any sequin project.
Needle breakage causes range from dulled tips hitting hard sequins to bending under fabric tension.
Keep size 14 and 16 needles readily available, plus a few size 70 options for delicate work.
Store them in labeled containers for quick access, which prevents frustrating mid-project stops and keeps your sewing sequins tutorial flowing smoothly from start to finish.
Removing Loose Sequins and Glue Residue
When sequin detachment occurs during sewing, tweezers provide precise removal without fabric damage.
Use seam rippers for tightly attached sequins, then vacuum loose bits with a mini nozzle.
For glue residues on sequin fabric, apply rubbing alcohol with cotton swabs or use textile-safe adhesive removal solvents.
Clear seam allowances thoroughly before stitching to prevent needle breaks. Masking tape collects remaining sequin pieces effectively.
Prevention methods include designating specific tools for sequin work and regular workspace cleaning to maintain equipment performance.
Gentle Hand Washing or Spot Cleaning
Once you’ve removed glue residue from your equipment, maintaining your sequin fabric through proper cleaning becomes your next priority. Gentle Hand Washing or Spot Cleaning keeps your projects looking pristine without compromising sequin security.
Always use cool water temperature and mild detergent choice when cleaning sequin fabric. Hot water can loosen adhesive and cause sequin damage repair issues later.
For fabric care, focus on these key approaches:
- Stain Removal: Dab gently with a soft cloth rather than rubbing vigorously
- Drying Methods: Lay flat on towels to prevent sequin shifting or falling off
- Fabric Handling: Support the weight when lifting wet garments to avoid stretching
Spot cleaning works best for small areas, while hand washing suits larger pieces when sewing sequin fabric projects require thorough cleaning.
Proper Storage of Sequin Fabric
Beyond gentle cleaning, storing your sequin fabric properly protects your investment and keeps those sparkly pieces ready for future projects.
Smart storage prevents heartbreak when you discover damaged sequins months later.
Store your sequin fabric using these protective methods:
- Wrap in acid-free tissue paper – Creates a barrier against humidity and environmental damage
- Roll instead of folding – Prevents permanent creases and sequin breakage along fold lines
- Choose a cool, dry place – Protects against moisture damage and prevents sequin tarnishing
- Add moth prevention sachets – Guards against fabric-eating insects that love natural fibers underneath sequins
Keep your fabric away from light exposure and maintain humidity control in your storage area.
To maintain fabric integrity, consider controlling temperature and humidity in your storage area.
Acid-free storage boxes work perfectly for long-term fabric care, ensuring your sequin treasures stay pristine.
Tips for Sewing With Sequin
Mastering sequin fabric requires specific techniques for smooth results.
Your needle selection matters most—use size 14-16 heavy-duty needles and keep extras handy since breakage happens frequently.
Choose polyester or nylon thread for durability, adjust your stitch length longer than normal, and sew slowly for control.
- Sequin Stabilizing: Remove sequins from seam allowances and use a walking foot to prevent fabric bunching while maintaining even feed through your machine.
To prevent puckering seams, consider lowering thread tension and pressure.
Frequently Asked Questions (FAQs)
Why are sequins so difficult to sew?
You’ll face challenges because sequins create bulk, dull scissors, break needles frequently, and catch on machine parts.
Their rigid edges scratch surfaces while loose ones fall off during cutting and stitching processes, which is a significant issue because sequins create problems.
Is sewing sequin fabric a good idea?
Sewing sequin fabric isn’t for beginners, but it’s definitely doable with the right approach. You’ll need heavy-duty needles, polyester thread, and patience, but the glamorous results make it worthwhile.
Can You mark a sequin pattern on a fabric?
Yes, you can mark sequin patterns on fabric using tailor’s chalk or water-soluble pens.
Test your marking method on fabric scraps first, then mark on the back side or use tracing stitches for accuracy. Test your marking method
How to sew sequin fabric?
Like taming a shimmering dragon, you’ll need patience and the right tools.
Use size 14-16 heavy-duty needles, polyester thread, and sew slowly.
Remove sequins from seam lines, employ a walking foot, and guide fabric gently to prevent catches.
Should sequin fabric be cut in the same direction?
You’ll want to cut sequin fabric in the same direction to maintain consistent shimmer and color appearance.
Cutting against the grain can cause sequins to shift and create uneven light reflection patterns throughout your finished garment, affecting the overall color appearance.
How do you make sewing difficult?
You’ll create challenging conditions by using dull needles, wrong thread types, improper tension settings, rushing through thick areas, skipping fabric preparation, and ignoring your machine’s limitations completely.
How do I prevent sequins from falling off during sewing?
Roughly 30% of sewers report losing sequins during projects.
You’ll prevent this by securing sequins with clear tape or fabric glue before stitching, removing loose ones along seam lines, and sewing slowly with proper needle tension.
What type of thread should I use for sewing sequin fabric?
Use polyester or nylon thread when sewing sequin fabric. These synthetic threads offer the strength and durability you’ll need to handle the fabric’s weight and thickness without breaking during stitching.
How do I prevent sequins from scratching my skin when wearing the garment?
Nearly 80% of sewers experience skin irritation from sequin garments.
Add a lightweight cotton or silk lining to your garment – it’ll create a smooth barrier between your skin and those scratchy sequin edges, keeping you comfortable all night.
Can you wash sequin garments in washing machine?
Most sequin garments shouldn’t go in washing machines because the agitation damages sequins and clogs drains.
Hand-wash gently in cool water instead, or use professional dry cleaning services for best results.
Conclusion
Mastering problems sewing sequin fabric transforms from nightmare to triumph when you apply these proven techniques.
Your heavy-duty needles will slice through challenges while proper preparation prevents the common pitfalls that derail projects.
You’ve learned to remove sequins strategically, mark fabric effectively, and handle delicate finishing touches with confidence.
Remember to keep spare needles nearby and clean your equipment regularly.
With these expert solutions, you’ll create stunning sequined garments that showcase professional results every time.
- https://www.sewessential.co.uk/blog/top-tips-for-sewing-with-sequin-fabric/
- https://www.ageberry.com/how-to-sew-sequins-and-ribbons-on-fabric-using-sequin-presser-foot/
- https://www.sewdiy.com/blog/2017/7-tips-for-sewing-sequin-fabric
- https://www.reddit.com/r/sewing/comments/42jfl3/advice_on_sewing_sequins/
- https://weallsew.com/sewing-with-sequin-fabric-tips-and-tricks/


